ST KILDA

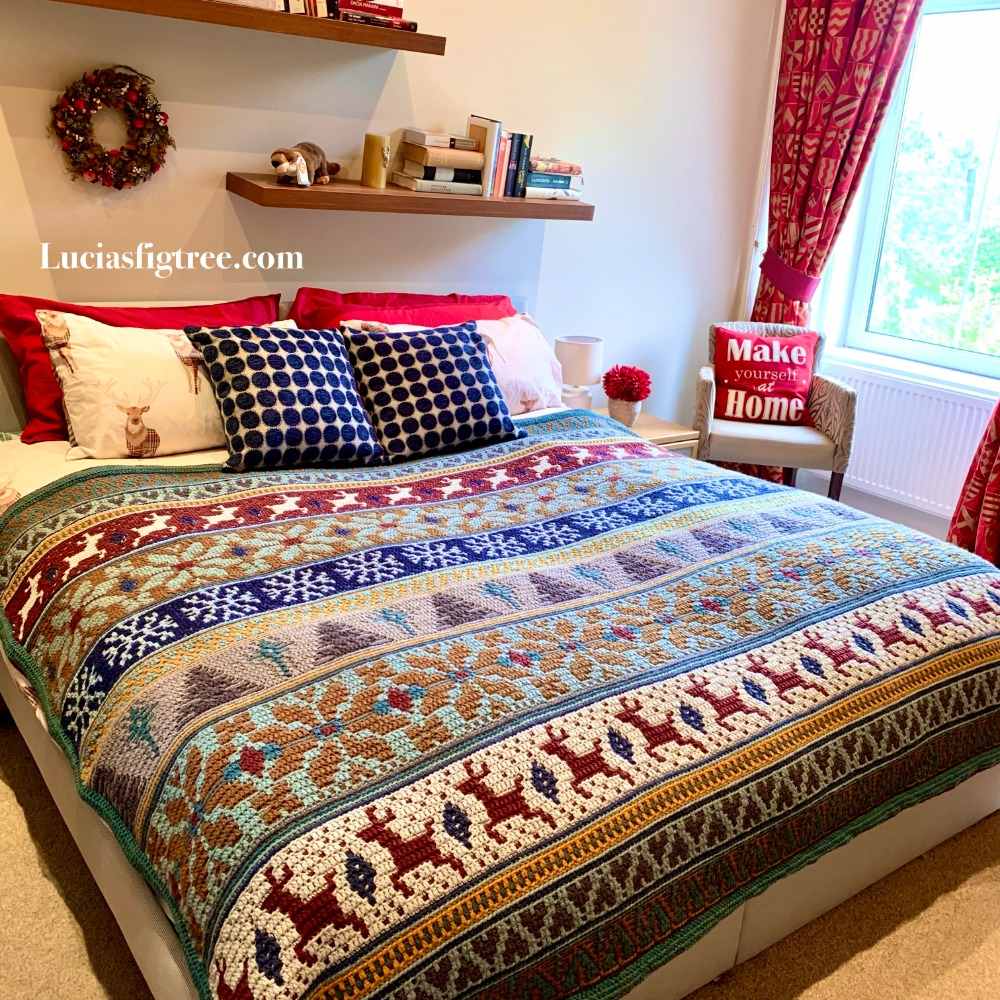
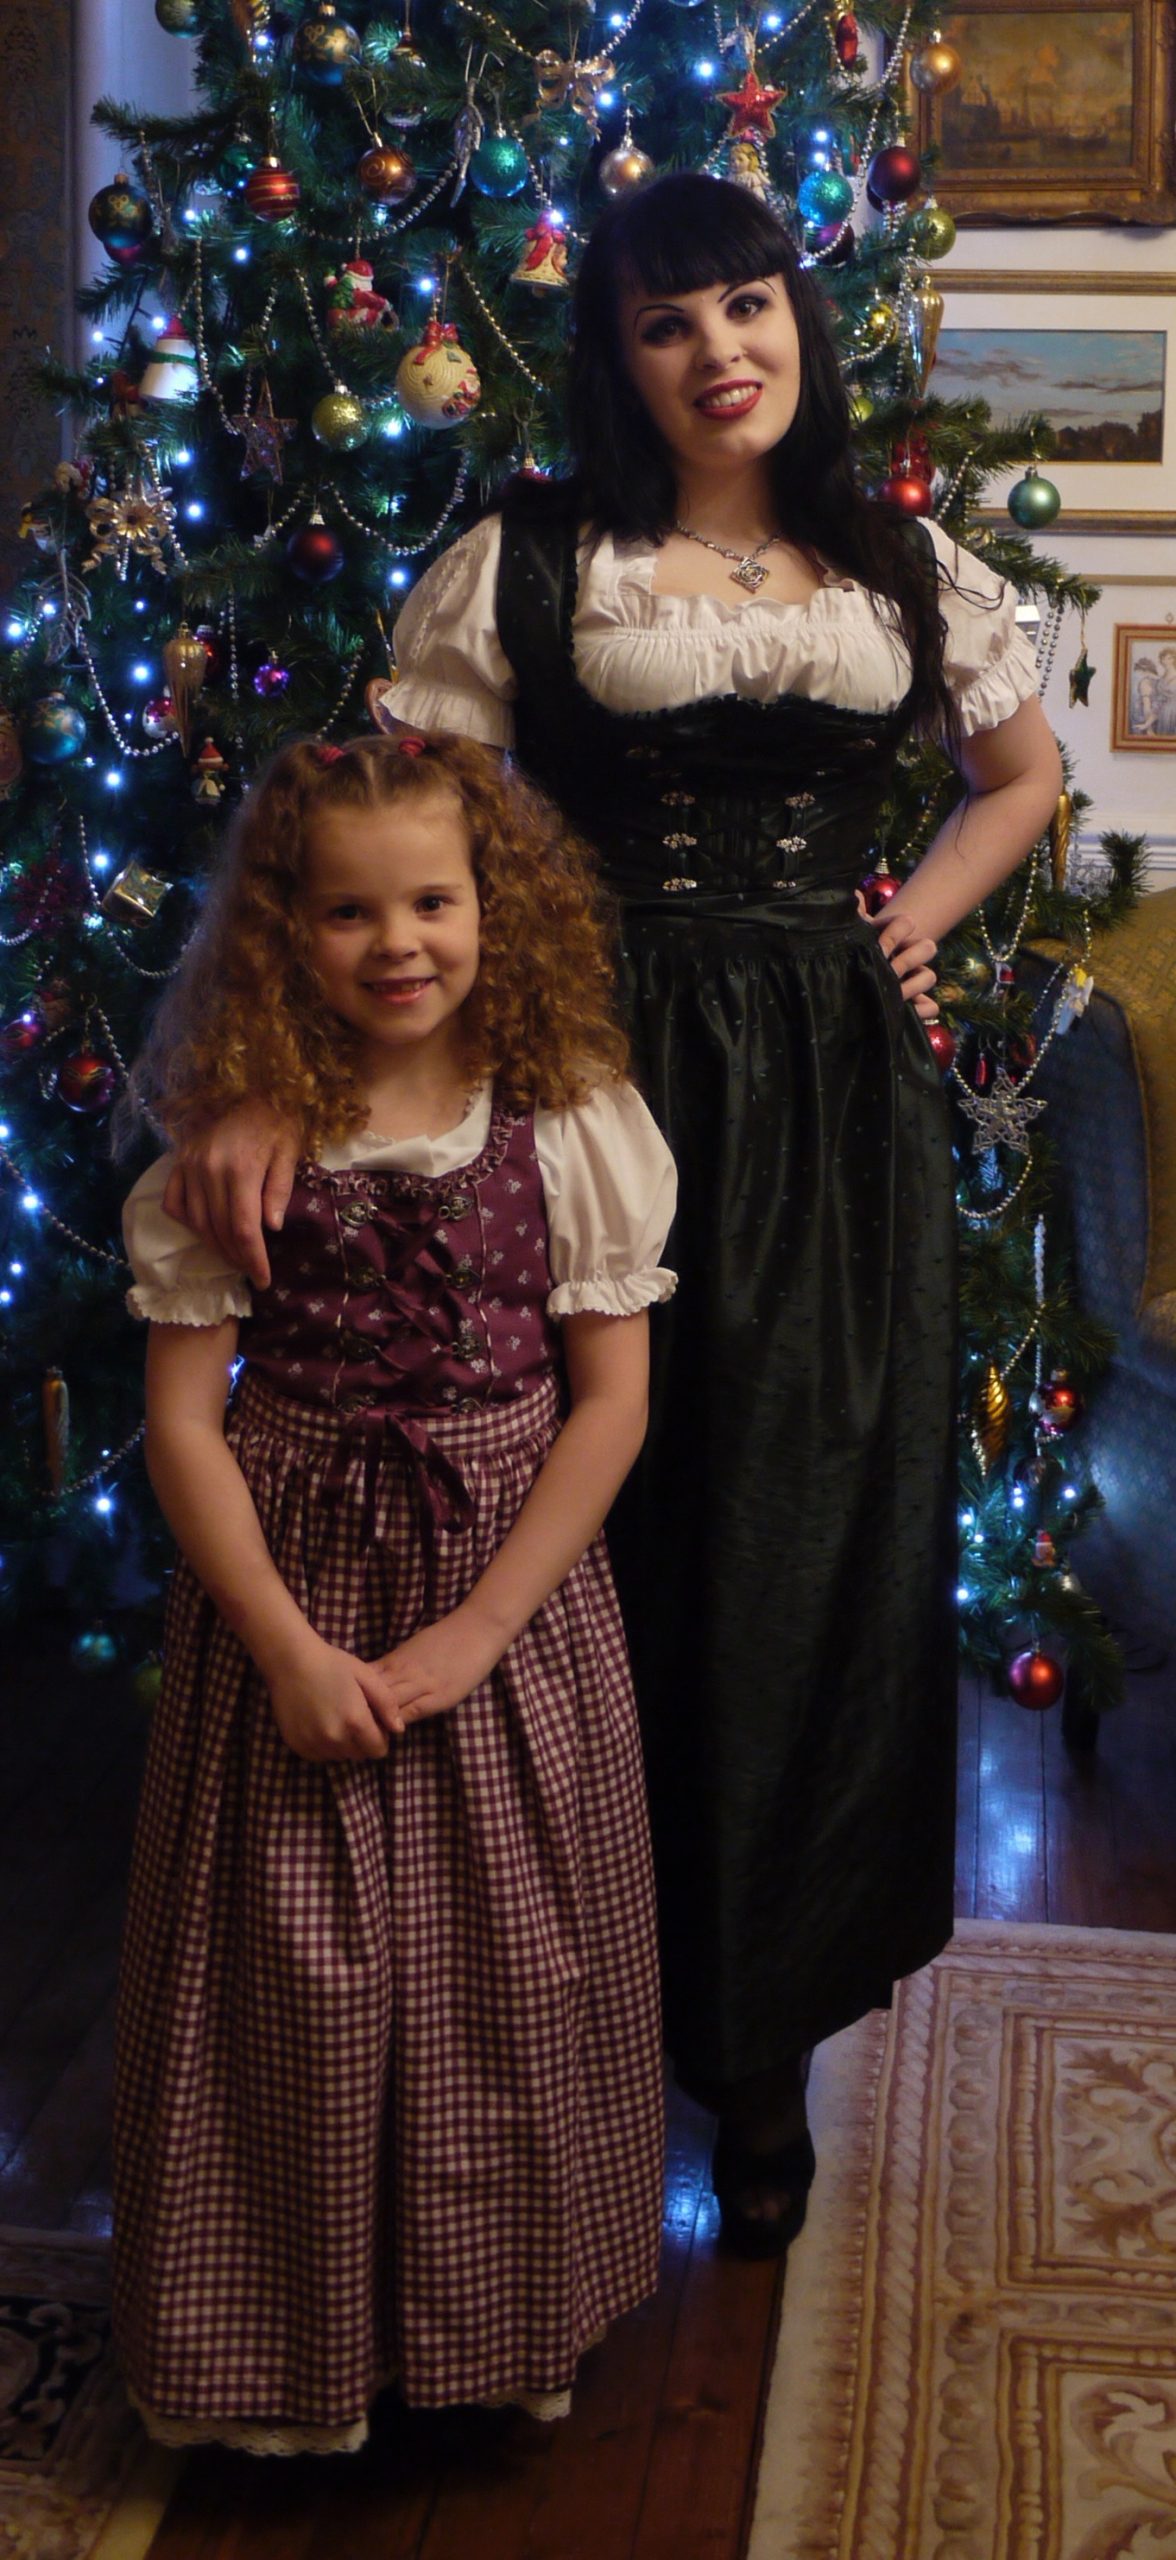
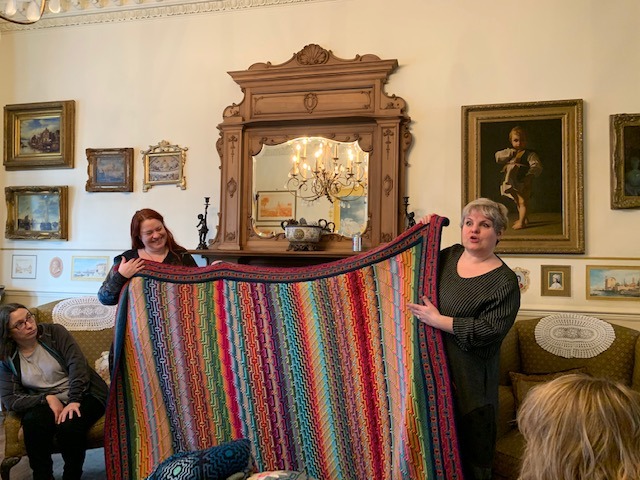
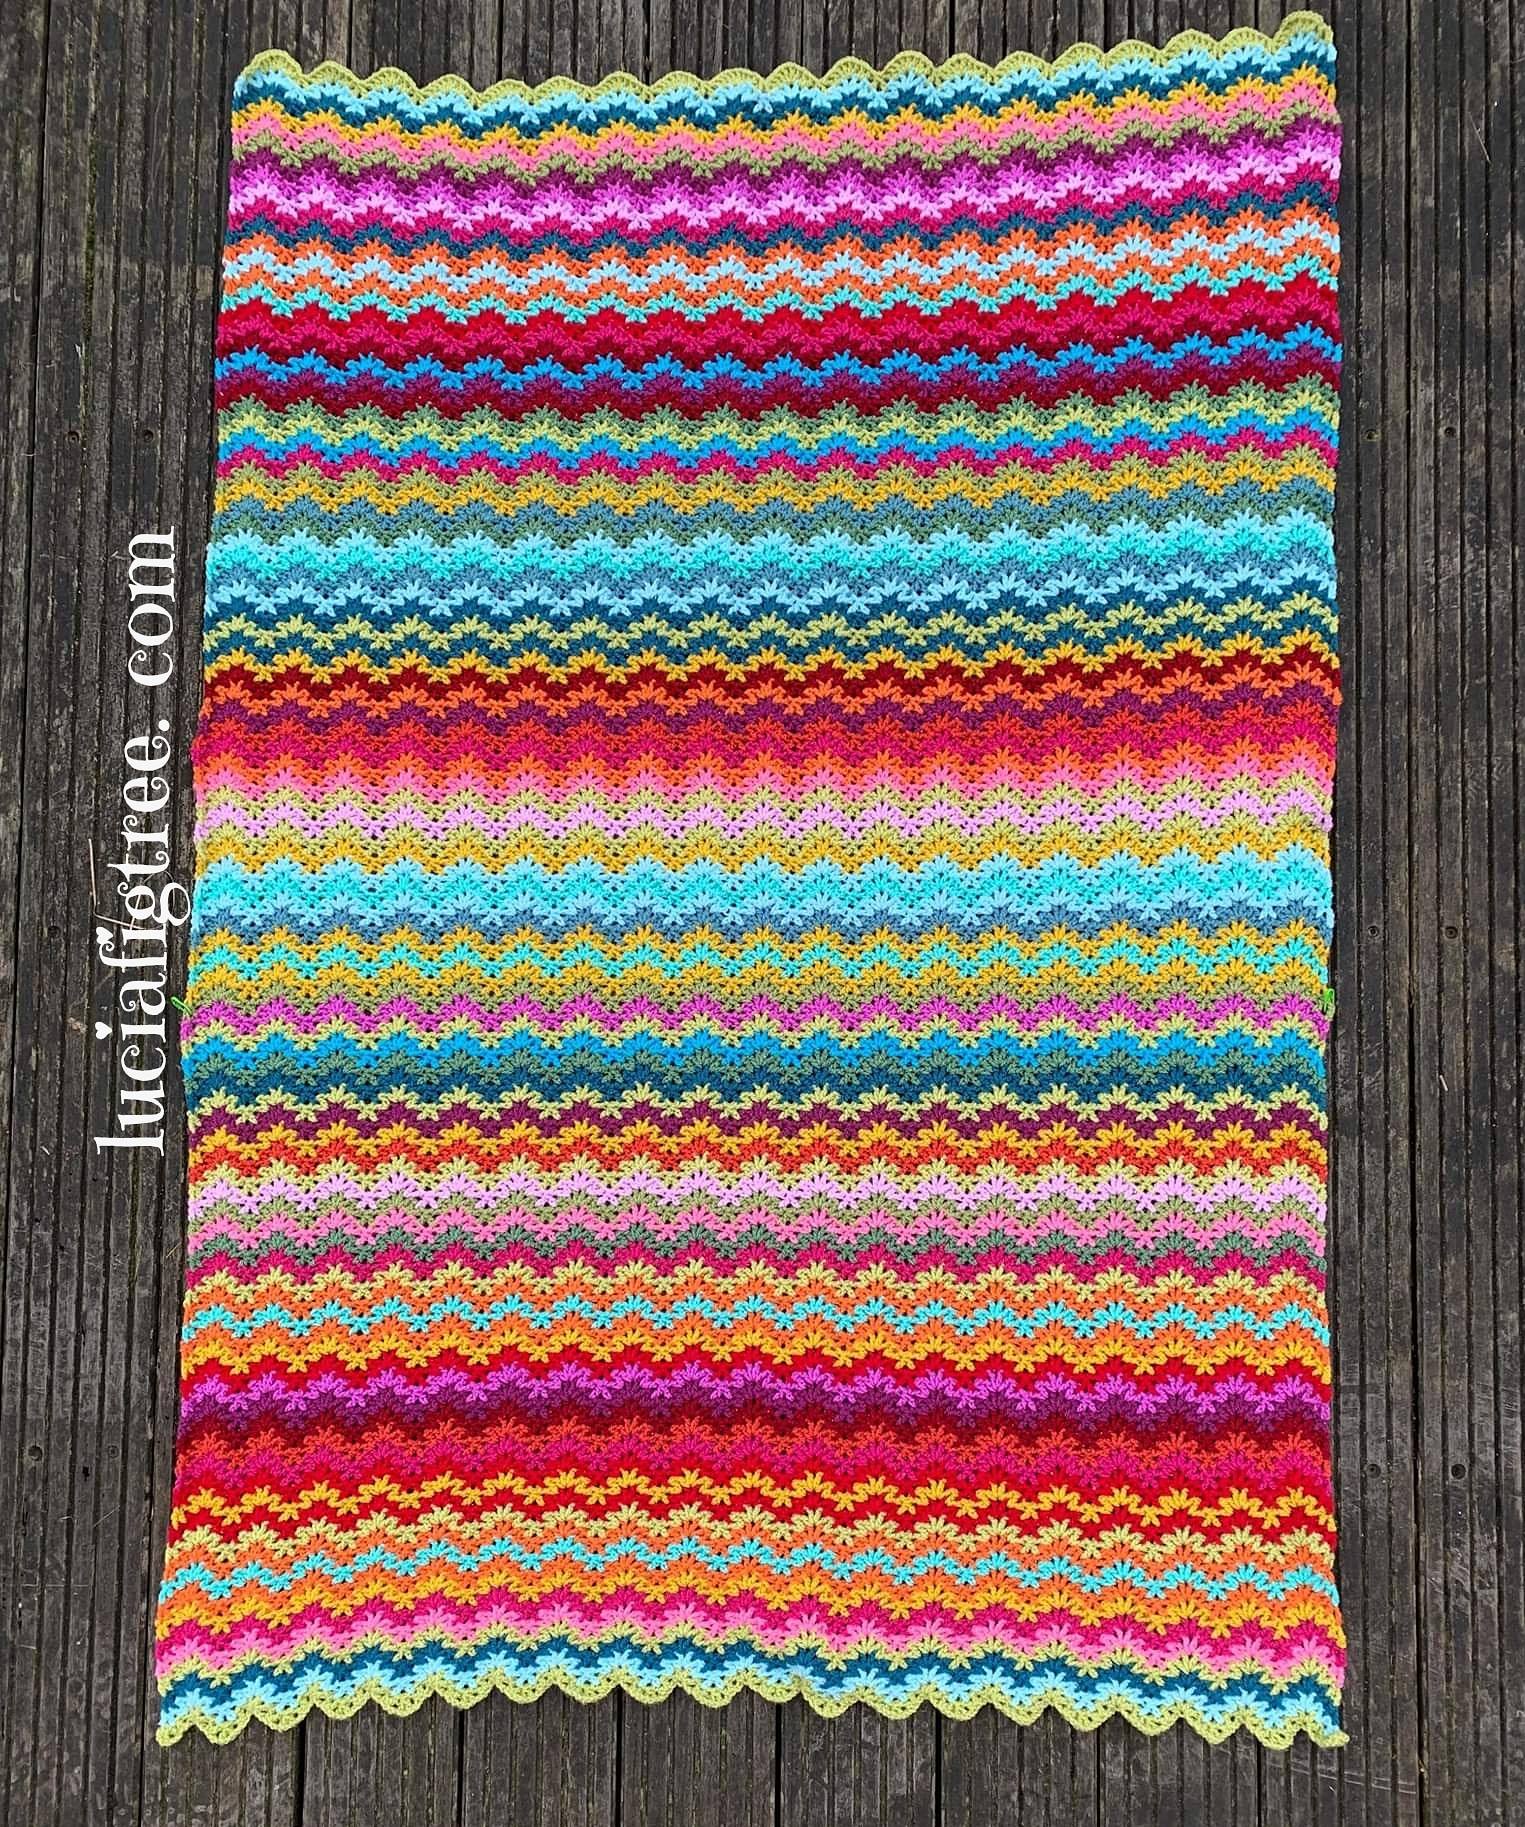
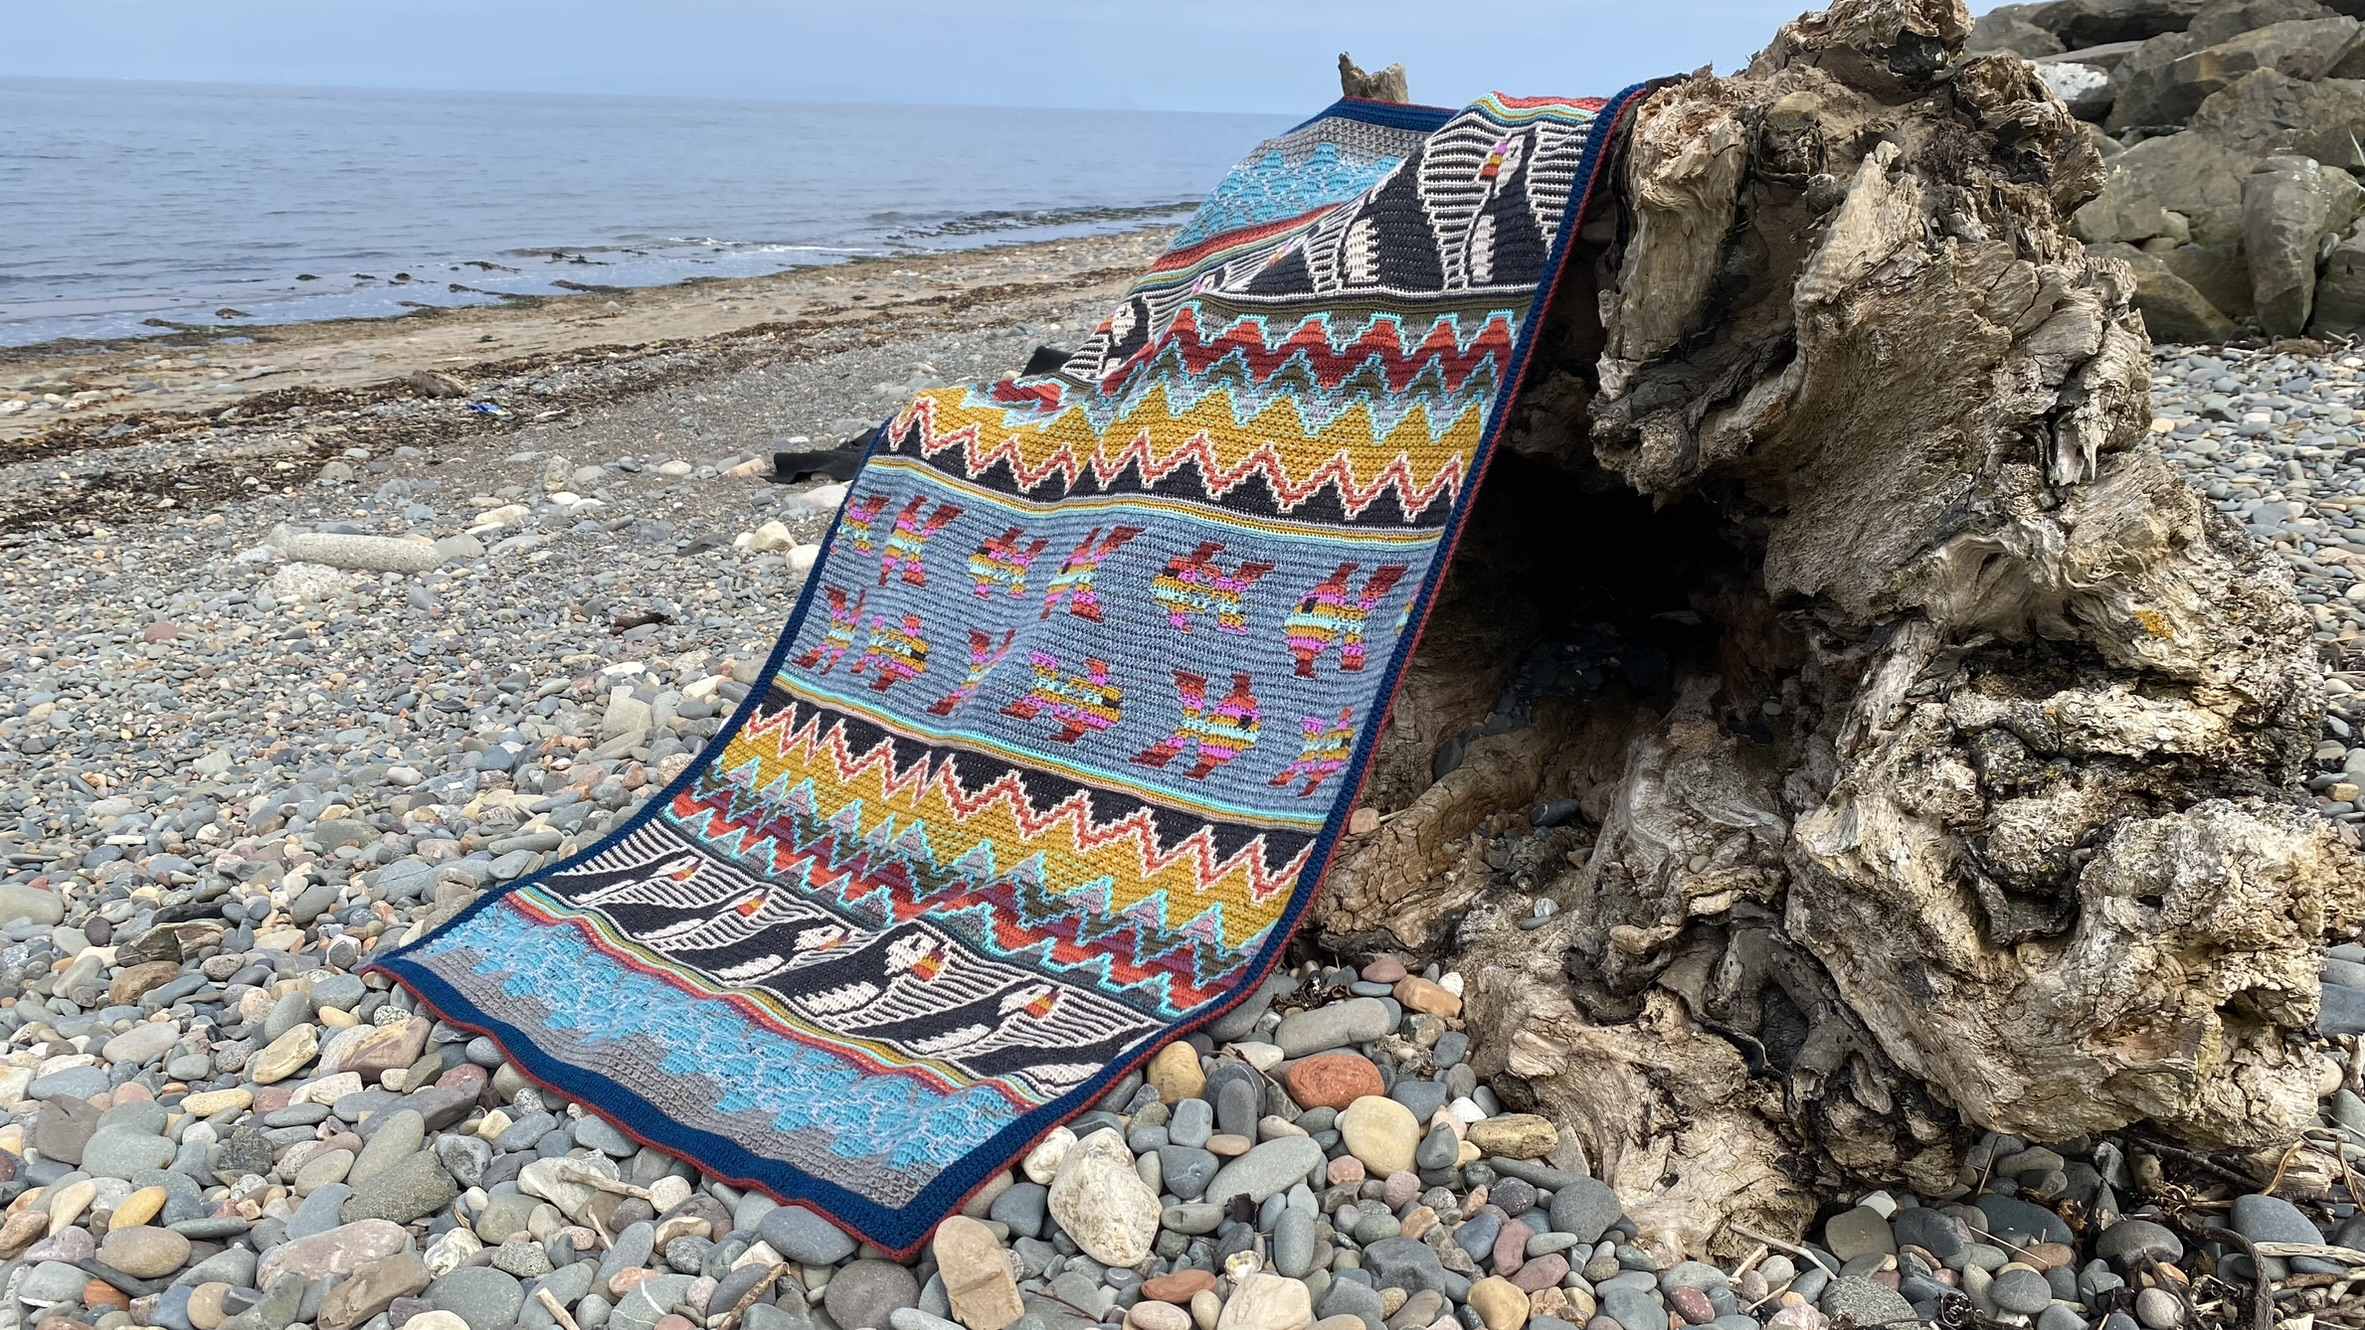
Hi everyone. I cannot believe it is already June…I don’t know if it is the same where you are but here in Scotland, we are experiencing the most amazing and glorious weather!! the sky is blue no rain… and it is a lovely pleasant mild temperature it is just amazing and the perfect weather for taking pictures! So last weekend Francesca and I went by the sea to take a few snapshots of my new blanket ST KILDA…

I am so pleased with this new blanket so I am going to tell you all about it…

Believing or not all started nearly a year ago… I saw on my Facebook an amazing picture that a friend of mine, Stephen took of some puffins…


 I thought they were the cutest thing ever and when something catches my eye it always ends up being an inspiration for a crochet creation…

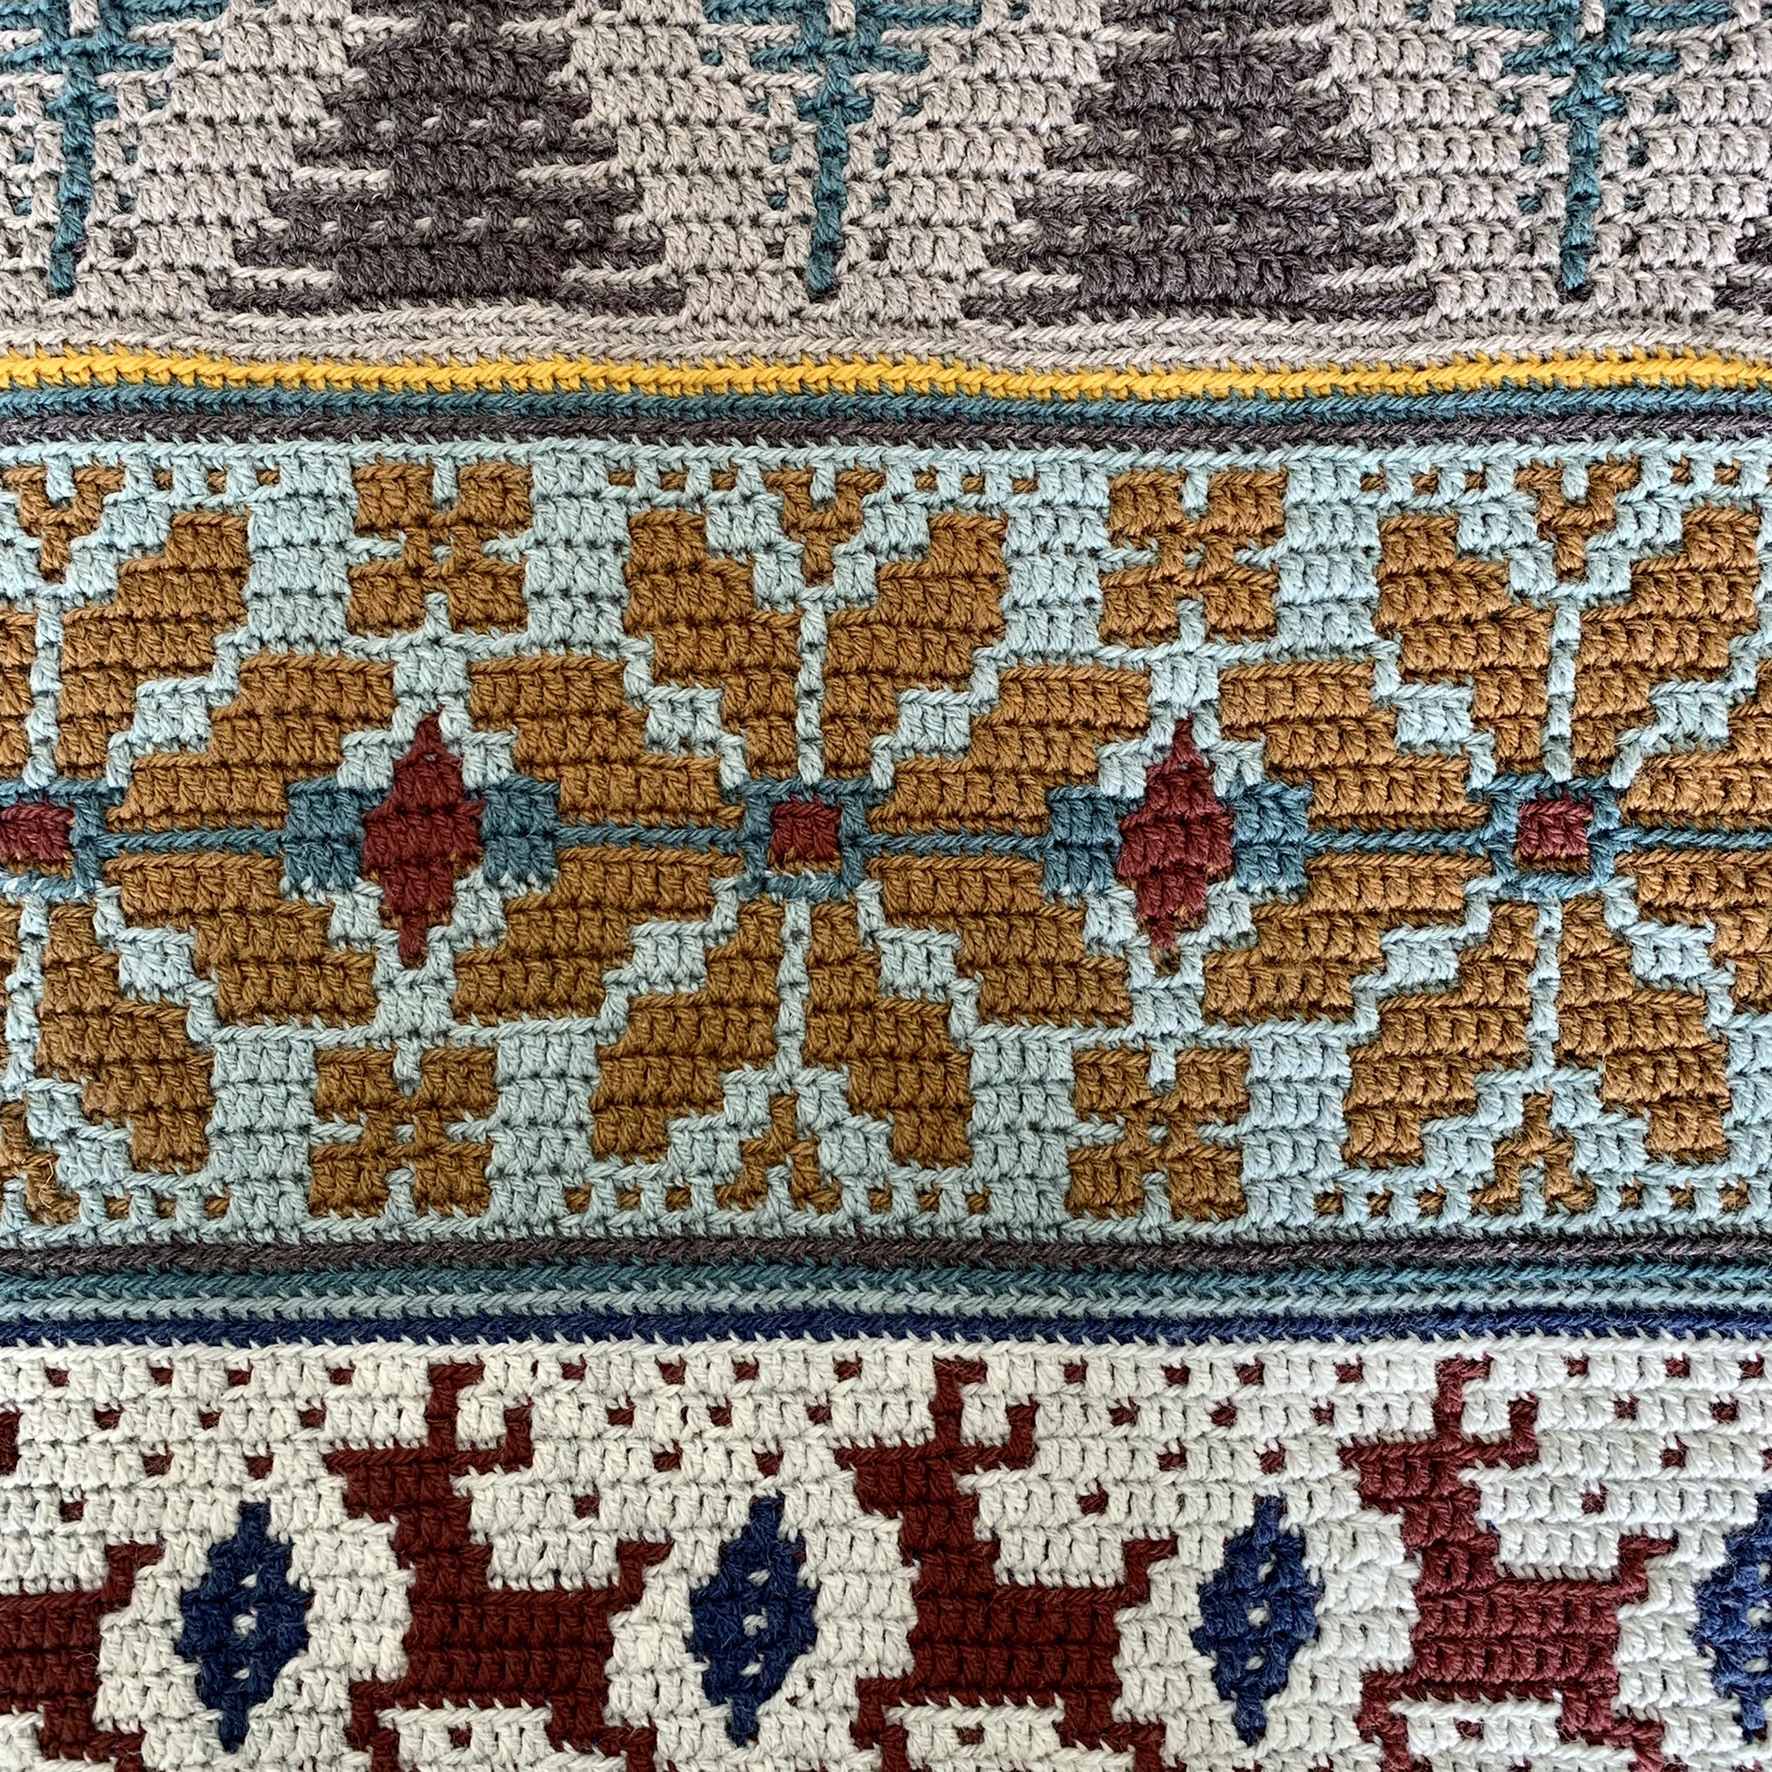
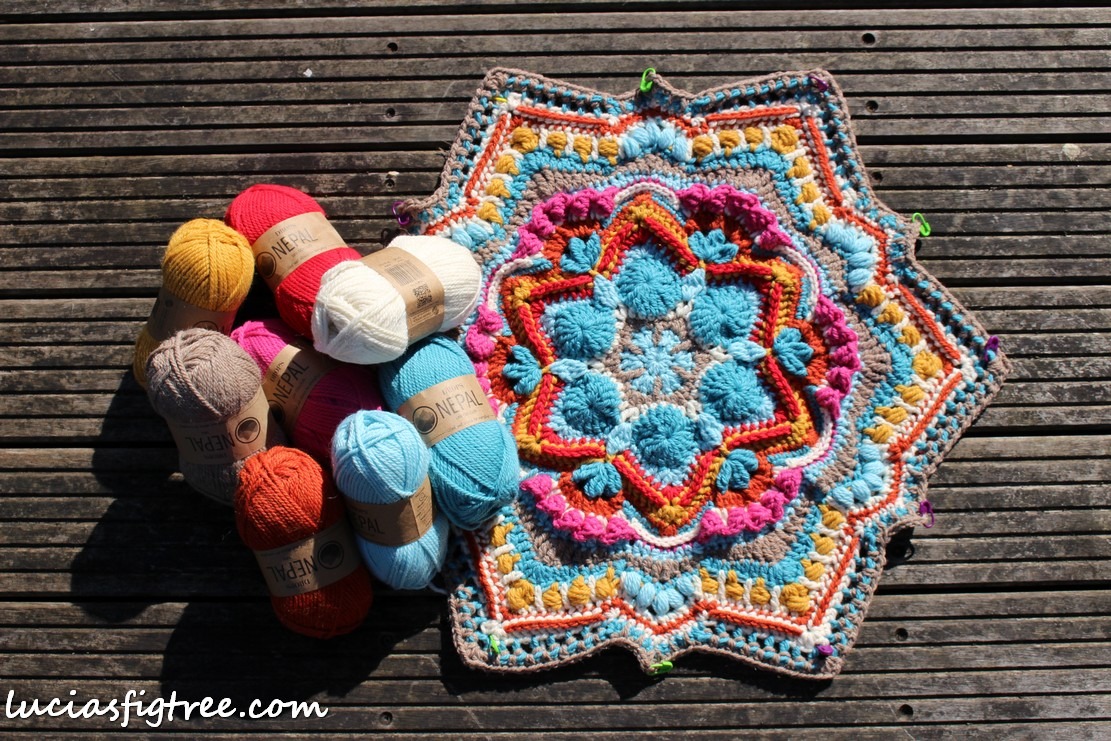
I always wanted to design a mosaic blanket because I love how versatile this technique is so the puffins seemed to me the perfect opportunity…

There are 2 designers that make the most amazing mosaic creations .. one is my bestie Tinna Thórudóttir Thorvaldsdóttir @tinnahekl who you all know and the other,  I have been following closely, is Abi  at Get Yer Hook On

Abi’s talent for creating stunning blankets is truly amazing, and what’s even more special is that her inspiration comes from the beautiful country we both call home. As a fellow Scot, I was thrilled to work with her on our latest creation – the breathtaking St. Kilda blanket. Through a few chats and a lot of back and forths on design ideas, we were able to bring to life a one-of-a-kind masterpiece that showcases the best of Scotland’s natural beauty. I couldn’t be more proud of the end result, and I’m sure you’ll fall in love with it just as much as I have!

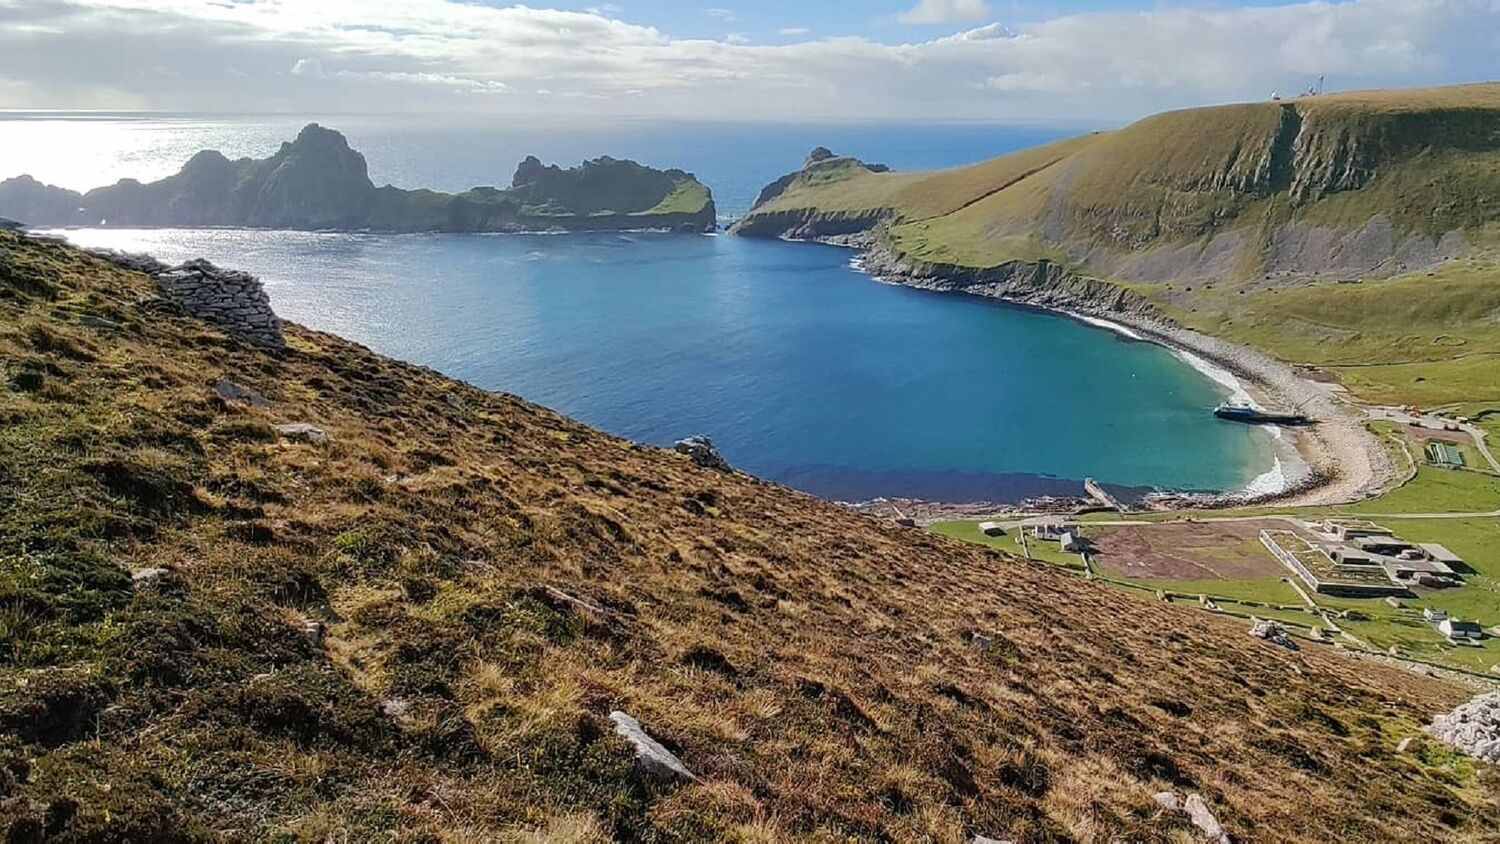
So why we called the blanket  St Kilda?

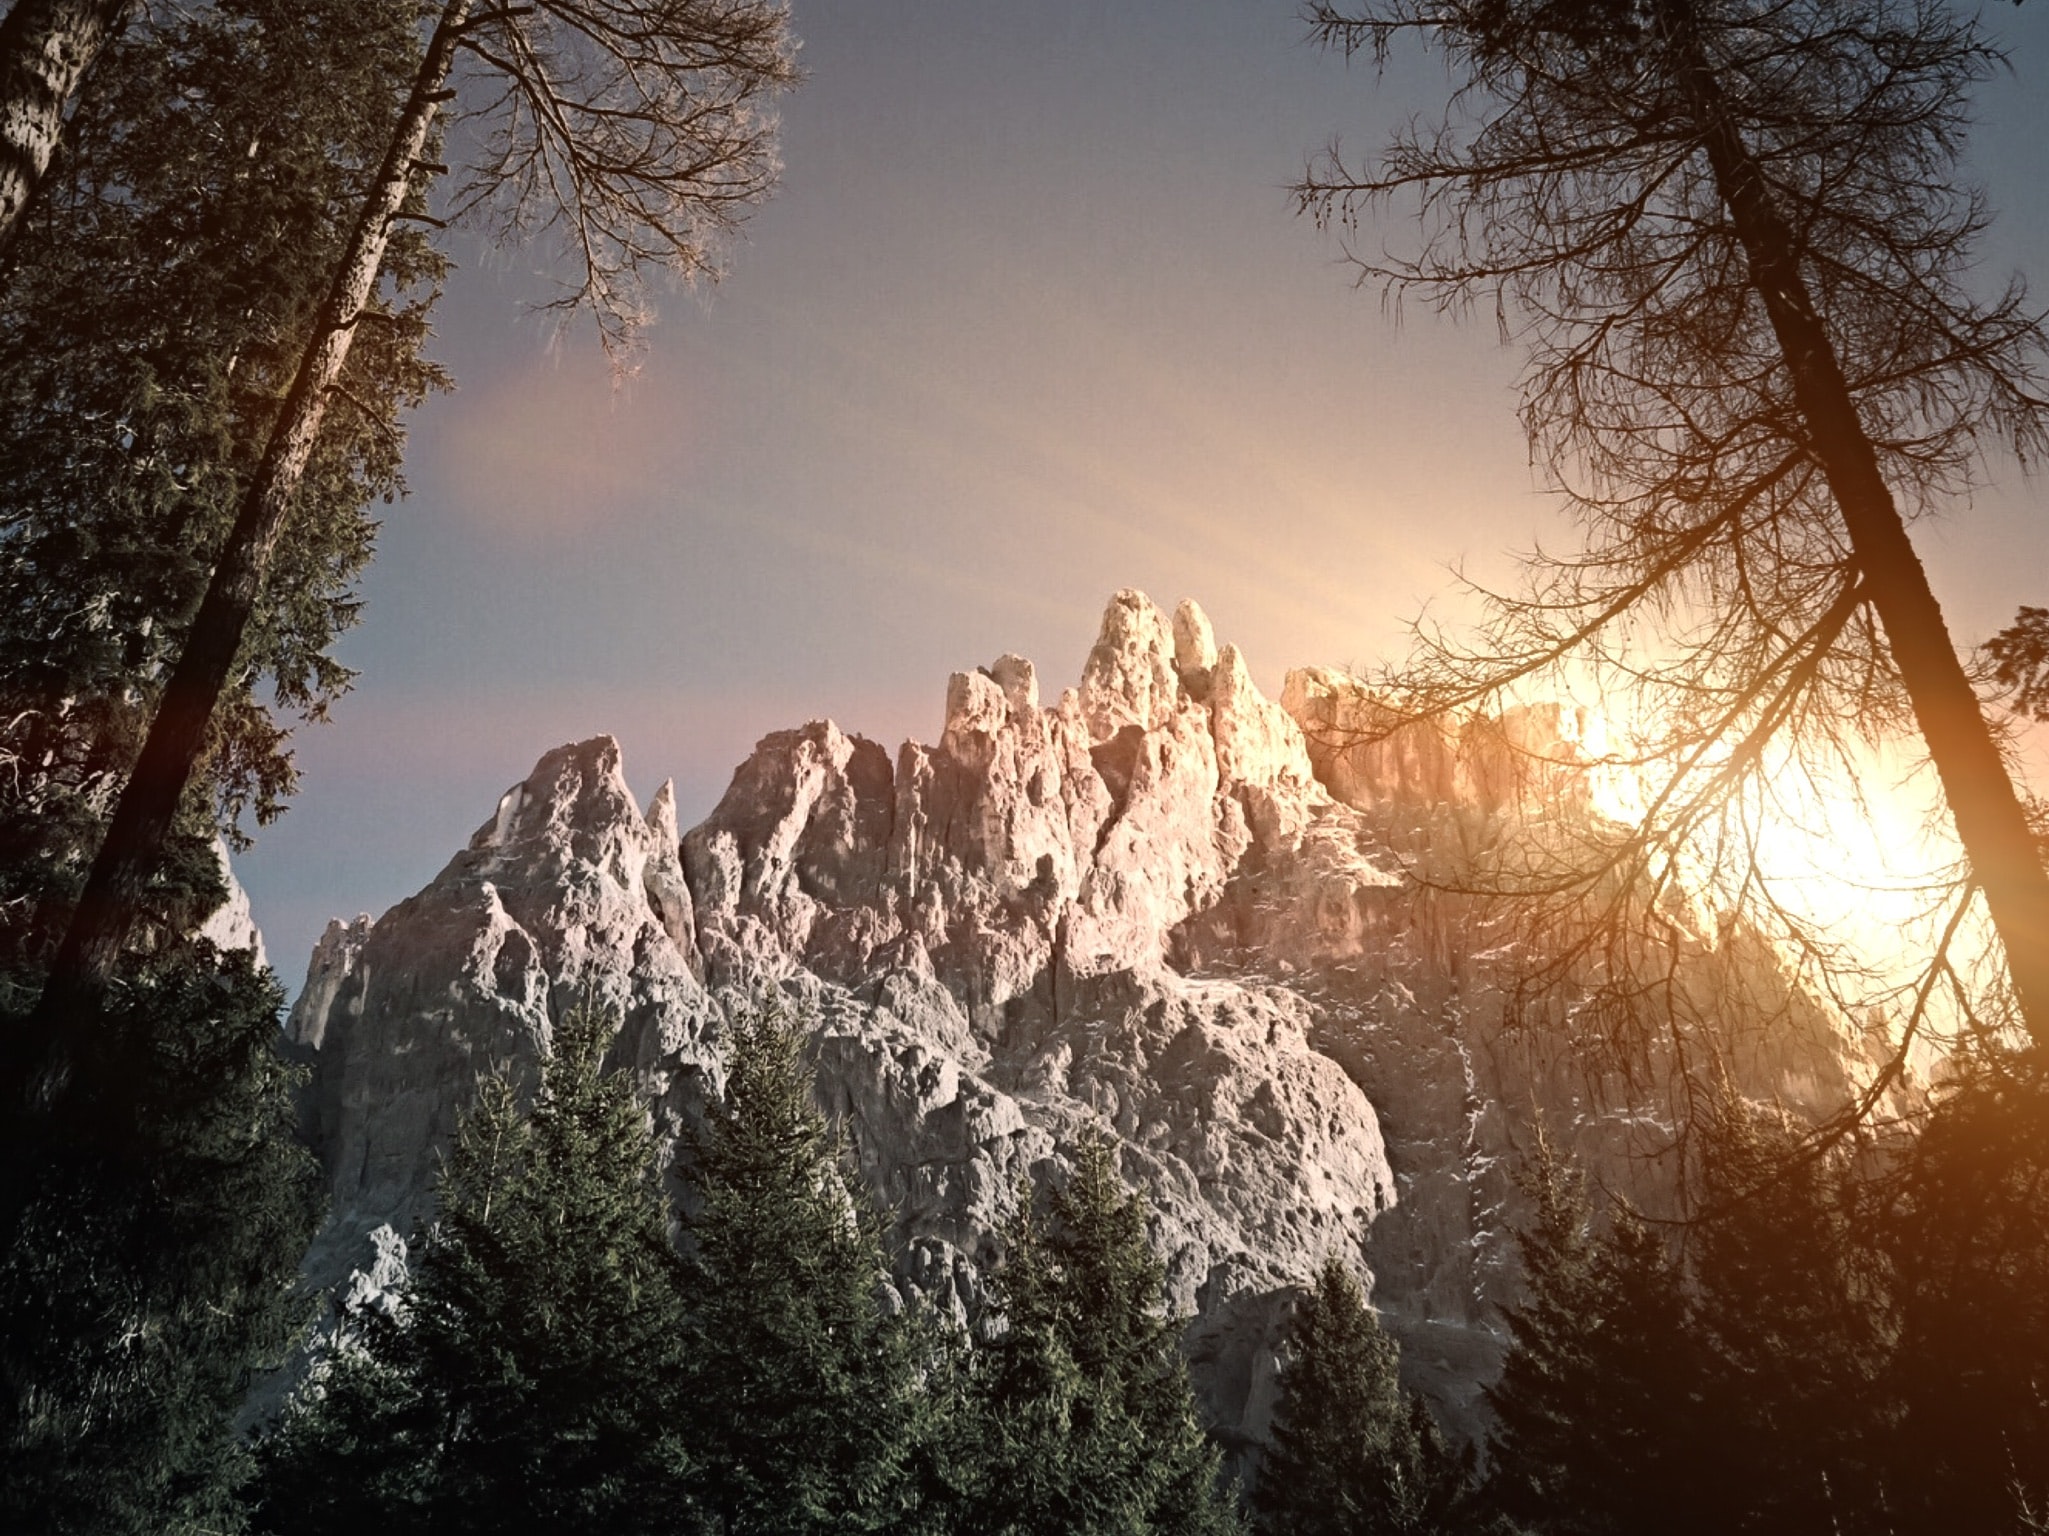
St Kilda, is an archipelago, and UNESCO World Heritage Site located off the north coast of Scotland, is known for its stunning natural beauty and diverse wildlife.

One of the most iconic and beloved creatures found in this region are the puffins, with their distinctive black and white markings and colourful beaks.


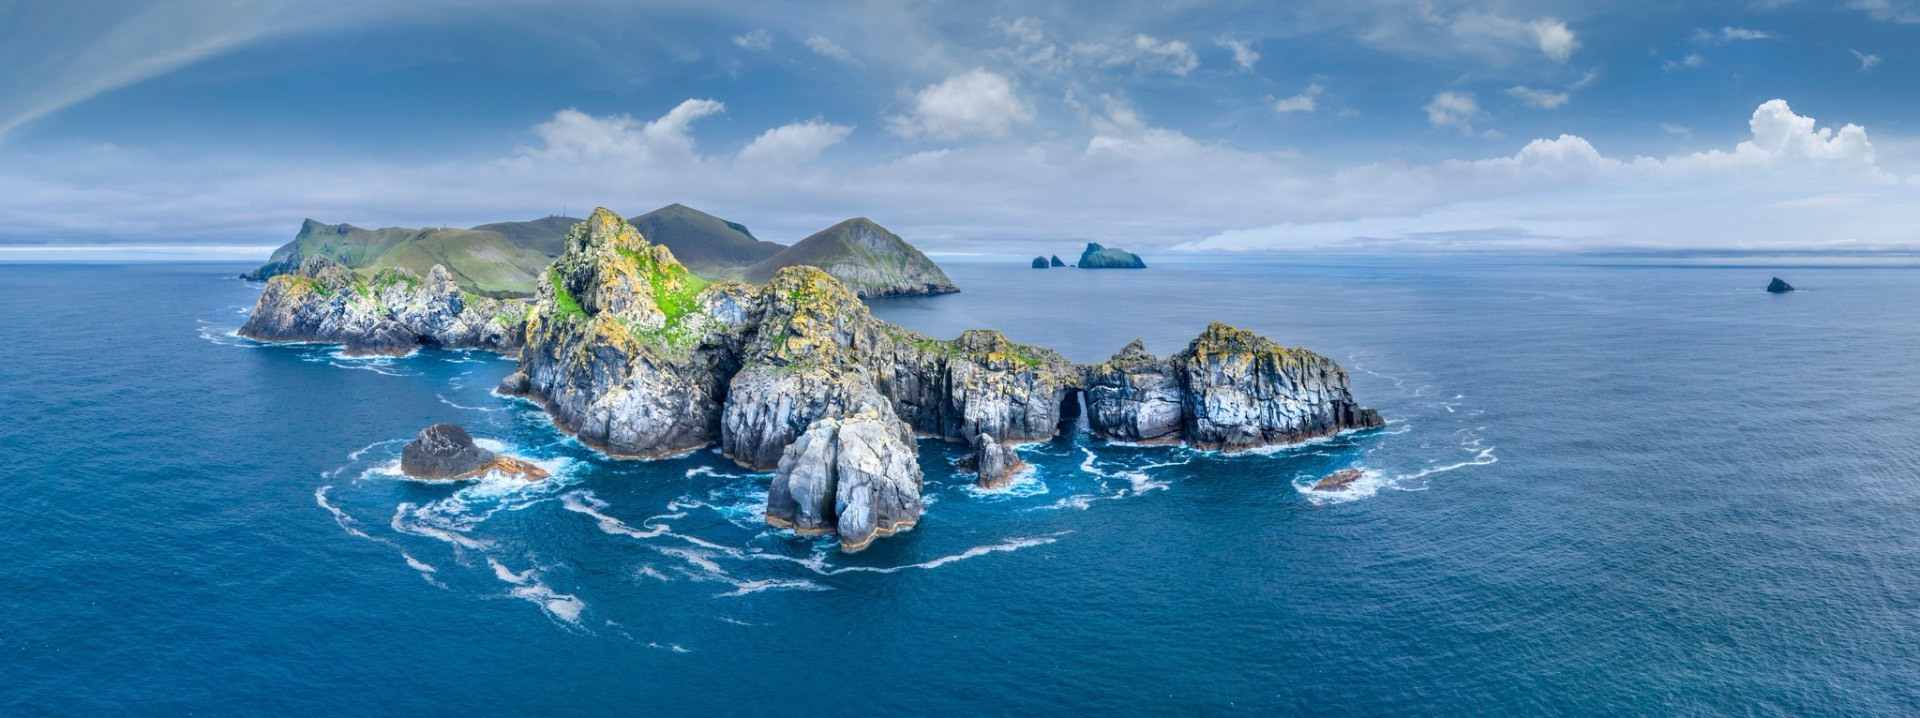
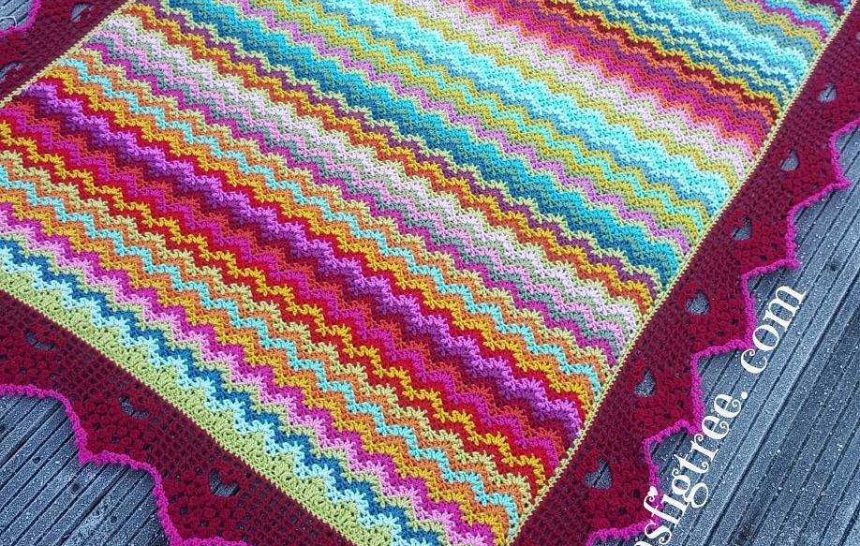
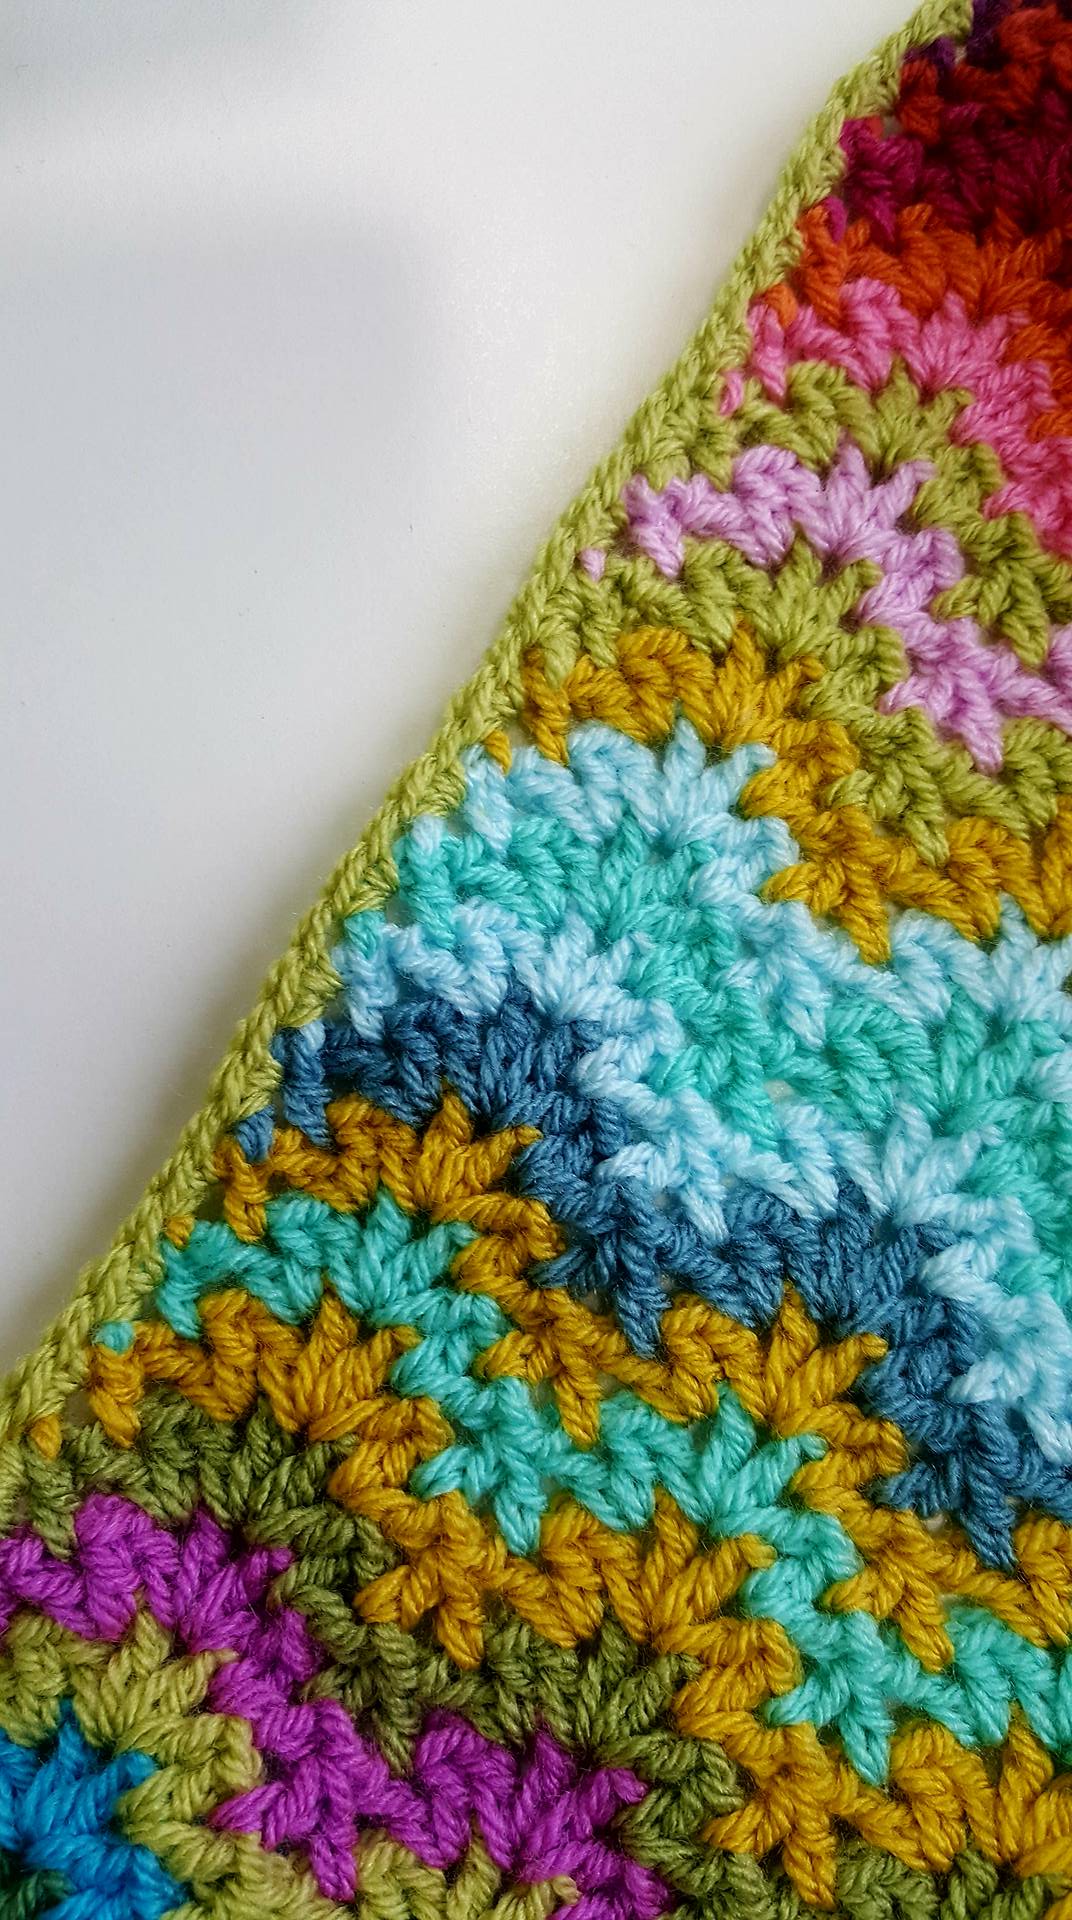
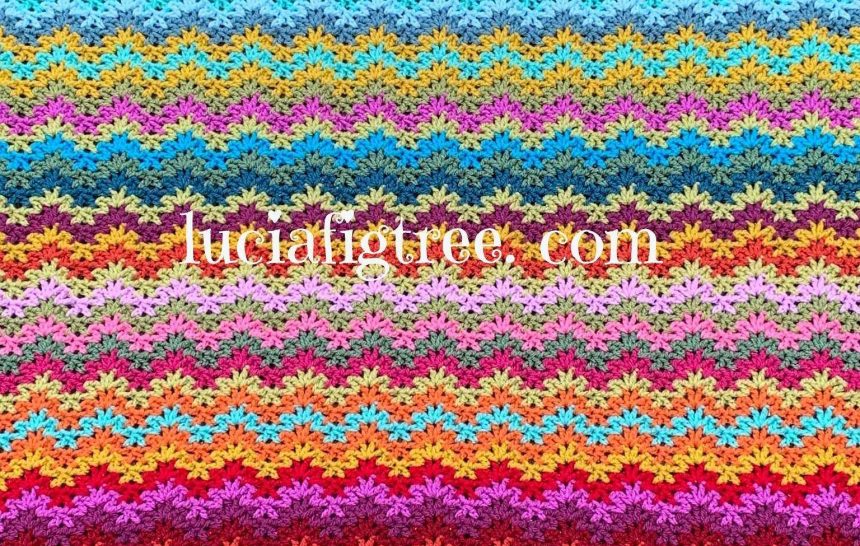
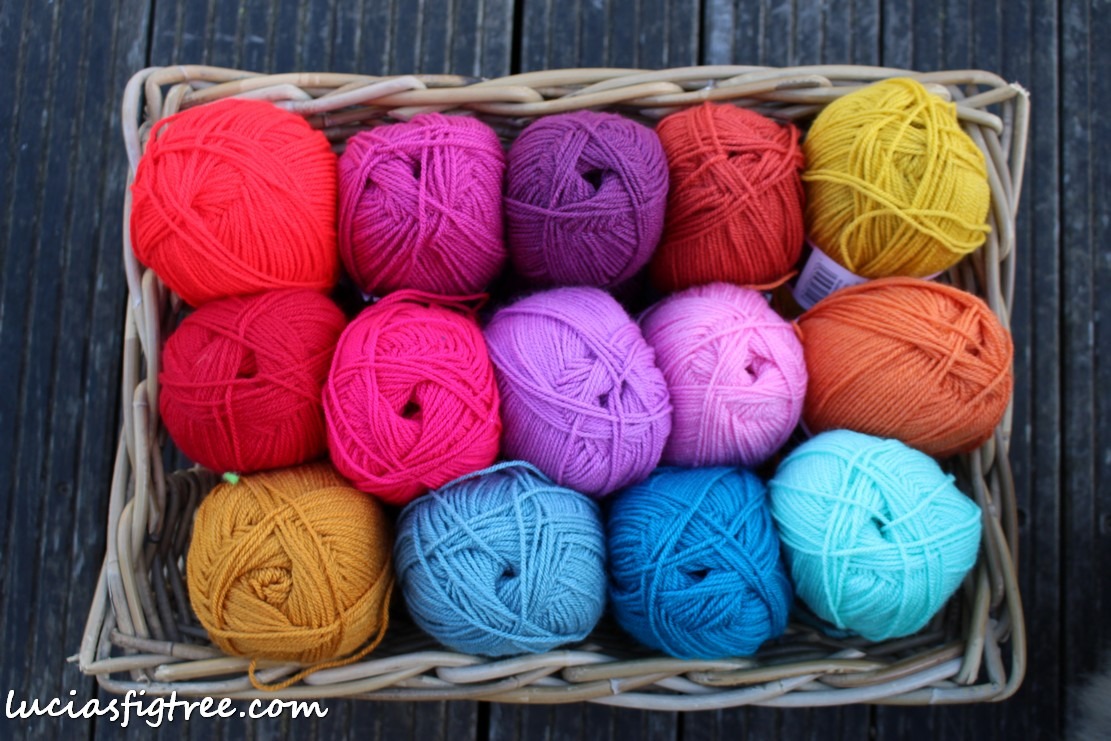
From the delicate swirls of the ocean waves to the shimmering scales of fish, the ocean life around St Kilda provides a rich tapestry of colours and shapes that  provides the most amazing colour palette for  the blanket

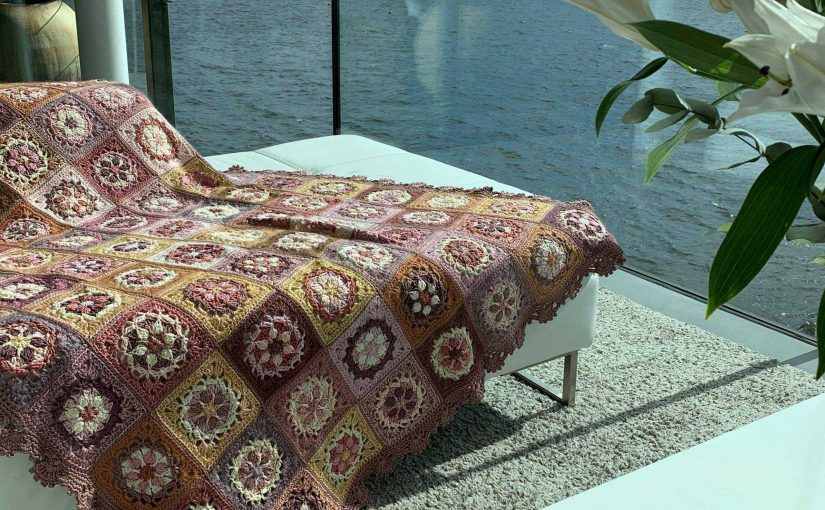
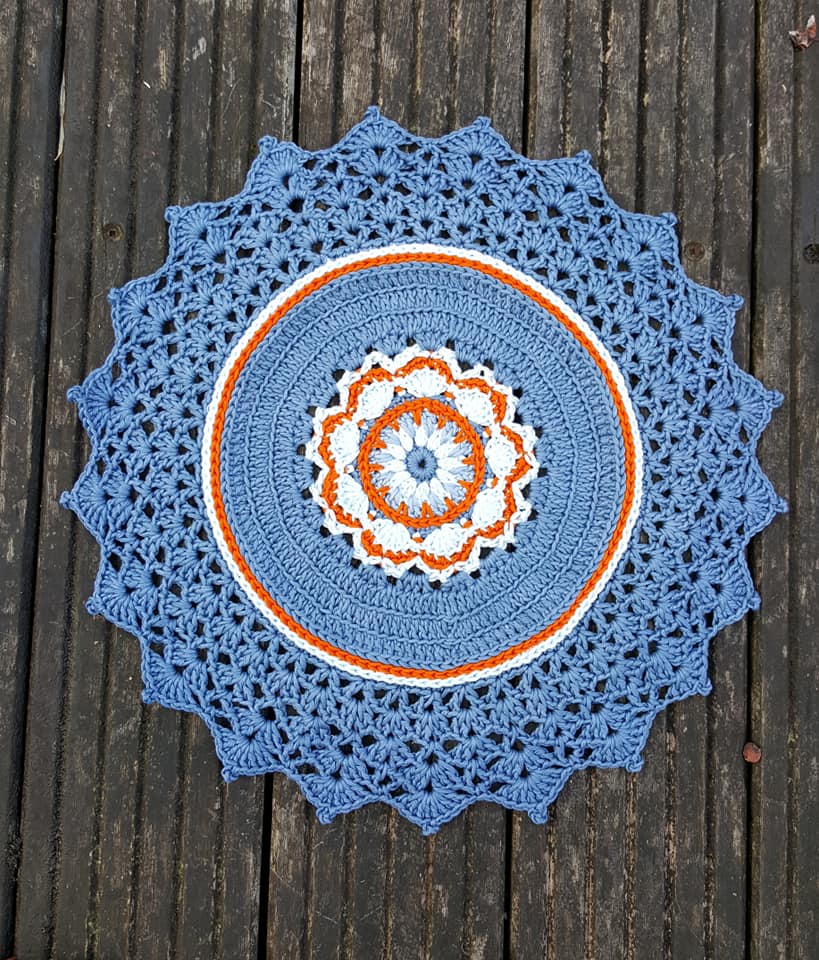
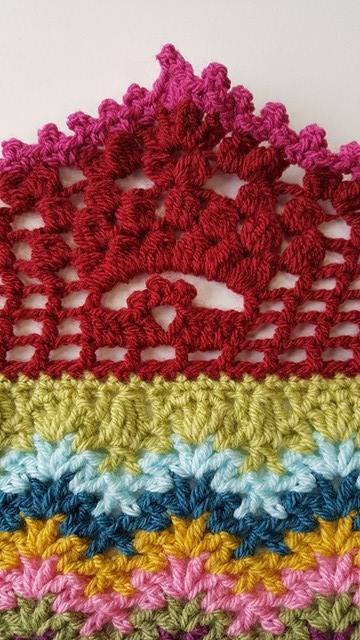
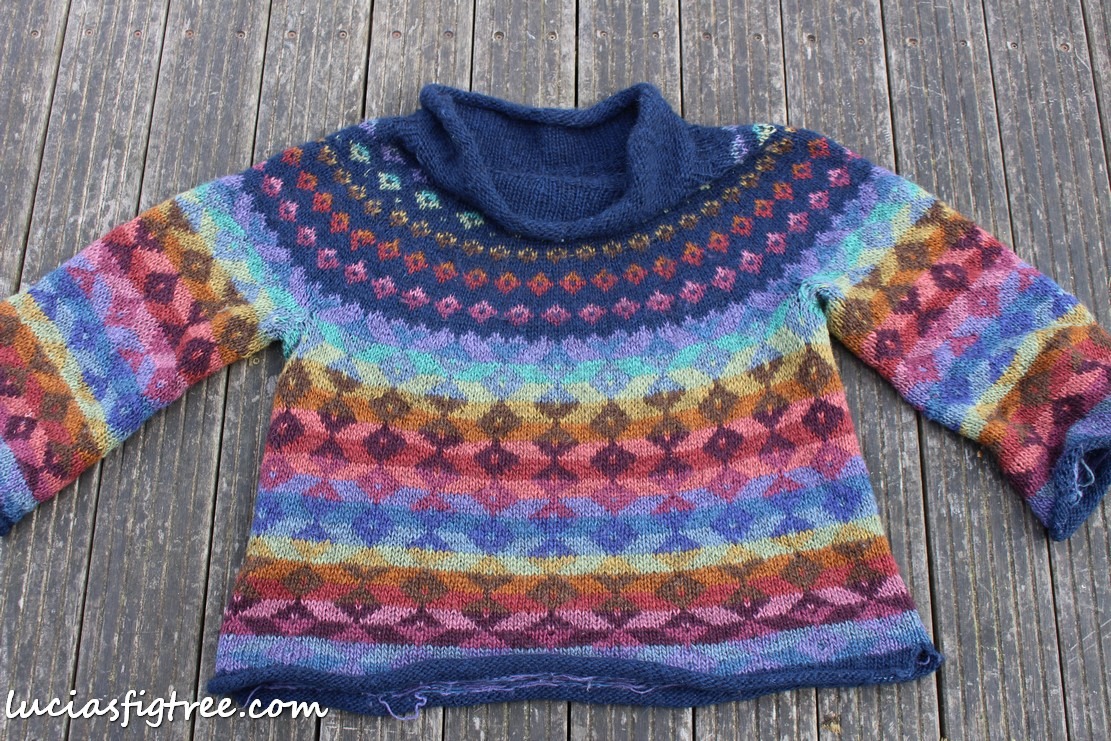
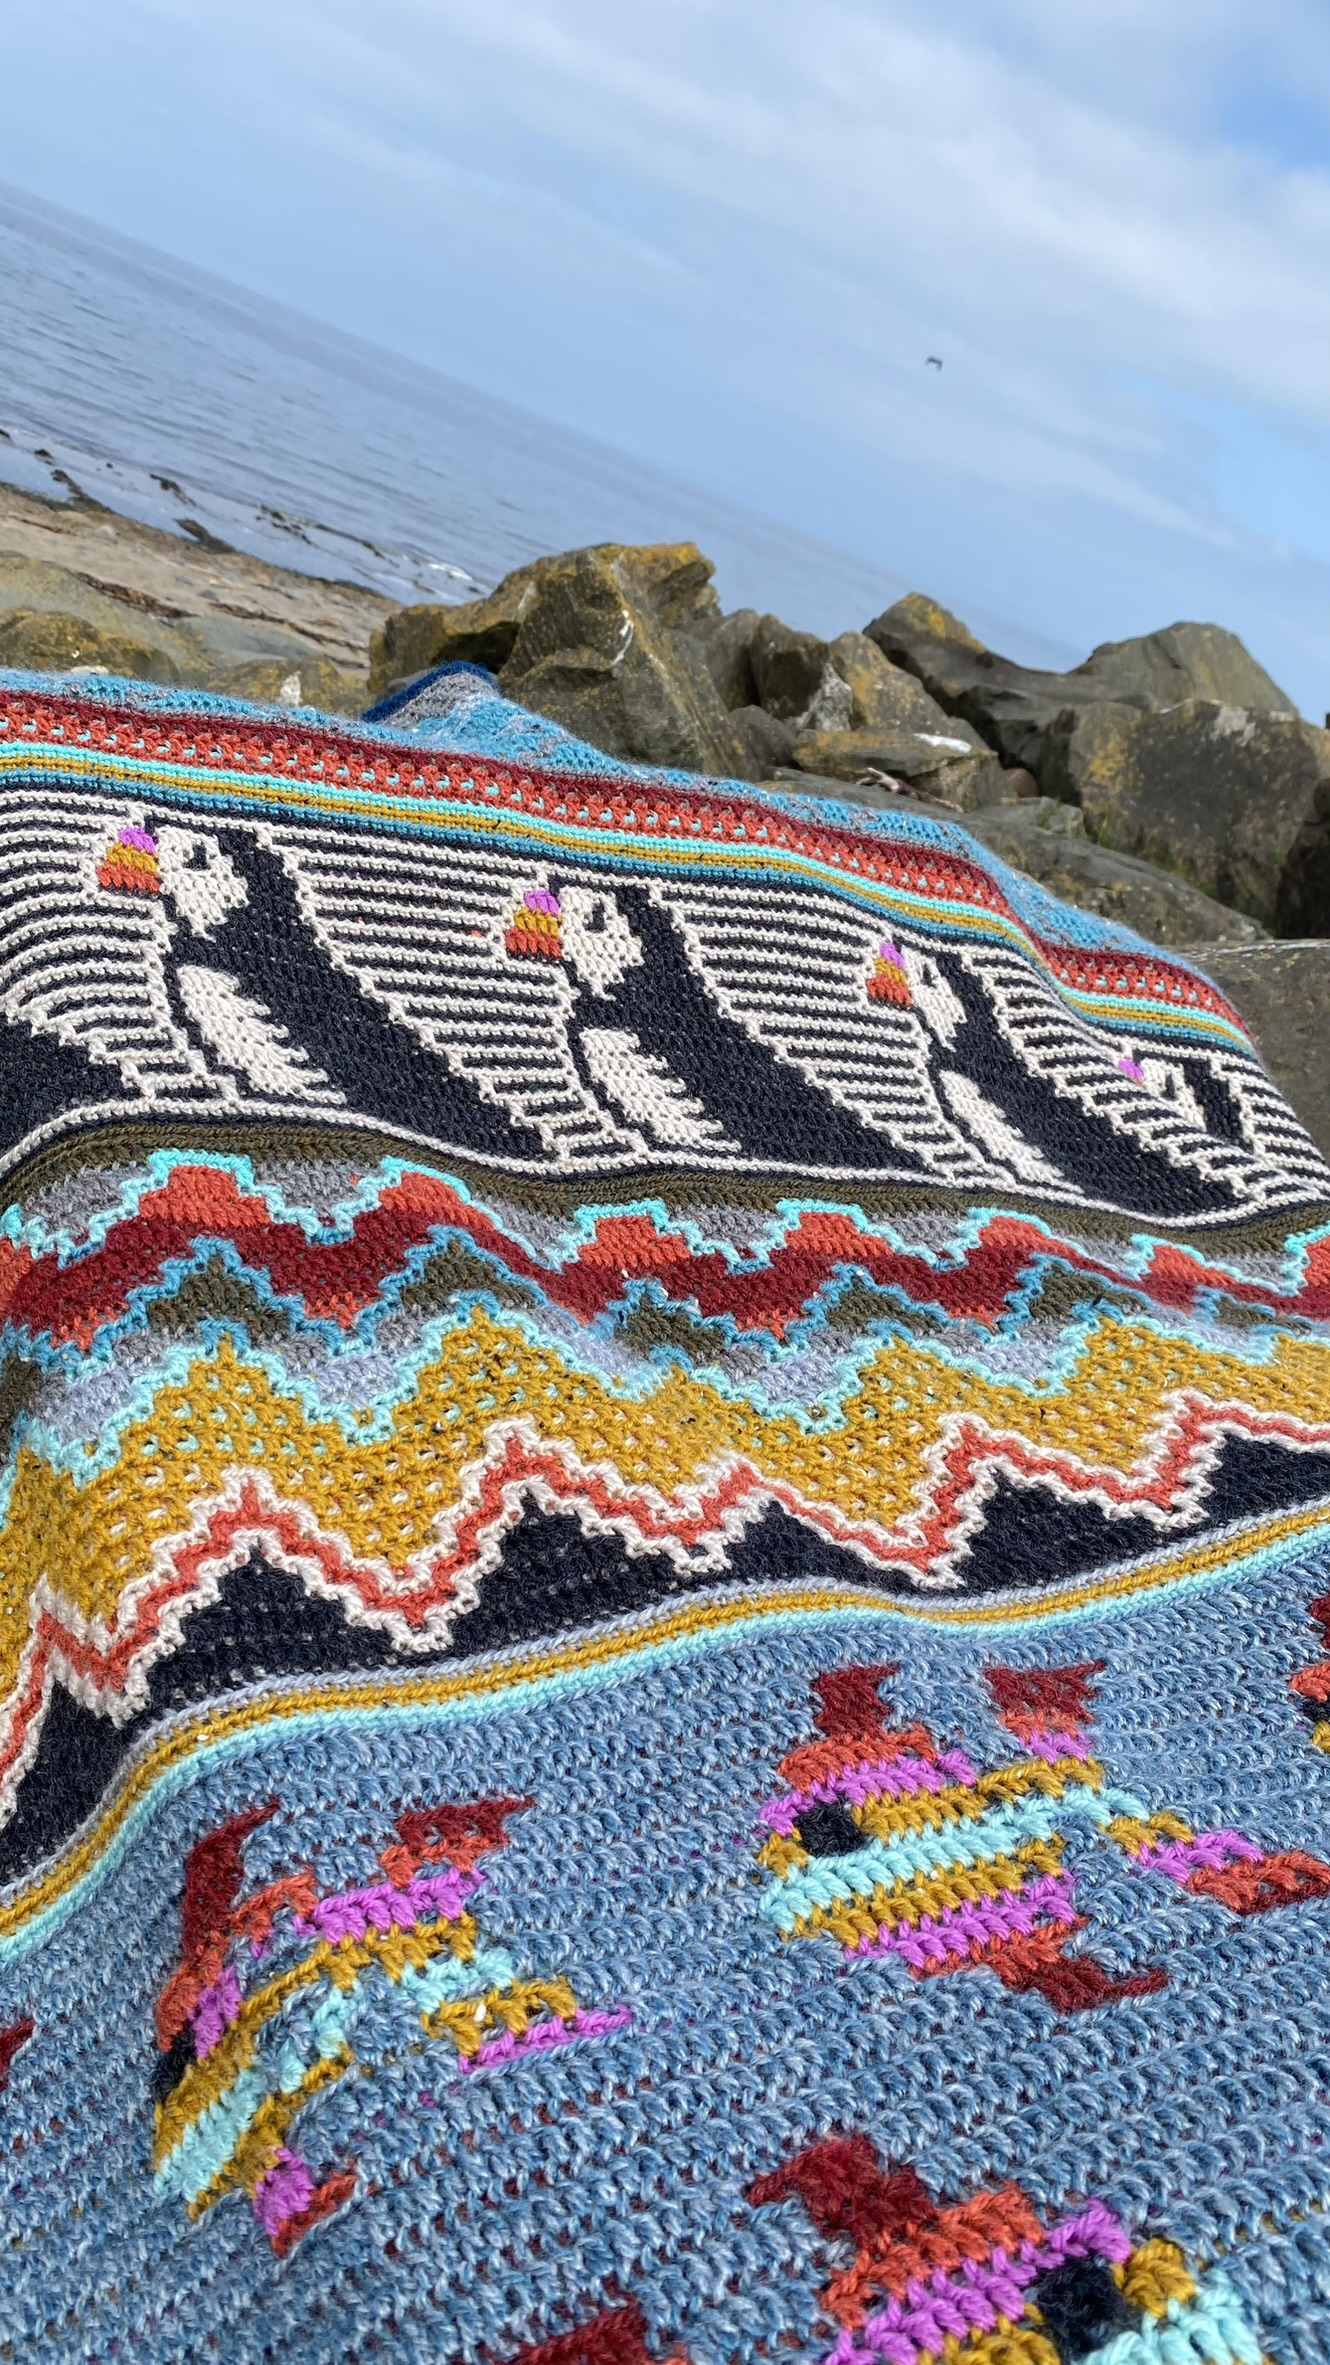
In my version I chose moss and granite for the rugged terrain of the island and deep teal for the waters, rusty reds and orange hues from the lichens, the yellows of the gorse… a happy school of fish is swimming in an ever-changing sea and the piece of resistance are those cute puffins hopping in between.


I look at it and makes me very happy and I hope I have captured or at least attempted to give justice to their wonderful habitat.

Now a few details about the blanket so you can make one yourself and have a little bit of Scotland in your home …


Abi’s version


Abi and I have crocheted  2 versions of the blanket and they are both included in the pattern so you have some choice.

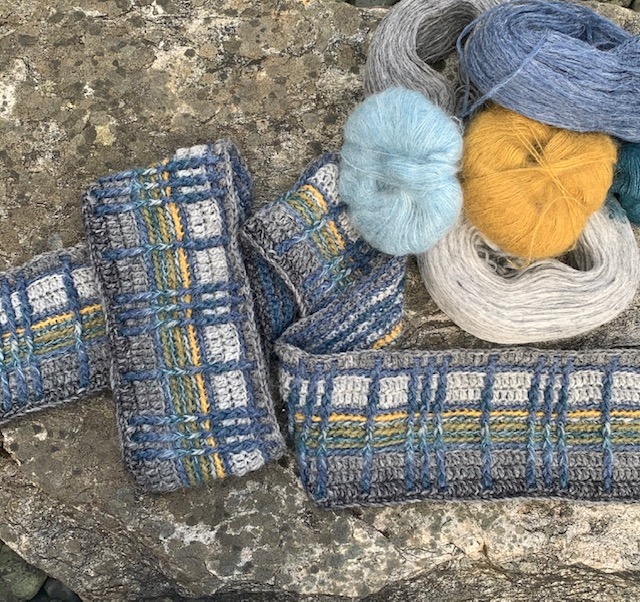
Abi version uses some Sirdar Jewelsun and Sirdar Hayfield Bonus Aran


My version uses   Stylecraft Yarn, I love Stylecraft because it is so reliable, has amazing colours and is widely available.

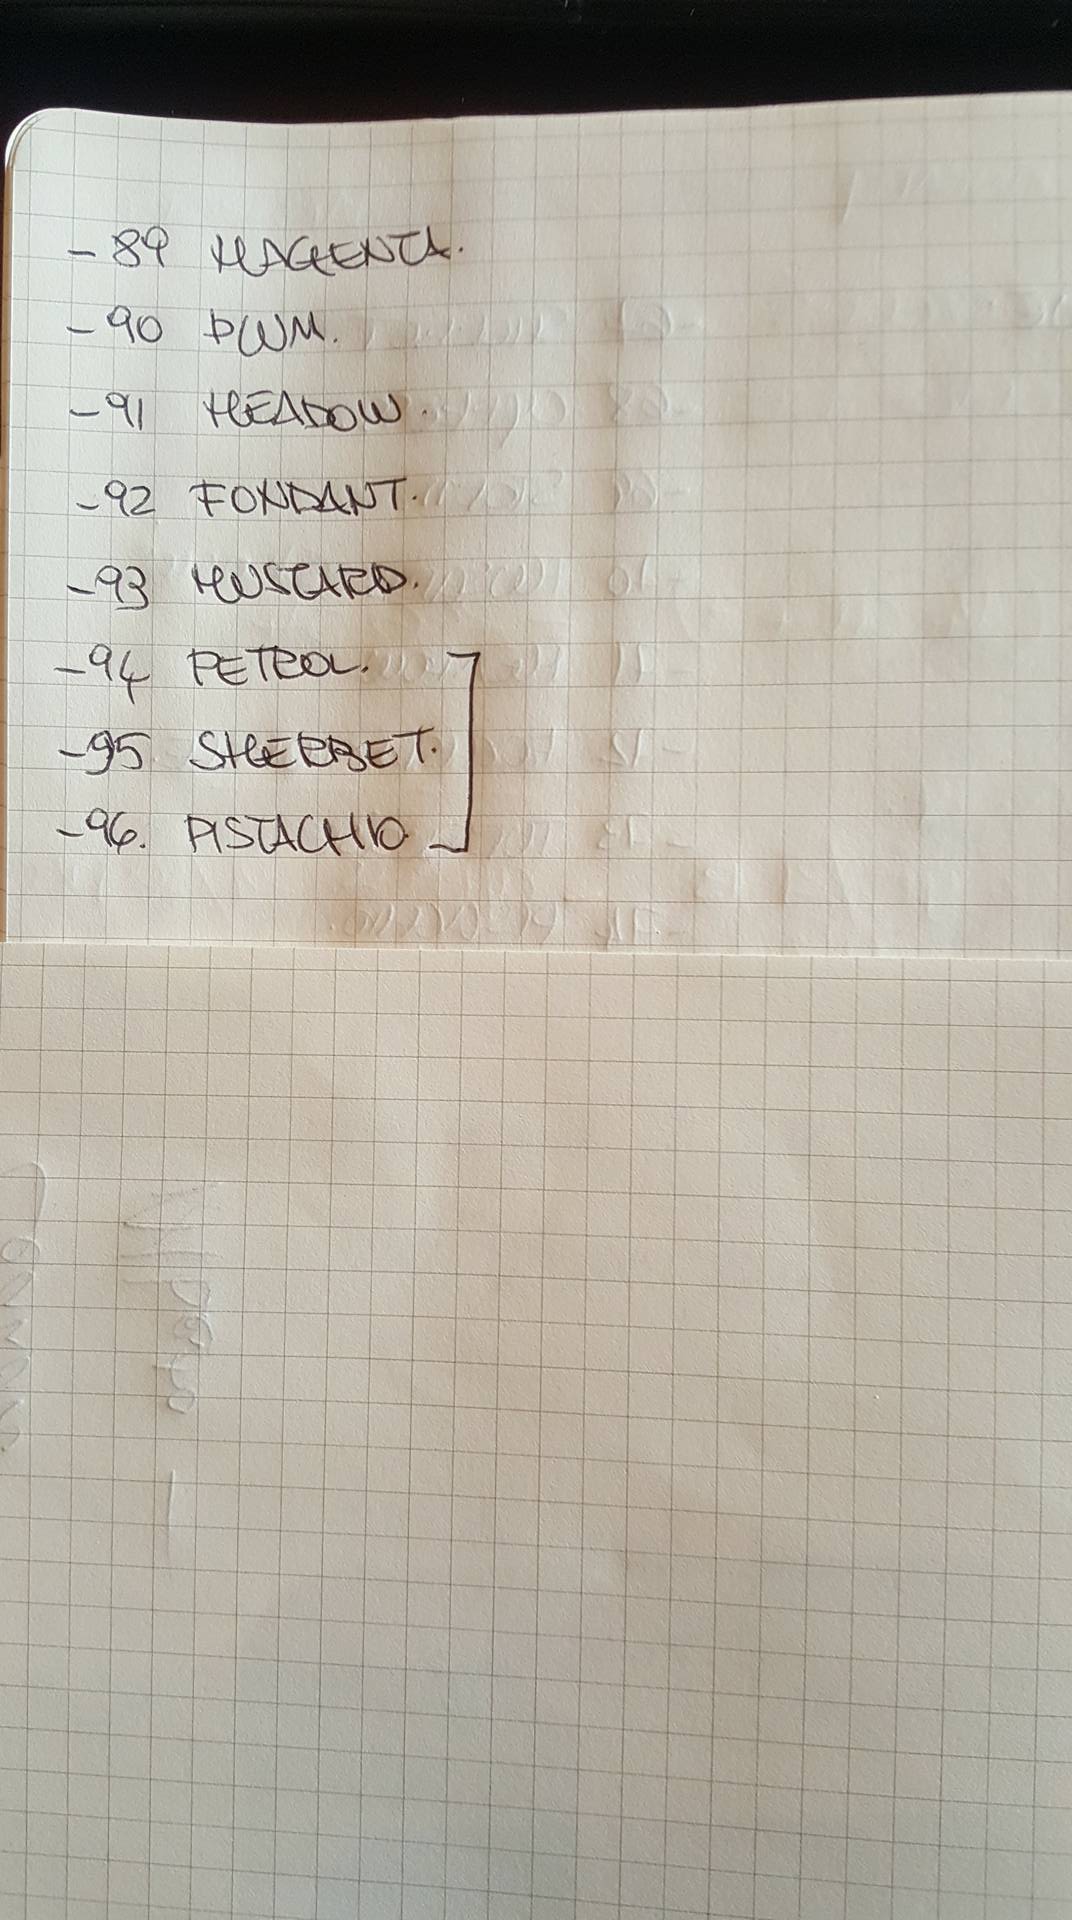
As I am always on a quest for the “perfect” shade I have used 3 different ranges of Stylecraft:  Highland Heather,  Life DK  and a bit of Special Dk, the result is a soft gorgeous blanket, with a hint of tweed that is perfect for our Scottish theme.


So what can I say..to close my blog post? A massive thanks to Abi McIntyre for her patience to put up with me first… I kept tweaking the design.. adding lines, turning the puffins.. and general shenanigans.. she did a fantastic job in transforming an idea and a few sketches into a beautiful professional pattern, more thanks to my forever-suffering daughter Francesca.. that put up with my temper and my amateur dramatic performances on a daily basis, she did the pictures and most of the technical work for our version and to all of you out there that never stop to encourage me to design something new and exciting!

So love to you all and let me see your beautiful St KIldas!!! 

Lucia xx

St Kilda – Digital Download


THE NONNO BEPI BLANKET

One very BIG blanket…

Hello everyone,

Firstly thank you very much for all the likes and lovely messages  I received both on Facebook and Instagram for my blanket!  I am overwhelmed.

This is a project that started without a precise plan and mainly as a way to relax during a rather difficult time and has ended up being a rather successful one.

Sometimes it is really true, the less you plan, the better the results.

It all started at the end of January, I  needed something to do while in Italy looking after my dad that was very sick, and the blanket kept me going during those long weeks.

Mosaic crochet is a straightforward and rewarding technique, there is something quite cathartic in working rows upon rows of double crochet and trebles, so it seems, at the time, the perfect choice for the circumstances.

I had seen Winter Wonderland and Winters Heart on social media and in order to create a bit more of a challenge I just mixed the 2 patterns together.

Drops Alaska seemed to be the most sensible choice as it is widely available in both Italy and the UK, and, at the time was also 30% off. ( which helps…)

After Dad passed, I  have to say, I got tempted to abandon the project as it reminded me of a difficult time, but then I thought, that my dad never left anything half-done, he was a perfectionist and everything he did was always done at the best of his abilities and he took great pride in his work…


So I kept going and I  finished! And I am very glad I did!

I called the blanket  NONNO BEPI ‘S BLANKET, in his memory, to remind me, not of the sadness of his departure, but of all the lovely times we had together.

A BIG THANK YOU also to ABI  @getyerhookon and ANA @oneskeinoflove , they created 2 beautiful blankets that inspired me!

As promised I have pulled together as many pieces of information as possible, so you can make the blanket yourself.

Please bear in mind that I have combined two patterns of other designers to make my blanket and I take copyrights very seriously so I will give you the colour I used, their placements and quantities but you need to buy ( as I did ) both the patterns for the charts of the different sections.

To make it easier I also added a diagram with the position of the different charts in the blanket.

You need to figure how ( depending on how wide you want your blanket to be ) the number of repeats for the blanket and how wherein the repeat you want to start to create and combine the 2 different patterns together.

I added some close-up pictures of the edges so that should help.

Both Patterns are very comprehensive and they already give you the number of repeats so it is just up to you how wide you want your blanket to be.

My blanket is 200 cm wide by 180cm long in total.

those measures are UNBLOCKED.

I had not a chance to wash or block the blanket because it is huge, it weighs 5 kilograms..

The weather in Scotland is still pretty awful at the moment and there is a big chance, if I wash it , that it will NEVER dry!

So that is my excuse for not blocking… Besides the fact that being so heavy it sits perfectly flat and square and I am not so bothered about the blocking.

So lets start:

As said on social media I used 2 different patterns combined:

-WINTERS HEART designed by Abi McIntyre ( a fellow Scot!) @GetYerHookOn

https://www.ravelry.com/patterns/library/winters-heart-mosaic-blanket

and

– WINTER WONDERLAND  designed by Ana Morais Soares @One Skein of Love.

ttps://www.ravelry.com/patterns/library/winter-wonderland-mosaic-cal

You can find both patterns on Ravelry and here are the links

YARN:

I used 108 balls of DROPS YARNS:  ALASKA.

ALASKA is a 100% wool,  Aran weight yarn that comes in 50gr balls,70 metres.

As said on social media it is a LOT of yarn but it is reasonably priced, well tested, widely available and also Drops does regular 30% discounts sales during the year ( I bought mine at the sale).

I have used Drops many times for my projects over the years and I think it is an excellent choice.

The Wool warehouse sells the yarn so please click on their logo on the side of the blog.

COLOURS USED:

– 58 MUSTARD: 4 balls
– 62 FOG MIX: 6 balls
– 66 TOFFEE: 15 balls
– 67 MAROON: 10 balls
– 12 NAVY BLUE: 12 balls
– 63 PEARL GREY: 10 balls
– 64 NORTH SEA: 21 balls
– 65 SAGE GREEN: 16 ball
– 50 DARK BROWN MIX: 9 balls
– 49 LIGHT BROWN MIX : 5 balls

PLEASE NOTE:

The quantities are approximate and are based on my tension so bear that in mind

I used 2 hooks:

-5.0mm  for the body of the blanket
-4.5mm  for the foundation round of the border.

TENSION:

BASED ON A SQUARE 10CM X 10CM worked in MOSAIC TECHNIQUE AND A 5.0 HOOK:

16 stitches x 15 rows.


PATTERN REPEATS:

You will have to do a bit of maths to fit the repeats of the 2 patterns as they are not the same, but it is very easily done by looking at the blanket edges.


In order to calculate your stitches counts and me not breaking copyrights

I give you the number of repeats I used:

I took as reference  WINTER WONDERLAND’s reindeer  as they are easily spotted in the blanket (PATTERN 4 in Oneskeinoflove’s pattern)

MY BLANKET HAS 14  REINDEER.


For WINTERS HEART I took as reference the STAR (PATTERN 9 in Getyerhookon ‘s pattern)

MY BLANKET HAS 9 STARS.


Some advice…

Please study the picture of the blanket…  and the start of the patterns. You will notice that I have respected the start of the WINTER WONDERLAND  chart but  I had to MOVE  the beginning of  WINTERS HEART to fit the discrepancy between the repeat.

I am also a bit obsessed with symmetry so I always try to centre the patterns, even though I might have to fidget a little, for example, the centre of the pine trees is in line with the centre of the star… but again it is up to you.

PATTERN SECTIONS/COLOURS USED


I made a chart for you to see which pattern I used in each SECTION.

There are 13 SECTIONS  which I numbered with letters from A to M .

Please see the chart below:


SECTION A :

Pattern 1 of  WINTER WONDERLAND.

COLOURS:

C1: 64 north sea

C3: 66 toffee

SECTION B:

Pattern 2 of  WINTER WONDERLAND (small hearts)

COLOURS:

C1: 50 dark brown mix

C3: 65 sage green

Small variation:

Row 2 and Row 14 are in NAVY BLUE

SECTION C:

Pattern 3 of WINTER WONDERLAND

COLOURS:

C1: 64 north sea

C3: 58 mustard

Small variation:

I added 1 extra row of DC ( UK ) and SC ( us) at the top and at the bottom of the pattern and they are both in sage green (65).

SECTION D:

Pattern 4 of WINTER WONDERLAND, The reindeer is my favourite!

COLOURS:

C1: 67 maroon

C3: 63 pearl grey

Small variation:

I added 1 extra row of DC ( UK )  SC ( us) at  the top and at the bottom of the pattern and they are both in navy blue (12)

There is some INTARSIA technique in this section, the diamonds between the reindeer are done in NAVY BLUE.

To do the intarsia you carry 2 strands at the same time and you switch colours following the chart. If you have never done intarsia before there are several videos on youtube. The colours that you are not using you carry in the back, to avoid the floats being a nuisance in the following row when you do the DC ( UK term) you can include the float. it will not appear on the front. Please look at the picture of the back as a reference.


SECTION E:

Pattern 9 of WINTERS HEARTS ( stars)

COLOUR A: 65 sage green

COLOUR B: 66 toffee

Small variation:

I added 1 extra row of DC ( UK )  SC ( us) at  the top and at the bottom of the pattern and they are both in the north sea (64)

Row A1 and Row A35 are in a Dark brown mix (50)

Also in this section, there is some intarsia (the diamond and the centre of the star are in MAROON (67) and row 18 and row 20

are in the north sea (64) plus take note of row 16 the intarsia to frame the square around the centre.


Close up of star E

SECTION F:

Pattern 5 of WINTERS HEARTS ( pine trees)

MY BLANKET HAS  8 PINE TREES

COLOUR A: 49 light brown mix

Colour B: 50 dark brown mix


Small variation:

Intarsia for the star in between the pine trees is worked in the north sea (64)

I added 1 extra row of DC ( UK )  SC ( us) at  the top and at the bottom of the pattern and they are both in mustard (58)


SECTION G:

Pattern 7 of WINTER WONDERLAND

COLOURS:

C1: 65 sage green

C3:  58 mustard


Small variation :

R1  is in light brow mix (49) and R11 is in north se (64)


SECTION H:

Pattern 14 of WINTER WONDERLAND (snowflakes )

MY BLANKET HAS  14 SNOWFLAKES

COLOURS:

C1: 62 fog mix

C3:  12 navy blue


Small variation:

I added 1 extra row of DC ( uk )  SC ( us) at  the top and at the bottom of the pattern and they are both in north sea (64)

SECTION I:

Pattern 9 of WINTERS HEARTS ( stars)

COLOUR A: 66 toffee

COLOUR B: 65 sage green


Small variation:

I added 1 extra row of DC ( uk )  SC ( us) at  the top and at the bottom of the pattern and they are both in north sea (64)

Row A1 and Row A35 are in Dark brown mix (50)

Also in this section there is some intarsia (the diamond and the centre of the star are in navy blue (12) and at the same time  you carry an extra strand of maroon for the centre of the star.

Closeup picture star I

SECTION J

Pattern 4 of WINTER WONDERLAND, The reindeer  again

COLOURS:

C1 : 63 pearl grey

C3: 67 maroon

Small variation:

I flipped the original chart!

So the reindeer are looking to the RIGHT ( that is easily done with a phone using the edited photo and you mirror the original chart )

I think they look much better but obviously is up to you. I added 2 extra rows of DC ( UK )  SC ( us) at  the top and at the bottom of the pattern and they are both in fog mix (62) and navy blue (12)

There is some INTARSIA technique in this section, the diamonds between the reindeer are done in NAVY BLUE.

SECTION K:

Pattern 3 of WINTER WONDERLAND

COLOURS:

C1: 64 north sea

C3: 58 mustard

Small variation:

I added 1 extra row of DC ( UK )  SC ( us) at the top and at the bottom of the pattern and they are both in fog mix (62).

SECTION L:

Pattern 2 of  WINTER WONDERLAND (small hearts)

COLOURS:

C1: 50 dark brown mix

C3: 65 sage green


Small variation:

Row 2 and Row 14 are in NAVY BLUE

SECTION M:

Pattern 1 of  WINTER WONDERLAND.

COLOURS:

C1: 64 north sea

C3: 66 toffee


BORDER:

My border is a double border so I can sandwich the pesky ends!

the foundation round  is done in dc ( UK terms) and a size 4.5 hook  and the following rounds  are half trebles(UK term)  the back is 4 rows and the front is 4 rows too, both made in the north sea (54), I joined the 2  sides of the border with a row of dc ( UK term) in maroon (67)

Also …

Make sure you have the same number of stitches on the vertical sides!!! otherwise, your blanket will squint.. the best way is to take a note of how many stitches you do per section, and make sure you do the same on the other side!


FEWWWW IT IS DONE!!!  I hope it helps

HAPPY CROCHETING TO YOU ALL

Love,

Lucia xxx

The PEACHY PETALS BLANKET

The PEACHY PETALS a new blanket…

After some silence I got a new blanket for you!

The time in lock down has given me the opportunity to reflect on what ‘s really important to me and it has been a time to re-evaluate priorities and to think about resetting goals for the future.

This doesn’t apply just to crochet but also to my life in general.

Crochet has played, without exaggeration, a vital role in these past few months, it has entertained me, distracted and brought some well needed focus.

I crocheted a lot, I made several samples, but mainly I focused on two new blankets.

One is a collaboration project with my friend Tinna Porudottir Porvaldar ( but I will write about all of that in my next entry…)  and the other is PEACHY PETALS !!

Over these past months I have been looking into my work and what I like about designing.

And I think I am a bit of an ‘odd ball’ ( no surprise in that…)

I don’t know how other designers work but for me every blanket is a long journey, it takes a lot of energy and time to come up with a concept or something that I think is new or interesting… so you will wonder why do I do it?

Because I love it! I love the excitement of starting something new, I like making samples,  choosing and tweaking the motif ,and at the same time my favourite part… picking the colours and fibres.

So the Peachy Petals is the result of all the above and several months of work.

Let’s start from the name.. why Peachy Petals….

‘Petal’ in Scotland is an old fashioned term of endearment, I heard Glen, my daughter Olympia’s boyfriend, calling her petal once, on a car journey, and the combination of the Scottish brogue plus the actual word made me smile ( don’t ask me why, it just did! ) , she is a bit of a petal after all!

And peach is her favourite colour… so there we go, a blanket came in my mind to emulate who Olympia is .. a lovely soft sweet girl that always smiles.

I wanted warm, light suffuse hues to emulate her character hence why the Peachy Petal is very different from my much bolder style!

So could I create something that is not so familiar to me? The answer is yes, as I do love a challenge.

Then came the practicality..how can I create something with tonal and subtle hues that is pleasing and interesting  without using a ridiculous amount of different yarns and costing a fortune?

The secret is mixing…

I started with a colour “Blooming Dahlia” or Pantone 15-1520

then I made a mood board of basic tonal palette inspired by interiors .It came apparent that the most important thing  to create a well balanced project while using several variations of the same colour.

The aim of this blanket was to use natural fibres and to create an array of tonal suffuse pale hues without using a lot of different colours and making the blanket prohibitively expensive!

I am very aware of the cost impact on my projects and I strive to offer projects that are beautiful but cost effective .

I think the combination of a mercerised cotton like Muskat and the Mohair silk yarn is a fabulous way to achieve the above.

The Mohair works beautifully in combination with the silkiness of the mercerised cotton and create not only subdued variations in colour but also gives a beautiful soft halo to the blanket. and… they work perfectly together, no knots, no tangles.

I have also added to the pattern  a bonus version of the blanket ,made by one of my testers , Susan Cox.


Susan sent me this lovely picture of her blanket that she called  ‘SPRING PETALS’ .

She  made her blanket in 100% cotton too but without Mohair. and she also crocheted a lovely cushion made with a combination of cotton and mohair.Am I not a lucky girl to have such lovely ladies helping me?

My testers Janet and Julie tested the motif and Maggie  draw a chart of the motif that I added to the pattern.

The pattern has also all the details on how to use the different yarns and the placements for each of the 96 motifs in the blanket, plus all the stats for Susan’s version.  I think it is a lovely variation to the pattern and I hope it will give you the confidence to use this versatile pattern with the colours of your choice.

You can download the  pattern  either from here  or from Raverly

Peachy Petals Blanket- Digital Download


So THANK YOU Susan for sharing your project, and Maggie Bullock for the motif’s chart.

LasT but not least you can get all the yarn for the blanket from the Woolwarehouse just press the icon , they have just started to send yarn internationally again after teh lockdown and  the MUSKAT is on sale at 40% less until the end of JULY !!!!

Woolwearhouse MUSKAT LINK

Wool Warehouse

So I hope you will give my new blanket a go !

Happy crocheting,

Lucia


A Tyrolean table set

If someone had told me last Christmas , that the world was going to change and I would spend the best part of the new year in lockdown in my home and scamper trying to rally all my children back I would first thought you have been watching far too many sci-fi movies .

Travel bans and self-quarantines across the globe have led to ‘U-turns’ and majour change of plans…

Today I should be packing ready to leave and spend a few weeks with my family in Italy , instead my flight has been cancelled and I am going no where…What I found more frightening is not the disruption of my plans but the fact that even visiting your parents is an impossible idea.

So while spending another week under lockdown, myself as many of you all over the world are looking cautiously and hopefully to better times.

So what is the best way to focus on positive thoughts?

Making something that remind you of happier and better times!

That is the thought behind my TYROLEAN TABLE SET.


As few of you know I come from a small village in Northen Italy and I love the Dolomites. I am so lucky that I had the opportunity to spend  weekends and long holidays on the most amazing beautiful mountains since I was a little girl and now my children are enjoying visiting the same village as I did.

Photography@martino pietropoli

I love everything of the landscape of South Tyrol  the picture perfect villages, the fresh air, the majestic mountains, the trees,the food and …obviously the textiles.

photography@ patrick baum

The Tyrolean region  has an amazing tradition of beautiful fabric, natural materials, yarn and garments.

One of my favourite garment of the Alps is the Dirndl. My girls ,over the years, have enjoyed wearing this beautiful  folk costume and  traditional dress for women and girls in the Alps.

With a lot of colours and textures in mind I created this new project and ,if you want to make something that is not too challenging or time consuming , a little project to enjoying between other works in progress, or a quick present to give to a loved one I think the TYROLEAN TABLE SET is a great option.

The pattern has written instructions and there are charts for both place-mat and coaster.

Tyrolean Table Set

I used Drops Muscat dk, a 100% mercerised cotton yarn, the quantities are specified in grams and there are 3 different colours options

You can find your yarn here:

Wool Warehouse

WOOL WAREHOUSE DROPS MUSCAT LINK


With a dk yarn the place-mat measures 39 cm/15.5 inches  in diameter and the coaster measures 12 cm/5inches.

All the best to You all out there, stay safe and keep crocheting!

love,

Lucia


The Coorie shawl, Tinna and I…..

Hi Everyone,

Well two posts in the space of a few days.. things are indeed changing…

I normally stay clear from talking about myself or my life and I focus on general topics or a crochet project, mainly because I do not think my life is so eventful to be worth it sharing but I am going to make an exception with this post.

I still find quite surreal what is going on around me at the moment but I guess I am not alone in my bewilderment.

By last Thursday the adrenaline that fuelled me over the mad rush to try to sort out as much as possible before the lock down dwindled to fumes, and I suddenly got hit by the enormity of the situation not only for me and my family but for the entire human race. That subsequently morphed into an overwhelming anxiety based on  tsunami of “what if…” dreadful scenarios.

I was so engulfed by the all thing that I couldn’t even pick up my hook and work on something.

I just went to my bed…

then, as I couldn’t sleep, I picked up my phone, which normally I NEVER do, as all Electronic devices are banned , in purpose,from my bedroom, but in these past few weeks I made an exception  and kept it by my bedside just in case I end up missing  a call from my parents or my brother in Italy…

Any way, I am scrolling  down my messages and I see one from Tinna .

I post a screen-shot for you…

So I  downloaded the pdf expecting the new pattern we had chatted about while she was here instead there is something new: the Coorie shawl…

and I am like awww a Scottish inspired pattern, so nice of her…

then I read the introduction and I started to cry…

What can I say?

Serendipity…things happen to you when you most need them!


I am posting the introduction here, but, please ,forgive me if it might seems a bit self indulgent.

I assure you that it is not the reason why I am posting it at all.

I am sharing it with you because those lines encompass all what I love about crochet!

Crochet is about feeling good ,enjoying the craft, it is about friendship,gifting, sharing, exchanging. Crochet is about hard work behind the scenes, it is about an overwhelming addiction to yarn, but what Crochet is for me is people!!

Please do not get me wrong, it is not all pretty rainbows and fluffy clouds,

more you share more you put yourself out there .

Bigger is your presence on line bigger isyour exposure to all sort, and you do encounter some unpleasant people which take vantage of you and your craft, but, thank goodness, there aren’t so many of them and the overall experience is so worth the effort, the sleepless nights, because the pattern is not right, the frustration with technology, the worries, the lack of time and more so the going back and start again…

The magical bit happens when, in your journey, you stumble in someone very special indeed.. and you find out that besides crochet you got loads of other things in common!

So when I picked up Tinna at the airport that Tuesday it felt like I was picking up a old friend,I opened my home to her and she fitted in like a glove as simple as that and if wasn’t for the crochet I will never have met her!

So yesterday I set aside what I was working on, pull out the lovely Icelandic  Plötulopi yarn Tinna brought me and I am making my Coorie, with this lovely surprising light unspun yarn  it will remind me of the lovely time we had together and I cannot wait for the next time we will see each other again.

As the real magic in life is just human kindness.

So all the best to you all out there, stay safe

Peace and love,

also  last but not least, if you want to make your COORIE too you can find Tinna’s pattern here:

https://www.ravelry.com/patterns/library/coorie-3

LUCIA XXX.


Last chapter on the January ‘s blues blanket.

I can not believe we are already in February!

Normally January drags a bit on for me but this year has definitely not been the case.

I guess I have been very busy with work and with “non-crochet “related stuff but I still managed to add a border and finish the blanket.

Today I can give you the last pieces of information so, if you like, you can finish your blanket in the same way.

About the border, I am going to digress a little bit and give you some thoughts.

I personally love borders very much especially if they are big and bold!

That works even better if you have a simple pattern throughout the main body of the blanket as we have in this case. Maybe my propensity for statements borders is due to the fact that my first attempts on crochet, many years ago, were cotton’s tread fancy borders for linen towels!

If you are Italian or Spanish or just Mediterranean in general you might are very familiar with them.

another picture this time from the oldest and most famous creative magazine in italy called “Mani di fata” which translate very appropriately in “Faerie hands” !!

It used to be a great test for beginners to master crochet without embarking in something too challenging or time-consuming, even if, I have to admit, it still took a fair amount of time to make them as the cotton yarn was at least a 4ply but often much thinner than that.

I have a few stashed in a drawer somewhere in the house, I use them seldom as they are delicate and definitely not tumble-driers proof!!!

If bold and big is not your style, it doesn’t matter as a ripple pattern can look just beautiful as it is! the little scallop at the top and end can be left as it is and still look fabulous so do not panic if you cannot be bothered doing the border your blanket will still look lovely. Just surf the internet or Pinterest for inspirations, and remember it is YOUR blanket so don’t be afraid to go off-piste! actually, I love if you go off-piste and you put your input! it makes your blanket more personal.

Back to what I have done… some pictures to start with:

In my case, I filled the ripple because I prefer straight edges especially if you are opting for a more challenging border.

I draw the distribution of the “filling” stitches for the top and bottom of the blanket.

I started my foundation round with the Pistachio on the corner ( now you can see why it is good to start and finish the blanket with the same colour. it brings continuity on your foundation  round, which means when you start the next round of the border with a contrasting colour ( in my case is the claret) you have a solid even base to work with)

on the side I worked 2 dc in the space created by each tr at the beginning and end of each round .

I have in my case 195 stitched in each of the vertical sides of the blanket and 114 on each of the horizontal for the 4 corners we have :(1dc-ch1-1dc) repeated 4 times.

so the foundation round is made of (1dc-2ch-1dc)+ 114 +(1dc-2ch-1dc)+195+ (1dc-2ch-1dc)+114+(1dc-2ch-1dc)+195.

the border is done with Claret and a 3.5 hook

I have chosen for the border  again a diagram I found on Pinterest this is a picture of it. I made some minor adjustments to the last couple of rounds to simplify it mainly because the pattern is written for a cotton thread and not DK yarn.

Ther repeat of the pattern is on a multiple of 10 so on my first round of claret I added 4 stitches in the each of the short sides and 3 on each of the long sides.

If you use another pattern for the border please consider adjusting the number of the stitches according to the repeat!

I posted a couple of close-up so you can see better how the pattern develops. It has a fair amount of rounds but it is pretty fast.

my last round is a contrasting one done in Fuchsia purple.

YARN QUANTITIES USED for the border:

for the Filling round and foundation, I used 35 grams of  PISTACHIO

for the BORDER:

  • ROUND 1 TO 7 : I used  150 grams of CLARET
  • ROUND 8 : I used 30 grams of  FUCHSIA PURPLE

last but not least….

I have been asked if I can transcribe the diagrams into words…. I know for many of you it is easier to use written instructions but I wish you tried ( NEW YEAR’S RESOLUTION !!!) to use a diagram!! It will open you amazing opportunities! this blanket, in particular, has such an easy diagram so please give it a try trust me you will never look back! there are loads of tutorial on you tube to learn how to read a diagram, do have a look and see which one suits you better.

love to you all…

I have something new I am working on so I will post again very soon,

lucia xx


A little bit more about the January’s blues blanket

Firstly sorry this blog entry is a bit late, finally, after a very frustrating weekend, I got my blog back!

I am quite impressed with myself for sticking to my new year’s resolutions ( or trying to) …I am back writing again!…( mind you it is early days…) nevertheless it feels good!

One of my children bought me a planner this year, I don’t know if it is meant to be a gentle hint to get better organised as I failed completely last year trying to ‘get organised’ using an App on my phone!

So on 2019, we go back to basic! Hoping that pen and paper might do the trick for me …

Do you have a planner too?

I still have to get used to these little snippets of encouragement that are keeping appearing randomly on this planner ..they make me giggle. I just discovered that there are stickers too! Probably those are a step too far for me🤣🤣🤣

I will keep you posted!

Let’s get back to the blanket.

I finished the main body a couple of days ago and I have been gathering the details so you can make one yourself.

As you know the blanket is not completed but I think it could be interesting for you to follow me “in real time” and see the blanket coming along, a bit like being behind the scenes.

The pattern is really simple, that was the point of this blanket in the first place,  to do something really easy and relaxing.

I used a V-STITCH RIPPLE for my blanket. As said on Facebook there are several versions and options for the stitch available out there.

The version I used I found it on Pinterest. Just a diagram nothing more here is the picture I have used.

.

I like to give credit to the designers even if  I think this is just a diagram of something that has been out in the open as a free pattern.  All I got is a watermark which said Tejiendo Peru’  I have also tried to get in touch with them but with no joy. so I assume it is ok for me to share with you as it is in the public domain already..

I  used the diagram above as a guide but  I did an alteration to it.

If you read the diagram you noticed that the rows are worked on the front (RIGHT side ) , then you turn your blanket and you work on the back (WRONG side). If you follow the diagram as it is in the picture below  you can see  the result:

I didn’t like the results on turning your work after each round, as I think it muddles the effect of the stitch so I opted for working just on the RIGHT SIDE ONLY! you can see the difference in the picture here:

The blanket is even, each round is exactly the same, no difference either in size or texture. Also because I change yarn every row it makes no difference of whatsoever if I  work always in the front.

Maybe you are all thinking I can’t see where the fuss is all about, but believe me when you work the all blanket you definitely will be able to see the difference between the two options. working just on the front makes a much better-looking blanket.

The blanket still doesn’t have a border but the main part measures 90 cm wide by 140 Cm long

the yarn used is STYLECRAFT SPECIAL DK . the hook size is a 3.5 mm (E).

Here the list of the colours I used:

The number between brackets refers to the quantities of yarn used in grams. obviously, do bear in mind that the yarn usage is just an indication based on my tension and a 3.5 hook used.

So dig out your leftovers from your stash as you might be able to use them and plan the blanket.

  • LIPSTICK (13)
  • SPICE (53)
  • CLARET (29)
  • MAGENTA (17)
  • PLUM (29)
  • FONDANT (27)
  • CLEMATIS (29)
  • MUSTARD (71)
  • PISTACHIO (90)
  • SHERBET (51)
  • ASPEN (33)
  • TURQUOISE (23)
  • STORM BLUE (10)
  • PETROL (34)
  • CYPRESS (25)
  • TOMATO (25)
  • MEADOW (71)
  • FUCHSIA PURPLE (52)

The pattern is based on a 14 stitches repeat plus 3. I started with 269 chain stitches that gave me 19 REPEATS ( 90 cm wide) it is very easy to adjust the size by adding or subtracting repeats to get to the size that you want.

I also took note of the colours sequence I used. there are 96 rows.

a  couple of HINTS :

  • if you look at the blanket I have repeated the first 3 rows in reverse order at the end. that will finish your blanket much better, it is like a visual frame which works beautifully not only for this blanket but in any you might want to do at home.
  • I also started each row with a self-standing treble and NOT 3 chains as in the diagram ( simply because I feel is a more sturdy way to start and it will work better when we will add the border.

that is all for today

thank you for reading,

Lucia xx

A little catch-up!

A little catch-up… I know it has been AGES!

I don’t know about you but time has passed me by in a whirl of yarn, patterns, ideas, pictures, stories and the odd family commitment or two..lol

So where to start…

I have pulled together very basic information about the Wreath because I know quite a few of you are interested in it.

I made it, as said, a couple of years ago, I guess I must have been a bit bored and when I am bored of my current WIPs or I am tired, I always look for something reasonably small and quick to make. I call it “instant gratification”

It turns out that in these 2 years I found my wreath really useful, I never, as said on Facebook, stitched the pieces permanently on the ring but I left them pinned down with these little white headspins.  I have used that wreath many times, for trying different colour combinations or using some of the flowers as decoration in pictures of other projects.

So if you need to test some colours instead than doing a lot of boring squares, make some flowers!! Then you can play with them!

There are many wreaths available in both Ravelry and Pinterest that can help you to decide how to make yours, for me, my initial inspiration was seeing the most amazing, beautiful and complicated wreaths that Lucy @attic24 had made and that what spun me making one.

Mine is much more simple in comparison with Lucy but .. did I mention, instant gratification??? LOL

I love small projects that can be made in a day or a weekend!

I have been looking throughout the past couple of days if I had saved any pattern or link or reference, but all I found were a couple of pictures. So for the purpose of this blog I pulled my wreath down and I made a 3D daisy and the 5 petal flower again so I can jot down the details.

so let’s start :

what do you need?

  • 1 half rounded polystyrene ring – 35cm in diameter. It has to be flat in the back and rounded in the front. (you can get them from crafts shops or Amazon)
  • leftover yarns.


Please look at Lucy’s wreaths, she has a very comprehensive tutorial on how to cover up your polystyrene ring and also there are some lovely patterns for the leaves too, which I used in my wreath. this is the link to Lucy’s blog wreath :

http://attic24.typepad.com/weblog/2015/03/winter-wreath-ta-dah-1.html


for the base of my wreath, I used some Lopi’s ALAFOSSLOPI  yarn left over from a jumper it is a chunky yarn, the colours are:

  • 0085 OATMEAL HEATHER
  • 0867 CHOCOLATE HEATHER.


I love this Icelandic 100% yarn because has a rustic, organic feeling, and it makes the most amazing super -toasty jumper ever!

I can’t remember exactely what hook I used but I guess must have been either a 4.00 or a 4.5 mm, you want your fabric to be dense so it covers the ring beautifully. So make a small section and see if it covers up the ring neatly. Mine worked, like Lucy’s, in rows of double crochet stitches (Uk terms)  22 stitches wide and 112 rows alternating 2 rows in oatmeal and 2 in chocolate.

To help to keep the strip in place as well as the sewing in the back I sprayed my ring with some SprayMount Yp208060506 adhesive spray, I use it in the office for my mood boards, it is great, but make sure you spray lightly!

now to the FLOWERS:

the yarn is leftovers of STYLECRAFT SPECIAL DK in:

  • storm blue
  • duck egg
  • mustard
  • camel
  • grape
  • lime
  • pale rose
  • parchment
  • gold

you also need some polyester toy filling for the centre of the daisy. If you have none, ordinary cotton wool balls will do.


I made 2 types of flowers :

-10  Hellebore flowers from Lucy’s wreath, pattern link here:

http://attic24.typepad.com/weblog/crochet-hellebore-flower.html

-12  three dimensional  daisies:

the pattern as follow:

The centre of the daisy is done with the same principle of amigurumi, crocheting in a spiral, without joining in the round and without turning the crochet work,

Start with any yarn and a 4.00mm hook and make a magic ring

Rnd1 :

Work 6 dc in a magic ring. ( 6 dc)

Rnd2:

work 2 dc in each stitch. ( 12dc)

Rnd3:

work [dc in next st, 2 dc in next st] repeat [ ] 6 times ( 18st)


Rnd4:

work 1dc in each st. ( 18dc)

Rnd5:

as Rnd 4 (18 st).

Rnd6:

as Rnd4 (18st) put a marker in any of those stitches as a reference for the petals we are going to do after.

Rnd7:

as Rnd4. (18 st).

Rnd8:

we start the decreasing now and your work will start to looks like a little cup.

work [1dc, 2dc together] 6times . stuff your little cup with the filling.

Rnd9:

work 2dc together all around, add some more stuffing and close the bud. ( if you want you can leave a long tail to sew the flower to the wreath later).


PETALS:

with a different yarn work on the side ( rnd6) , using the picture as a reference,

1st ROUND OF PETALS

work :

[1dc, ch3,skip 1 st, 1dc ] all around that should give you 9ch3 loops that we are going to fill up to make the first ring of petals.


in each of the ch3 spaces work: 1dc-1htr-2tr-1htr-1dc.


2nd ROUND OF PETALS

work:

1dc in the skipped st above, 5 ch, skip 1 dc and repeat that makes another round of  9petals  staggered from the petals before the previous round. In  each of the ch5 space we work: [1dc-1htr-4tr-1htr-1dc ]


that makes our 3D DAISY!

LEAVES:

makes 18 ( again make as much as you like!)

the pattern is again from lucy’s @Attic24, this is the link:

http://attic24.typepad.com/weblog/may-roses.html

For my version I used some  leftovers of STYLECRAFT CHUNKY SPECIAL  and  some of the ALAFOSS LOPI I used for covering the ring in:

STYLECRAFT SPECIAL CHUNKY:

  • gold
  • camel
  • dark brown
  • lime ( stylecraft DK)

ALAFOSS LOPI

  • oatmeal heather
  • chocolate heather.

then you can take a few pins and place your little flowers and leaves all around the ring…

hope it has helped

love to you all and happy “crocheting”..( someone told me I shouldn’t use the term “happy hooking”!)

I got a few more things  coming along so stay tuned!!!

lucia xxx


Cosmic, amigurumi and other stories…

Hello everyone,

Here I am with a new blog entry to keep you all updated on my …never-end stack of Works in progress!!..

So where to start…my obsession with amigurumi is still in full swing…

I got a couple of new books one of which is SUPER CUTE! it is all about bugs and butterflies.What fascinated me is that  Lydia Tresselt, the designer behind LalyLala, is so skilled that made even a fly looking cute!

I attempted a butterfly, is not finished yet, the pattern is beautifully written as  Lydia has been writing amigurumi patterns for a long time.I am sure many of you are well acquainted with her kangaroos and other super cute animals, if not please have a look at her work, it is well worth it a visit.

https://www.etsy.com/uk/shop/lalylala

” Lalylala’s Beetles, Bugs and Butterflies” is her last book, I got it from Amazon a few days ago. It is lovely and a  bit different from the average crochet book, the first part tells a story about the life cycle of the insects and the second part is all about patterns for the different stages of the bugs lives. from caterpillar to adult insect, they look very cute and easy to make.   I think they would be perfect for a child because they are not only lovely to play with but, to a degree, they could be quite educational, as they are not too “human-like “as often happens to amigurumis. on that subject, I have discovered another amazing designer, Sonja van der Wijk , her website is called Son’s popkes  https://sonspopkes.com/

I bought 3 of her patterns on Ravelry, and I got one free I thought to would be a good idea to use some of the Lett-lopi yarn I got in my stash…

if you follow me you might remember the Odinella blanket I made last year using   Lett-lopi.

https://luciasfigtree.com/patterns/odinella-icelandic-blanket/


a fabulous yarn especially for knitting and if you are interested in making outdoors garments or beautiful Lopapeysa ,with their recognizable design that has since become a national icon for Icelandic cultural identity ( I love Iceland!)

I made so many  Lopapeysa over the years, they have been my favourite knitting project. So if you love knitting and you also love the outdoors I would definitely recommend knitting one. They can be a bit scratchy at the beginning but they become amazingly soft with age and also they last a long time!

Francesca, my daughter, has a favourite one  I made for her when she was 16 and she wear it all the time..it has a couple of holes on the sleeves but I think it adds to the charm!

you can see it here.

I also have to finish my last bear and i have to  make a  “VERY PINK” ‘s one for my niece, Aurora, she is going to be 7 at the end of May and she loves pink…

This week I also finished joining together the Camo-blanket for Francesca.. I loved joining together the squares she made ,and adding a border.

More WIP’s…the COSMIC CAL!!  how exciting!!!

I normally don’t do Cals because I am really impatient and I  haven’t done a Cal since the Sophie’s Universe, but I think the Cosmic is a lovely one so I decided to give it a go.https://www.crystalsandcrochet.com/

I have been an admirer of Helen’s work since she started designing, she has recently joined the Stylecraft’s blogstars group and has been a real privilege chatting to her, she is not only a great designer but also a lovely all around person!.  the Cosmic is going to be my first blanket using Helen’s patterns.


Part one went live this week on the Stylecraft’s web site, it is available in English, American and Dutch, but on Helen’s page is translated in many other languages so have a look at Helen’s page! there is also a video tutorial too on youtube which I found very helpful.

I enjoyed the pattern so much that I made 2 versions as I couldn’t make up my mind about the yarn!! I made a Stylecraft SPECIAL DK ‘s one and an Aran weight one with some Drop’s NEPAL that I had at home.


Some of you ladies as asked me about the colours I used on the Stylecraft’s version so here they are: plum/matador/mustard/petrol/empire/gold/bright pink/aspen/magenta/spice/storm blue/fuchsia purple/lipstick/fondant /tomato.

I am not sure yet how I am going to use them and if I will drop a colour or two…as all of you I am following the CAL so is a bit if an adventure!

I also decided to make my life more complicated and in certain rounds, I used 2 colours instead then 1 so again I don’t know if that will work for all the different parts..I will keep you posted, and here is part one of the Stylecraft’s version finished and I am nearly there with the Aran too.

that is all for today, wishing you all a lovely weekend,

the sun shined in Scotland for a couple of hours!…it is back cloudy now..lol

see you next time! thank you for reading

Lucia xx


X