A little bit more about the January’s blues blanket
Firstly sorry this blog entry is a bit late, finally, after a very frustrating weekend, I got my blog back!
I am quite impressed with myself for sticking to my new year’s resolutions ( or trying to) …I am back writing again!…( mind you it is early days…) nevertheless it feels good!
One of my children bought me a planner this year, I don’t know if it is meant to be a gentle hint to get better organised as I failed completely last year trying to ‘get organised’ using an App on my phone!
So on 2019, we go back to basic! Hoping that pen and paper might do the trick for me …
Do you have a planner too?

I still have to get used to these little snippets of encouragement that are keeping appearing randomly on this planner ..they make me giggle. I just discovered that there are stickers too! Probably those are a step too far for me🤣🤣🤣
I will keep you posted!
Let’s get back to the blanket.
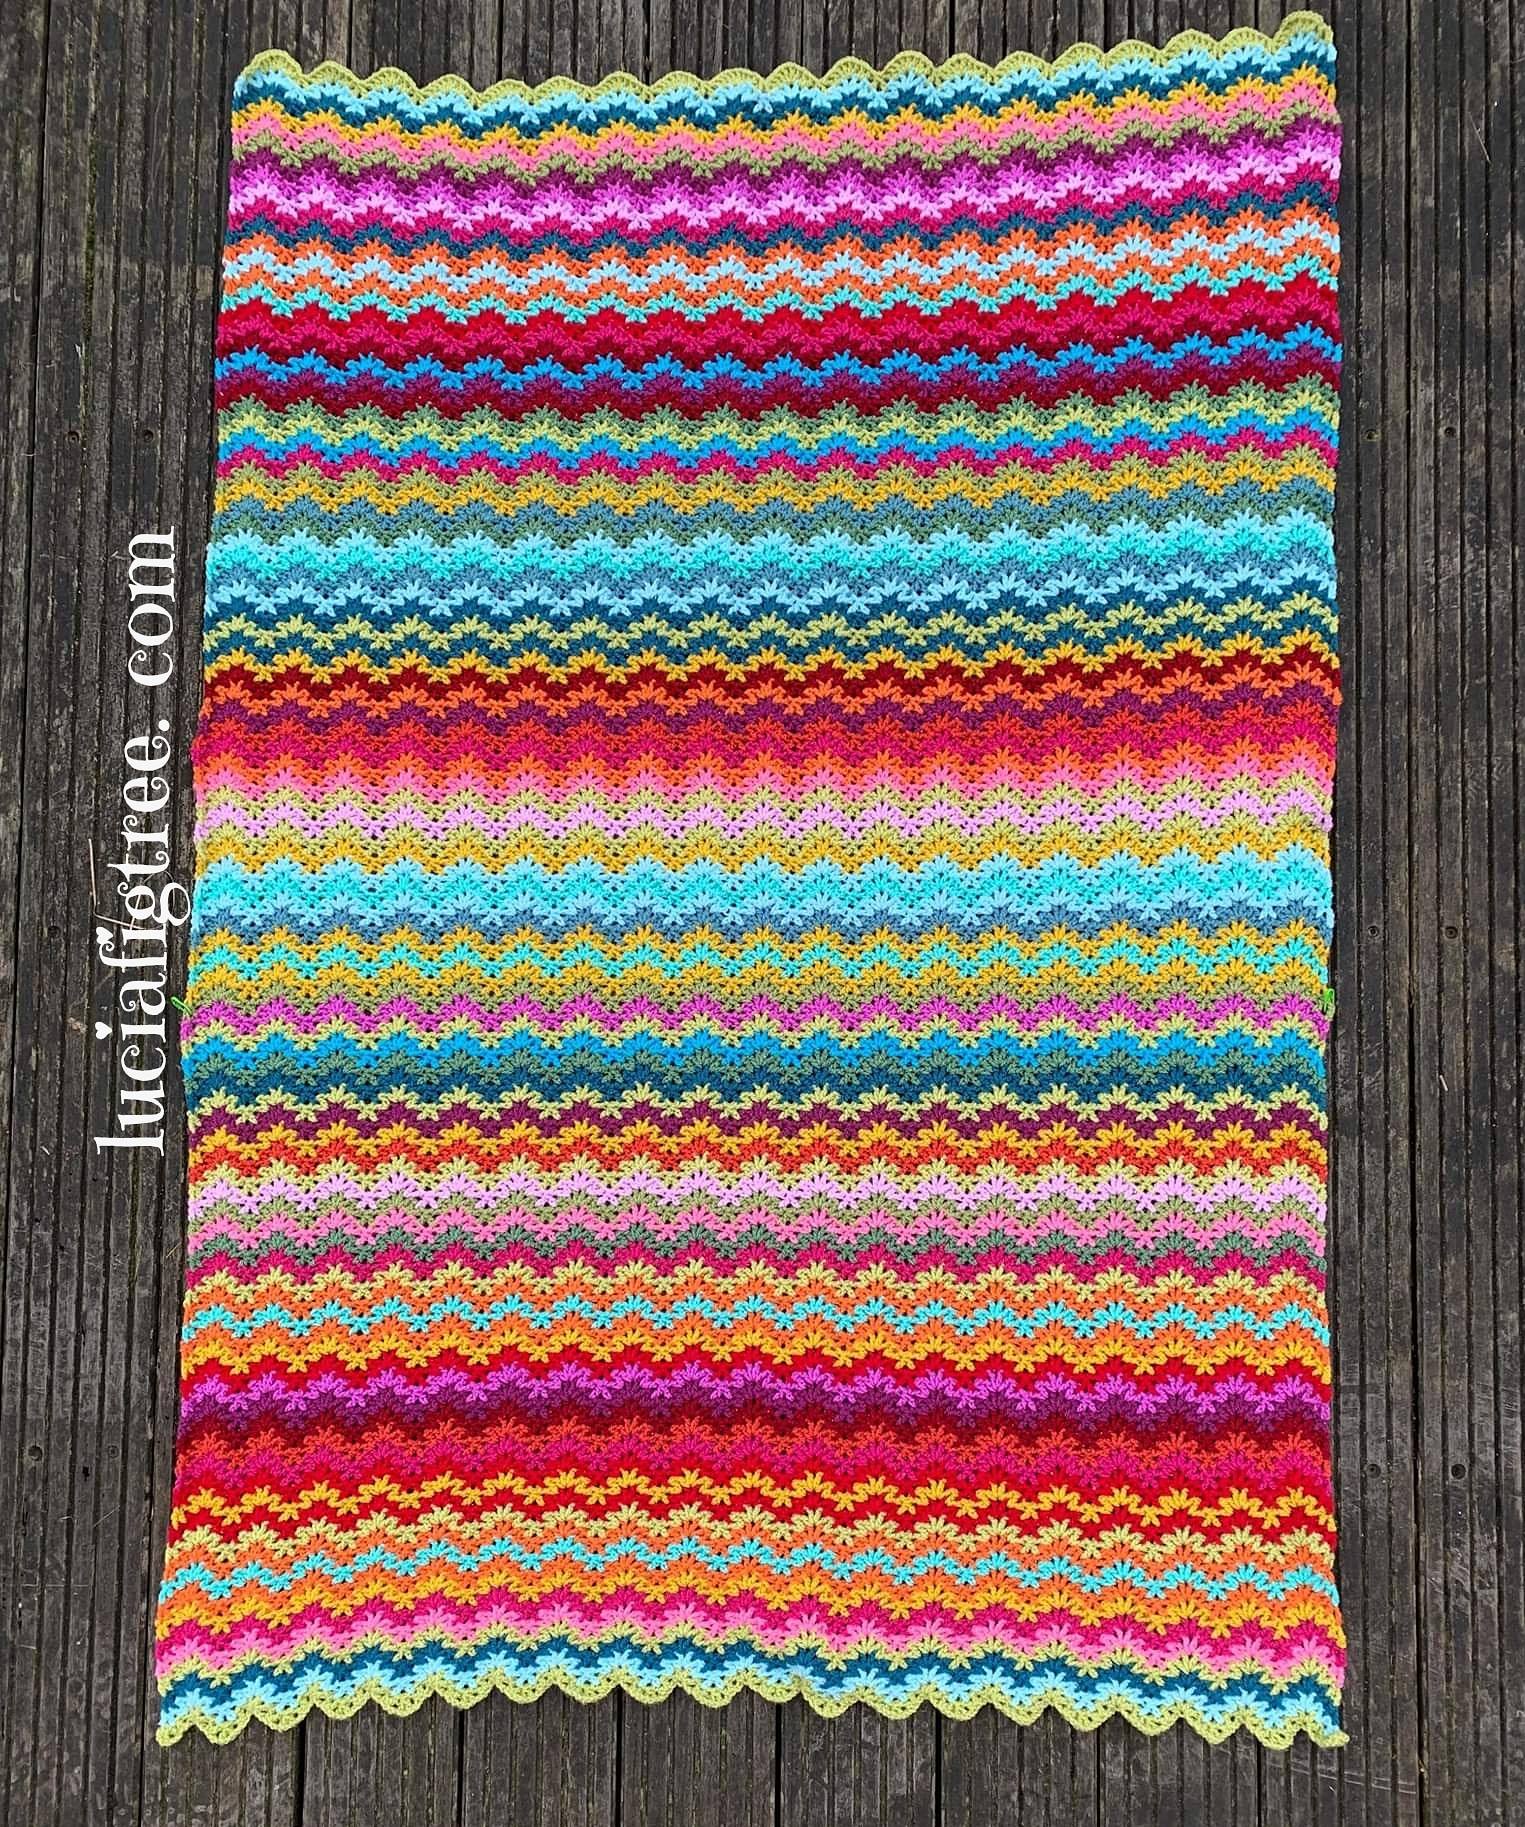
I finished the main body a couple of days ago and I have been gathering the details so you can make one yourself.
As you know the blanket is not completed but I think it could be interesting for you to follow me “in real time” and see the blanket coming along, a bit like being behind the scenes.
The pattern is really simple, that was the point of this blanket in the first place, to do something really easy and relaxing.
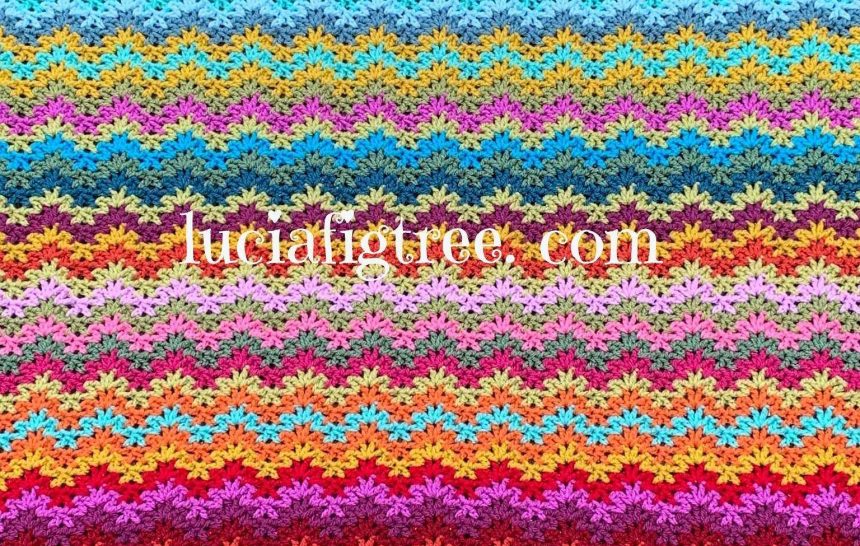
I used a V-STITCH RIPPLE for my blanket. As said on Facebook there are several versions and options for the stitch available out there.
The version I used I found it on Pinterest. Just a diagram nothing more here is the picture I have used.
 .
.
I like to give credit to the designers even if I think this is just a diagram of something that has been out in the open as a free pattern. All I got is a watermark which said Tejiendo Peru’ I have also tried to get in touch with them but with no joy. so I assume it is ok for me to share with you as it is in the public domain already..
I used the diagram above as a guide but I did an alteration to it.
If you read the diagram you noticed that the rows are worked on the front (RIGHT side ) , then you turn your blanket and you work on the back (WRONG side). If you follow the diagram as it is in the picture below you can see the result:

I didn’t like the results on turning your work after each round, as I think it muddles the effect of the stitch so I opted for working just on the RIGHT SIDE ONLY! you can see the difference in the picture here:

The blanket is even, each round is exactly the same, no difference either in size or texture. Also because I change yarn every row it makes no difference of whatsoever if I work always in the front.
Maybe you are all thinking I can’t see where the fuss is all about, but believe me when you work the all blanket you definitely will be able to see the difference between the two options. working just on the front makes a much better-looking blanket.

The blanket still doesn’t have a border but the main part measures 90 cm wide by 140 Cm long
the yarn used is STYLECRAFT SPECIAL DK . the hook size is a 3.5 mm (E).
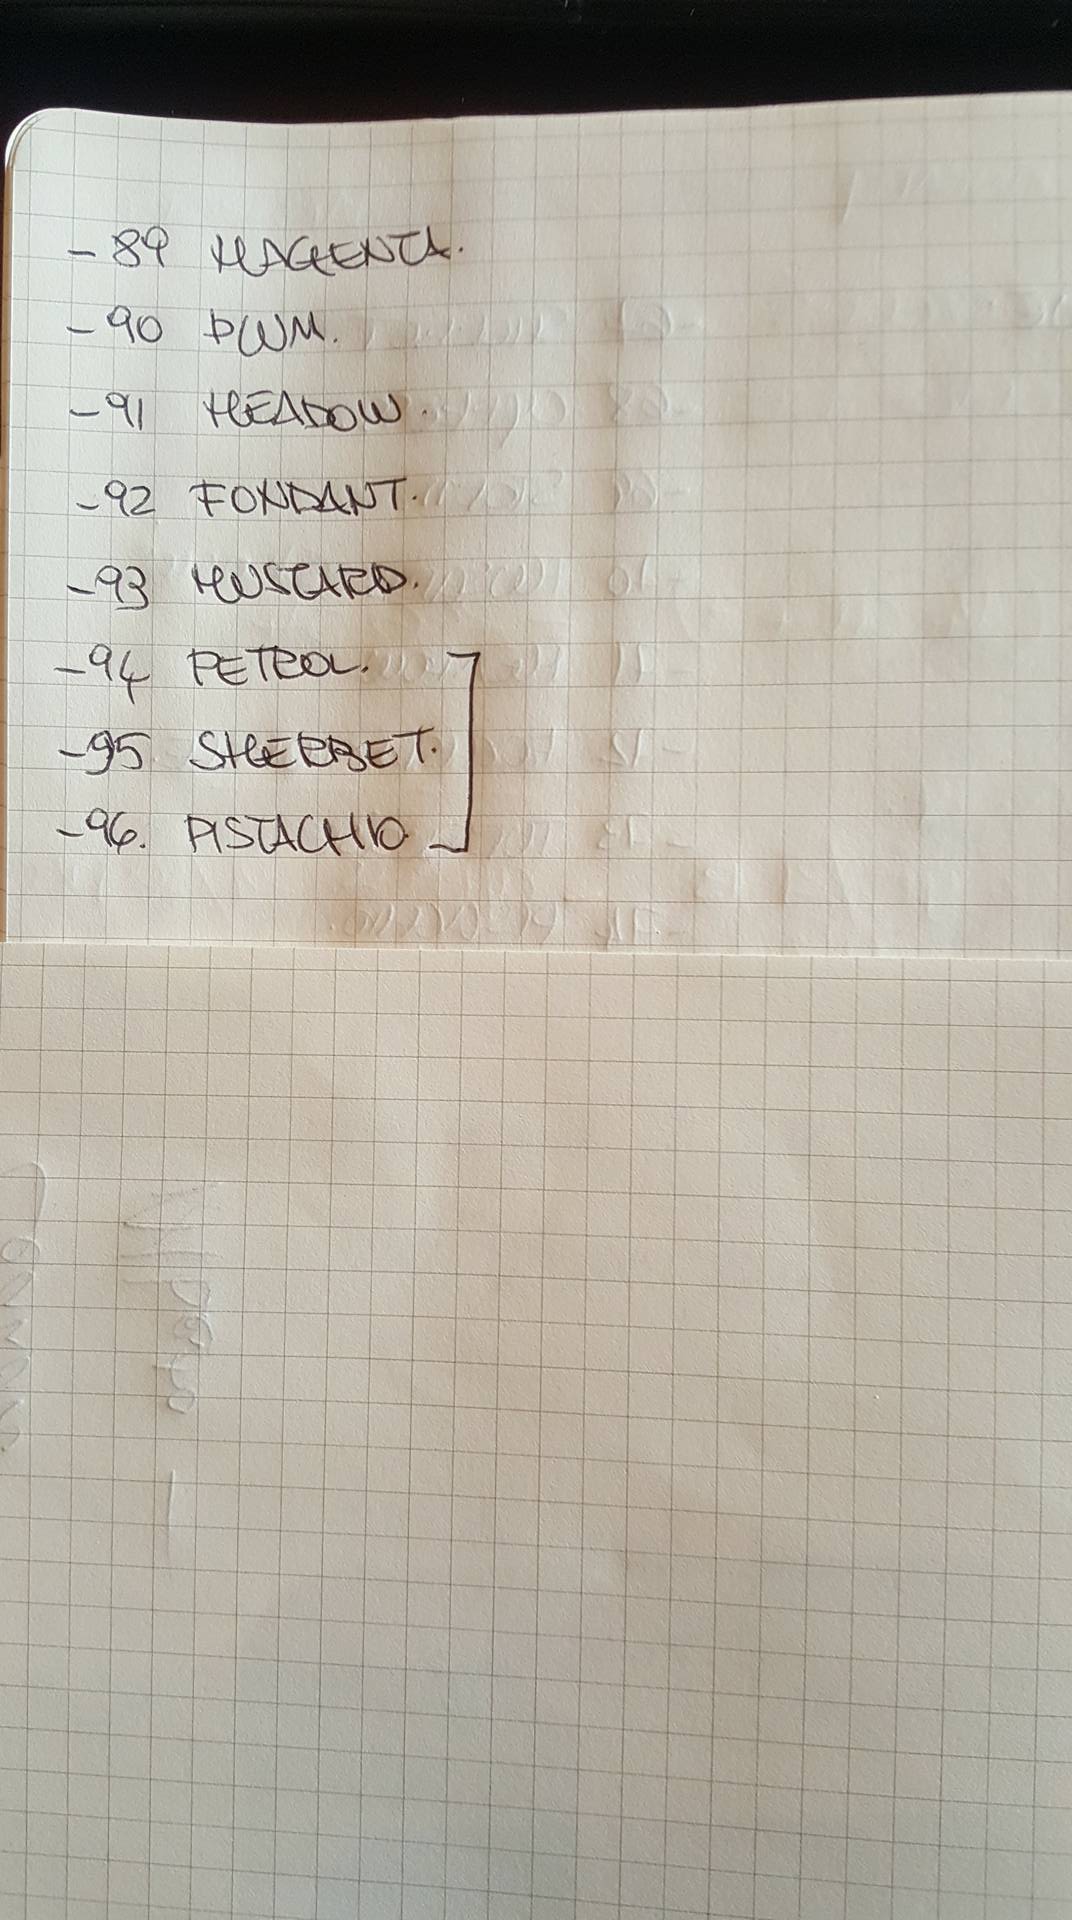
Here the list of the colours I used:
The number between brackets refers to the quantities of yarn used in grams. obviously, do bear in mind that the yarn usage is just an indication based on my tension and a 3.5 hook used.
So dig out your leftovers from your stash as you might be able to use them and plan the blanket.
- LIPSTICK (13)
- SPICE (53)
- CLARET (29)
- MAGENTA (17)
- PLUM (29)
- FONDANT (27)
- CLEMATIS (29)
- MUSTARD (71)
- PISTACHIO (90)
- SHERBET (51)
- ASPEN (33)
- TURQUOISE (23)
- STORM BLUE (10)
- PETROL (34)
- CYPRESS (25)
- TOMATO (25)
- MEADOW (71)
- FUCHSIA PURPLE (52)
The pattern is based on a 14 stitches repeat plus 3. I started with 269 chain stitches that gave me 19 REPEATS ( 90 cm wide) it is very easy to adjust the size by adding or subtracting repeats to get to the size that you want.
I also took note of the colours sequence I used. there are 96 rows.


a couple of HINTS :
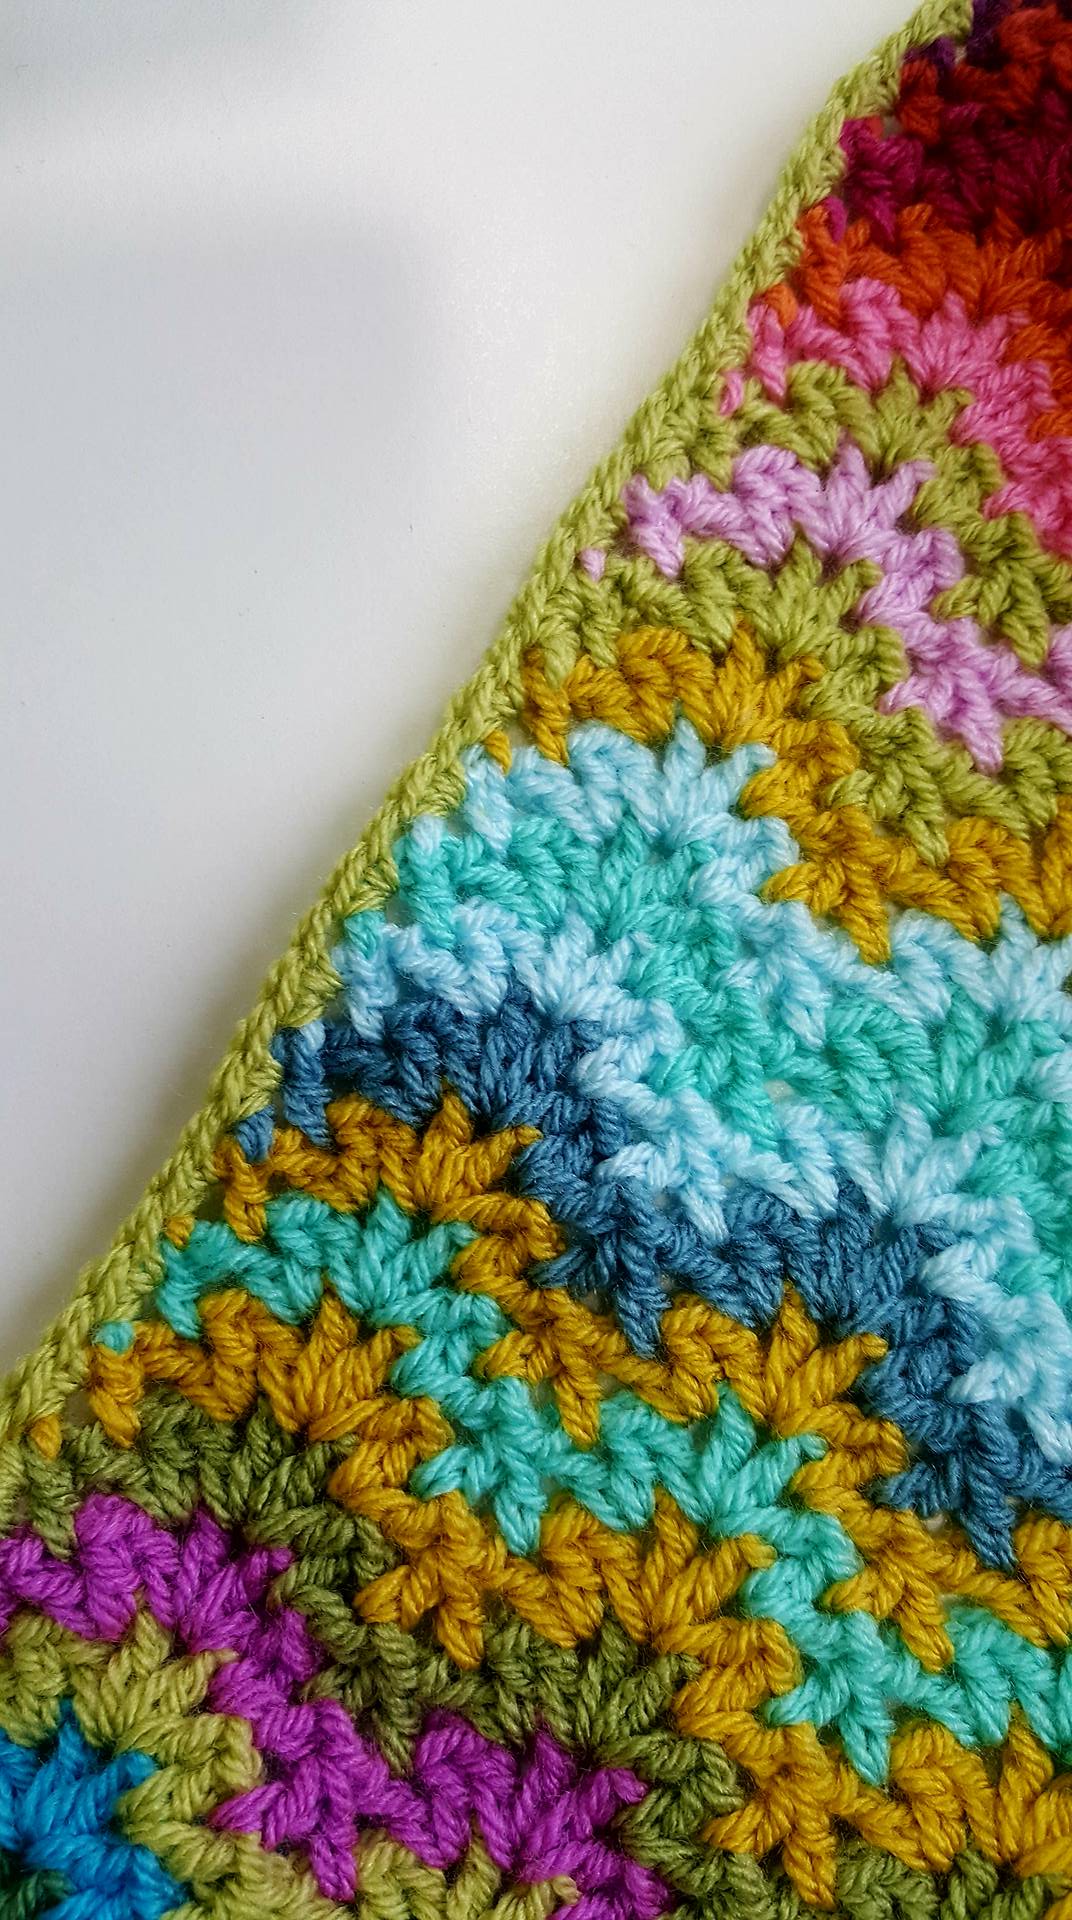
- if you look at the blanket I have repeated the first 3 rows in reverse order at the end. that will finish your blanket much better, it is like a visual frame which works beautifully not only for this blanket but in any you might want to do at home.
- I also started each row with a self-standing treble and NOT 3 chains as in the diagram ( simply because I feel is a more sturdy way to start and it will work better when we will add the border.
that is all for today
thank you for reading,
Lucia xx
Hi Lucia, I like the version you have created, visually it’s stunning another item for this years to-do list
Gorgeous! Also, this month I switched back to a paper planner after about 25 years and I am loving it!
I love the blanket will be attempting that in the future is it possible to get a print friendly version……
It’s beautiful! Thank you for sharing. I would like to try it, but one question: How do you start the rows then, what is a self-standing treble?
Hi Gulden ,
I am going to make a quick video hopefully later on today.I will post it as soon as I am done xx
Would’nt know what to do without my planner. Whole my life works from that bundle of paper. Welcome to us paper lovers.
thank you Tineke! xxx
Beautiful — I’m doing more of my blankets without all-around borders. At least of any size. I really like your moss stitch down the side in the last photo.
Yes, especially this blanket looks very neat without a border. on the side I just did 2dc ( UK term) on the space.You can even leave the wavy ripple at th end and the beginning it looks lovely as it is. I think I am going to fill the wave to be able to attach a more complex border , but I m still trying to figure out how to get a straight edge that doesn’t frill…
Beautiful as usual. Thanks for this lovely rainbow.
I’ve come over to your blog, through your Facebook post and admired your blanket. I love the Bargello look of the ripples and it’s so colourful too. Thank you for sharing.
Can you tell me how you managed all the ends? I love working a bazillion colors in my blankets, but with 1 color per row the idea of being able to bury the ends securely with so little to work into, is driving me a little nuts. I’m pretty anal about ends ….. I sew them up/down/back/forth …. and they never, ever peek out. Just wondering how you managed yours. Thanks!
I just sew them in…lol