I AM BACK !!!!!!

I am BACK!!!

I know it has been ages…

I have been so busy trying to finish several projects which I  had committed to it and I  was so frustrated because I couldn’t share any of the work I was doing… but now my last project is live  I am BACK  !!!!!!

It has been an amazing few months!

I have been working flat out on several things.. I should also say  I did take on board a bit too much and at times I was slightly overwhelmed by the all things but now that all the blankets are available it makes it all worthwhile.

The final chapter was to deliver my last blanket to CROCHET NOW’s HQ last month!  very exciting and a bit scary too… The RISE &SHINE cal has been a real labour of love! to create something to keep an audience interested and more so, happy to continue on a project that is going to run over 12 months it is NOT an easy task!!

I really hope you will like it, and with trepidation, I am waiting for the reactions online as it went live TODAY !!!!!!!!!

So I am back writing again… I missed writing my blog, but I know you all have very busy lives and I didn’t want to fill my blog with idle chit-chat and not been able to tell you what I was doing.  so where to start…

Let’s go in reverse order and start with the latest project…

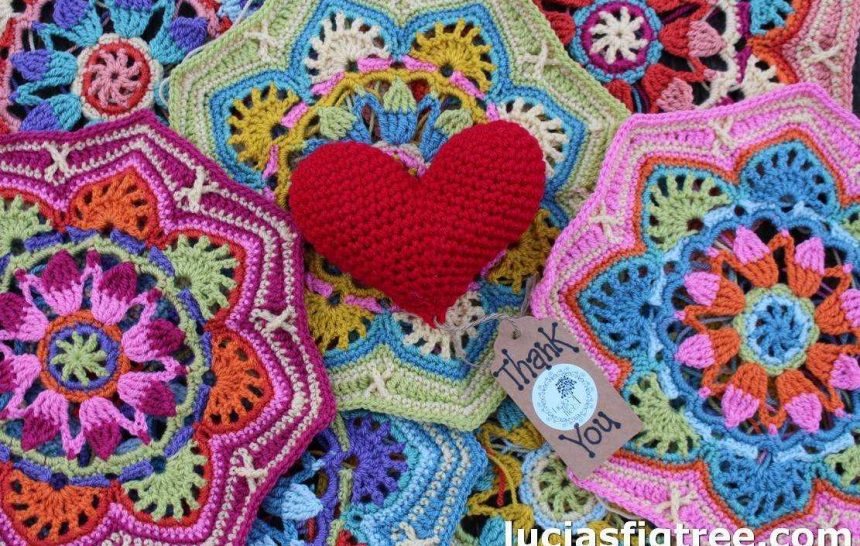
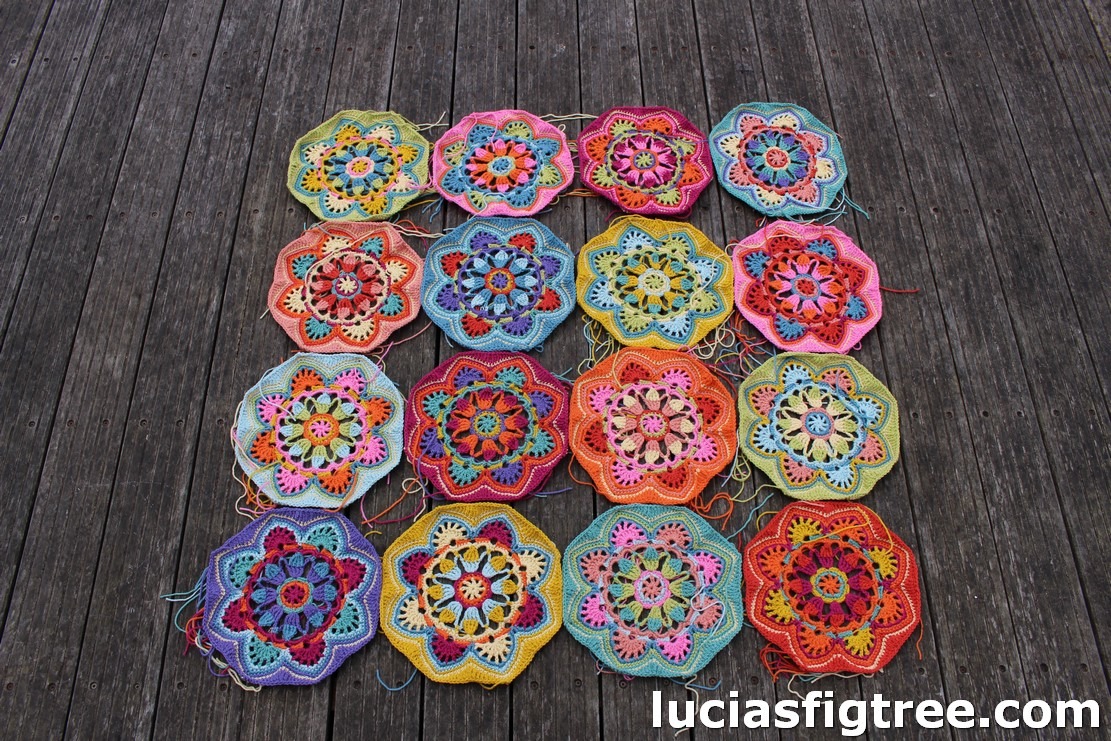
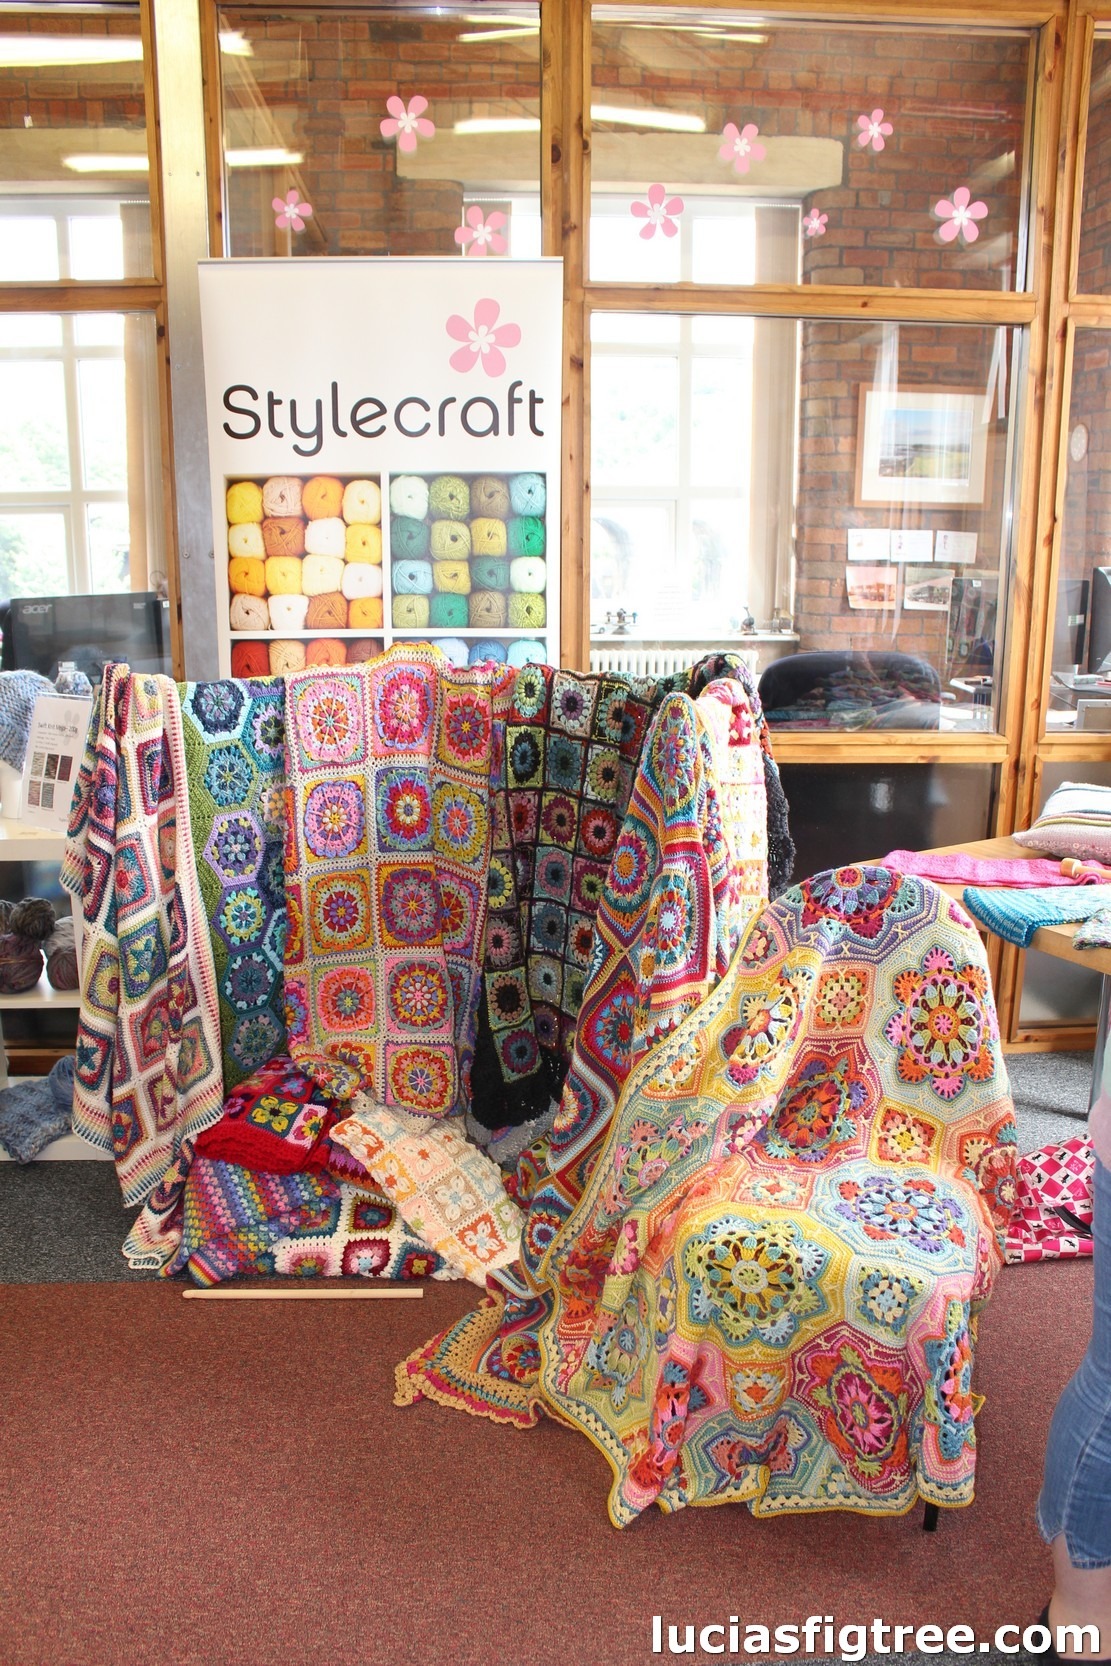
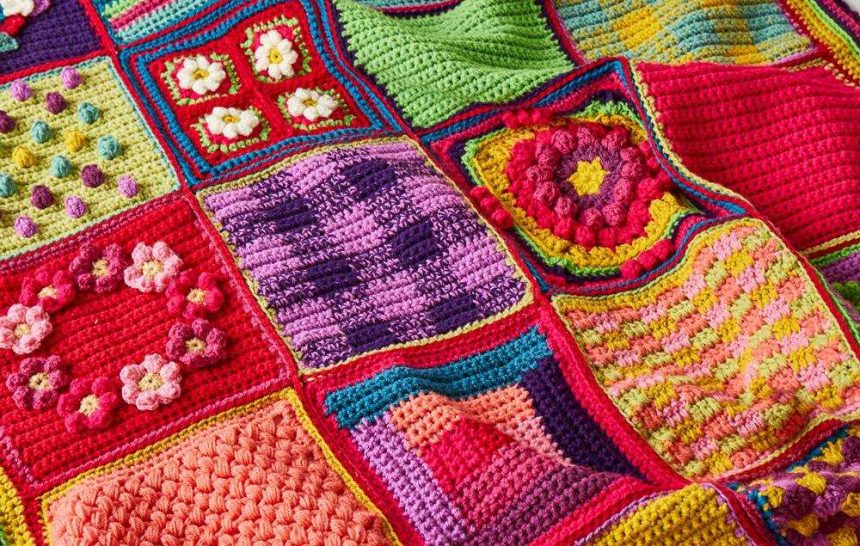
here are some pictures, also you will find pieces of information on the CAL on Crochet Now website… I have a few more pictures but I will post them as the CAL progresses.


The blanket is a CAL and will run over 12 months.

Part 1 can be found in Issue 27 of Crochet Now which will be in shops on Thursday 12th April or available to buy online at www.moremags.com/crocheting 

I have used STYLECRAFT SPECIAL DK, (mainly using 2 strands  held together)  the colours are:


Stylecraft Special DK – 295m per 100g ball; 100% acrylic

3 balls in Mustard 1823

2 balls each in Fuchsia Purple 1827, magenta 1084, Shrimp 1132, Grass Green 1821, Sage 1725, Bright Pink 1435, Emperor 1425

1 ball each in Plum 1061, Fondant 1241, Pistachio 1822, Empire 1829, Petrol 1708, Lipstick 1246

(Important Note: Based on the designer’s tension, 98g of Fondant 1241 and 96g of Empire 1829 were used in this blanket. If you are unsure of how loose your tension is, we recommend purchasing additional balls of these shades.)

Stylecraft Special Aran – 196m per 100g ball; 100% acrylic

1 ball in Lipstick 1246


What I can say, is that it is really great fun, it is a project for everyone and I hope you will love it.

It is all about texture, interesting techniques,  and more so COLOUR!!!

I don’t know where you are based around the world, but for us in the UK has been one VERY LONG WINTER!! we had snow in Scotland up to last weekend.. really  I’m still thinking spring will never come this year!! so the brightness of the colours of the Rise & Shine kept me entertained during the winter months. To be able to create something it can be really tiring and sometimes quite frustrating too…especially when things do not go to plan, but I loved every moment of it.

But thats not all…

two more blankets I designed for Stylecraft went live a few weeks ago… both bursting with colours, one is called HYPNO and the other BOHO…

you can find them as a Pattern  here:

https://www.poppys-holmfirth.co.uk/lucia-s-shop/lucia-s-shop/lucia-dunn-hypno-blanket-cushion-printed-pattern-9527

https://www.poppys-holmfirth.co.uk/lucia-s-shop/lucia-s-shop/lucia-dunn-boho-blanket-and-cushion-printed-pattern-9528

at the same time, I made the Valentina Shawl…for Poppy’s ,
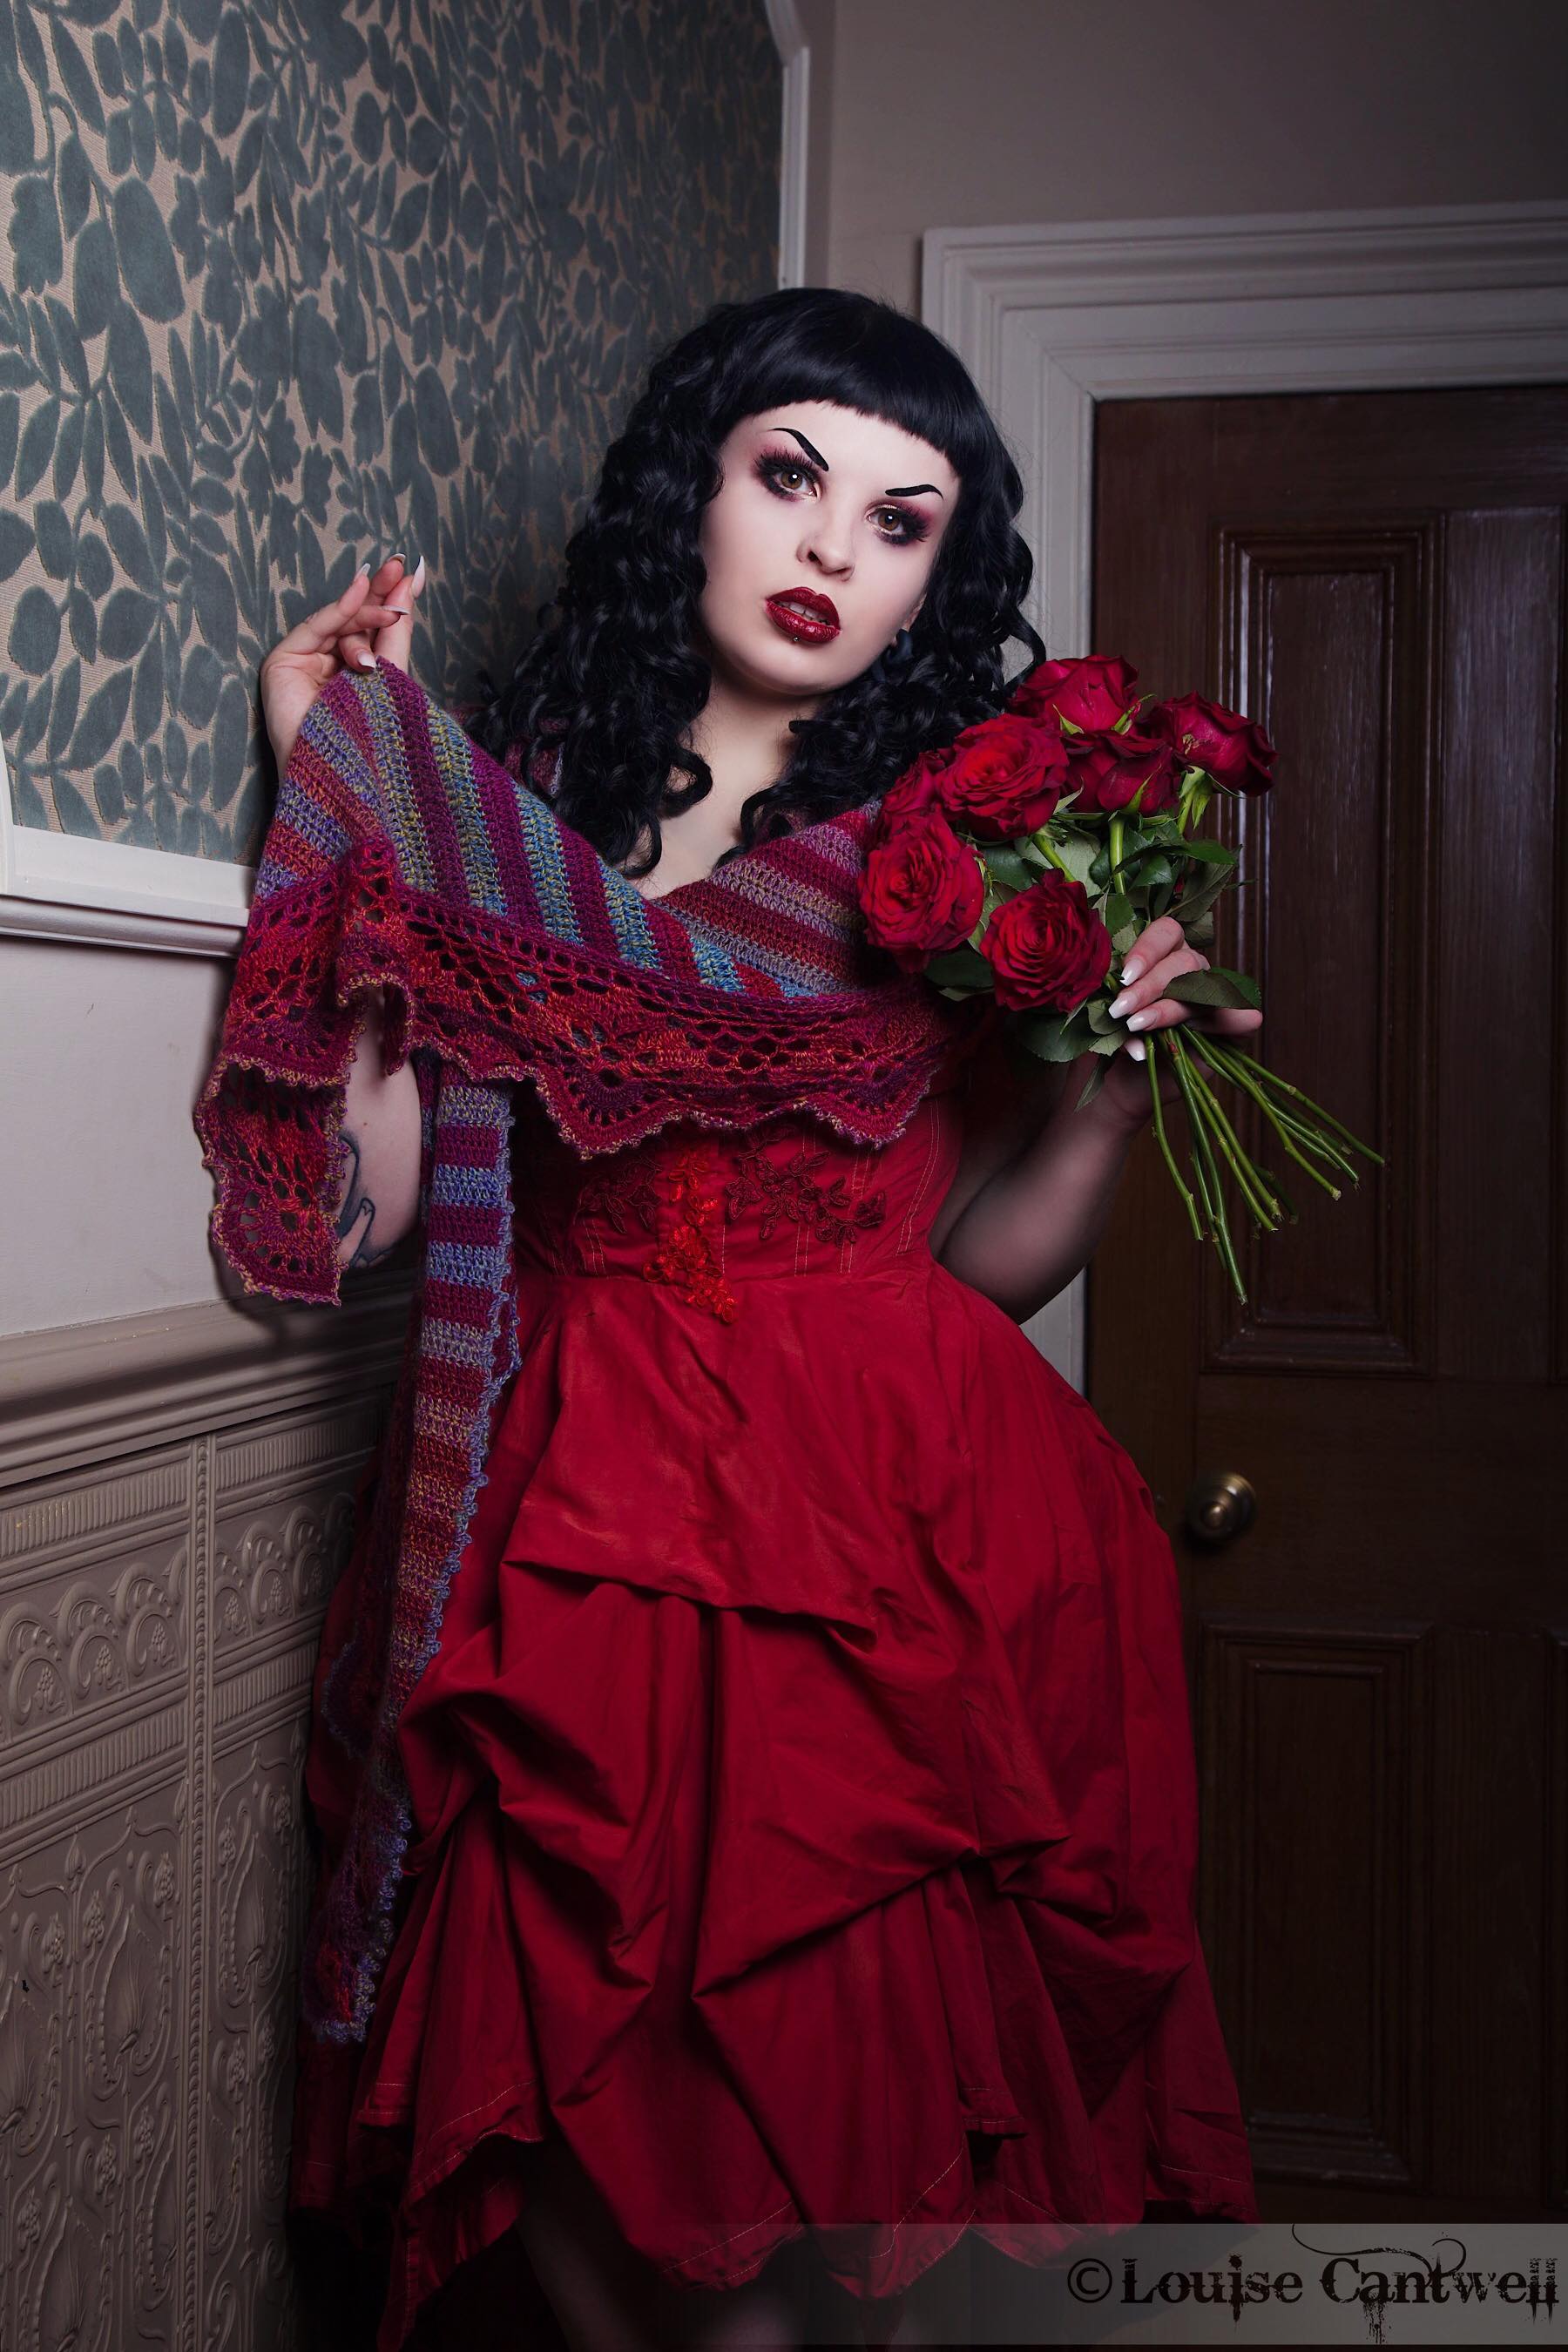
and I wrote the pattern with the help of the ladies at Poppy’s for the Walrus blanket too..they are both available on my shop at Poppy’ s https://www.poppys-holmfirth.co.uk/lucia-s-shop/lucia-s-shop  and soon should also be on my Ravelry’s store.


I will write all about my Poppy’s adventures as it deserves a proper special blog entry!  everyone made me so welcome! and it has been amazing to be able to collaborate with others! but I will do it in a  separate entry,  this one is just for touching base, dust off the cobwebs out of my blog and just let you know I am back again.

So you have: a CAL, 2 BLANKETS, A SHAWL  and the WALRUS BLANKET too…

what am I doing now? …

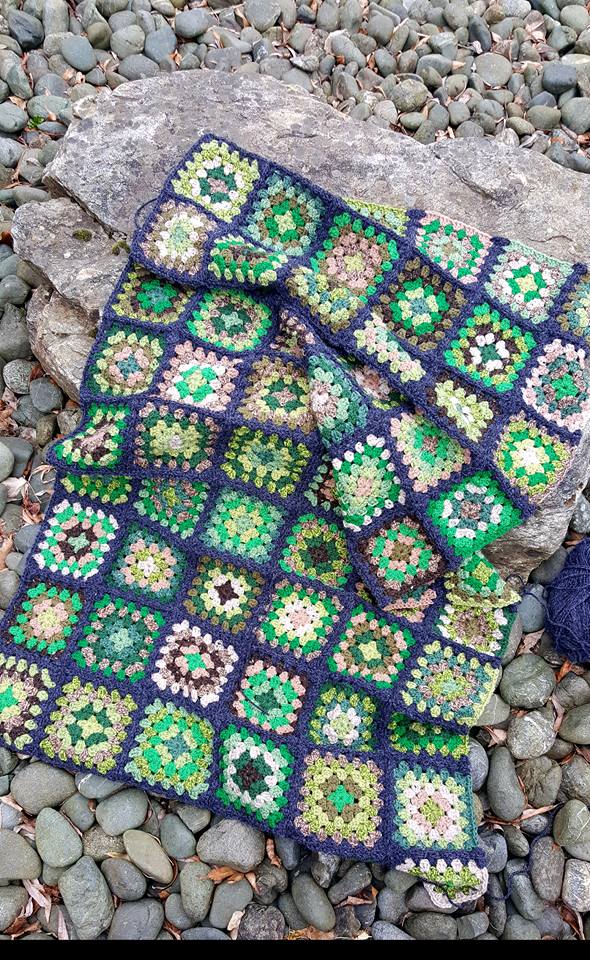
I am helping to finish my daughter  Francesca’s granny square blanket… she made 180 squares and she panicked a little when it came to joining them so I said I was going to help… ( don’t ask me why…)
I also had a dip into amigurumi…

It all started because I needed a rest from Blankets and I wanted a little project.. if you follow me on facebook you might have guessed I got a bit obsessed with it! no idea why the amigurumis are so addictive!
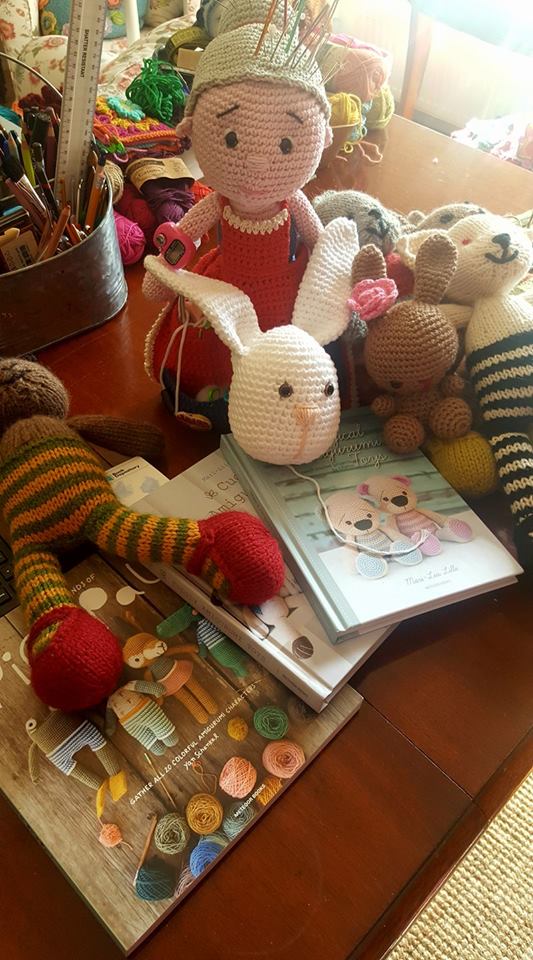
it might be the fact that you work on a tridimensional plane and that is a bit of a novelty to me… so I started with a Crafter Granny… then I made a bear, then  I made another bear..( which I  still have to complete)..then I tried a bunny but looked like out of a horror movie …then my son Giuseppe asked me to make  a  chameleon for his girlfriend that loves  Tangled’s Pascal.. so I just finished that a day ago ready for her 18th birthday..

I am planning other things too… but I needed a few weeks of not designing, recharging my batteries by just enjoying other people amazing patterns!! and I feel the energy coming back which is a good news indeed!!

So, as I LOVE lists of TO DO’s my new resolutions are…

  • do not take too much work on!!!
  • write at least 2 blogs a month with updates on what I am doing,
  • walk and not be a couch crocheting potato!
  • be more social and not a grumpy bear hiding behind a mountain of yarn…
  • organise some new exciting material for classes ( because I love teaching!!!) and put some dates in the diary.
  • make more videos!
  • last but not least go to London to see my daughter Valentina!!
  • loads of more things that I am sure I have forgotten…

that is all for today! thank you for all your support, I love your messages and all your lovely comments on Facebook and Instagram!

and on that subject just a little note…

I understand how frustrating  it must be not to be able to get either the patterns or the kits for the Eastern Jewels and the Frida’s Primavera because often they are sold out or are not available as digital downloads , but as I replied to many of  you, I just designed both the patterns and I am not involved in how they are distributed.

So please get in touch with ether Stylecraft or Janie Crow if you need some updated pieces of information.

https://www.stylecraft-yarns.co.uk/

https://janiecrow.co.uk/presta/

My only direct contact with the retail status is Poppy’s and I know they have  sold several packs of the Eastern Jewels, ( the Frida’s Primavera is just available  from Jane ) but again they too, as retailers, depend from Jane and Stylecaft for the  printed patterns so please, if you are interested, leave your email with Helen’s at Poppy’s and I am sure that if the packs will be back in stock she will message you .

https://www.poppys-holmfirth.co.uk/lucia-s-shop/lucia-s-shop

HAPPY CROCHET!  thank you for reading,

love to you all

LUCIA XXX

The “art” of blanket planning…a beginner’s journey

I am still thinking if I am going to have a theme or what I am planning for 2018… I have few deadlines I need to honour but after that, I am a free -bird and I can do whatever I fancy.

So in the midst of creating something new and exciting I am also putting together a program for classes for beginners and more advanced crocheters, because one of the highlights of last year was teaching, I discovered that  I LOVE TEACHING! I like the excitement to meet new people, I like the energy and buzz that they bring to the table and I like that they go home, hopefully with some new skills to work with.

teaching to beginners is probably the most challenging of all lessons as it is often their first encounter with this amazing exciting artform and you want to pass on the rudiments of crochet as well as possible,

but at the same time not be boring or frustrating or altogether scary!  so I engaged the help of my daughter Francesca to test some samples of possible projects to make sure that I teach them  to walk before to run as Hussein Bolt! Francesca is great because she can crochet already, she is what I would call a very keen beginner and I think that is a good platform to start with.

While testing and chatting about several possibilities she said she wanted to make a blanket “all by herself” for someone very special… so I started to say ..ok what do you have in mind, what size, what colours, what yarn …etc.


It became apparent to me that you can make an original, interesting and exciting blanket from scratch even if you are a beginner, just following some basic rules.

So that is what this  Blog entry is all about a beginner’s journey…and I will keep you updated on her progress and you might find something interesting to use on your projects at home.

So where to start…

WOOOW SO EXCITING I AM GOING TO MAKE A NEW BLANKET!….

then comes the frantic search on Pinterest , Ravelry, magazines, books, social media, and patterns of all sorts.. which is all good.

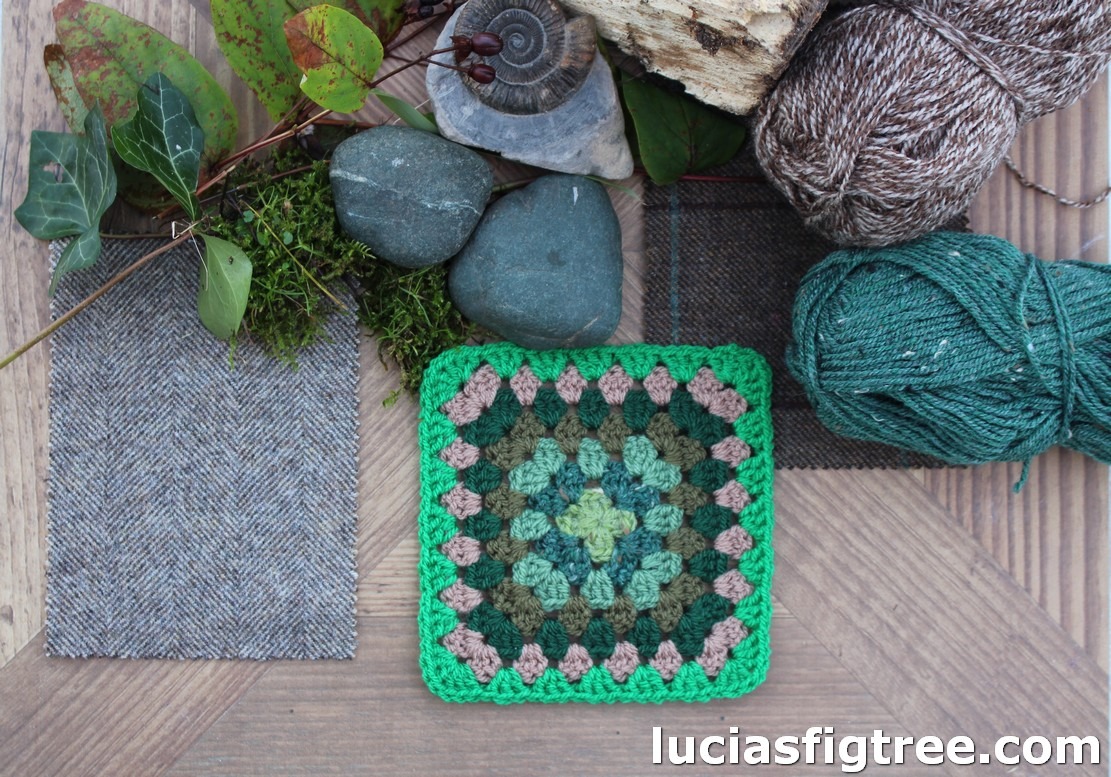
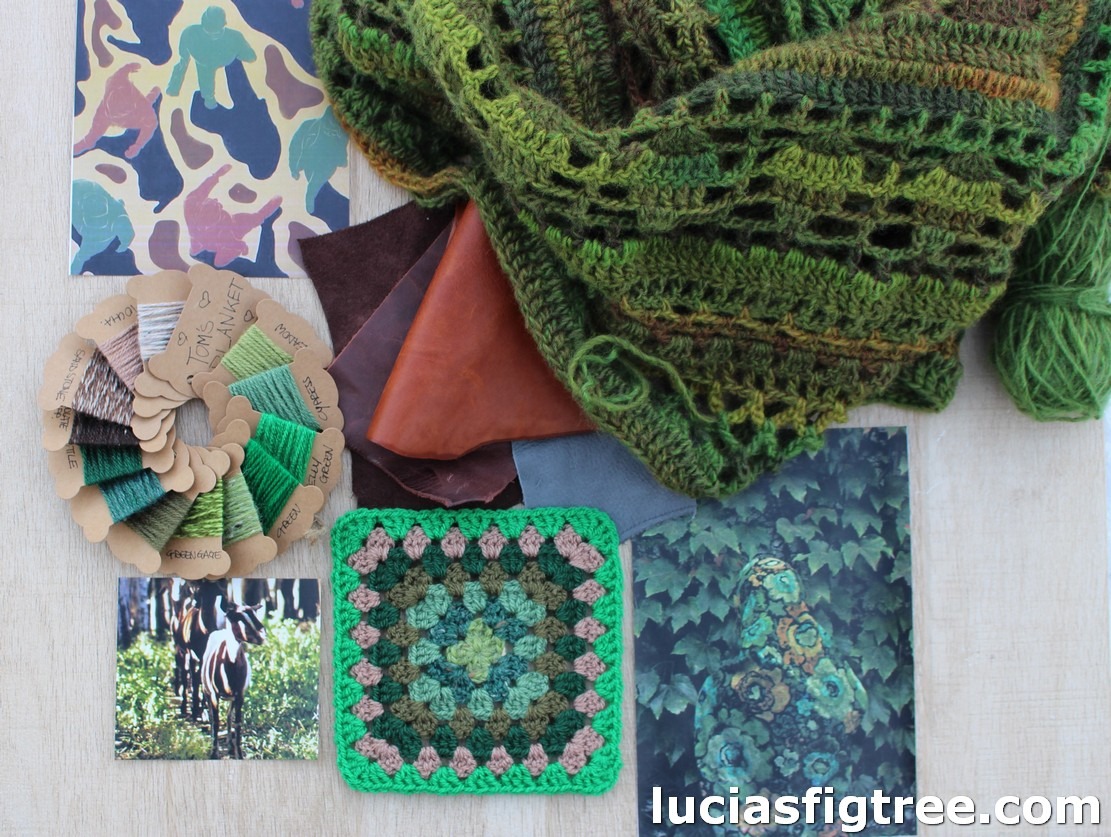
So I encouraged her to collect things, scrap of fabrics, leafs, stones , anything that can create a visual map .  Even the process to combine them all together it is very important because you can focus on the colours and that will reflect on the choice of yarns you are going to make . so make a bord, take a picture with your phone and THEN CHOOSE THE YARN!!

Bring the picture with you at your yarn-store or use it as reference if you shop on line  or even to select some hues from your stash..( because we all have one of those…).

So Francesca collected things she likes and patterns she finds interesting, but also I reminded her that if you make something for someone else your search should be focused not on the pattern you like or you want to make yourself, but on what he/she would  like to have!

She made the boards and took the pictures herself  …so this is a collaboration project!

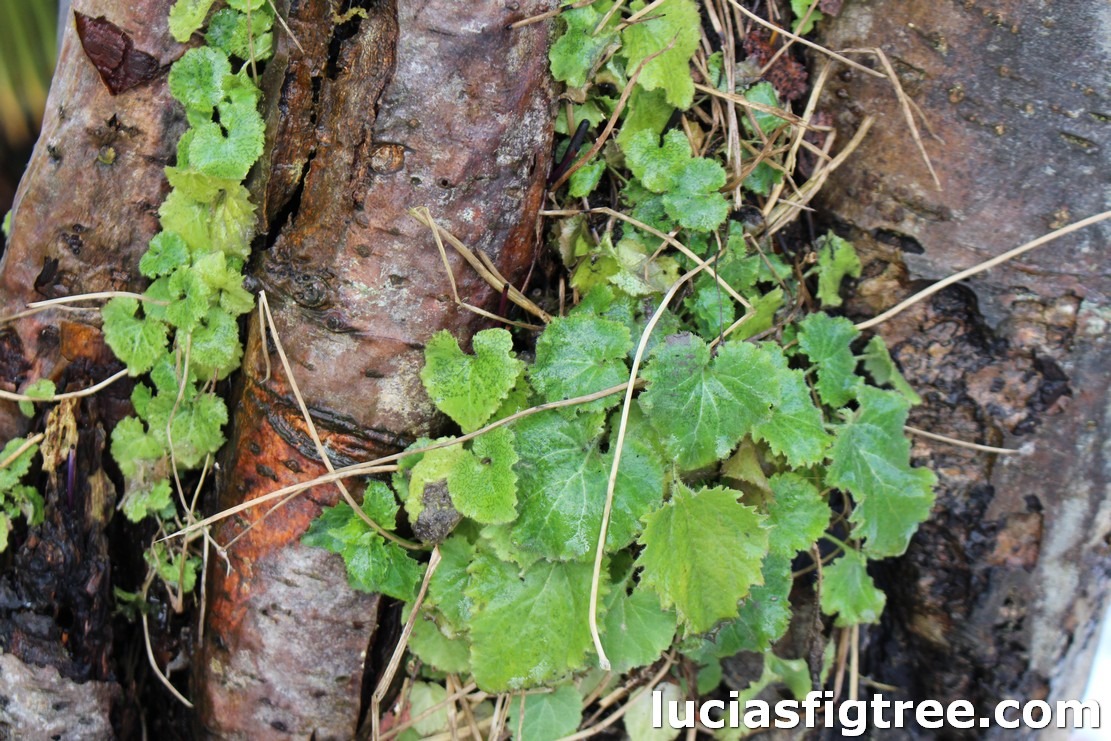
Some nature’s inspiration….and , by the way, you do not need amazing skills or amazing landscapes, travelling or what so ever…just go outside !!!

Very often you see on social media fellow crocheters complaining that they spent a lot of time, efforts and money making  what they thought was a lovely blanket ar scarf or whatever but they encounter  a very  tepid reception. Now I do believe there is always a rogue one that no matter what you make he/she still could not  careless but you will find that 99% of the  time people love receiving a handmade gift made with  love. .. BUT  you must follow a few rules to succeed…

I have to confess, I have seen some shockers on my computer that made me think ..oh well no wonder it didn’t work out!

FIRST RULE:

ARE YOU SURE HE/SHE WANTS A BLANKET?????

that is a GREAT START  to figure that out first!  maybe he /she prefer a new t-shirt, a pair of shoes, a concert ticket, been taken out on a special day, a Transformer, some Kyle Jenner’s makeup or a gosh.. a Gucci bag! I don’t know..million of different possibilities and remember

if he/she doesn’t really want a blanket it is not all lost! don’t get upset or deflated..just MAKE A BLANKET FOR YOURSELF ! or find someone else 😀

SECOND RULE:

DO NOT BITE OFF MORE THEN YOU CAN CHEW!

aghhhh really delicate point… I know we all have seen the most amazing and intricate blanket and we want to make one exactly the same but you must  be realistic and not only look at your budget but also at your abilities especially if it is meant as a gift. it has to be right..none of that malarky “ohh I miss 2 stitches on my round 23..now I am at round 37  should I unravel and fix it?…if you noticed the answer is always YES!! totally utterly YES!!! I can’t stress that enough..the idea that you could call it unique means you are kidding yourself on ,it is like baking a cake and forgetting the sugar, apologies if I am being a little bit harsh.

I am going to tell you a little story… after the Frida’s  Primavera was released I had a lot of emails from ladies showing me their progress and I really loved to help and  compliment them on their efforts.. but I also had a lady who sent me a picture of the blanket and one of the  hexagons had only 5 sides… she  had joined the blanket and said to me..I know it has 5 sides and not 6 but will it be still ok? can you tell me how can I fix it ?.. what could  I say? there isn’t a nice way to say…sorry but you have to unravel the all blanket because it doesn’t look right.. I did say that and I don’t think she was very impressed at all.  I wish I had a “Magic Wand” or an a “Aladdin’s Lamp” to correct mistakes , but trust me..mistakes have to be fixed. I made tonnes myself and I have had to unravel countless times until I am entirely happy with it.  So the bottom line is;

if you see it, others, even if they do not crochet,  will see it too.


So CHECK YOUR WORK! and more importantly practice your square until you are completely happy with it,  before embarking on a full blanket!. It takes just maybe an evening  to practice a  motif or a  square,  please make a swatch of the stripe, or wave or  whatever pattern you plan to use..and I know it might be a bit boring and you are excited to start, but it will save you time and frustrations in the long run.

I have been going on a bit of a tangent..let’s get back on track…


so my advice is simple;


Do not bite off more you can chew.

Swatch whatever you think is good

Believe and be comfortable that you can do it.

And  tackle the project head on!


Please always remember, that  it is MUCH BETTER to make a beautifully executed properly planned, humble, granny square’s blanket, than  a wonky striped blanket or a complex hexagon blanket with  one of the sides missing .

Back to Francesca’s blanket…

As the blanket is for a guy she didn’t want a fussy pattern and she opted for ..the granny square. and I am very happy she did that because it allows me to show you what amazing potentials a granny square has!

So she did a few samples..until she was happy with it..then came the part I like most COLOURS !!! I leave you with a picture…and  I will tell you the story next time 😀

love to you all,

Lucia xx

Annabelle’s blanket colours and few more stories….

my plan to write a blog entry last weekend didn’t really work…due to a flu epidemic that left most of us floored for a few days.

I am on the mend now so I thought I could catch up with this.

Firstly I would like to say a BIG THANK YOU for all the lovely comments on the colours choice! I  thought Caro’s pattern was really lovely and unusual and it worked really well with the bright colours  I used.


Here is the link to the original pattern just in case you missed it on Facebook, as said, I bought it on Ravelry.

https://www.ravelry.com/patterns/library/baby-blanket-in-overlay-crochet

and this is the list of the colours and yarn I used for my version:

STYLECRAFT SPECIAL DK :

1 ball each in:

spice,fondant,fuchsia purple,magenta,mustard,aspen and buttermilk.

STYLECRAFT BATIK DK :

2 balls each in :

pistachio and coral.

a note on the quantities…

I listed what I started with, but as you know, I made the 48 squares suggested in the pattern, but I ended up using just 20 squares for Annabelle  because I wanted the blanket to be stroller’s size as I found it is  a very practical option to give as a present, they are not too big, they can be carried everywhere,  they can be fold and stuffed  in a bag if  not needed and, in my experience, you can get the most use out of it


So if you are thinking to make a blanket for a baby I would suggest anything between these 2 sizes:

a minimum of   60cm x 75cm  to  75cm x 100cm .

Annabelle’s measures: 65cm x 85cm and you can see it “in action” here…

How cute are Annabelle and her sister Rose? I was delighted that Siobhan and Andrew were ok with me sharing this lovely picture of their beautiful girls with you, so you have a chance to see the other blanket I made for Annabelle’s older sister, Rose when she was born two years ago. It still looks great and I am so pleased they use it all the time because that is what blanket -making is all about! making something that is useful, that can be washed, that can be dragged around and snuggle under and if the colours make you smile that is an added bonus!

Next, I have to organize my thoughts for 2018…

I have several things in mind and a few projects I have been working on, behind the scenes,  coming up too.

it is going to be a VERY exciting year! as I am NEVER tired to crochet, I have a head full of colours and ideas. but my aim this year is to take on board all the comments and advice I gathered in 2017 and to make my work more accessible to all of you out there, I want to do more classes so I can pass on my passion for this amazing craft , I want to be less erratic with my blog entries and improve my online presence too…

It is going to be a lot of work but it is going to be great fun too so stay tuned!


lots of love,

Lucia xx


DECEMBER’S blanket,Frau Holle and a little girl called Annabelle…

29th of December…in Italy, we say “meglio tardi che mai”  which translate… “better late than never”…..

Firstly,  I am so sorry for the lack of posts…and thank you for your patience and I hope you are all enjoying your festivities.

What have I been doing?

This month has been a bit of a blur … I had things to finish that, unfortunately, I can’t share until next year…I also had work, family and all the rest to manage as December seems to be the busiest time of the year!!! Yesterday was also my birthday.

If you are following me on facebook you might have seen some post about Frau Holle as she is the theme for my December blanket. So let’s start introducing this special lady which has been part of my Christmas since I can remember…


I should start by saying I have been brought up with books…  and yes, as you might have guessed,  I am old enough to remember apple just as fruit- yes, a time before iPads, mobile phones, internet and computers.

It was the time when entertainment meant books and I was so lucky to have a grandmother with the most extraordinary knowledge of folk tales and stories and the will to share them.

I was the little girl that always said ‘another one, please’…

I know now, after 50 years, that my grandmother loved mixing and matching.

she picked what she wanted from the stories, she also made some up on the spot.

One night was an episode from the Odyssey or Eneid, the other was some mythological beast. Another night was some exotic location, the other a tiger out of a Salgari’s book ( if you are Italian you might know him). One night would be some little girl lost in Nordic landscapes, a god with one eye, a grey horse with eight legs , a magical tree  with lots different worlds and my favourite …GHOST STORIES!

and I mean proper ones…none of this wishy-washy Twilights saga….

The common denominator of all these stories were that none of them were PC ( politically correct) , no annoying pig which jumps in puddles (she who must not be named).

My nonna’s stories were full of monsters, gore, dramas, swords, heroes, felons, dragons and skeletons on horseback, a LOT of pre- Disney’s  faeries, and amazing goblins lost little creatures which were always rather nasty … (I am still quite wary what is lurking under a bridge over a creek…)

so tales of all sort, I loved them so much and I still love them now.

One of my favourite stories is from the Dolomites, a range of mountains in northern Italy on the border with Austria.

I love those mountains so much, they are home to me and to Frau Holle.

You might be familiar with one of the versions of this folk tale’s  figure. The story is as old as the 1st century BC when Germany was populated by tribes.

The legend tells the story of an Earth Goddess that we know as Frau Holle or Hulda.

She was known in Northen Hesse and quite popular on my mountains too until she became famous in the 19th century thanks to the work of the Brothers Grimm. So if you don’t know it you should read Wilhelm’s version- it is a lovely story.

For us, on the Dolomites, Frau Holle is not just the depiction of a nice lady who shakes her pillow and the feathers which fall become snow on Earth… she is also the sky queen who, besides mastery of clouds and winds, she had the power of granting sunshine and prosperity to the fields. She is the motherly protector of women’s lives, she controlled feminine work, namely favouring spinning, and, as Frau Holda or Holle, she kept the souls of the unborn children.

In some countries, it was said that her home was on a mountain, a magnificent cave, and still in some others, it was in the waters of some fountains or ponds it all depends on where you are.

So I made a little one to hang over my table to remind me that, sometimes,  we all need a bit of magic too!


anyway back to the blanket…

A new baby girl has just joined the family, she is the daughter of my husband’s cousin Siobhan. Her name is Annabelle and she has a beautiful big sister called Rose who is truly adorable.

Annabelle was born about 6 weeks ago and she is well overdue a blanket!

I made a blanket for her older sister so I making one for her now. I used, as inspiration, one of several beautiful images of Frau Holle from the Grimm’s tales…

I loved the colours and the details of these illustrations as much as I love the story.

So here it is my last blanket on the go..hopefully it will be ready in a few days but here you can see the first square…on some very “on theme” fresh snow!

and the usual production line on the go…

and some very appropriate, fresh snow, shot of the garden this morning…


The colour choices are mine but the pattern is not- I bought it online, I will give you all the details once I have finished the blanket.

To you all, I wish you a peaceful New Year and the best for 2018!!

I will write a final post with a summary of this amazing year VERY SOON

lots of love

lucia xxx

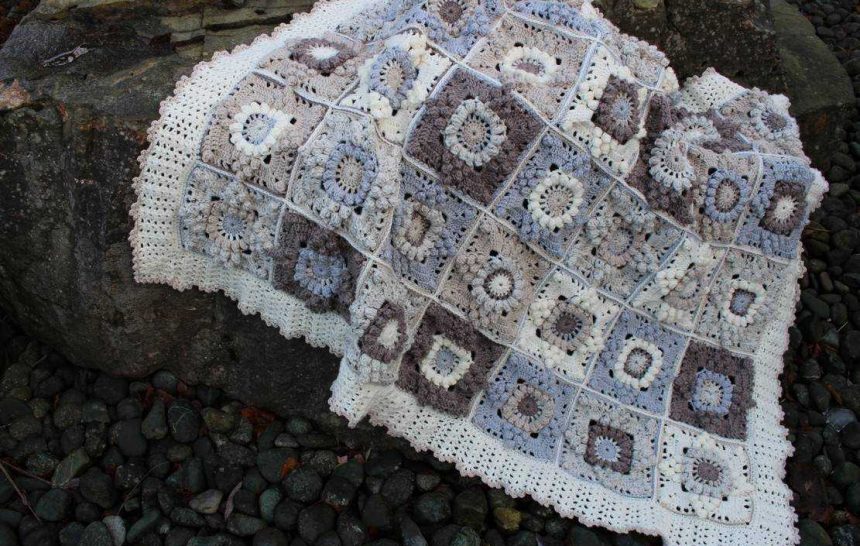
November blanket: the WALRUS HUG

Ok it is December already… and I finally found the time to write a post about the November blanket. I don’t really know where my days go especially at this time of the year, it feels like I am always chasing my tail! I had a couple of project to finish and deadlines at work too. plus we had a bit of a drama with frozen pipes and burst pipes… the joy of living in a house that is 200 years old…

any way back to the Blanket..do you like it?


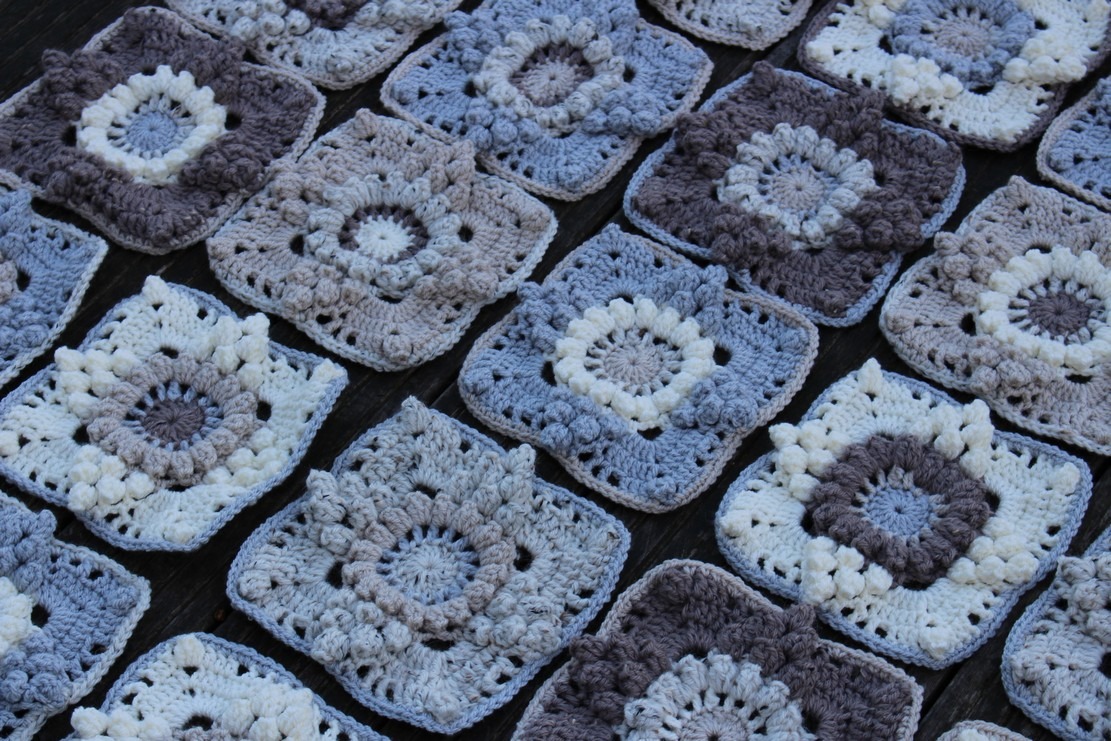
I started joining the pieces together at the end of November and finished the blanket a couple of weeks ago . Joining the pieces is one of my favourite parts as the blankets start to take shape. Until this stage, it is a bunch of squares that “should” work nicely together, that is what happens when you start a blanket from scratch without a pattern to refer to- so there is always some risk involved!


It might be a bit daunting to create something from scratch but it is very exciting too, until the end you don’t know if it is going to all workout or if it is going to be something “OK “… I make several attempts before getting it right, and there isn’t really a plan of action. I do start with an idea of a general feeling, then I try to match the yarn to that feeling.Then I look on the internet for images that might convey my idea, as inspiration, then …even if I have been doing that for many years, I still need to put them on a scrapbook. There is nothing like a visual aid if you plan a blanket and that is what I was teaching to the ladies that came at Poppy’s in November.

On that matter if you haven’t read it, please read the Blog entry that Sophie from Stylecraft did of the weekend, it is so well written and has lovely pictures too…I was far too busy chatting and playing with the yarn that I took virtually no pictures at all!!!

This is the link if you haven’t read it yet….https://stylecraft-yarns.co.uk/blog/lucias-eastern-jewels-workshop-at-poppys/

so back to the blanket.. why WALRUS HUG?????

Well, there is a story behind… Like many of you, I crochet while doing other things, especially at night, I might listen to audible if I need to keep my eyes on the project, but if it is something I am quite comfortable with I watch TV with the family. One date that we never miss is a Sunday night Sir David Attenborough’ s BLUE PLANET 2. All my kids love it and we make a point to watch it together. It is a bit of  a routine..cups of teas, biscuits, blankets, I always have a WIP in my hands, but I choose something easy so I can follow the program at the same time…( I have been known  to crochet without looking..) Blue Planet is amazing, I watched all David Attenborough’s programs but there is something really special about this last one. I think it is not only about the amazing, extraordinary beauty of the world that we are living in, but there is also an emphasis on how important it is to be aware of the fragility of the environment. What we can do, even on a simple domestic scale, to make a difference.

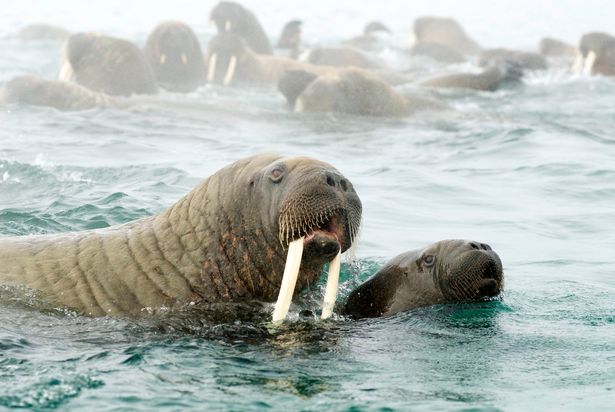
Nothing hit home as obvious as the mother walrus, swimming in the icy waters of the Arctic , holding her exhausted pup as she grows increasingly ­desperate to find a resting place for herself and her baby. As ice flows diminish, she finds competition for a spot is so fierce she must fight her way through the other breeding walruses. It brought tears to my eyes and all my children were the same…that is why it is so important for them to see programs like that.It creates an awareness of the situation and it might help in the long run.

That is why the blanket is called a walrus hug, it doesn’t matter if it is a human or another mammal, the maternal instinct is always there to protect, comfort, and keep our children safe. A blanket, as trivial as might be, can help to make something feel better.  So while I was watching the program I thought about the blanket I was working on in my lap and that is how the name came along.

If you have a chance do watch  BLUE PLANET 2, it is amazing and such a breath of fresh air in a very disappointing selection of programs to watch with the family on a Sunday night.

so here is my walrus hug..it is heavy, cosy and perfect for the season.

I am writing the pattern and I am determined to get it out before the end of 2017!! so yeah still a few days in the office then Christmas then hopefully some chilling time and plenty of crochet ahead! so wish me luck!

I am getting there..well maybe 😀

happy crochetting and thank you for reading,

Lucia xx


November blanket….time to cosy-up!

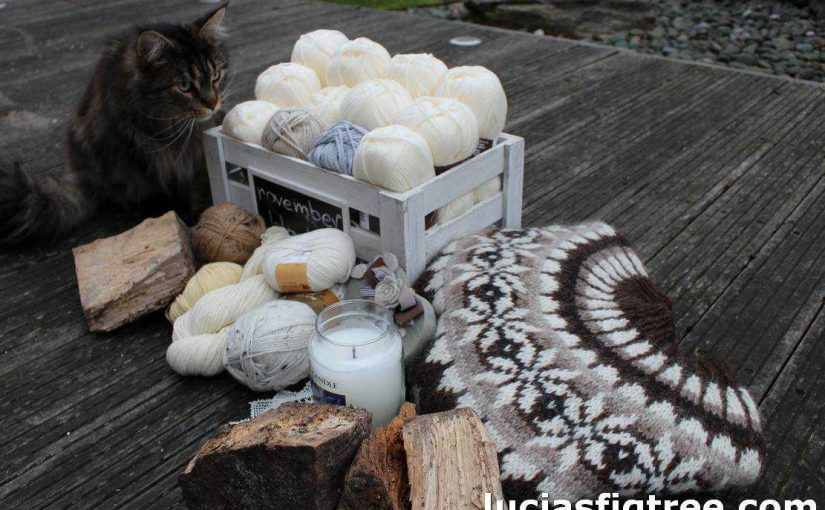
Halloween is over, yesterday we had the first frost, so as the temperatures plummet, no excuse is needed to wrap up warmer…and that is what I am aiming for with the NOVEMBER BLANKET.

I like the colder months very much, I do not mind shorter days, the cold, the wind and the rain as the key to enjoying this time of the year is to surround yourself with the softest, cosiest textiles around and maybe the odd hot chocolate or two….

Chunky knit, throws but also some soft cushions, maybe a sheepskin rug, some lovely scented candles, mood lighting ..it is all over magazines and shops windows as a way to create a perfectly plush refuge from the wind and rain and to lighten up your home as the days get shorter.

This trend is getting more and more popular, and has a few names: it is called Hygge, Gezellig and many other names…all of which encompass this desire for something cosy, nice, homey, friendly, snuggly, fun, comfortable or enjoyable…I guess it’s a feeling rather than a word.

It is everywhere… I went to IKEA a couple of days ago to get few bits and pieces ( they have the best and cheapest unscented candles…)  so I took a couple of snapshots with my phone of some neutral interiors set-ups, I always feel IKEA is a good indicator of what is trending and what people are seeking.


so I decided for this month I am going to go cosy, chunky and neutral!


neutral what a word for me!!!

I love colours and I am always surrounded by colour but for this month I thought would be fun to step out of my comfort zone and try something new and go NEUTRAL…

How scary!

so where to start..

the first thought that came to my mind was my nightmare hue, the unnameable one …it starts with an “M”…

the colour of the 90s: If like me you are 50 something you know EXACTLY what I am talking about, it  was omnipresent and everywhere, public spaces, hotels, new homes, old homes……well I bet you guessed what I am referring but I might write it down just ONCE: “m-a-g-n…” I bet ALL of you have used, have lived with, have bought a tin of…

MAGNOLIA!!!

I still have nightmares of designing houses and been told that the colour for walls, ceilings, woodwork and everything else that could be painted, was going to be magnolia, because “it goes with everything, it looks clean and fresh…” and me thinking “gosh not AGAIN!!!!”

Now I think that nearly 20 years later, neutral rooms don’t have to be a bore.

the trick is to create contrast and avoid everything been ” too plain and too matchy”  because that is what causes dullness is the same tonality;  so what is vital is to play with the saturation levels and undertones to create a warm, calming, inviting environment that has still freshness and crispness.

Another key to ban dullness is TEXTURE, and that is chunky yarns, sheepskins, washed wood, earthy pottery, candles, greenery and maybe even a pet!

Now if you go in a DIY store you find rows upon rows of neutral colours and undertones available for your home.

What I find really funny is that they aren’t called white, cream, beige, pale grey anymore…

they are called…

newborn, falling snow,lambskin..polar drift, icing sugar ..hahhaha you name it!

said that one thing is true…neutral colours, when used properly, work anywhere and everywhere.

So this is my challenge this month a neutral blanket!


I have already made a sample or two, I cant make up my mind yet about which one of the 3 colours to choose …so I have to sit on it for a little while I guess…


Chat  to you soon,

love you all,

Lucia xx


unexpected and incredible!!

I have been thinking for two weeks about this blog entry, I just wanted to write about my weekend at Yarndale and few Yorkshire tales too but it occurs to me that I might have to write something else.


I am going to write how surreal these past two weeks have been and how touched I am for all your comments and the amazing popularity the blanket has reached. I totally wasn’t expecting such a success and it fills me with happiness, do you know why? It is because when I started my blog I started because I wanted to share something that I thought even if it is just some yarn worked with a hook it has some amazing power to bring people together and to bring a little slice of rainbow and warmth.


It might sound a bit pompous but I knew the Eastern Jewels was a good blanket, sometimes when you crochet so much you have good blankets and maybe not so good blankets- it is all a part of the process. BUT when I was making the eastern I thought “WOW this one looks good!!” as I never plan ahead or sketch the different squares it really becomes alive as it grows.

BUT when I was making the Eastern I thought “WOW this one looks good!!” as I never plan ahead or sketch the different squares it really becomes alive as it grows. But I never thought in my wildest dream that it would have been so good! What I thought about as I was making it, and please correct me if you think is not the case, is that crochet is really universal and never mind who you are, where you live or how old you are, you can see the same thing I see and that to me is mind-boggling. And so exciting. So when I read all those amazing comments under the Stylecraft competition I was like ohhh my goodness- all that work, all that frogging and endless cups of tea and pieces of octagons on the floor everywhere do have paid off! I manage to let you see what I see or better what I want to see.


Can we crochet something as ephemeral as happiness? Probably we can, or better according to your comments we absolutely can! You can sit in your home or whenever you like and with some balls of yarn you can make something that makes you smile and it is not an attempt or a copy! And it is not like a painting that you need a magic touch…you just have to follow some lines written in a piece of paper and there you go! You have the exact same blanket done by you for you. And I find that so amazing! I wish I could find the words to better express what it has been like seeing all these messages, and following all the saga of  Stylecraft running out of yarn, running out of brochures because no one could have predicted how popular the blanket would be!


It has been so crazy that I started to make another one myself! I started before I left for Italy at the beginning of the week and I took some of the octagons with me to let my parents see them and it is so interesting remaking the same blanket again and so enjoyable because this time I have not to think or frog constantly I just follow the patterns and it happens again all those colours start to sing together! Yes, you can repeat over and over.


Now I am thinking about all of you crocheting the blanket in your homes, maybe you have a special place where to put it once it has been done or maybe you have a special person in mind to gift it to. I find it so humbling that you decided to take a little bit of my thoughts and bring it to something as special as your own home!


But also want to point on something else which is collaborative work. How great we are when we join together and work together! I would probably never manage to make  something as the Eastern Jewels is  if Jane had not let me use her pattern!


Patterns are a piece of you and it is really something quite special to let someone else take over and interpreting your work Jane is an amazing artist and a generous mind and to me this is the best of all this experience the collaborative side of it. You do not need to work alone or be jealous of your work. Go out there, get together use your mind and hearts and make something amazing! We all have something to bring to the party, we all have ideas, experience, happiness, to share! Buddha says  “Thousands of candles can be light from a single candle and the light of a candle will not be shorted  happiness never decreases by been shared.”

Love you all,

Lucia .

The EASTERN JEWELS is finally LIVE !


The September blanket is a bit of an unusual one…because I start making it 7 months ago…it took ages ( but I am going to tell you why) but I finally can share  it  with you and I never been so eager to write about a project as much as I have been for this  blanket.

So here is the story behind this latest collaboration between Jane Crowfoot,  https://janiecrow.co.uk/presta/Stylecraft https://www.stylecraft-yarns.co.uk/ and myself.

I will start with a bold statement:

THIS IS THE BEST BLANKET I CROCHETED SO FAR!!!

…and let me tell you I have crocheted quite a few of them!

It has been a real labor of love and,considering that it is not such a big blanket, it has also taken me ages to come up with the final color selection. I have been through several balls of yarn and I have a big basket of failed attempts sitting in my studio!!!!

Look at this “baby”…how lovely is she????


So grab a coffee or a tea, sit comfortably so I can tell you the story of the latest creation I have been working on, behind the scenes, for the past few months.

It all started back at the beginning of the year with another recoloring project: the Frida Primavera which I am sure many of you have seen it.

I enjoyed the challenge very much, I knew the blanket as I had taken part to the CAL that Jane ran for Stylecraft the previous year.

And, I am taking the opportunity to say that I am so happy that the new colorway was well received by many of you, thank you again for all your lovely messages!!.

On that wave, Annabelle from Stylecraft and Jane asked me, back in March, if I would consider doing the same for the Persian Tiles.

and by now you know me so I said …

YES!!!!

I knew the original pattern as I had bought a copy from Jane when it got released but I never got around making it…

Hence I got quite excited about the prospect of working on something new. The Persian tiles was another chance to unplug, look away from the screens and my day job, let the liminal brain take over and unleash creativity.

Doing that for an already existing pattern is an added bonus as I feel like it is a bit like coloring between the lines, in a way, quite a safe exercise,  as all I have to do is focus on the colors which are my favorite part of the process.

Where did I start from?

I always start, like I do for all my blankets, by making a sample of the motif with some random yarn as long as it is the same composition and gauge. It might seem a waste of time but it is the opposite.   Making a sample helps you to familiarise yourself with the pattern. It helps you to solve some possible “tricky” parts and it gives you an idea of tension and size of the final motive. It also allows you to see if you need to adjust or not the size of your hook and finally it is a record of your work to keep as future reference, especially if you are making the blanket for someone else.

this is a picture of one of the ‘trial’ motifs I made as said, it is random yarn to start with….


Once I got the motif right then is when the fun starts as it is COLOUR TIME!

So this is the original Persian Tiles. The picture is from Michelle and Anne’s page  crochetbetweenworlds.net    Michelle and Anne are also  Blogstars for Stylecraft, they are amazing and you should check their page! I believe this blanket was made by Michelle

what catches your eye first?

For me was the geometry of the pattern and how the original colors emphasized this aspect, so my first thought was that in order to make something that looked different and was a real alternative to the original, I needed to do something more than merely changing the original seven colors. I needed to come up with a different way to use colors and keep the geometry but in a more relax and loose manner. I show you what I mean with an example of actual tiles…

Here you have a collage of different way to use the colors in tiles that are very similar in style and all retain the same strong geometry feel. As you can see just changing how the colors are used it changes quite dramatically the overall look.

Using the tiles above as a reference, I thought that Jane’s original color selection was similar to square N.1.  What caught my attention was square N.3

I liked how the geometry aspect was a bit diluted by the apparent randomness of the colors.

So let’s have a close-up look at the Eastern jewels…

Can you see where I am coming from?  By not repeating the same sequence of colors for each motif it makes the blanket looks more ‘random’. In reality, it is not random at all, Every single color and its position have been chosen.

I used just 12 colors to start with including the buttermilk which is my “neutral”.

The buttermilk is actually the most important hue in all blanket. I was so pleased when Annabelle at Stylecraft accepted my proposal and introduced this new color in their range! I was so determined to convince her that it was a must! now you can see why…


these are the “neutrals” on the Stylecraft range…so you have:

white, cream, parchment, and buttermilk.

I apologize as the white is not in the picture but ..I run out of it!

Said that it doesn’t really matter because what I want to show you is not the actual hue but how they work with the other colors.

So now look how these neutrals behave in blankets….

WHITE:


CREAM:


PARCHMENT:


and finally the BUTTERMILK:


you will agree with me that if we are looking at:

PICTURE 1:

just ONE round of white in a very bright blanket still makes a huge impact.

PICTURE2 :

even if the percentage of the use of cream is much higher than in picture 1  it is still predominant but not as stark.:

PICTURE3:

there is a LOT of parchment…but it blends more with the colors and the impact is quite subdued.

finally PICTURE 4:


in the Eastern the buttermilk it is completely blended and helps the other colors to keep the geometry!

I know it might sound a bit too technical and boring but I want to give you the tools to see how colors behave so you can make your own combinations.

Another bit of theory and then I promise  I stop..

the blanket uses as I said 12 colors. I needed to keep the number of colors down to keep the cost of the blanket ‘s kit down and also to avoid to have a lot of left-overs.


To create the illusion of LOADS of colors EVERY motif has a DIFFERENT colors combination, BUT even if there are 12 colors and 14 rounds on each of the hexagons, I  used just an average of 7/8 colors for each Hexagon. The result is that each hexagon has a color which is more predominant and that is what creates the effect you see. Ironically if I had used all 12 hues for each hexagon  ( considering that there are 14 rounds you could, in theory, use all the hues for each motif) I would have a much more uniform looking blanket than what you see.

how did I decide what colors to use and when? very, very simple:

I wanted a “HAPPY” blanket, and I started by selecting colors that I identify with that. Colors that remind me of the past, of happy holidays, beautiful landscapes, the Mediterranean sea, but also the colors of food, spices, and even, why not, …smells.

As an example of colors reference how about this picture of the Cinque Terre,  five small villages on the Ligurian Coast of Italy called Monterosso, Vernazza, Corniglia, Manarola and Riomaggiore…beautiful places so worth a visit if you are touring Italy.

Someone once asked me what computer program I use to choose and select the position of my colors…I actually laughed!!!  because if you knew me in person you would know that my relationship with technology certainly is one of “LOVE-HATE”!

I love computers as they allow me to communicate with you, but at the same time, every single task doesn’t seem to come ‘naturally ‘ to me. I always struggle and forget the sequence of steps  I have to take even in simple tasks as transforming an HR picture in a more manageable format so not to take all my allowance of data for the blog…so the idea of me mastering complex technologies and using some amazing gizmo of a color program is totally ludicrous!!

I use a large table crammed with pencils,  balls of yarn, color swatches,  and most of all my eyes…that is all there is to. No magic formulas in operation here!

Same goes to balance the blanket and choose the next round.

I always make one round at a time for each of the main motifs then I place them on the floor, the best place is outside if its not raining… as I get a real feel for the colors in natural light.   Here is a  couple of pictures of the blanket starting taking shape.


I wanted to share the creative process with you because it gives you an idea what takes making a blanket .. and that is just one part of it.

After the blanket is done, then the long and a bit tedious, process to record and translate my scribbles on my copybook into something that can be used starts…

I have to say I am not a fan of this particular stage of “blanket making” because you got to be precise and make sure that everything is correct and make sense, and I find all the above quite boring! I like playing with colors and making things..I do not like papers!  but at the end of the day that is of no use if it is not shareable…after all it is like a cooking recipe: you cant say ‘Oh there is a bit of this and a pinch of that..’ if you want someone else to make it!

That is all there is about it, my dear fellow crocheters!!

I want to thank Jane once again for letting me play with her patterns, and Annabelle plus all her team at Stylecraft for their hospitality and making me feel part of the team, for checking and re-checking my notes …. for   the  copious amounts of yarn they send me on a regular basis and the platform they have offered me to share my work with all of you out there!

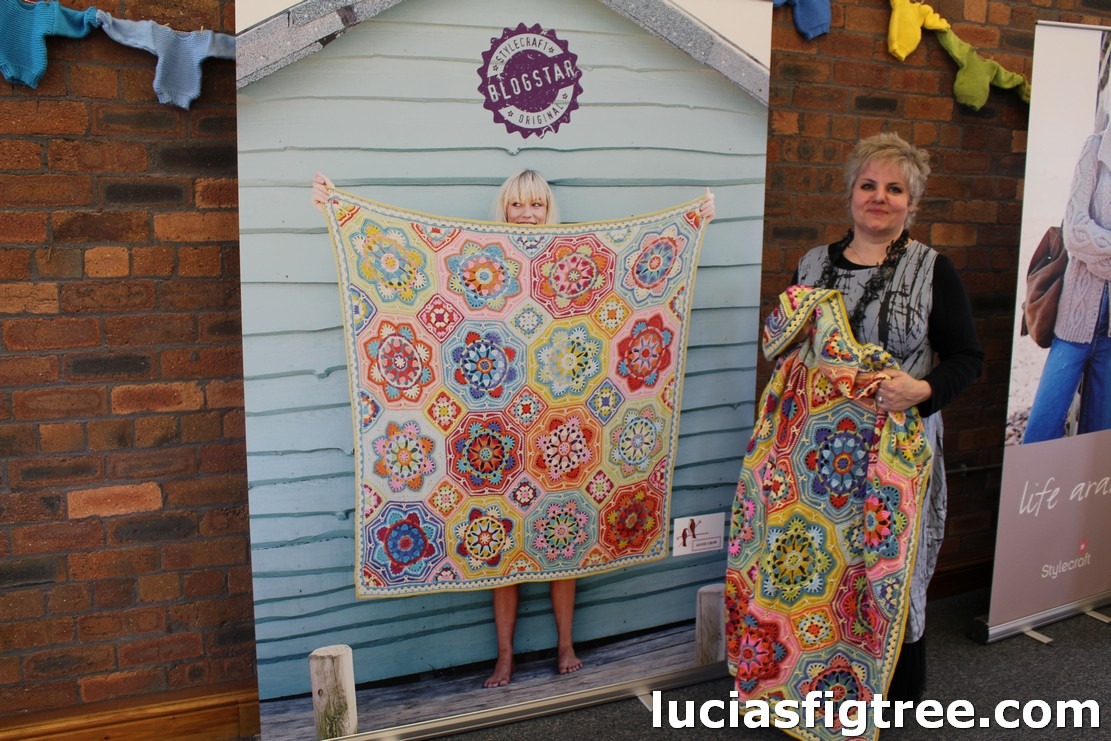
I leave you with a couple of pictures I took in July at Stylecraft’s HQ…


and… I know the Model on the billboard looks much better than me holding the blanket… but please indulge me a little. lol!!.. after all I do love the Eastern very much and

I hope you will love it too!


thank you for reading

love lucia xx

Some overdue details for the Indigo blanket.

Hello everyone,

This entry is well overdue, but as I said on facebook I have been really busy with family, work, a commissioned crochet project, that I can’t wait to share with you all,  magazine articles, June’s blanket…and the giveaway too!!

Having said that, I have been putting together some close-up pictures of the Indigo blanket and a few notes about the patterns for the different squares,  the stitches used and some links online for them.


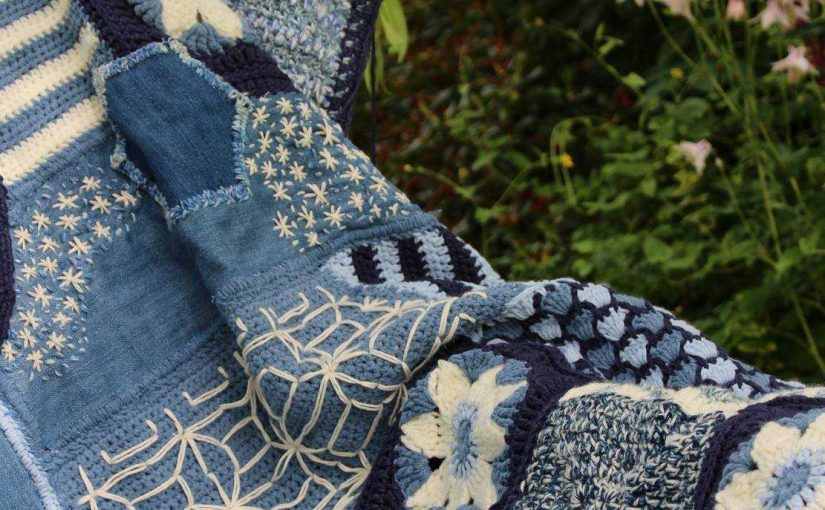
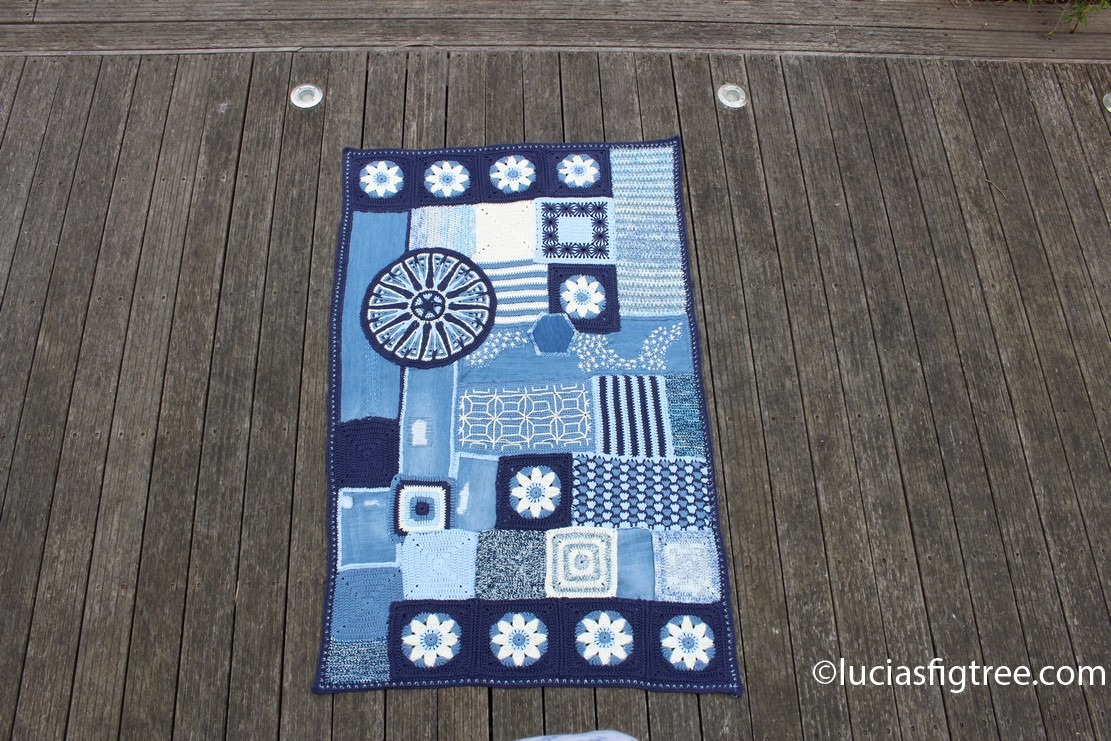
Firstly I would like to start saying that the peculiarity of this blanket is to be a  bit random, so please do not feel stressed about sizes of the squares, how many rounds etc. it is after all  it is all about scraps, recycling and  random  motifs  pieced  together, wanting to perfectly recreate what I have done defeats the purpose of the concept of ‘boro’.

Use my blanket and the details I have posted here as a guideline to create your own indigo blanket!

In my previous post I gave you the details of the yarn and materials  I used:


and the link to the overlay mandala from CARO that is the focal point of the blanket. As I have said, anything round that you like will do. I wanted to try one of her mandalas and that is why I bought the pattern.

besides, it is SO IMPORTANT to support the designers by buying some of their patterns when you can. I know that everyone prefers free patterns but please sometimes spare a moment for the designers.. after all the patterns will  cost as much as a fancy coffee out of your favourite chain, or  a magazine; and the point is those 3, of 4 pounds you spend  will give you hours of pleasure and entertainment and will help one of those talented ladies to find the time to dedicate to create some more patterns for all of us to enjoy!

I had no idea what an arduous task it is to write a pattern until I attempted to do it  ‘properly’myself. It takes hours upon hours, then you got to have it tested for mistakes by some other crocheter, then you have to photograph the different stages, maybe make a chart and also you have to set it up on a template!

I am doing all of that for the Norian…So far I had to pay for someone to make me a template to use, because I do not have the IT skills to create one from scratch by myself,  also often it is a good idea to use a  professional pattern corrector to make sure that your pattern is absolutely foolproof  and making sure that each comma and hyphen is in the right place so anyone can understand and follow your instructions, that doesn’t come for free either….

well …sorry for the rant!


Anyway, back to the Indigo blanket.


let’s start at the top with the cherry blossom squares.

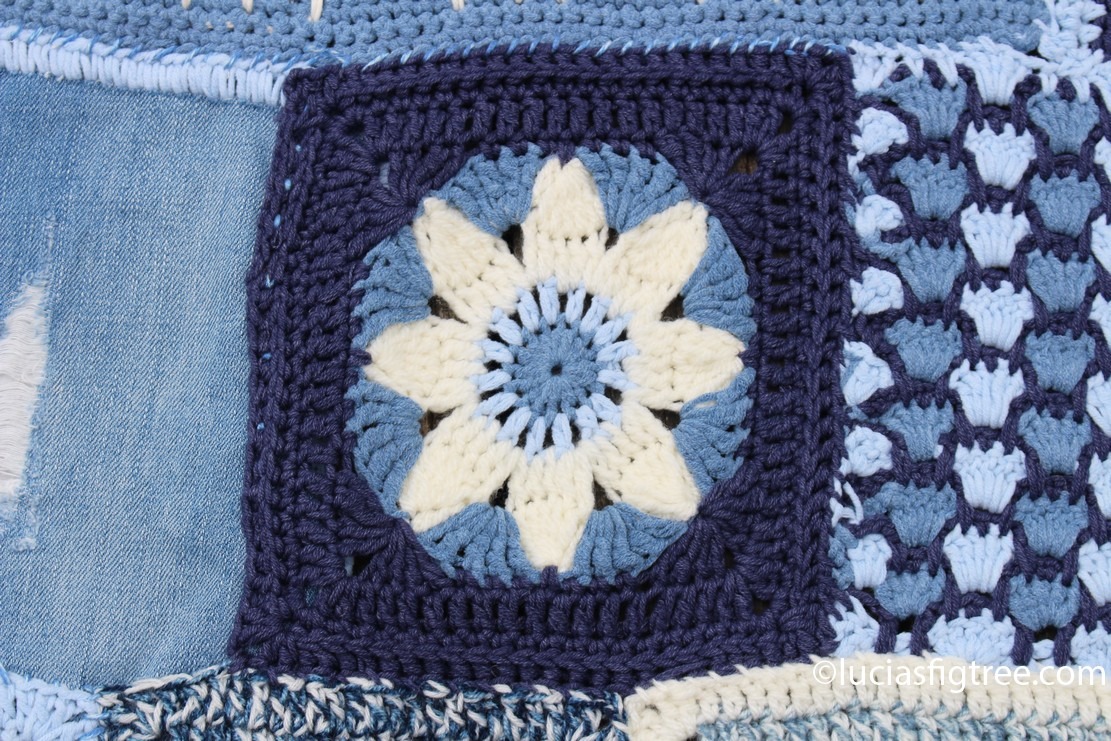
There are 10 of them, they measure 19cm square ( just over 7 inches square) I used a size 4 1/2 hook and one strand of Jeanie yarn in Memphis/Dixie/Delta. Also, the petals are in StylecrafAran in cream. This is the pattern I used.

I am sorry the chart is not good quality but it is a zoomed screenshot from Postila Ru and I can’t find the original link.

After round 7 I added another round of front post trebles to increase the size of the square and give some tridimensionality.

The squares are joined together on the right side with a simple dc round. Again I loved the 3D effect.


The long rectangle on the right of the  cherry blossom square is made up with rows of  long double crochet linen stitch  a fabulous textured stitch here is a link to the pattern:


Long Double Crochet Linen Stitch Pattern

It is made of alternate rounds: one round is a strand of 4ply

one round is a strand of 4ply Stylecraft  yarn in cream with a strand of Sundae dk in blueberry sorbet.

2nd round is one strand of Batik  storm.

The rectangle measure 58cm/18 cm.  and I started with a 28 chains and 78 rounds.

the first block with the embroidery the pattern is of a pot holder. I liked the look of it and this is the link to the embroidery aspect:

https://uk.pinterest.com/pin/506373551838477528/

there are 8 solid granny squares all made of 7 rounds. This is the pattern  I used : http://www.craftpassion.com/solid-granny-square-crochet-pattern/

one of each in : cream/Memphis/dixie/delta

one in a alternate rows in delta/menphis/dixie/cream/ delta/Memphis.

one in alternate rounds of  a strand of 4ply in cream and storm together and a round of cream

one in a strand of 4 ply cream and blueberry sorbet together

one in a strand of batik indigo and 4ply cream

they all measure 19 cm square.

there are  2 squares of half trebles alternate 2 rows of each in dixie and delta and the other one is memphis and cream

a large rectangle in Memphis with some embroidery in cotton classique dk ivory . This is the diagram , again from postila. no idea of the source.

The one that I haven’t been able to source again is, unfortunately, my favorite square. I think has been taken down from online because it must have breached copyrights. I have no idea. All I know is that it has disappeared…But there are loads of alternative of  very similar shell patterns on my picot. here is a couple of links you might want to consider:


http://mypicot.com/0031.html

http://mypicot.com/0037.html

There are some denim squares, rectangles, and 1 hexagon. I tried to salvage as much as I could out of the jeans I cut. The size is not relevant but make sure your corners are 90 degrees, it make easier to crochet around !

I cut my pieces with a rotary cutter, it came with 3 types of blades: a straight one, a wave one, and a perforating blade. this is the Amazon link : https://www.amazon.co.uk/gp/product/B005DQ90UM/ref=oh_aui_detailpage_o05_s00?ie=UTF8&psc=1 .

I cut the pieces to the shapes I wanted with the straight blade, then I ran the perforated one about 5 millimeters from the edge of the piece. That creates the holes that allow you to go through with a crochet hook and make the border ( I just did a sort of elongated DC (UK terms) ). 2 points of advice. if the fabric ( like mine was ), is a bit frail and old you might end up ripping the space between the holes…as there isn’t much space, my blade created probably a 2/3 millimeters bridge between holes, so when you try to join 2 pieces of fabric that have a crochet edge, it is not strong enough to hold. Hence why I often overlapped the pieces to not create a point of tension and rip the border. But if you use a stronger fabric I think it will hold much better. It all depends. Another way to do it it is making single holes with the crochet head..now I did that on the hexagons, again it is a bit of a pain, to be honest…I know that the correct way should be using a needle and thread and create a border where you can attach the crochet, but I felt it was a bit of a palaver and I always try to find out the quickest route. ( after all the blanket was an experiment). so to summarize: perforating blades are a great choice but you must have a reasonably strong fabric, and a steady hand to run the holes; individual holes, again great if the fabric is thinner but a bit labour intensive if otherwise; 3 the thread and needle one: most likely the best if you want something really neat but it will take a great deal of time. You will have to make a sample with the fabric of your choice and see how you feel about it.

The piecing together it is really a bit of a try and miss!! I just overlayed some and but together others….the only important thing is that you try to come up with a blanket that is as rectangular as possible with straight sides!  If your squares are too big and do not fit, once you have decided the frame of the blanket just overlay them to fit! After all, that is what Boro is about, overlaying and just stitch together.

If you are more skilled and patient than I am let your creativity run riot and decorate your blanket with some lovely embroidery!  Get inspiration from sashiko work, some is incredibly beautiful and complex but some are just simple run of single small stitches together..I tried a bit of this and that but I am definitely NOT skilled at all.Having said that I love it because it is not perfect!


I hope the guidelines above are of some use to you all,

happy crocheting,

Lucia x


Voilà ! the macaroons blanket.

31stof March! just in time….

You probably have already seen some previews on my  Instagram. I finished the macaroon blanket last week, but I have been so busy trying to finalise the last details of the ” secret project” plus I had a few deadlines at work . However, I am now finally sitting down, writing the recipe for the macaroons blanket, so you can all make one for yourselves!

Firstly let me tell you,  it will take a degree of patience! The squares are very easy to make but there are 280 of them!  Saying that… I actually really enjoyed the journey and seeing all of these little bundles of colours growing in my basket… a bit of frustation  at times with the ends to be sewn in BUT it will be worth it in the end as the blanket came out really beautiful !! Like baking, it is with no doubt, a labour of love.

If I can make a suggestion, as often happens to me with any granny square blanket, I find it much easier to make it if the project is running along side  with something else, and most important, sew in your ends as you go! or it will be a nightmare!

THE SQUARE: it is my design. I made a small photo gallery so it is even easier for you to make your own:

FOUNDATION : magic circle


ROUND1:

3 ch( makes the first treble),2 trebles,  *3 ch, 3 trebles* repeat ** 2 more times., ss on the 3chs ( which act as  your first treble)  and fasten off.

(12 trebles and 4 ch3 spaces)

ROUND2:

start with a new colour in one of the 3 chs spaces and work  a cluster of 3 trebles together,3chs and another cluster; 3ch and in the next 3 chspace of round 1 repeat * cluster,3chs cluster 3 chs*  ss and fasten off. [ 8 clusters, 8  3chs spaces]

please note as from the photos your squares will curl! do not worry as the final round will straighten down the square.


ROUND3:

Start a new colour in any  3 chs space  between 2 clusters and work the angle as follow:* 3 chs ( act as 1st treble) 2 trebles, 3chs,  3trebles.

In the next 3 chs space work 2 trebles, 1 puff stitch in the centre of the 3 trebles of  ROUND 1 , 2 more  trebles*; and repeat **


so that is the little mini granny square. it looks lovely both sides


Next the yarn used and colours:

STYLECRAFT SPECIAL DK

  • CLARET
  • LIPSTICK
  • POMEGRANATE
  • GOLD
  • SPICE
  • FONDANT
  • APRICOT
  • SAFFRON
  • LEMON
  • CLEMATIS
  • LAVANDER
  • DUCK EGG
  • SPRING GREEN
  • PISTACHIO
  • MEADOW
  • one ball for each of the shades  EXCEPT for the PISTACHIO where you will need three balls in total.

the squares are 280, they measure 7,5 cm and are  organised in 14 columns of 20 squares each.the border is 15 cm deep.

The joining method is a simple row of dcs . I changed colours every time , that has made a lovely “multicolours grid” effect, which makes the blanket interesting both sides!.  the all blanket is 120×180 in total and the border is 15 cm deep.


THE BORDER:

the border is an adaptation of border number 72 from the new Edie Eckman’s book : ‘every which way crochet border.’ I said an adaptation because I repeated round 1 and 2 several times to make the border more substantial, and as consequence, I had to change the corners too, as I like my borders to be perfectly flat.


I know it is a nuisance but I can’t post even a partial picture of Edie’s border as that would infringe the copyrights . all I am saying just look at the closeups,  or use another border that is a multiple of 10 stitches.

I hope you will enjoy making the macaroon blanket and thank you for all the lovely likes and messages I received!

Bring on APRIL!!!!!!!

love as always,

Lucia x