RISE AND SHINE BLANKET!

Hello everyone and welcome to my blog once again!

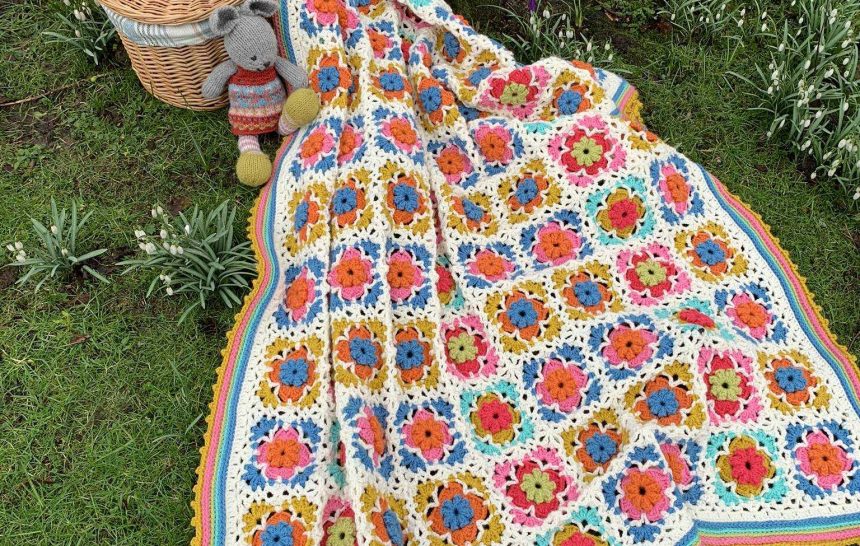
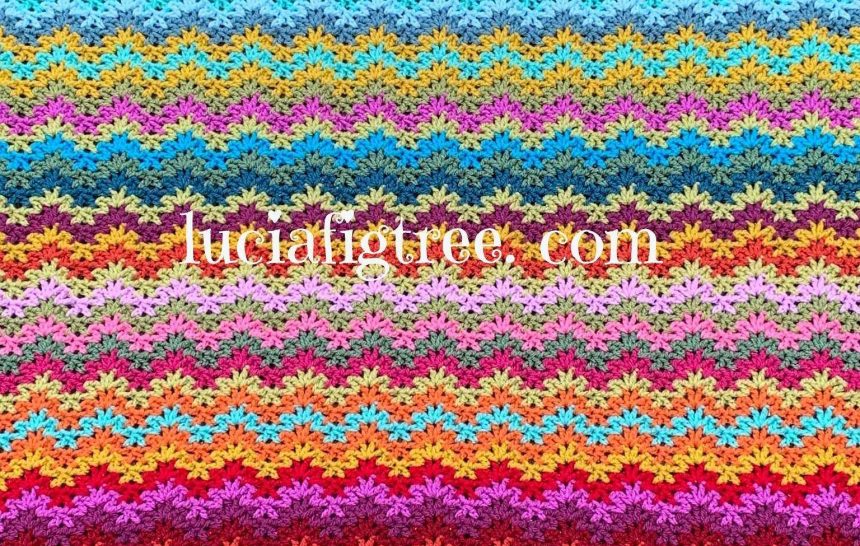
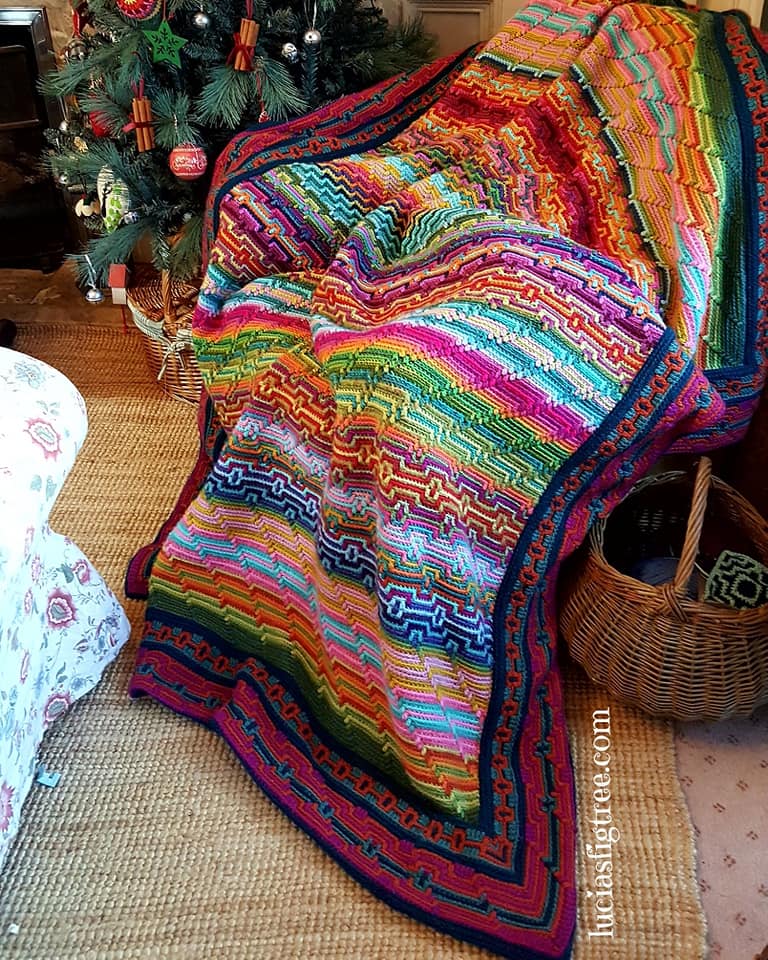
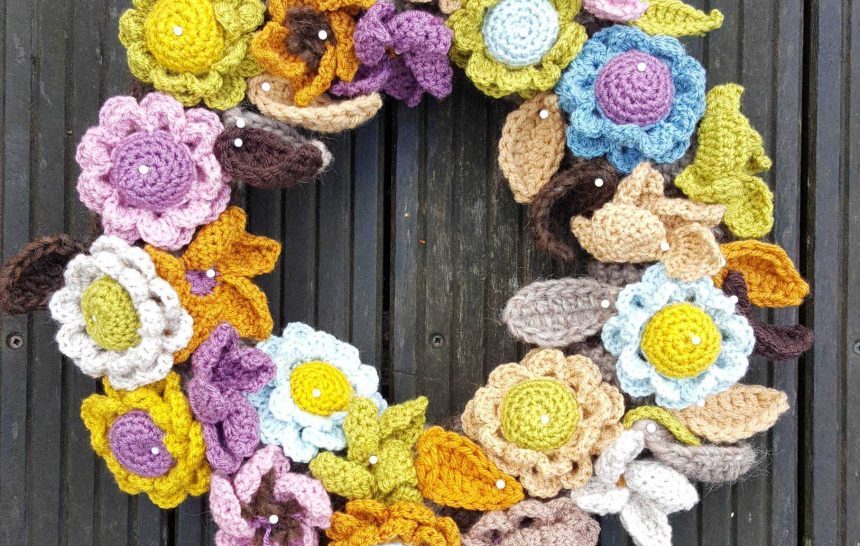
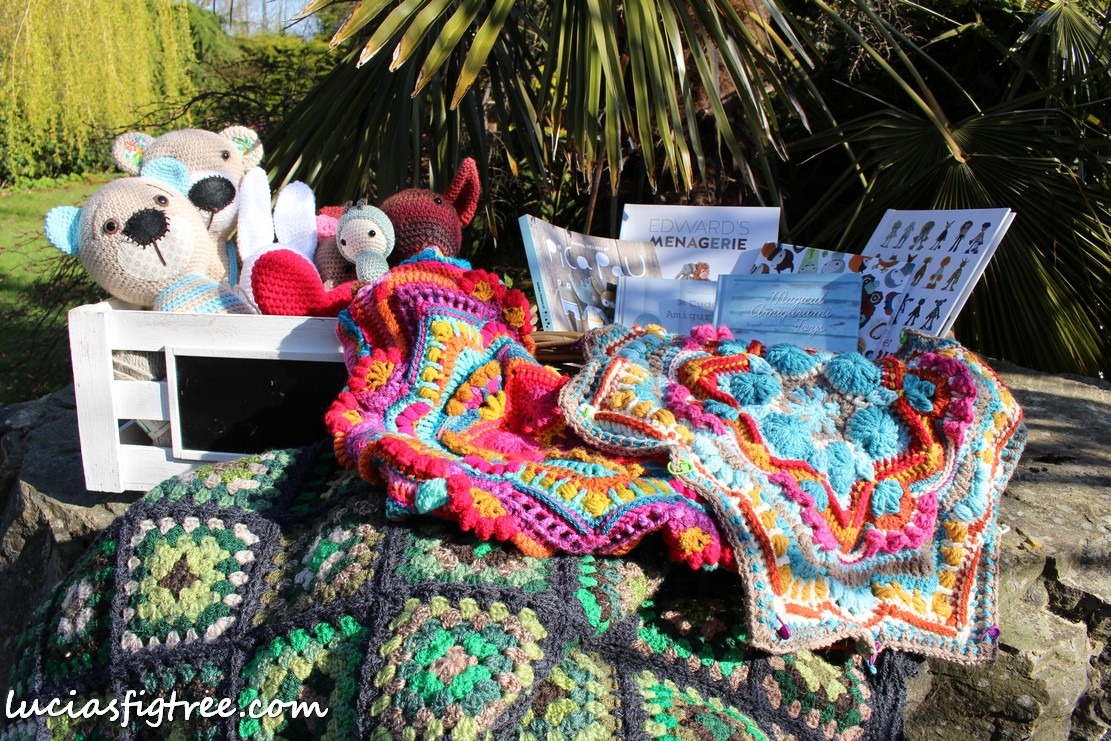
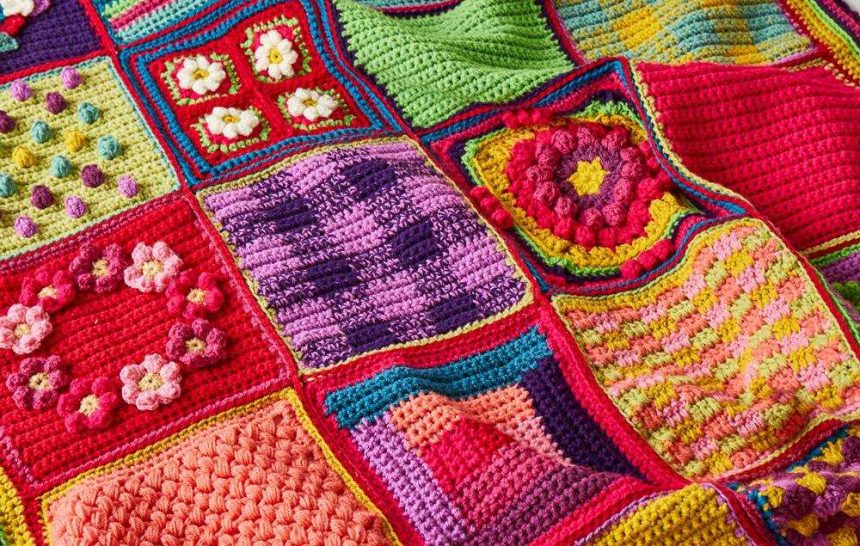
Today I a going to introduce you to my most complex pattern to date…the RISE AND SHINE BLANKET!


The Rise and Shine was designed in 2018 and featured as a CAL (Crochet-along) over 13 issues of a magazine called Crochet Now.

I got the copyrights to the blanket back a few months ago but I didn’t have the time to put the file back together and publish it myself until now.

So here she is on all her glory!

The rise and shine was what you could call a “labour of love.” It took me ages to come up with the concept and even more time in making endless swatches and samples of each square.


What is the main idea behind it?

I wanted to introduce new techniques and demonstrate how versatile crochet can be, how it opens windows of infinite creativity. Each square teaches you something, it might be a technique, a texture or a lesson in colour. By the end what I hope you will achieve is confidence with different techniques, an idea of how colours work and the importance of texture.


The blanket also tells a story, a story about things I like , places where I have been ,and images or colours that intrigue me.

I am not going to go through every single square but I am going to give you some examples, simply because if I show you what thought process behind it you can make your “own” blanket too with your memories, your stories and your experiences!


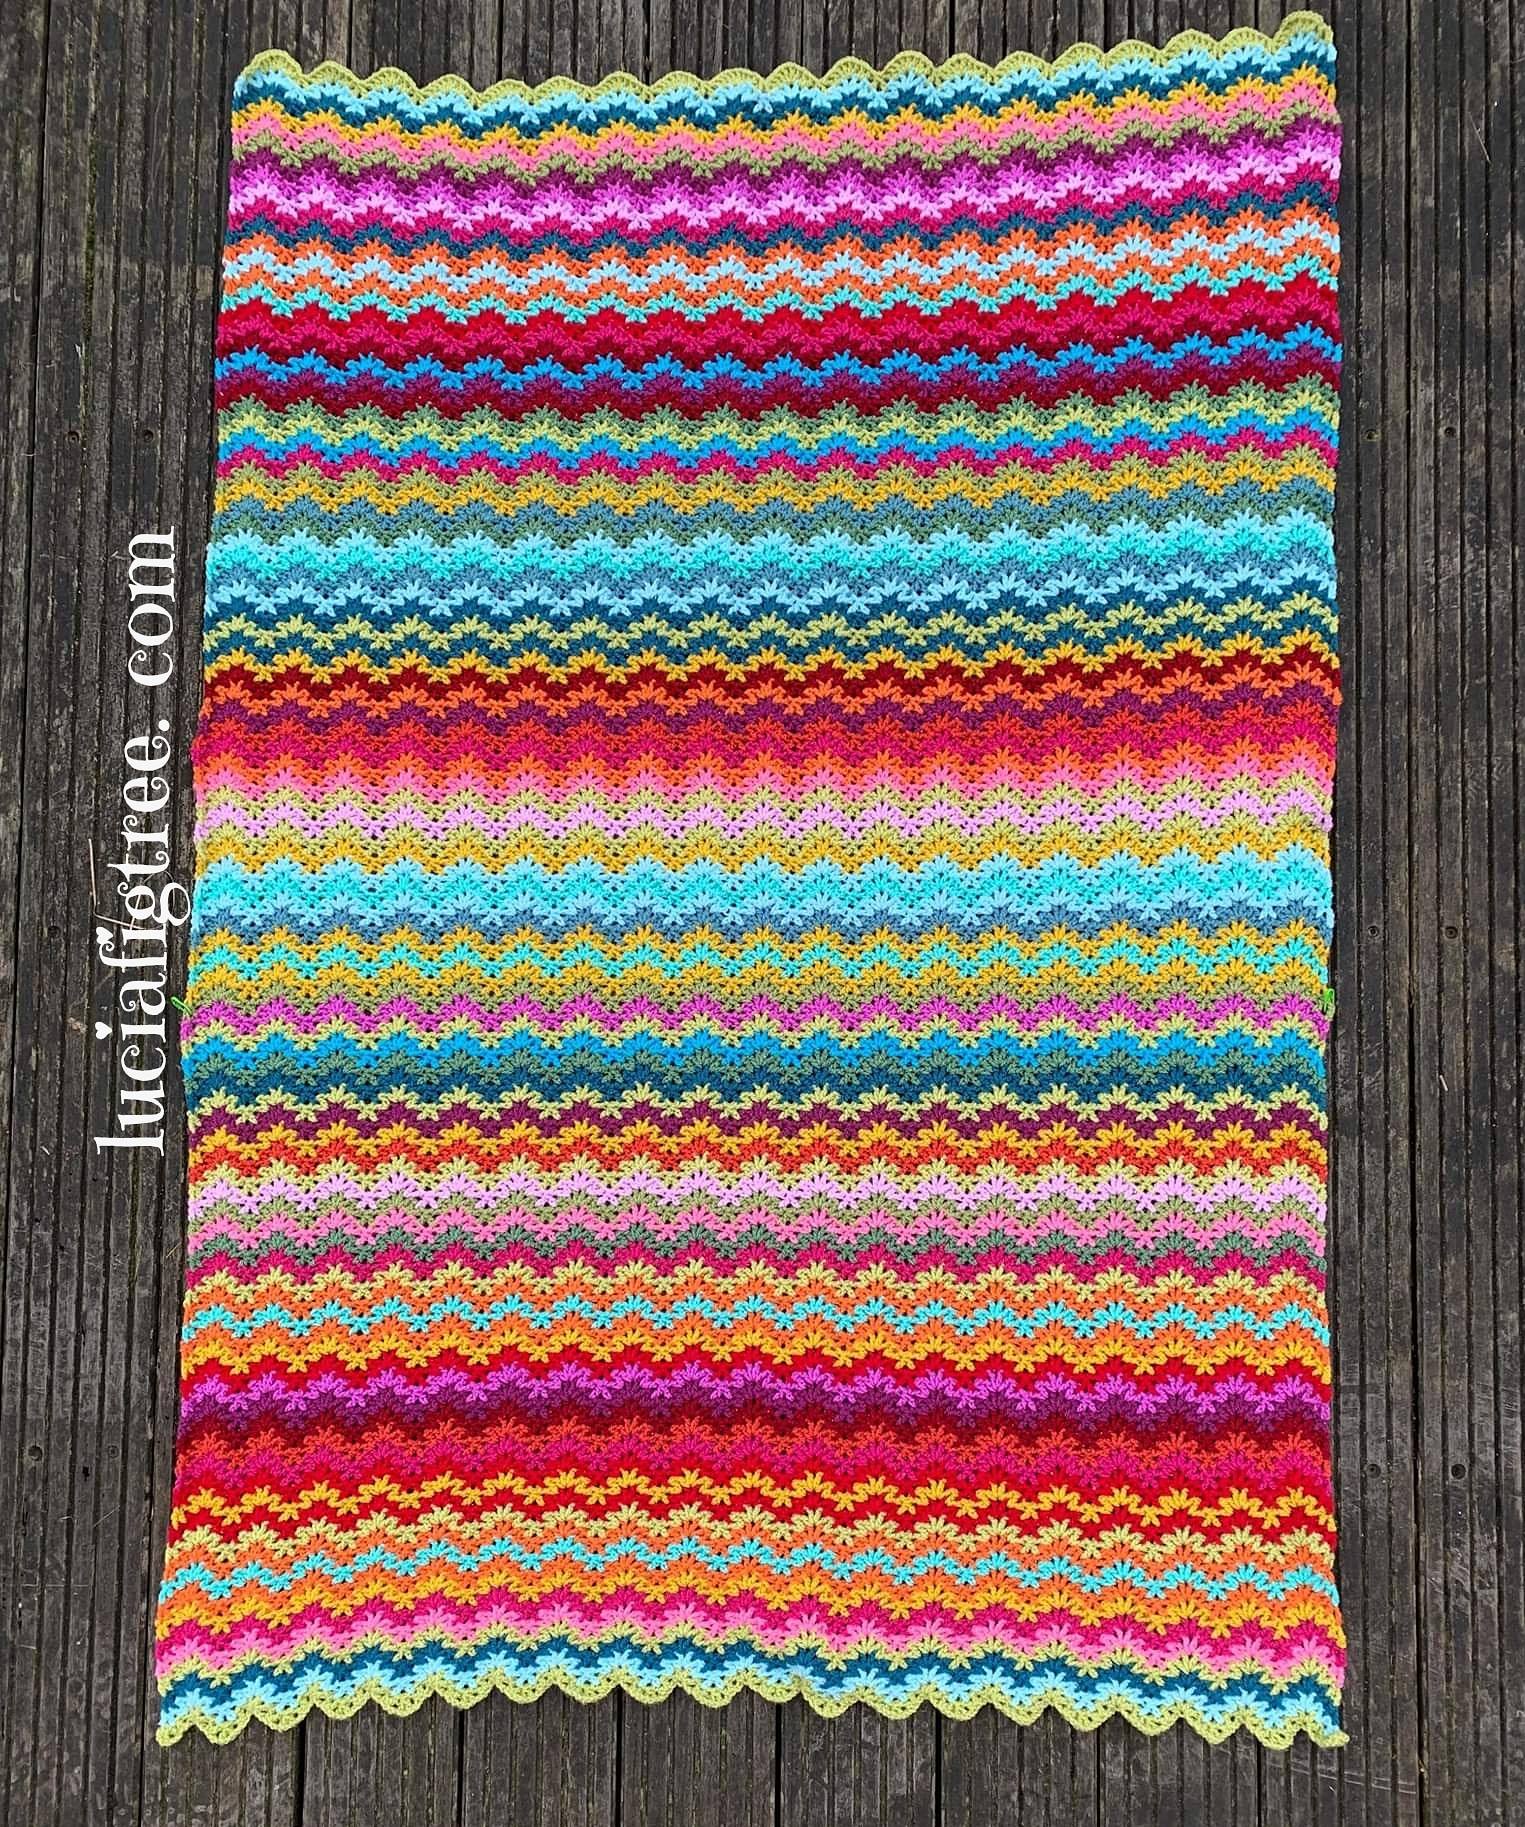
So lets have a look at this blanket…

There are 24 squares, the pattern is arranged in a scale from easy to complex..again because it is a journey… Each  focuses on either a technique, texture or colour. The squares are all the same size and you can place them as you like! You do not need to follow my scheme either. If there is a square you do not like or you find really challenging please do not be discouraged or frustrated! The aim of the project ultimately is to be FUN!! So lets not forget that…

I designed a grid with the placement of every square.


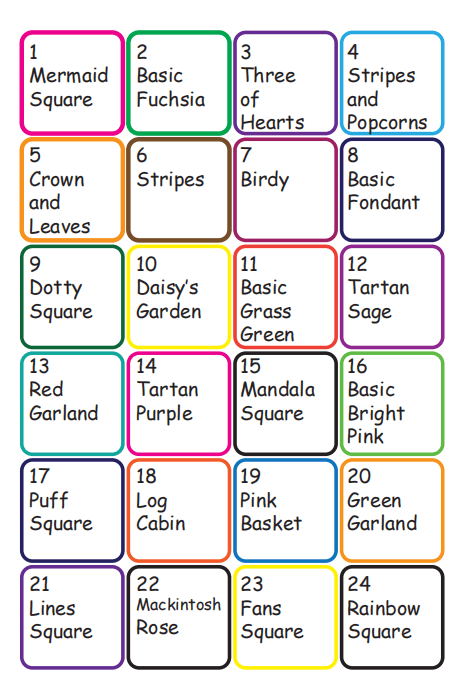
And , as said, in the pattern the squares are organized from easy to complex.


Because I mentioned stories and thoughts behind the squares I am going to show you what I mean with a couple of examples

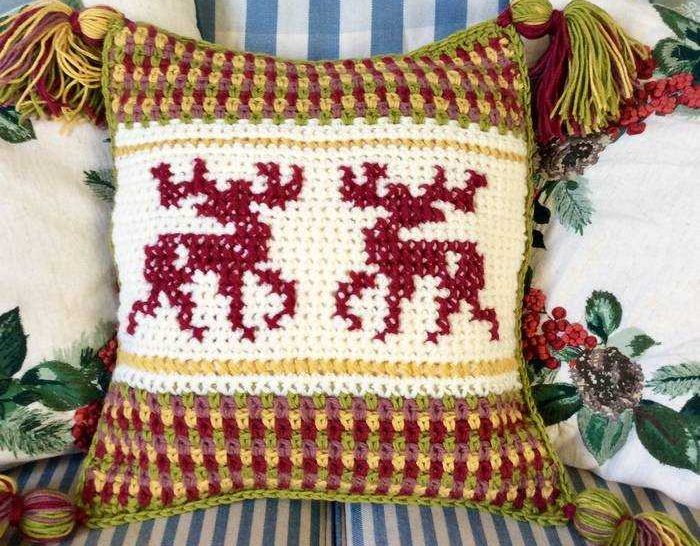
Let’s have a closer look to a simple square like the PUFF SQUARE ( which is square 17 in the grid)


This square is all about texture and a warm muted shade: Shrimp.


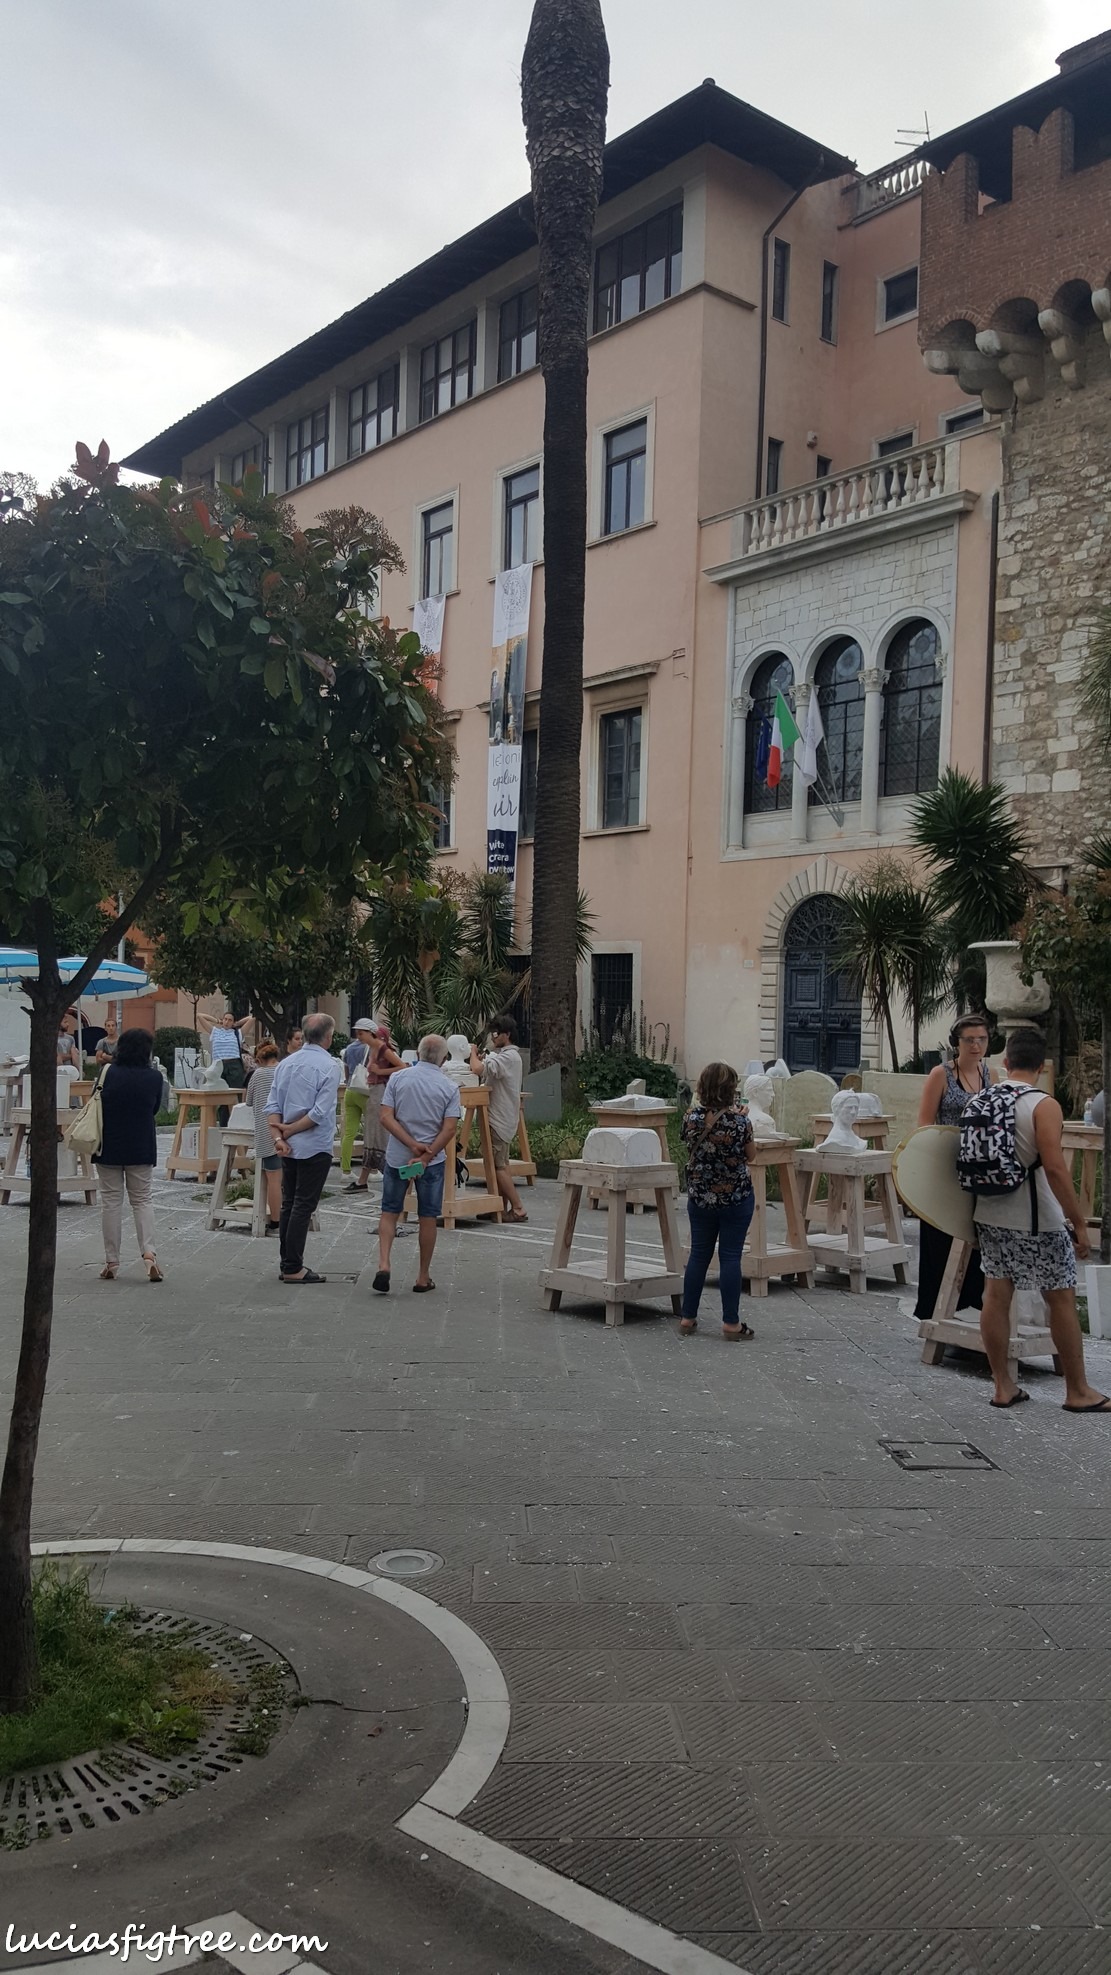
I love this colour very much because it reminds me of Venice where I studied architecture for 7 years, it reminds me of the palaces and the light of the city and I feel there is a lot of energy in this beautiful muted Mediterranean colour.


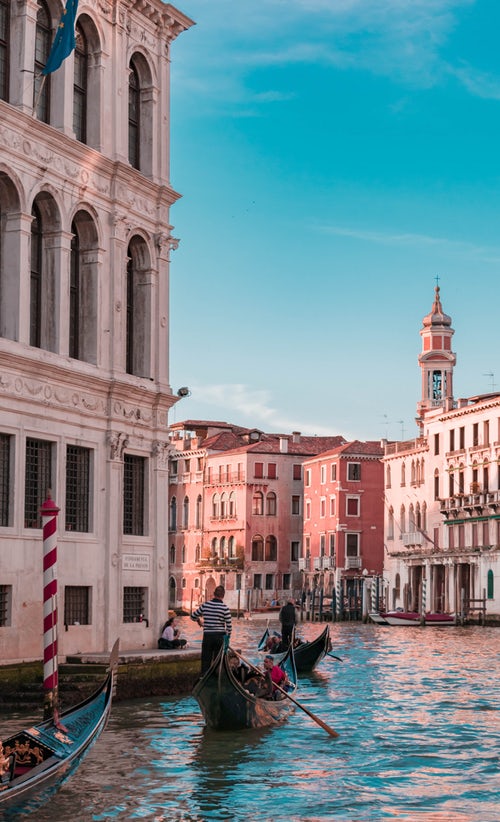
Shrimp goes beautifully with stronger hues like reds, greens, and mustards, it balances them and adds warmth and that is why I used it in the blanket.

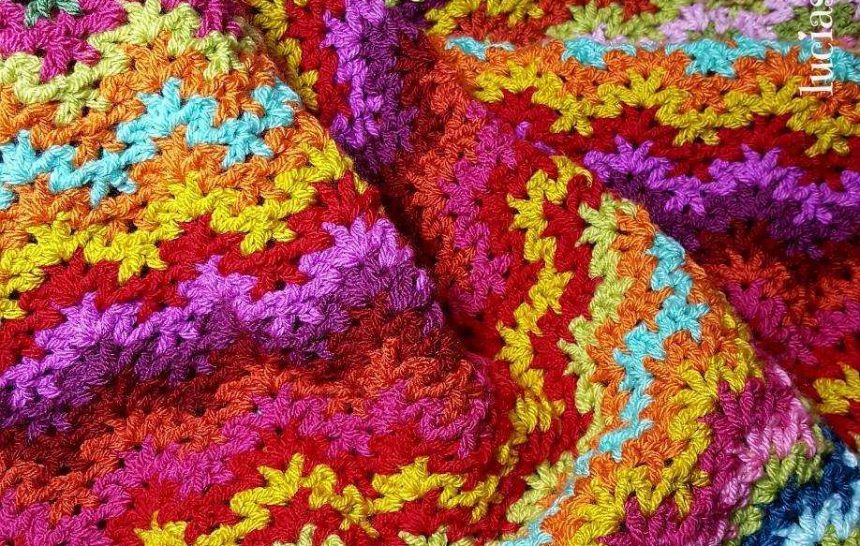
In fact, when choosing colours and textures to put together in a design scheme, that not only looks but also feel good, you must be aware of the importance of how the colours interact with each other’s and how texture is another factor that can influence the tone and the colours.


Ok, we covered colour… let’s now cover interests, things that fascinate you also how to make a mood board…
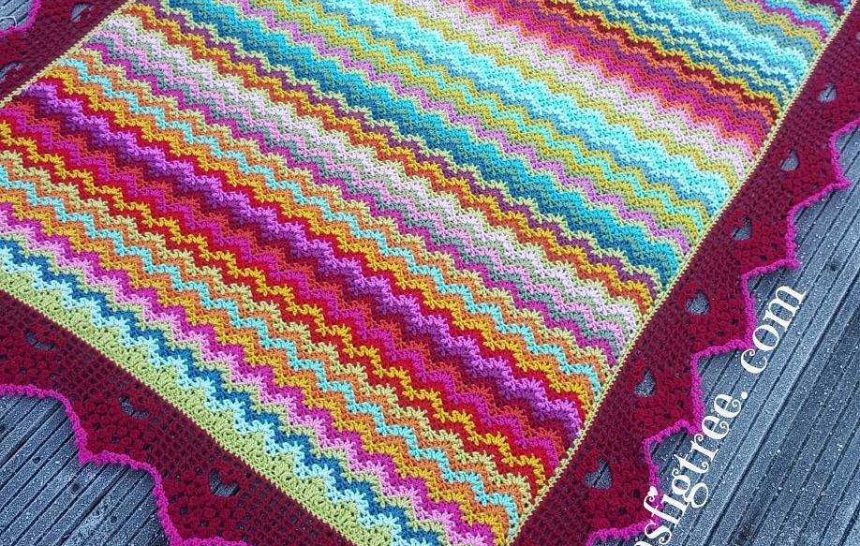
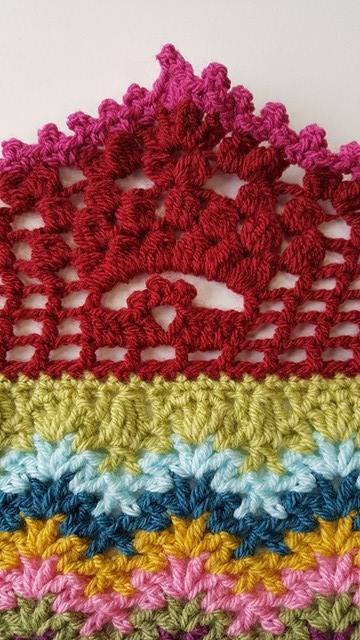
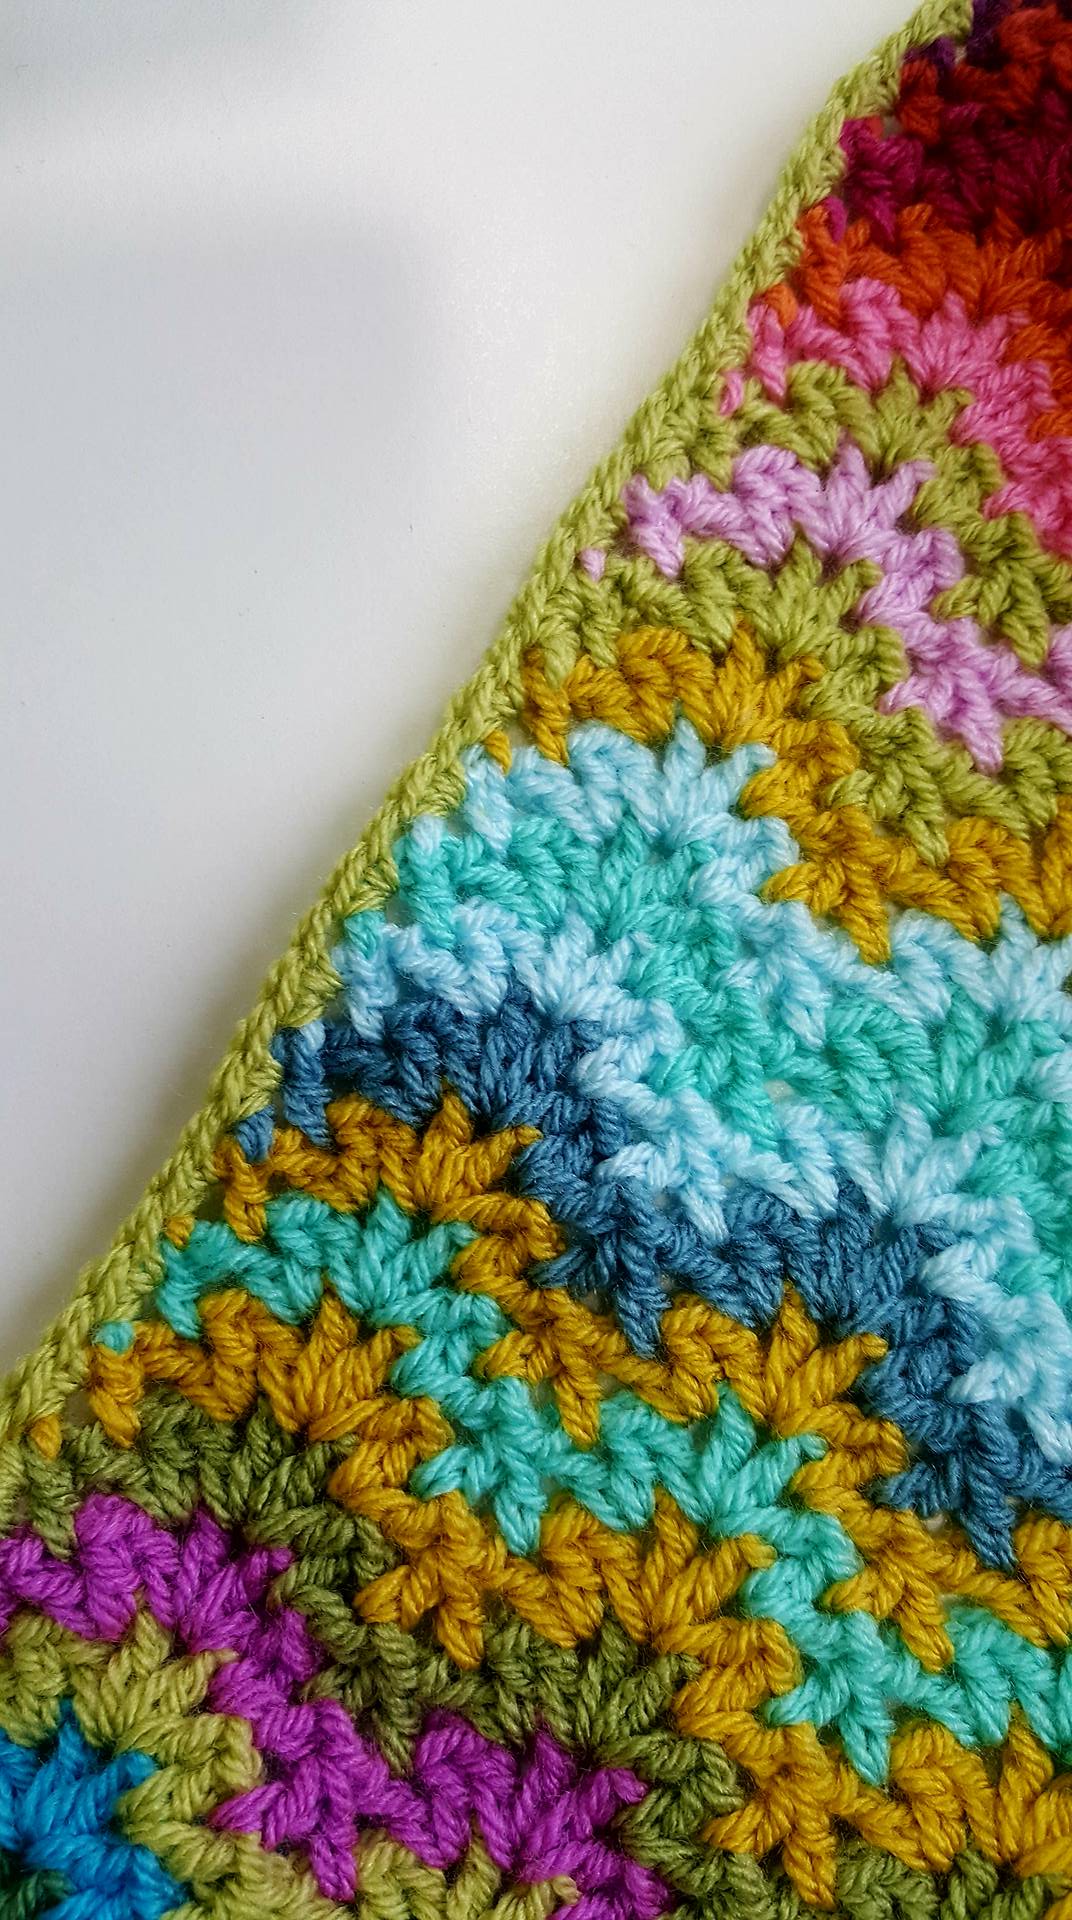
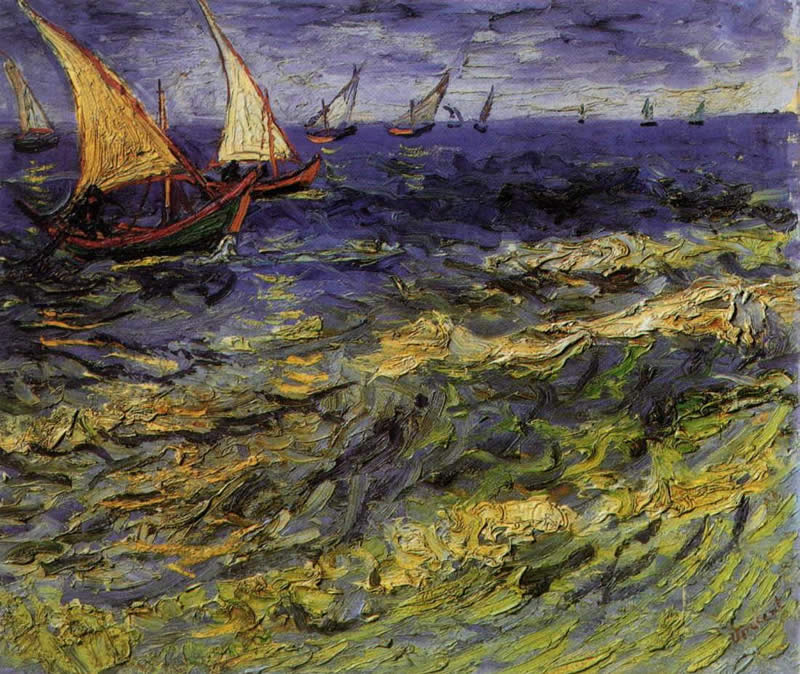
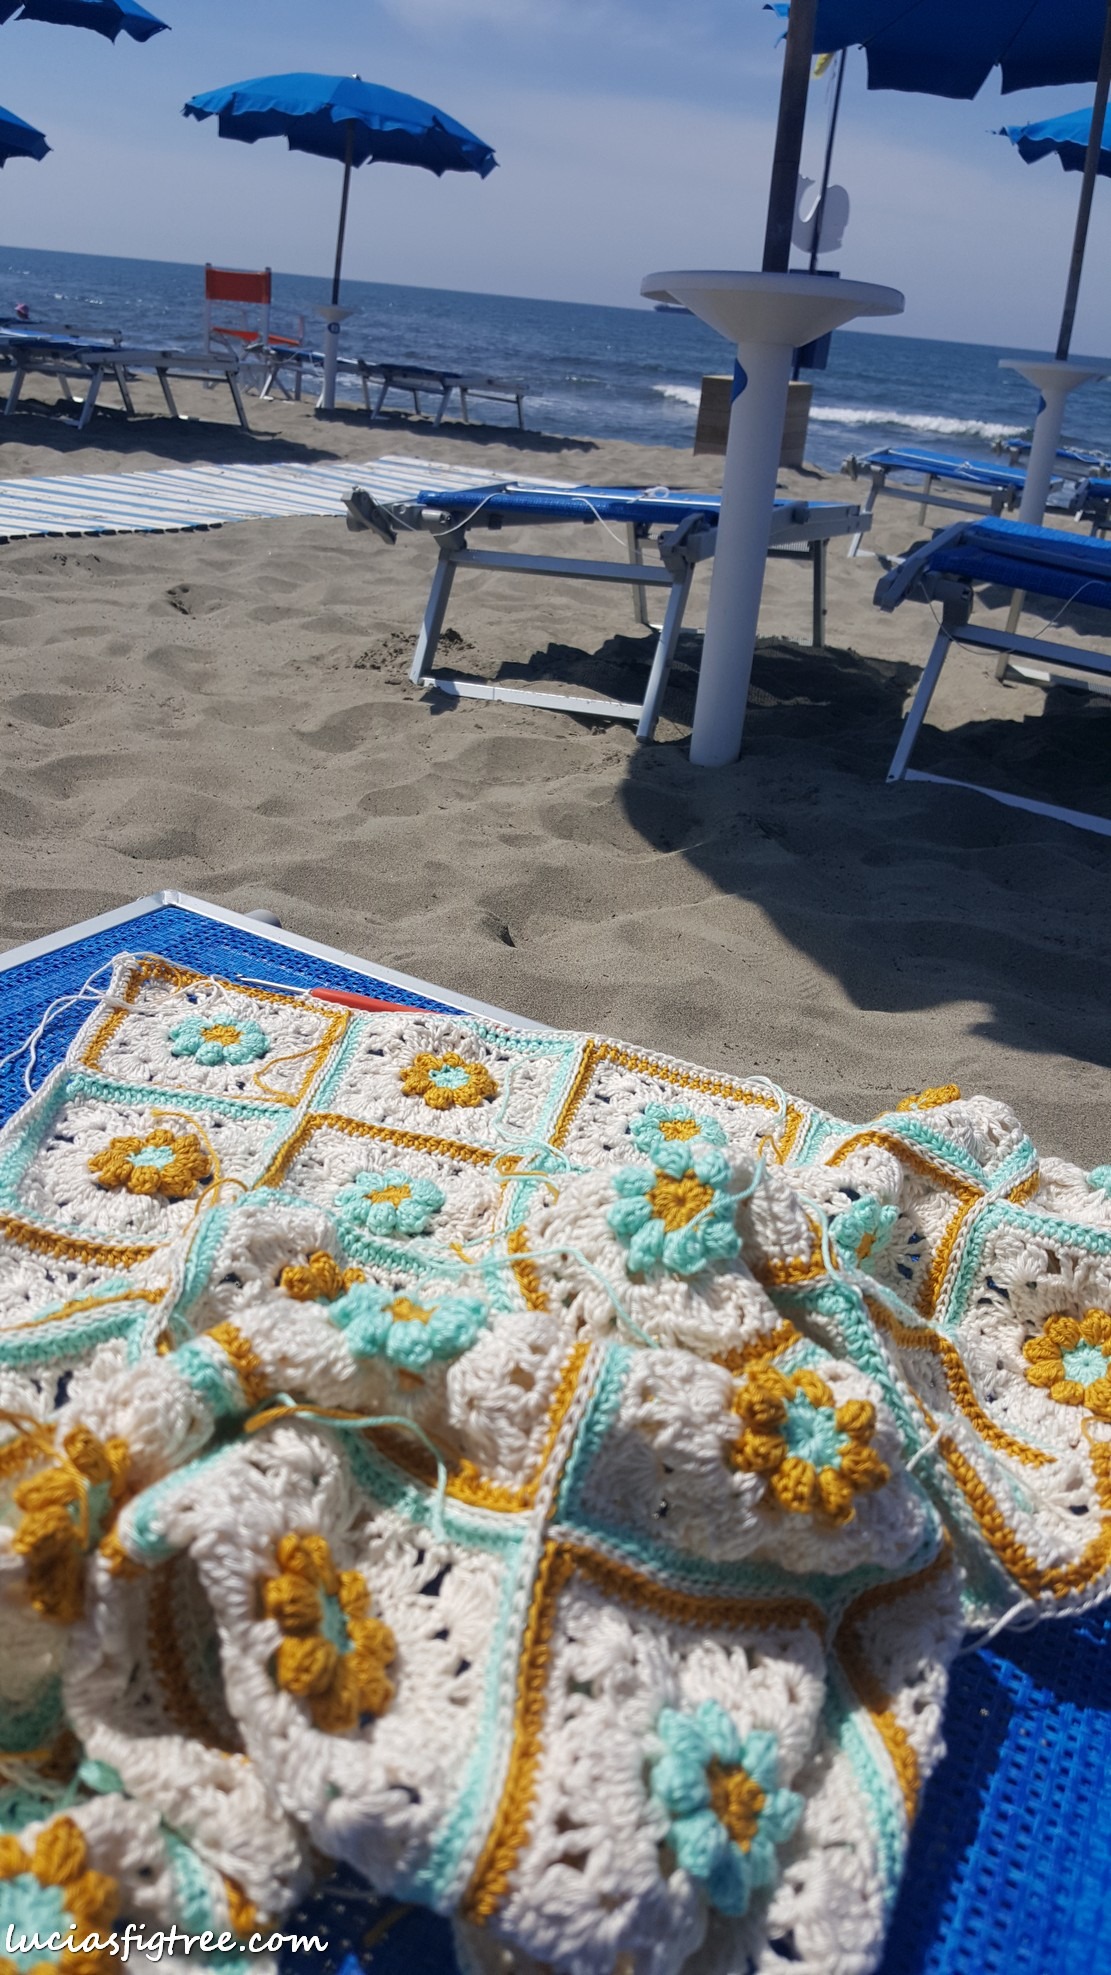
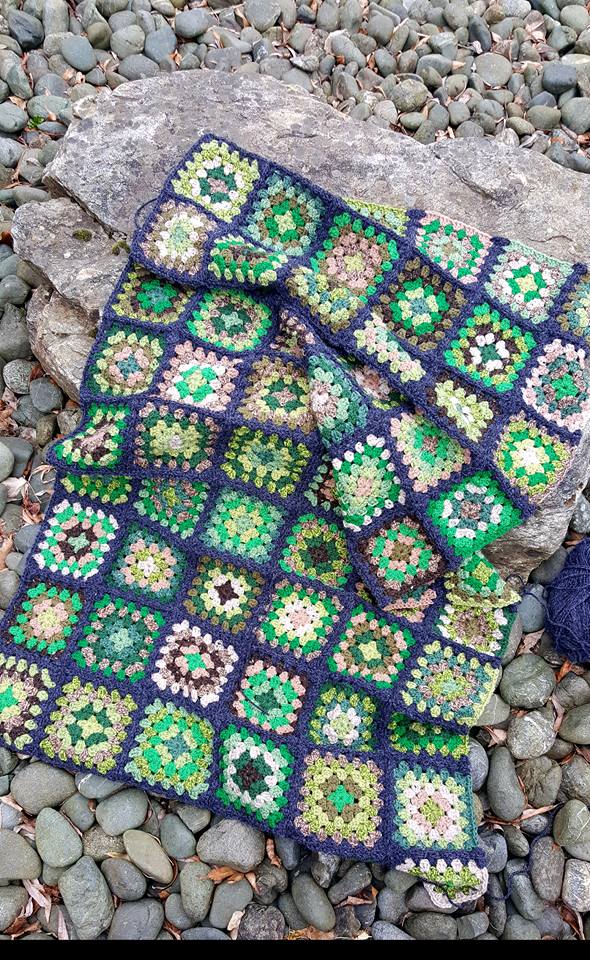
 

The  MERMAID SQUARE

I think I have been fascinated by Mermaids since I can remember hence why I HAD to add them too in some form to the blanket.

I love this mythological creature not only their colours, the myriads of ever-changing greens, turquoises, blues, but also what I find really fascinating about mermaids is that to me they represent the ultimate freedom.

They are death and birth when they shed their skin to come ashore, they are contradictory beautiful and deadly, a true personification of the unpredictability of the oceans. They are strong and free, they are smart and adaptable and they can swim anywhere and do whatever they want… and I bet, sometimes we all wish we could do the same!

Last but not least let me introduce you to “mood-boarding” with a couple of more examples

Mood-boarding is a fantastic tool not only to colour’s coordinate, but also to add something special to your project.  I called them visual chronicles.

The idea is to show ordinary objects of everyday life can inspire you in your projects and also my point is to use stuff that any of you can find in your house, nothing is bought in purpose it is all about finding inspiration on the ordinary, just a way to stimulate creativity.
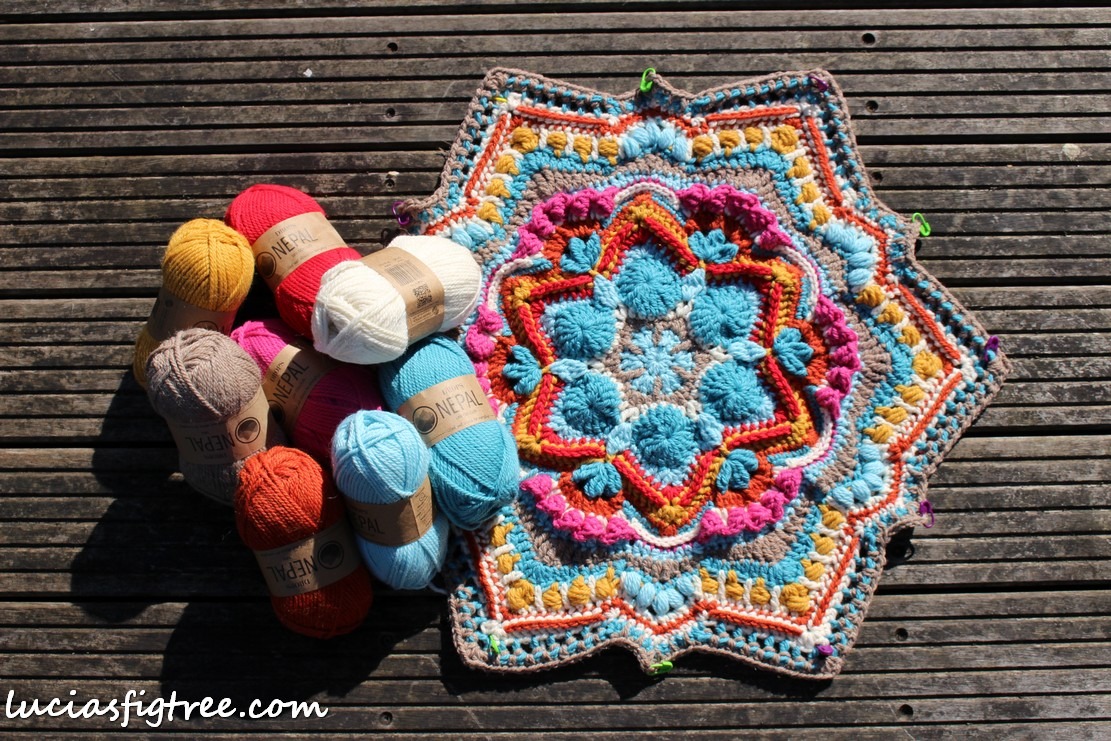
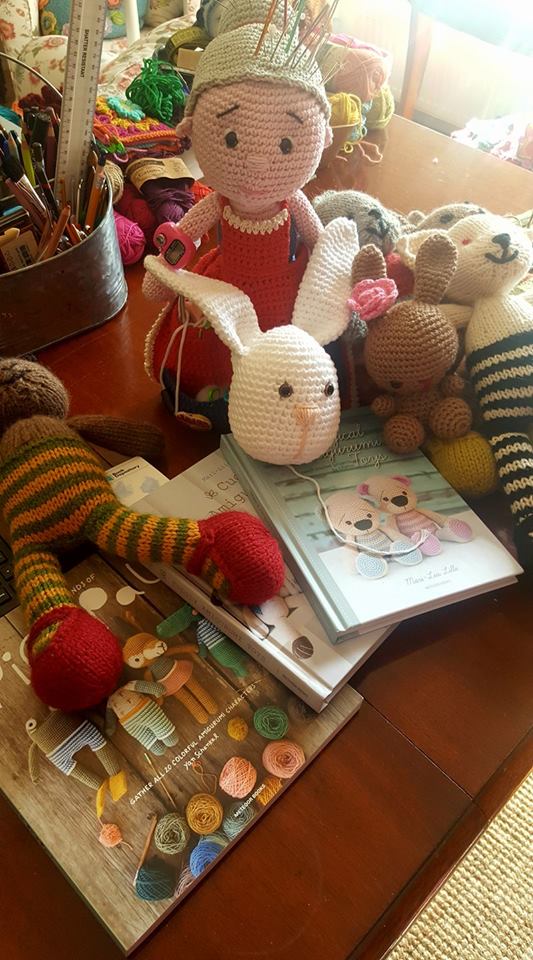


The MANDALA SQUARE


It is very simple, all you have to do is to take a 60 cm square space, I used a large tile I found in the office, but even cardboard will do, and position little things that you found or bought, objects you have collected, colours that trigger happy memory even a juicy apple will do! the key is that the objects are connected to a happy memory, like a lovely walk in the countryside, or a trip with your loved ones.

The purpose of the board is to replicate the feeling and the memory of that day. There is not a right way or a wrong way, just play with the objects, when you have done take a picture and, if you like, start again changing places or adding bits and pieces until you are happy.


Here is my mood board that inspired my mandala square, it is a trip to Spain we did with the children a few years ago, so there is one of those little silly dolls that I bet you all have in the back of a drawer.. happy sunny colours, a hippy holidays’ crochet bag, some blue fabric that reminds me of the sea, a flower, and even a little tin of paprika.

So give it a go, it is really easy and will make your projects very special as you are crocheting memories.


I really hope you like my Blanket.. the pattern is available both on Raverly and here on my shop.

Rise and Shine Pattern- Digital Download

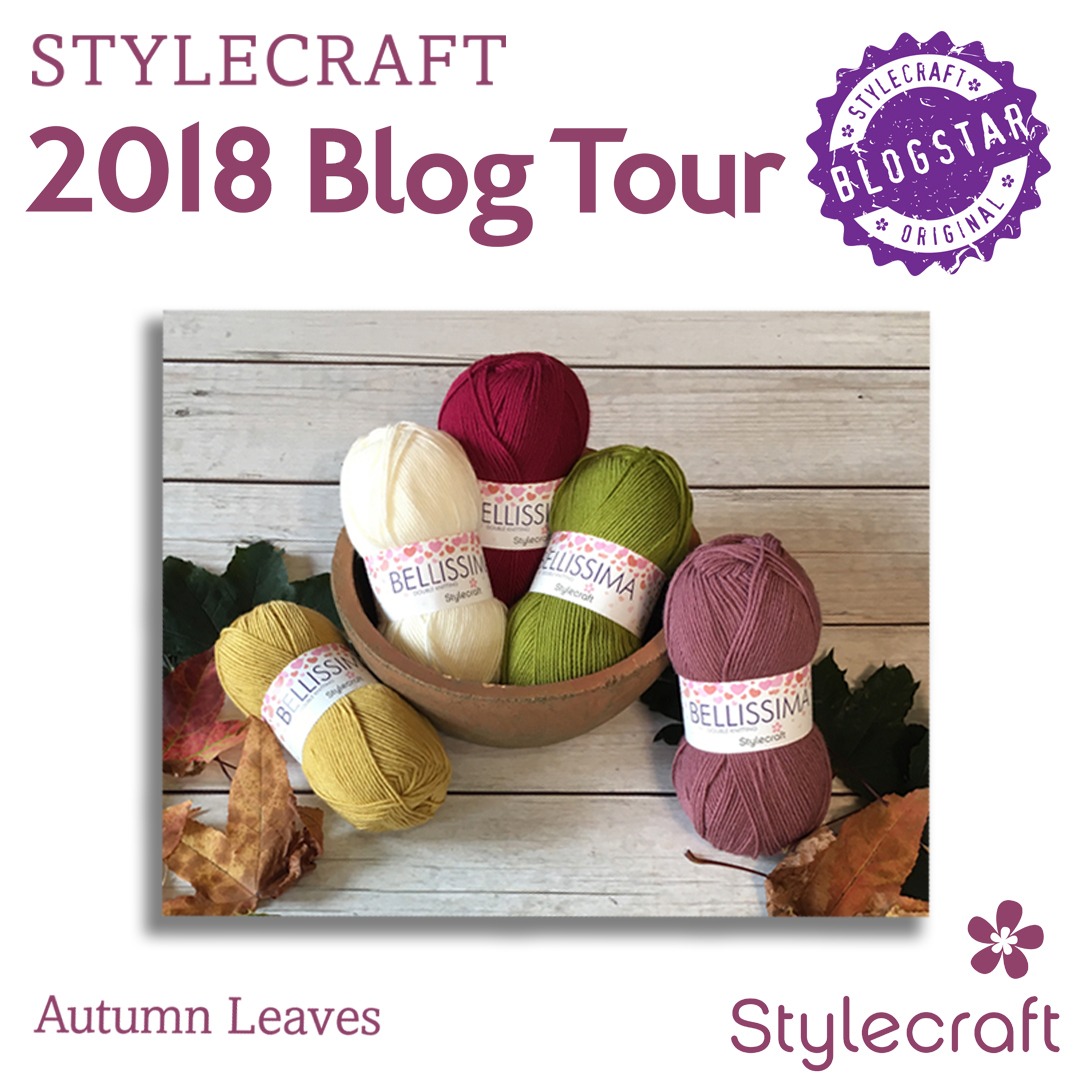
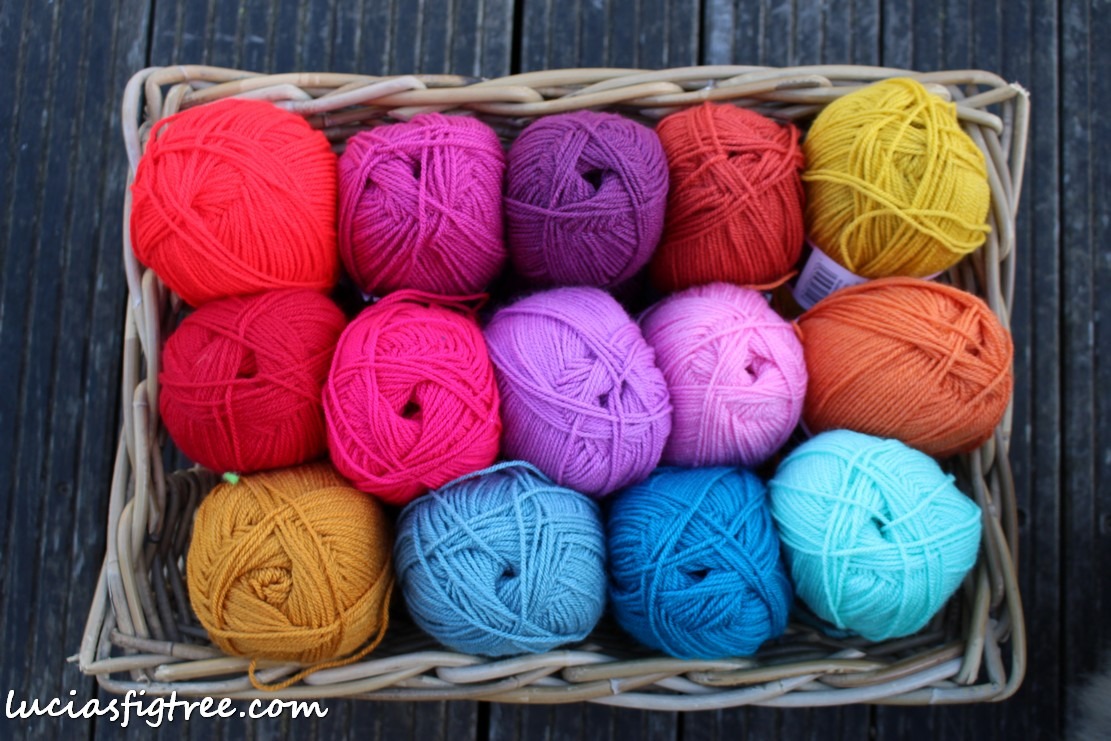
I also have arranged a pack being made for you from the Woolwarehouse.

Rise and Shine Woolwearhouse Yarn Pack


All the best to you all

Lucia xx


Peerie Blooms Blanket

HELLO EVERYONE!

gosh, it has been such a long time… I got carried away but so many things that I have neglected my blog! So |I will rectify this and make sure I write more blog’s entries because I  have been missing this platform .. so let’s start the new year with a new project! My first project for 2020 is the Peerie Blooms blanket. I made the blanket in collaboration with Stylecraft Yarns as
my contribution to the new Blogstar’s MAL program. It is a perfect opportunity to use some of Stylecraft’s new colours that have been recently added to their Special Range in Aran and Chunky weight.

As you all know the majority of my projects are done with DK yarn so the challenge has been using an Aran weight and a relatively small colour palette! I wanted to create an easy-to-crochet project, with a simple and uncomplicated square quick to make with the Aran yarn, a great way for beginners to experiment with colours and textures a blanket for the ones of you that don’t have much time or want an ‘in-between’ projects to enjoy on the go or as a break from more complex patterns or while socializing, travelling or watching TV !!


Did I cover all the possibilities and full-fill the challenge? I hope I have! The name Peerie means small in Scottish and that is what this blanket is all about.. a razzmatazz of little three-dimensional flowers in a vibrant meadow full of colours.  There are 99 squares organised in 4 colours combinations and arranged as a Tartan fabric, again a homage to Scotland, my adoptive home that I love so much. As I want EVERYONE to be able to make my blanket, regardless of their abilities or native language, the pattern includes charts of the motif, the joining method and the border.

I also have uploaded, on my youtube channel, my first video of how to make the Peerie Blooms square. In the next few days, I will upload the joining method too.

The pattern contains the instruction for a bonus blanket made by one of my testers , Susan Cox. It is a smaller version, perfect for a baby blanket or a little lapghan made with Stylecraft BELLISSIMA  and BAMBINO

YOU CAN BUY YOUR PACK OF YARN CLICK THE LINK BELOW

Peerie Blooms Blanket – Wool Warehouse Pack

FOR THE PATTERN HERE IS THE LINK BELOW

Peerie Blooms Blanket Pattern -Digital Download

So this year is all about embracing technology!

I will make more videos and I hope you will follow my Youtube channel and help me with your comment in making my patterns better and better.
I really hope you will give the |Peerie Blooms a go! So pick up your crochet and join
us in the fun!

Lucia xx


Last chapter on the January ‘s blues blanket.

I can not believe we are already in February!

Normally January drags a bit on for me but this year has definitely not been the case.

I guess I have been very busy with work and with “non-crochet “related stuff but I still managed to add a border and finish the blanket.

Today I can give you the last pieces of information so, if you like, you can finish your blanket in the same way.

About the border, I am going to digress a little bit and give you some thoughts.

I personally love borders very much especially if they are big and bold!

That works even better if you have a simple pattern throughout the main body of the blanket as we have in this case. Maybe my propensity for statements borders is due to the fact that my first attempts on crochet, many years ago, were cotton’s tread fancy borders for linen towels!

If you are Italian or Spanish or just Mediterranean in general you might are very familiar with them.

another picture this time from the oldest and most famous creative magazine in italy called “Mani di fata” which translate very appropriately in “Faerie hands” !!

It used to be a great test for beginners to master crochet without embarking in something too challenging or time-consuming, even if, I have to admit, it still took a fair amount of time to make them as the cotton yarn was at least a 4ply but often much thinner than that.

I have a few stashed in a drawer somewhere in the house, I use them seldom as they are delicate and definitely not tumble-driers proof!!!

If bold and big is not your style, it doesn’t matter as a ripple pattern can look just beautiful as it is! the little scallop at the top and end can be left as it is and still look fabulous so do not panic if you cannot be bothered doing the border your blanket will still look lovely. Just surf the internet or Pinterest for inspirations, and remember it is YOUR blanket so don’t be afraid to go off-piste! actually, I love if you go off-piste and you put your input! it makes your blanket more personal.

Back to what I have done… some pictures to start with:

In my case, I filled the ripple because I prefer straight edges especially if you are opting for a more challenging border.

I draw the distribution of the “filling” stitches for the top and bottom of the blanket.

I started my foundation round with the Pistachio on the corner ( now you can see why it is good to start and finish the blanket with the same colour. it brings continuity on your foundation  round, which means when you start the next round of the border with a contrasting colour ( in my case is the claret) you have a solid even base to work with)

on the side I worked 2 dc in the space created by each tr at the beginning and end of each round .

I have in my case 195 stitched in each of the vertical sides of the blanket and 114 on each of the horizontal for the 4 corners we have :(1dc-ch1-1dc) repeated 4 times.

so the foundation round is made of (1dc-2ch-1dc)+ 114 +(1dc-2ch-1dc)+195+ (1dc-2ch-1dc)+114+(1dc-2ch-1dc)+195.

the border is done with Claret and a 3.5 hook

I have chosen for the border  again a diagram I found on Pinterest this is a picture of it. I made some minor adjustments to the last couple of rounds to simplify it mainly because the pattern is written for a cotton thread and not DK yarn.

Ther repeat of the pattern is on a multiple of 10 so on my first round of claret I added 4 stitches in the each of the short sides and 3 on each of the long sides.

If you use another pattern for the border please consider adjusting the number of the stitches according to the repeat!

I posted a couple of close-up so you can see better how the pattern develops. It has a fair amount of rounds but it is pretty fast.

my last round is a contrasting one done in Fuchsia purple.

YARN QUANTITIES USED for the border:

for the Filling round and foundation, I used 35 grams of  PISTACHIO

for the BORDER:

  • ROUND 1 TO 7 : I used  150 grams of CLARET
  • ROUND 8 : I used 30 grams of  FUCHSIA PURPLE

last but not least….

I have been asked if I can transcribe the diagrams into words…. I know for many of you it is easier to use written instructions but I wish you tried ( NEW YEAR’S RESOLUTION !!!) to use a diagram!! It will open you amazing opportunities! this blanket, in particular, has such an easy diagram so please give it a try trust me you will never look back! there are loads of tutorial on you tube to learn how to read a diagram, do have a look and see which one suits you better.

love to you all…

I have something new I am working on so I will post again very soon,

lucia xx


A little bit more about the January’s blues blanket

Firstly sorry this blog entry is a bit late, finally, after a very frustrating weekend, I got my blog back!

I am quite impressed with myself for sticking to my new year’s resolutions ( or trying to) …I am back writing again!…( mind you it is early days…) nevertheless it feels good!

One of my children bought me a planner this year, I don’t know if it is meant to be a gentle hint to get better organised as I failed completely last year trying to ‘get organised’ using an App on my phone!

So on 2019, we go back to basic! Hoping that pen and paper might do the trick for me …

Do you have a planner too?

I still have to get used to these little snippets of encouragement that are keeping appearing randomly on this planner ..they make me giggle. I just discovered that there are stickers too! Probably those are a step too far for me🤣🤣🤣

I will keep you posted!

Let’s get back to the blanket.

I finished the main body a couple of days ago and I have been gathering the details so you can make one yourself.

As you know the blanket is not completed but I think it could be interesting for you to follow me “in real time” and see the blanket coming along, a bit like being behind the scenes.

The pattern is really simple, that was the point of this blanket in the first place,  to do something really easy and relaxing.

I used a V-STITCH RIPPLE for my blanket. As said on Facebook there are several versions and options for the stitch available out there.

The version I used I found it on Pinterest. Just a diagram nothing more here is the picture I have used.

.

I like to give credit to the designers even if  I think this is just a diagram of something that has been out in the open as a free pattern.  All I got is a watermark which said Tejiendo Peru’  I have also tried to get in touch with them but with no joy. so I assume it is ok for me to share with you as it is in the public domain already..

I  used the diagram above as a guide but  I did an alteration to it.

If you read the diagram you noticed that the rows are worked on the front (RIGHT side ) , then you turn your blanket and you work on the back (WRONG side). If you follow the diagram as it is in the picture below  you can see  the result:

I didn’t like the results on turning your work after each round, as I think it muddles the effect of the stitch so I opted for working just on the RIGHT SIDE ONLY! you can see the difference in the picture here:

The blanket is even, each round is exactly the same, no difference either in size or texture. Also because I change yarn every row it makes no difference of whatsoever if I  work always in the front.

Maybe you are all thinking I can’t see where the fuss is all about, but believe me when you work the all blanket you definitely will be able to see the difference between the two options. working just on the front makes a much better-looking blanket.

The blanket still doesn’t have a border but the main part measures 90 cm wide by 140 Cm long

the yarn used is STYLECRAFT SPECIAL DK . the hook size is a 3.5 mm (E).

Here the list of the colours I used:

The number between brackets refers to the quantities of yarn used in grams. obviously, do bear in mind that the yarn usage is just an indication based on my tension and a 3.5 hook used.

So dig out your leftovers from your stash as you might be able to use them and plan the blanket.

  • LIPSTICK (13)
  • SPICE (53)
  • CLARET (29)
  • MAGENTA (17)
  • PLUM (29)
  • FONDANT (27)
  • CLEMATIS (29)
  • MUSTARD (71)
  • PISTACHIO (90)
  • SHERBET (51)
  • ASPEN (33)
  • TURQUOISE (23)
  • STORM BLUE (10)
  • PETROL (34)
  • CYPRESS (25)
  • TOMATO (25)
  • MEADOW (71)
  • FUCHSIA PURPLE (52)

The pattern is based on a 14 stitches repeat plus 3. I started with 269 chain stitches that gave me 19 REPEATS ( 90 cm wide) it is very easy to adjust the size by adding or subtracting repeats to get to the size that you want.

I also took note of the colours sequence I used. there are 96 rows.

a  couple of HINTS :

  • if you look at the blanket I have repeated the first 3 rows in reverse order at the end. that will finish your blanket much better, it is like a visual frame which works beautifully not only for this blanket but in any you might want to do at home.
  • I also started each row with a self-standing treble and NOT 3 chains as in the diagram ( simply because I feel is a more sturdy way to start and it will work better when we will add the border.

that is all for today

thank you for reading,

Lucia xx

JANUARY’S BLUES…AND MORE THOUGHTS

2019…

a new year!

I don’t know about you but I found January a bit of a difficult month…especially after the whirlpool of activities, family, parties, food, visitors, birthdays and so on.

January means  the fizzling out of the holidays and that life is about to crank back into action and so I welcome the new year  with a mix of relief and sadness, relief because I quite like to go back to my normal routine with the added bonus of a fresh new start, and sadness because  I  miss having a “full house” as I wave goodbye to Valentina  on her way back to London and Giuseppe to university.

my babies…

January, for me, has always been a time for looking back to the past, and more importantly, forward to the coming year. It’s a time to reflect on the changes I  want (or need) to make and resolve to follow through on those changes. January is about lists, hopes and resolutions.

I found the resolution’s part quite funny in a way because there are 364 other days to make resolutions, but we choose to make them on a single day!

If you follow me on Facebook and Instagram you probably have noticed that my crochet slows down during the holiday’s period, I finished my beautiful Havana just before the holidays and that was really it..

I made a few hats and a Valentina shawl, but nothing very exciting.

My creativity seems to take a break as I need to empty my head and start to re-focus.

I feel creativity is about imagination and yet it is also about reality too, seeing the world as truly is and observing carefully, so I welcome the peace of these few days to gather my thoughts

about observing…


I read this last night:  an extract of a letter Vincent Van Gogh wrote during his stay in Saintes-Maries :

“One night I went for a walk by the sea along the empty shore. It was not gay, but neither was it sad – it was – beautiful. The deep blue sky was flecked with clouds of a blue deeper than the fundamental blue of intense cobalt, and others of a clearer blue, like the blue whiteness of the Milky Way. In the blue depth the stars were sparkling, greenish, yellow, white, pink, more brilliant, more emeralds, lapis lazuli, rubies, sapphires. The sea was very deep ultramarine – the shore a sort of violet and faint russet as I saw it, and on the dunes (they are about seventeen feet high) some bushes Prussian blue.”

Saintes-Maries, 5th june 1888

is it not just amazing?  to be able to see reality in such a way? I thought you might like it too.

So after not lifting a hook or thinking about crochet for almost a month, I started ephemerizing again…which means collecting ephemera like pictures, colours chips, dried flowers, quotes, books, photographs anything that catches my eye and I  feel my “crojo” akka “crochet mojo” is coming back to me slowly . I needed something easy, rhythmic, relaxing, no headaches of pattern writing… just concentrating on the simple pleasure to see the colours mixing and morphing into each other.

Here it is my new project, it is just 2 days old..so I m not sure where I am going with it but I will share it with you next week..pattern, colours etc.. just give me a few more days to see how it develops.

Love to you all,

Lucia xx


Is it TOO EARLY ????

Hello everyone!

You might be wondering what the title of my blog is all about…

it is about, surprise, surprise…COLOURS.

So let’s take a step back and give you a bit of a background… Many of you are probably aware that, as every year, October  is the time for the

STYLECRAFT BLOG TOUR!


Back in July, at our summer meeting, we got given two packs of BELLISSIMA yarn to choose from. I loved them both but I decided to opt for the Autumn Leaves ..because somehow the hues reminded me of Christmas!


Then I start to think  Gosh is it  October too early to talk about Christmas?? probably it is, at least in my book, but I might be forgiven this time as you can decide to make the cushion ANYTIME!


I am not going  give you a time  or a deadline to download the pattern I decided to leave it  free and available  so you can enjoy it whenever you feel  “Christmassy”

I also made sure that looks pretty both sides! hahhah because, let’s face it, cushions are there to be used and not just to be displayed..so we want the bottom part to be as nice as the front!


I really hope you will  like my cushion, it is a quick, cheery, little project, something that you can make it   in no time ( the yarn is used two strands together), It is  something for your home or to give to a loved one , or something  special you can add to a hamper full of Christmas goodies!


I am going to add a Christmas picture of my studio to put you in the mood..:


Please, if you make one, let me see it! Join us on our facebook page:  “Crochet with Poppy’s and Lucia’s Figtree”

it is a closed group where we share projects, tips and also you can get discounts for yarn and giveaways    https://www.facebook.com/groups/crochet/?hc_ref=ARQTzC0B_0QGNHRJfadJfD7Z-BfC7Nno93j6pXunCuGmaMYRrj4XH3xx8zJhoTiuXHI   and spam me with your cushions!!!

The yarn is perfect for the project, it is soft, but has a beautiful stitch definition. which is a perfect base for Cross Stitch.

If you have never attempted cross stitch on a crochet cloth, please give it a go! it is easy, very effective and it will open lots of options for your future projects.

bottom line?

DO TRY my little cushion!


As always there is an opportunity to win a pack of yarn entering this giveaway,

LINK FOR FREE PACK GIVEAWAY!!

share my page and give an opportunity to your friends to try.. and I cannot wait to see all your lovely reindeers !!

as always,

lots of love and thank you for reading my blog.

Lucia xx

HERE IS THE PATTERN!!! PRESS THE LINK!

Reindeers Cushion Download


A little catch-up!

A little catch-up… I know it has been AGES!

I don’t know about you but time has passed me by in a whirl of yarn, patterns, ideas, pictures, stories and the odd family commitment or two..lol

So where to start…

I have pulled together very basic information about the Wreath because I know quite a few of you are interested in it.

I made it, as said, a couple of years ago, I guess I must have been a bit bored and when I am bored of my current WIPs or I am tired, I always look for something reasonably small and quick to make. I call it “instant gratification”

It turns out that in these 2 years I found my wreath really useful, I never, as said on Facebook, stitched the pieces permanently on the ring but I left them pinned down with these little white headspins.  I have used that wreath many times, for trying different colour combinations or using some of the flowers as decoration in pictures of other projects.

So if you need to test some colours instead than doing a lot of boring squares, make some flowers!! Then you can play with them!

There are many wreaths available in both Ravelry and Pinterest that can help you to decide how to make yours, for me, my initial inspiration was seeing the most amazing, beautiful and complicated wreaths that Lucy @attic24 had made and that what spun me making one.

Mine is much more simple in comparison with Lucy but .. did I mention, instant gratification??? LOL

I love small projects that can be made in a day or a weekend!

I have been looking throughout the past couple of days if I had saved any pattern or link or reference, but all I found were a couple of pictures. So for the purpose of this blog I pulled my wreath down and I made a 3D daisy and the 5 petal flower again so I can jot down the details.

so let’s start :

what do you need?

  • 1 half rounded polystyrene ring – 35cm in diameter. It has to be flat in the back and rounded in the front. (you can get them from crafts shops or Amazon)
  • leftover yarns.


Please look at Lucy’s wreaths, she has a very comprehensive tutorial on how to cover up your polystyrene ring and also there are some lovely patterns for the leaves too, which I used in my wreath. this is the link to Lucy’s blog wreath :

http://attic24.typepad.com/weblog/2015/03/winter-wreath-ta-dah-1.html


for the base of my wreath, I used some Lopi’s ALAFOSSLOPI  yarn left over from a jumper it is a chunky yarn, the colours are:

  • 0085 OATMEAL HEATHER
  • 0867 CHOCOLATE HEATHER.


I love this Icelandic 100% yarn because has a rustic, organic feeling, and it makes the most amazing super -toasty jumper ever!

I can’t remember exactely what hook I used but I guess must have been either a 4.00 or a 4.5 mm, you want your fabric to be dense so it covers the ring beautifully. So make a small section and see if it covers up the ring neatly. Mine worked, like Lucy’s, in rows of double crochet stitches (Uk terms)  22 stitches wide and 112 rows alternating 2 rows in oatmeal and 2 in chocolate.

To help to keep the strip in place as well as the sewing in the back I sprayed my ring with some SprayMount Yp208060506 adhesive spray, I use it in the office for my mood boards, it is great, but make sure you spray lightly!

now to the FLOWERS:

the yarn is leftovers of STYLECRAFT SPECIAL DK in:

  • storm blue
  • duck egg
  • mustard
  • camel
  • grape
  • lime
  • pale rose
  • parchment
  • gold

you also need some polyester toy filling for the centre of the daisy. If you have none, ordinary cotton wool balls will do.


I made 2 types of flowers :

-10  Hellebore flowers from Lucy’s wreath, pattern link here:

http://attic24.typepad.com/weblog/crochet-hellebore-flower.html

-12  three dimensional  daisies:

the pattern as follow:

The centre of the daisy is done with the same principle of amigurumi, crocheting in a spiral, without joining in the round and without turning the crochet work,

Start with any yarn and a 4.00mm hook and make a magic ring

Rnd1 :

Work 6 dc in a magic ring. ( 6 dc)

Rnd2:

work 2 dc in each stitch. ( 12dc)

Rnd3:

work [dc in next st, 2 dc in next st] repeat [ ] 6 times ( 18st)


Rnd4:

work 1dc in each st. ( 18dc)

Rnd5:

as Rnd 4 (18 st).

Rnd6:

as Rnd4 (18st) put a marker in any of those stitches as a reference for the petals we are going to do after.

Rnd7:

as Rnd4. (18 st).

Rnd8:

we start the decreasing now and your work will start to looks like a little cup.

work [1dc, 2dc together] 6times . stuff your little cup with the filling.

Rnd9:

work 2dc together all around, add some more stuffing and close the bud. ( if you want you can leave a long tail to sew the flower to the wreath later).


PETALS:

with a different yarn work on the side ( rnd6) , using the picture as a reference,

1st ROUND OF PETALS

work :

[1dc, ch3,skip 1 st, 1dc ] all around that should give you 9ch3 loops that we are going to fill up to make the first ring of petals.


in each of the ch3 spaces work: 1dc-1htr-2tr-1htr-1dc.


2nd ROUND OF PETALS

work:

1dc in the skipped st above, 5 ch, skip 1 dc and repeat that makes another round of  9petals  staggered from the petals before the previous round. In  each of the ch5 space we work: [1dc-1htr-4tr-1htr-1dc ]


that makes our 3D DAISY!

LEAVES:

makes 18 ( again make as much as you like!)

the pattern is again from lucy’s @Attic24, this is the link:

http://attic24.typepad.com/weblog/may-roses.html

For my version I used some  leftovers of STYLECRAFT CHUNKY SPECIAL  and  some of the ALAFOSS LOPI I used for covering the ring in:

STYLECRAFT SPECIAL CHUNKY:

  • gold
  • camel
  • dark brown
  • lime ( stylecraft DK)

ALAFOSS LOPI

  • oatmeal heather
  • chocolate heather.

then you can take a few pins and place your little flowers and leaves all around the ring…

hope it has helped

love to you all and happy “crocheting”..( someone told me I shouldn’t use the term “happy hooking”!)

I got a few more things  coming along so stay tuned!!!

lucia xxx


summer’s stories…

Goodmorning everyone 😀

I eventually managed to get some internet and a laptop to download some of my summer’s photos! And also write a small update.

So where to start… I left Scotland at the end of May so to spend some time with my family in Italy; it has been a lovely break for many reasons, mainly because I had some proper quality time with my mum and dad, my cousins in Tuscany and my brother and his family.

My family comes from all over Italy and, during these past few weeks I have been travelling quite a bit, not only to spend time with loved ones ,but also to enjoy exhibitions, museums, the beach, the hills .. the only regret I  have is  the lack of time to visit my beloved Dolomites!

So I got here some lovely pictures of Ferrara, on the Po Valley, where my maternal Grandmother was from,

then I went to Carrara, a small town famous for the white marble on the sea at the border between Tuscany and Liguria, Carrara is where my paternal grandmother came from and my cousins are living and where I used to spend most of my summers before I moved to Scotland 27 years ago.

Tomorrow I am off to southern Spain to catch up with my children and Michael for few days all together…

In the midst of all, I m still crocheting OBVIOUSLY!

Last year, when I came to Italy, I took a lot of acrylics and it was a major mistake because the heat was so fierce that literally melted the acrylic in my hands, this time, I took just cotton and I have been working on several WIPS at the same time.

I have a new shawl that is getting tested at the moment, I am working on a new blanket which is going to be really interesting.

It is a new concept of pattern focused on versatility.

I have taken on board all your messages and requests, I know that some of you are not so keen on acrylic yarns and prefer natural fibres, I also know that cotton is often your choice not only for an ethical reason but also for climate issues.It will be the main subject of my new classes that I got planned for July and the autumn: https://www.poppys-holmfirth.co.uk/wool-shop/knitting-and-crochet-workshops .

So, as it is already quite hot in Italy, the blanket I am making is a cotton one, but I will have an acrylic version available and by the autumn a pure wool one ( very exciting to let you know about this new collaboration I am working on) also different sizes, borders and joining methods too!

so LOADS of interesting new things.


As cotton has been my focus for the past few weeks, I also tested some new yarns.

Just before leaving a Bulgarian company called PERFORMANCE YARNS, https://performanceyarn.com/ contacted me and asked me if I was interested in testing some of their products,  I said that ,as long as I could give and write an honest opinion, I was delighted to try  new yarns, so just before I left I received a pack with 5 different yarns to try, so far I tried 2 of them, as I got quite a few deadlines to work on at the same time.

I tested a blend of 80% cotton and 20% linen called LINEN TOUCH https://performanceyarn.com/product/linen-touch/ and a 100% combed, gassed and mercerized cotton called  COTTON QUEEN MULTI.https://performanceyarn.com/product/cotton-queen-multi/

The linen/cotton  was lovely , it didnt split but ,as it is untreated, I felt it slowed the work quite a bit, I dont know if it is due to the heat or the fact it is an aran weight,  but I felt I was much slower that I normally am, I will try again in Scotland to see if it is a temperature issue only, on the other side the COTTON QUEEN is AMAZING!!!! it glides on the hook, it has a beautiful shine and is incredibly soft too!

Probably the best cotton I worked with so far!

I made a small project, and I used some Scheepjees Catona too to compare the two kinds of cotton, the Performance’s cotton is better, it has the same shine, it doesn’t split but it is far softer which means it will not hurt your hands even if  crochet long hours or you are a very fast crocheter. Such fabulous yarn.

I used mercerized cotton many times but I never heard of ‘GASSED’ cotton, so I found out that it is a different treatment that improves not only the shine but more so the softness of the fibres which makes a huge difference.

I still have three more yarns to test so I will let you know how I m getting on with them.

I never ordered from PERFORMANCE, but the yarn they sent me arrived well packed and very quickly by a carrier. They are Bulgaria’s biggest yarn manufacturer with 80 years of experience. They have an easy website and shop to navigate, their prices are competitive and they do worldwide delivery at 4 euros flat rate or free for orders over 40 euros.

I really like this COTTON QUEEN so I will find out more about the colours available etc once I am back.

As soon I got to Spain , assuming that I got proper internet, I will write some more updates, for now, I wish you all a lovely summer and thank you for reading!

love,

Lucia xx

Cosmic, amigurumi and other stories…

Hello everyone,

Here I am with a new blog entry to keep you all updated on my …never-end stack of Works in progress!!..

So where to start…my obsession with amigurumi is still in full swing…

I got a couple of new books one of which is SUPER CUTE! it is all about bugs and butterflies.What fascinated me is that  Lydia Tresselt, the designer behind LalyLala, is so skilled that made even a fly looking cute!

I attempted a butterfly, is not finished yet, the pattern is beautifully written as  Lydia has been writing amigurumi patterns for a long time.I am sure many of you are well acquainted with her kangaroos and other super cute animals, if not please have a look at her work, it is well worth it a visit.

https://www.etsy.com/uk/shop/lalylala

” Lalylala’s Beetles, Bugs and Butterflies” is her last book, I got it from Amazon a few days ago. It is lovely and a  bit different from the average crochet book, the first part tells a story about the life cycle of the insects and the second part is all about patterns for the different stages of the bugs lives. from caterpillar to adult insect, they look very cute and easy to make.   I think they would be perfect for a child because they are not only lovely to play with but, to a degree, they could be quite educational, as they are not too “human-like “as often happens to amigurumis. on that subject, I have discovered another amazing designer, Sonja van der Wijk , her website is called Son’s popkes  https://sonspopkes.com/

I bought 3 of her patterns on Ravelry, and I got one free I thought to would be a good idea to use some of the Lett-lopi yarn I got in my stash…

if you follow me you might remember the Odinella blanket I made last year using   Lett-lopi.

https://luciasfigtree.com/patterns/odinella-icelandic-blanket/


a fabulous yarn especially for knitting and if you are interested in making outdoors garments or beautiful Lopapeysa ,with their recognizable design that has since become a national icon for Icelandic cultural identity ( I love Iceland!)

I made so many  Lopapeysa over the years, they have been my favourite knitting project. So if you love knitting and you also love the outdoors I would definitely recommend knitting one. They can be a bit scratchy at the beginning but they become amazingly soft with age and also they last a long time!

Francesca, my daughter, has a favourite one  I made for her when she was 16 and she wear it all the time..it has a couple of holes on the sleeves but I think it adds to the charm!

you can see it here.

I also have to finish my last bear and i have to  make a  “VERY PINK” ‘s one for my niece, Aurora, she is going to be 7 at the end of May and she loves pink…

This week I also finished joining together the Camo-blanket for Francesca.. I loved joining together the squares she made ,and adding a border.

More WIP’s…the COSMIC CAL!!  how exciting!!!

I normally don’t do Cals because I am really impatient and I  haven’t done a Cal since the Sophie’s Universe, but I think the Cosmic is a lovely one so I decided to give it a go.https://www.crystalsandcrochet.com/

I have been an admirer of Helen’s work since she started designing, she has recently joined the Stylecraft’s blogstars group and has been a real privilege chatting to her, she is not only a great designer but also a lovely all around person!.  the Cosmic is going to be my first blanket using Helen’s patterns.


Part one went live this week on the Stylecraft’s web site, it is available in English, American and Dutch, but on Helen’s page is translated in many other languages so have a look at Helen’s page! there is also a video tutorial too on youtube which I found very helpful.

I enjoyed the pattern so much that I made 2 versions as I couldn’t make up my mind about the yarn!! I made a Stylecraft SPECIAL DK ‘s one and an Aran weight one with some Drop’s NEPAL that I had at home.


Some of you ladies as asked me about the colours I used on the Stylecraft’s version so here they are: plum/matador/mustard/petrol/empire/gold/bright pink/aspen/magenta/spice/storm blue/fuchsia purple/lipstick/fondant /tomato.

I am not sure yet how I am going to use them and if I will drop a colour or two…as all of you I am following the CAL so is a bit if an adventure!

I also decided to make my life more complicated and in certain rounds, I used 2 colours instead then 1 so again I don’t know if that will work for all the different parts..I will keep you posted, and here is part one of the Stylecraft’s version finished and I am nearly there with the Aran too.

that is all for today, wishing you all a lovely weekend,

the sun shined in Scotland for a couple of hours!…it is back cloudy now..lol

see you next time! thank you for reading

Lucia xx


I AM BACK !!!!!!

I am BACK!!!

I know it has been ages…

I have been so busy trying to finish several projects which I  had committed to it and I  was so frustrated because I couldn’t share any of the work I was doing… but now my last project is live  I am BACK  !!!!!!

It has been an amazing few months!

I have been working flat out on several things.. I should also say  I did take on board a bit too much and at times I was slightly overwhelmed by the all things but now that all the blankets are available it makes it all worthwhile.

The final chapter was to deliver my last blanket to CROCHET NOW’s HQ last month!  very exciting and a bit scary too… The RISE &SHINE cal has been a real labour of love! to create something to keep an audience interested and more so, happy to continue on a project that is going to run over 12 months it is NOT an easy task!!

I really hope you will like it, and with trepidation, I am waiting for the reactions online as it went live TODAY !!!!!!!!!

So I am back writing again… I missed writing my blog, but I know you all have very busy lives and I didn’t want to fill my blog with idle chit-chat and not been able to tell you what I was doing.  so where to start…

Let’s go in reverse order and start with the latest project…

here are some pictures, also you will find pieces of information on the CAL on Crochet Now website… I have a few more pictures but I will post them as the CAL progresses.


The blanket is a CAL and will run over 12 months.

Part 1 can be found in Issue 27 of Crochet Now which will be in shops on Thursday 12th April or available to buy online at www.moremags.com/crocheting 

I have used STYLECRAFT SPECIAL DK, (mainly using 2 strands  held together)  the colours are:


Stylecraft Special DK – 295m per 100g ball; 100% acrylic

3 balls in Mustard 1823

2 balls each in Fuchsia Purple 1827, magenta 1084, Shrimp 1132, Grass Green 1821, Sage 1725, Bright Pink 1435, Emperor 1425

1 ball each in Plum 1061, Fondant 1241, Pistachio 1822, Empire 1829, Petrol 1708, Lipstick 1246

(Important Note: Based on the designer’s tension, 98g of Fondant 1241 and 96g of Empire 1829 were used in this blanket. If you are unsure of how loose your tension is, we recommend purchasing additional balls of these shades.)

Stylecraft Special Aran – 196m per 100g ball; 100% acrylic

1 ball in Lipstick 1246


What I can say, is that it is really great fun, it is a project for everyone and I hope you will love it.

It is all about texture, interesting techniques,  and more so COLOUR!!!

I don’t know where you are based around the world, but for us in the UK has been one VERY LONG WINTER!! we had snow in Scotland up to last weekend.. really  I’m still thinking spring will never come this year!! so the brightness of the colours of the Rise & Shine kept me entertained during the winter months. To be able to create something it can be really tiring and sometimes quite frustrating too…especially when things do not go to plan, but I loved every moment of it.

But thats not all…

two more blankets I designed for Stylecraft went live a few weeks ago… both bursting with colours, one is called HYPNO and the other BOHO…

you can find them as a Pattern  here:

https://www.poppys-holmfirth.co.uk/lucia-s-shop/lucia-s-shop/lucia-dunn-hypno-blanket-cushion-printed-pattern-9527

https://www.poppys-holmfirth.co.uk/lucia-s-shop/lucia-s-shop/lucia-dunn-boho-blanket-and-cushion-printed-pattern-9528

at the same time, I made the Valentina Shawl…for Poppy’s ,

and I wrote the pattern with the help of the ladies at Poppy’s for the Walrus blanket too..they are both available on my shop at Poppy’ s https://www.poppys-holmfirth.co.uk/lucia-s-shop/lucia-s-shop  and soon should also be on my Ravelry’s store.


I will write all about my Poppy’s adventures as it deserves a proper special blog entry!  everyone made me so welcome! and it has been amazing to be able to collaborate with others! but I will do it in a  separate entry,  this one is just for touching base, dust off the cobwebs out of my blog and just let you know I am back again.

So you have: a CAL, 2 BLANKETS, A SHAWL  and the WALRUS BLANKET too…

what am I doing now? …

I am helping to finish my daughter  Francesca’s granny square blanket… she made 180 squares and she panicked a little when it came to joining them so I said I was going to help… ( don’t ask me why…)

I also had a dip into amigurumi…

It all started because I needed a rest from Blankets and I wanted a little project.. if you follow me on facebook you might have guessed I got a bit obsessed with it! no idea why the amigurumis are so addictive!

it might be the fact that you work on a tridimensional plane and that is a bit of a novelty to me… so I started with a Crafter Granny… then I made a bear, then  I made another bear..( which I  still have to complete)..then I tried a bunny but looked like out of a horror movie …then my son Giuseppe asked me to make  a  chameleon for his girlfriend that loves  Tangled’s Pascal.. so I just finished that a day ago ready for her 18th birthday..

I am planning other things too… but I needed a few weeks of not designing, recharging my batteries by just enjoying other people amazing patterns!! and I feel the energy coming back which is a good news indeed!!

So, as I LOVE lists of TO DO’s my new resolutions are…

  • do not take too much work on!!!
  • write at least 2 blogs a month with updates on what I am doing,
  • walk and not be a couch crocheting potato!
  • be more social and not a grumpy bear hiding behind a mountain of yarn…
  • organise some new exciting material for classes ( because I love teaching!!!) and put some dates in the diary.
  • make more videos!
  • last but not least go to London to see my daughter Valentina!!
  • loads of more things that I am sure I have forgotten…

that is all for today! thank you for all your support, I love your messages and all your lovely comments on Facebook and Instagram!

and on that subject just a little note…

I understand how frustrating  it must be not to be able to get either the patterns or the kits for the Eastern Jewels and the Frida’s Primavera because often they are sold out or are not available as digital downloads , but as I replied to many of  you, I just designed both the patterns and I am not involved in how they are distributed.

So please get in touch with ether Stylecraft or Janie Crow if you need some updated pieces of information.

https://www.stylecraft-yarns.co.uk/

https://janiecrow.co.uk/presta/

My only direct contact with the retail status is Poppy’s and I know they have  sold several packs of the Eastern Jewels, ( the Frida’s Primavera is just available  from Jane ) but again they too, as retailers, depend from Jane and Stylecaft for the  printed patterns so please, if you are interested, leave your email with Helen’s at Poppy’s and I am sure that if the packs will be back in stock she will message you .

https://www.poppys-holmfirth.co.uk/lucia-s-shop/lucia-s-shop

HAPPY CROCHET!  thank you for reading,

love to you all

LUCIA XXX

X