ST KILDA

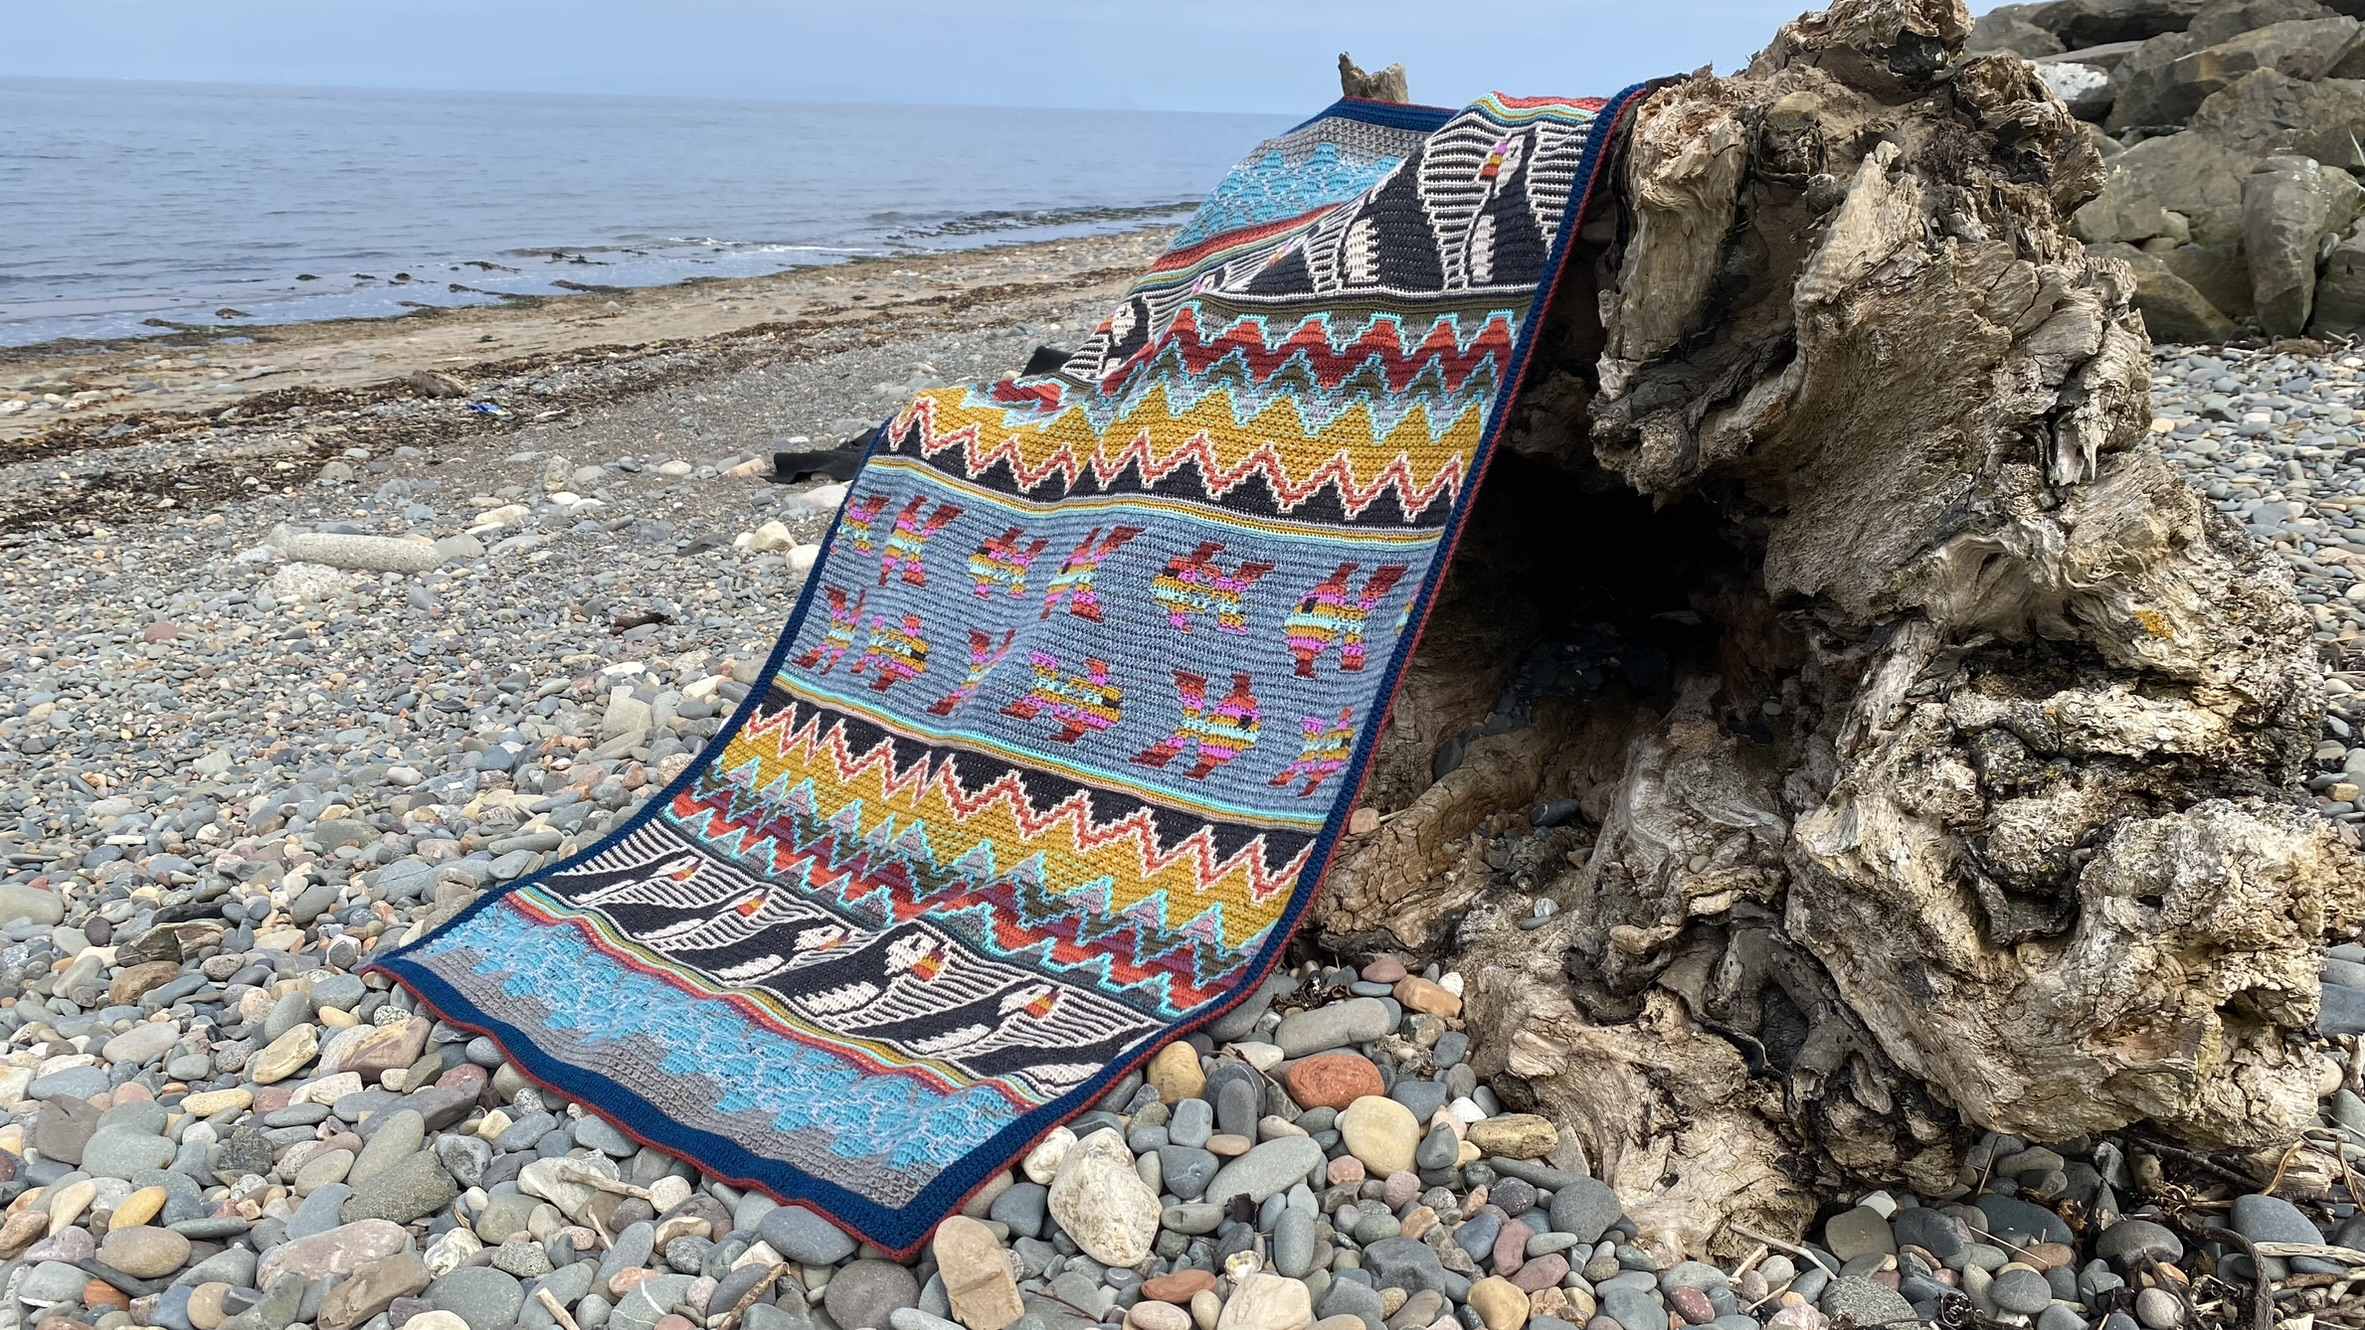
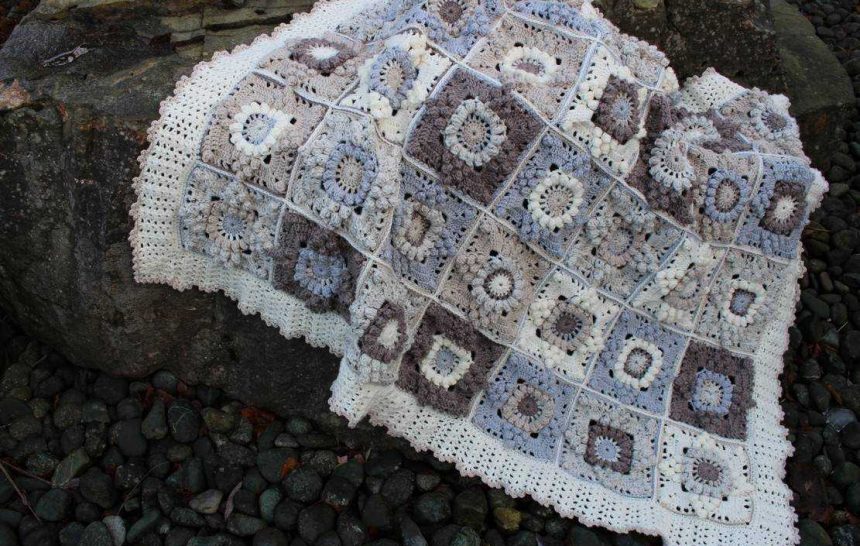
Hi everyone. I cannot believe it is already June…I don’t know if it is the same where you are but here in Scotland, we are experiencing the most amazing and glorious weather!! the sky is blue no rain… and it is a lovely pleasant mild temperature it is just amazing and the perfect weather for taking pictures! So last weekend Francesca and I went by the sea to take a few snapshots of my new blanket ST KILDA…

I am so pleased with this new blanket so I am going to tell you all about it…

Believing or not all started nearly a year ago… I saw on my Facebook an amazing picture that a friend of mine, Stephen took of some puffins…


 I thought they were the cutest thing ever and when something catches my eye it always ends up being an inspiration for a crochet creation…

I always wanted to design a mosaic blanket because I love how versatile this technique is so the puffins seemed to me the perfect opportunity…

There are 2 designers that make the most amazing mosaic creations .. one is my bestie Tinna Thórudóttir Thorvaldsdóttir @tinnahekl who you all know and the other,  I have been following closely, is Abi  at Get Yer Hook On

Abi’s talent for creating stunning blankets is truly amazing, and what’s even more special is that her inspiration comes from the beautiful country we both call home. As a fellow Scot, I was thrilled to work with her on our latest creation – the breathtaking St. Kilda blanket. Through a few chats and a lot of back and forths on design ideas, we were able to bring to life a one-of-a-kind masterpiece that showcases the best of Scotland’s natural beauty. I couldn’t be more proud of the end result, and I’m sure you’ll fall in love with it just as much as I have!

So why we called the blanket  St Kilda?

St Kilda, is an archipelago, and UNESCO World Heritage Site located off the north coast of Scotland, is known for its stunning natural beauty and diverse wildlife.

One of the most iconic and beloved creatures found in this region are the puffins, with their distinctive black and white markings and colourful beaks.


From the delicate swirls of the ocean waves to the shimmering scales of fish, the ocean life around St Kilda provides a rich tapestry of colours and shapes that  provides the most amazing colour palette for  the blanket

In my version I chose moss and granite for the rugged terrain of the island and deep teal for the waters, rusty reds and orange hues from the lichens, the yellows of the gorse… a happy school of fish is swimming in an ever-changing sea and the piece of resistance are those cute puffins hopping in between.


I look at it and makes me very happy and I hope I have captured or at least attempted to give justice to their wonderful habitat.

Now a few details about the blanket so you can make one yourself and have a little bit of Scotland in your home …
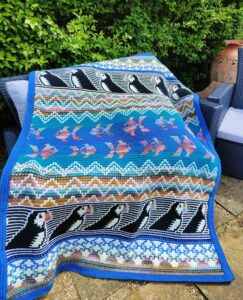
 

Abi’s version


Abi and I have crocheted  2 versions of the blanket and they are both included in the pattern so you have some choice.

Abi version uses some Sirdar Jewelsun and Sirdar Hayfield Bonus Aran


My version uses   Stylecraft Yarn, I love Stylecraft because it is so reliable, has amazing colours and is widely available.

As I am always on a quest for the “perfect” shade I have used 3 different ranges of Stylecraft:  Highland Heather,  Life DK  and a bit of Special Dk, the result is a soft gorgeous blanket, with a hint of tweed that is perfect for our Scottish theme.


So what can I say..to close my blog post? A massive thanks to Abi McIntyre for her patience to put up with me first… I kept tweaking the design.. adding lines, turning the puffins.. and general shenanigans.. she did a fantastic job in transforming an idea and a few sketches into a beautiful professional pattern, more thanks to my forever-suffering daughter Francesca.. that put up with my temper and my amateur dramatic performances on a daily basis, she did the pictures and most of the technical work for our version and to all of you out there that never stop to encourage me to design something new and exciting!

So love to you all and let me see your beautiful St KIldas!!! 

Lucia xx
St Kilda – Digital Download


A little catch-up!

A little catch-up… I know it has been AGES!

I don’t know about you but time has passed me by in a whirl of yarn, patterns, ideas, pictures, stories and the odd family commitment or two..lol

So where to start…

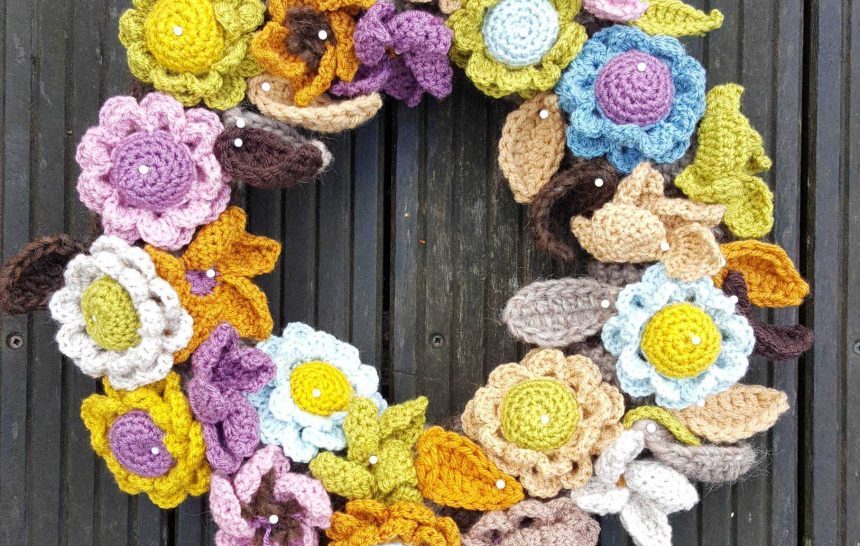
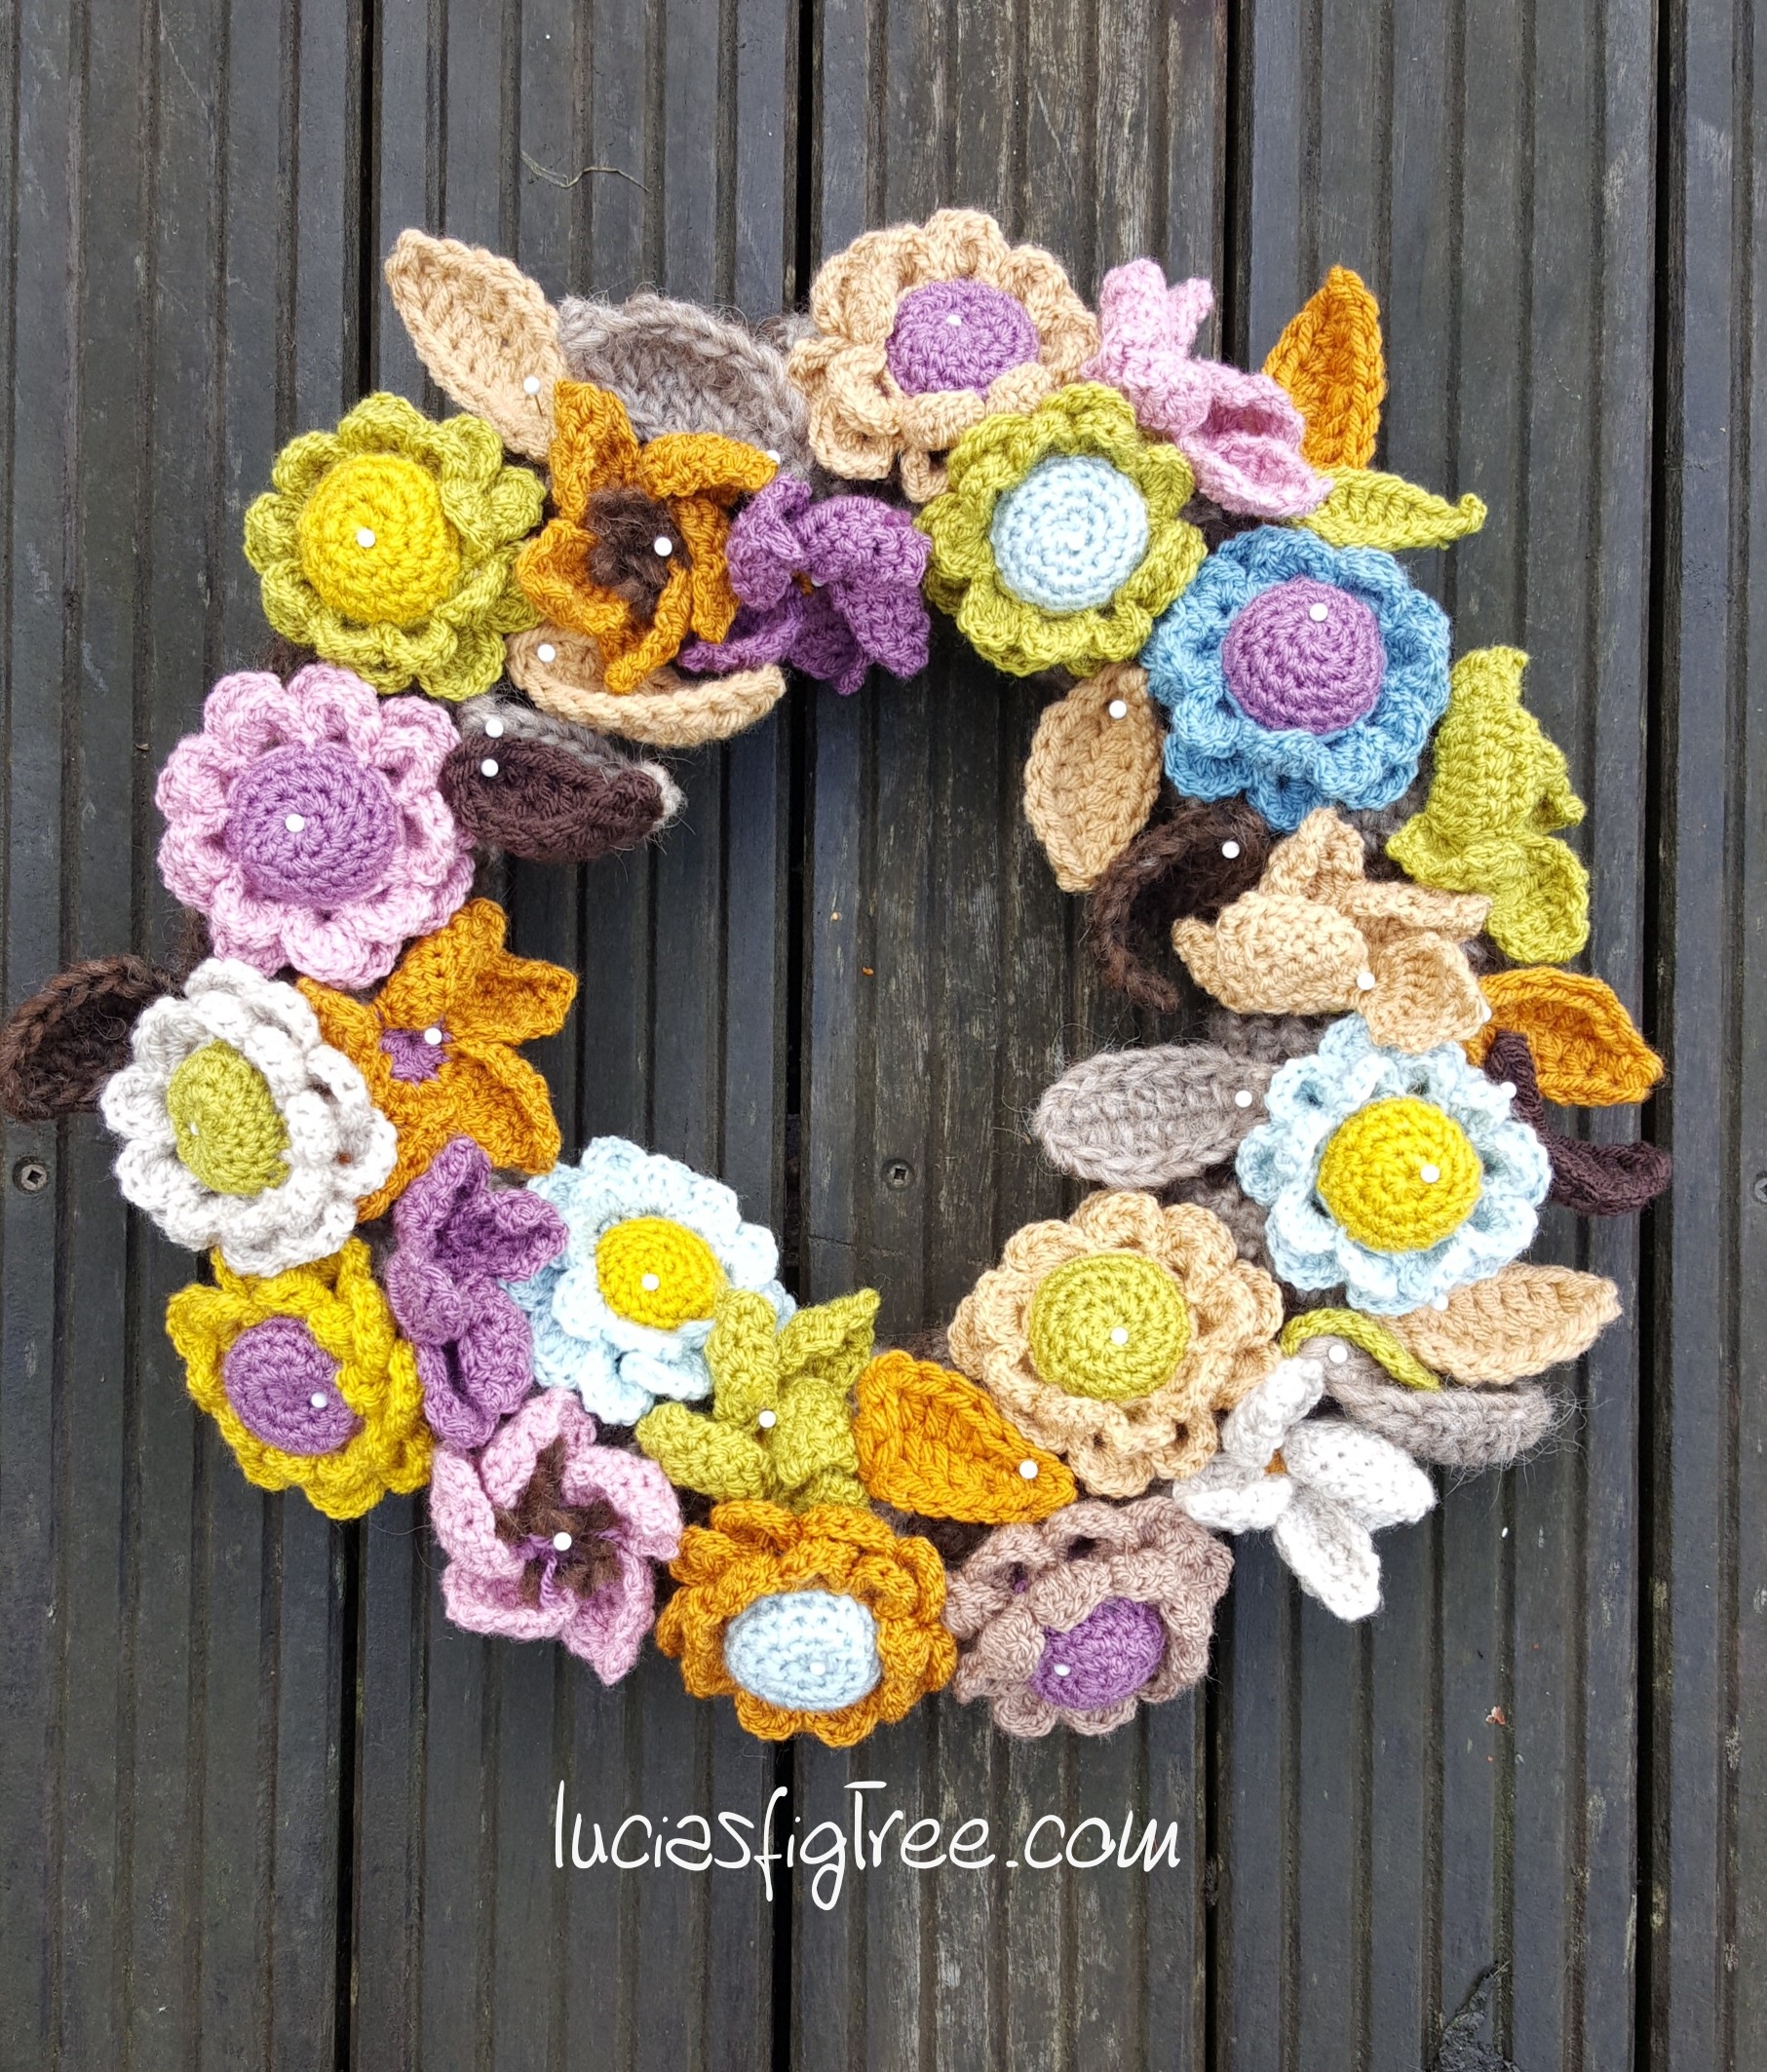
I have pulled together very basic information about the Wreath because I know quite a few of you are interested in it.

I made it, as said, a couple of years ago, I guess I must have been a bit bored and when I am bored of my current WIPs or I am tired, I always look for something reasonably small and quick to make. I call it “instant gratification”

It turns out that in these 2 years I found my wreath really useful, I never, as said on Facebook, stitched the pieces permanently on the ring but I left them pinned down with these little white headspins.  I have used that wreath many times, for trying different colour combinations or using some of the flowers as decoration in pictures of other projects.

So if you need to test some colours instead than doing a lot of boring squares, make some flowers!! Then you can play with them!

There are many wreaths available in both Ravelry and Pinterest that can help you to decide how to make yours, for me, my initial inspiration was seeing the most amazing, beautiful and complicated wreaths that Lucy @attic24 had made and that what spun me making one.

Mine is much more simple in comparison with Lucy but .. did I mention, instant gratification??? LOL

I love small projects that can be made in a day or a weekend!

I have been looking throughout the past couple of days if I had saved any pattern or link or reference, but all I found were a couple of pictures. So for the purpose of this blog I pulled my wreath down and I made a 3D daisy and the 5 petal flower again so I can jot down the details.

so let’s start :

what do you need?

  • 1 half rounded polystyrene ring – 35cm in diameter. It has to be flat in the back and rounded in the front. (you can get them from crafts shops or Amazon)
  • leftover yarns.


Please look at Lucy’s wreaths, she has a very comprehensive tutorial on how to cover up your polystyrene ring and also there are some lovely patterns for the leaves too, which I used in my wreath. this is the link to Lucy’s blog wreath :

http://attic24.typepad.com/weblog/2015/03/winter-wreath-ta-dah-1.html


for the base of my wreath, I used some Lopi’s ALAFOSSLOPI  yarn left over from a jumper it is a chunky yarn, the colours are:

  • 0085 OATMEAL HEATHER
  • 0867 CHOCOLATE HEATHER.


I love this Icelandic 100% yarn because has a rustic, organic feeling, and it makes the most amazing super -toasty jumper ever!

I can’t remember exactely what hook I used but I guess must have been either a 4.00 or a 4.5 mm, you want your fabric to be dense so it covers the ring beautifully. So make a small section and see if it covers up the ring neatly. Mine worked, like Lucy’s, in rows of double crochet stitches (Uk terms)  22 stitches wide and 112 rows alternating 2 rows in oatmeal and 2 in chocolate.

To help to keep the strip in place as well as the sewing in the back I sprayed my ring with some SprayMount Yp208060506 adhesive spray, I use it in the office for my mood boards, it is great, but make sure you spray lightly!

now to the FLOWERS:

the yarn is leftovers of STYLECRAFT SPECIAL DK in:

  • storm blue
  • duck egg
  • mustard
  • camel
  • grape
  • lime
  • pale rose
  • parchment
  • gold

you also need some polyester toy filling for the centre of the daisy. If you have none, ordinary cotton wool balls will do.


I made 2 types of flowers :

-10  Hellebore flowers from Lucy’s wreath, pattern link here:

http://attic24.typepad.com/weblog/crochet-hellebore-flower.html

-12  three dimensional  daisies:

the pattern as follow:

The centre of the daisy is done with the same principle of amigurumi, crocheting in a spiral, without joining in the round and without turning the crochet work,

Start with any yarn and a 4.00mm hook and make a magic ring

Rnd1 :

Work 6 dc in a magic ring. ( 6 dc)

Rnd2:

work 2 dc in each stitch. ( 12dc)

Rnd3:

work [dc in next st, 2 dc in next st] repeat [ ] 6 times ( 18st)


Rnd4:

work 1dc in each st. ( 18dc)

Rnd5:

as Rnd 4 (18 st).

Rnd6:

as Rnd4 (18st) put a marker in any of those stitches as a reference for the petals we are going to do after.

Rnd7:

as Rnd4. (18 st).

Rnd8:

we start the decreasing now and your work will start to looks like a little cup.

work [1dc, 2dc together] 6times . stuff your little cup with the filling.

Rnd9:

work 2dc together all around, add some more stuffing and close the bud. ( if you want you can leave a long tail to sew the flower to the wreath later).


PETALS:

with a different yarn work on the side ( rnd6) , using the picture as a reference,

1st ROUND OF PETALS

work :

[1dc, ch3,skip 1 st, 1dc ] all around that should give you 9ch3 loops that we are going to fill up to make the first ring of petals.


in each of the ch3 spaces work: 1dc-1htr-2tr-1htr-1dc.


2nd ROUND OF PETALS

work:

1dc in the skipped st above, 5 ch, skip 1 dc and repeat that makes another round of  9petals  staggered from the petals before the previous round. In  each of the ch5 space we work: [1dc-1htr-4tr-1htr-1dc ]


that makes our 3D DAISY!

LEAVES:

makes 18 ( again make as much as you like!)

the pattern is again from lucy’s @Attic24, this is the link:

http://attic24.typepad.com/weblog/may-roses.html

For my version I used some  leftovers of STYLECRAFT CHUNKY SPECIAL  and  some of the ALAFOSS LOPI I used for covering the ring in:

STYLECRAFT SPECIAL CHUNKY:

  • gold
  • camel
  • dark brown
  • lime ( stylecraft DK)

ALAFOSS LOPI

  • oatmeal heather
  • chocolate heather.

then you can take a few pins and place your little flowers and leaves all around the ring…

hope it has helped

love to you all and happy “crocheting”..( someone told me I shouldn’t use the term “happy hooking”!)

I got a few more things  coming along so stay tuned!!!

lucia xxx


Cosmic, amigurumi and other stories…

Hello everyone,

Here I am with a new blog entry to keep you all updated on my …never-end stack of Works in progress!!..

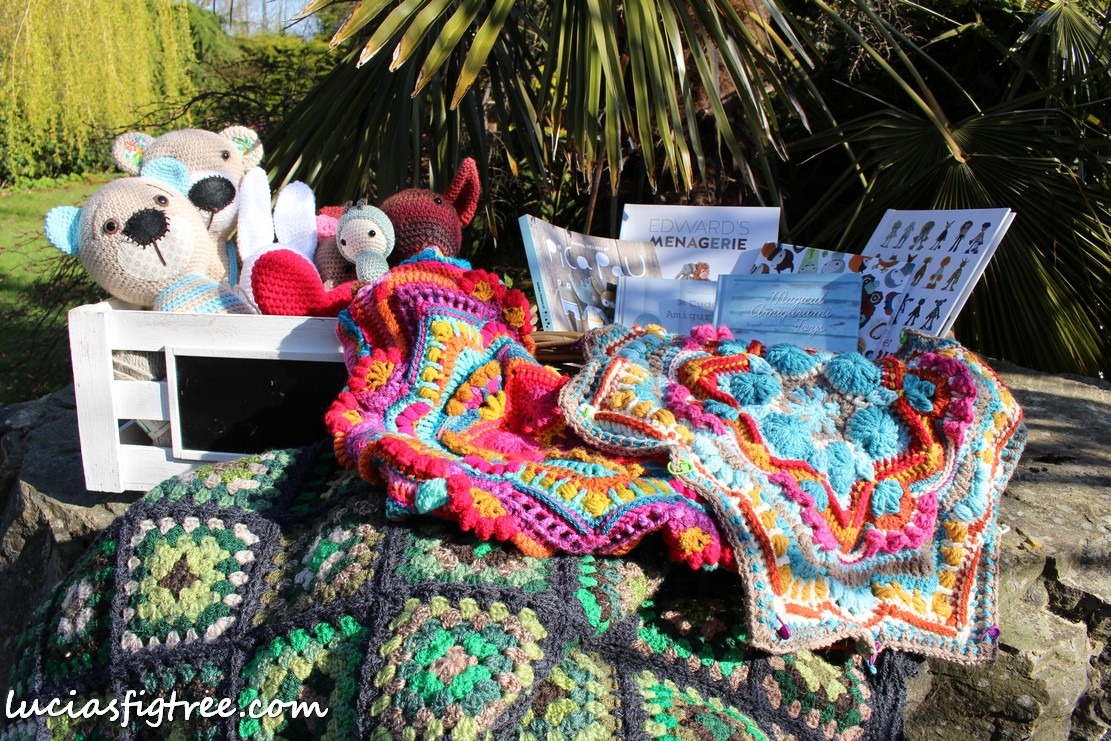
So where to start…my obsession with amigurumi is still in full swing…

I got a couple of new books one of which is SUPER CUTE! it is all about bugs and butterflies.What fascinated me is that  Lydia Tresselt, the designer behind LalyLala, is so skilled that made even a fly looking cute!

I attempted a butterfly, is not finished yet, the pattern is beautifully written as  Lydia has been writing amigurumi patterns for a long time.I am sure many of you are well acquainted with her kangaroos and other super cute animals, if not please have a look at her work, it is well worth it a visit.

https://www.etsy.com/uk/shop/lalylala

” Lalylala’s Beetles, Bugs and Butterflies” is her last book, I got it from Amazon a few days ago. It is lovely and a  bit different from the average crochet book, the first part tells a story about the life cycle of the insects and the second part is all about patterns for the different stages of the bugs lives. from caterpillar to adult insect, they look very cute and easy to make.   I think they would be perfect for a child because they are not only lovely to play with but, to a degree, they could be quite educational, as they are not too “human-like “as often happens to amigurumis. on that subject, I have discovered another amazing designer, Sonja van der Wijk , her website is called Son’s popkes  https://sonspopkes.com/

I bought 3 of her patterns on Ravelry, and I got one free I thought to would be a good idea to use some of the Lett-lopi yarn I got in my stash…

if you follow me you might remember the Odinella blanket I made last year using   Lett-lopi.

https://luciasfigtree.com/patterns/odinella-icelandic-blanket/


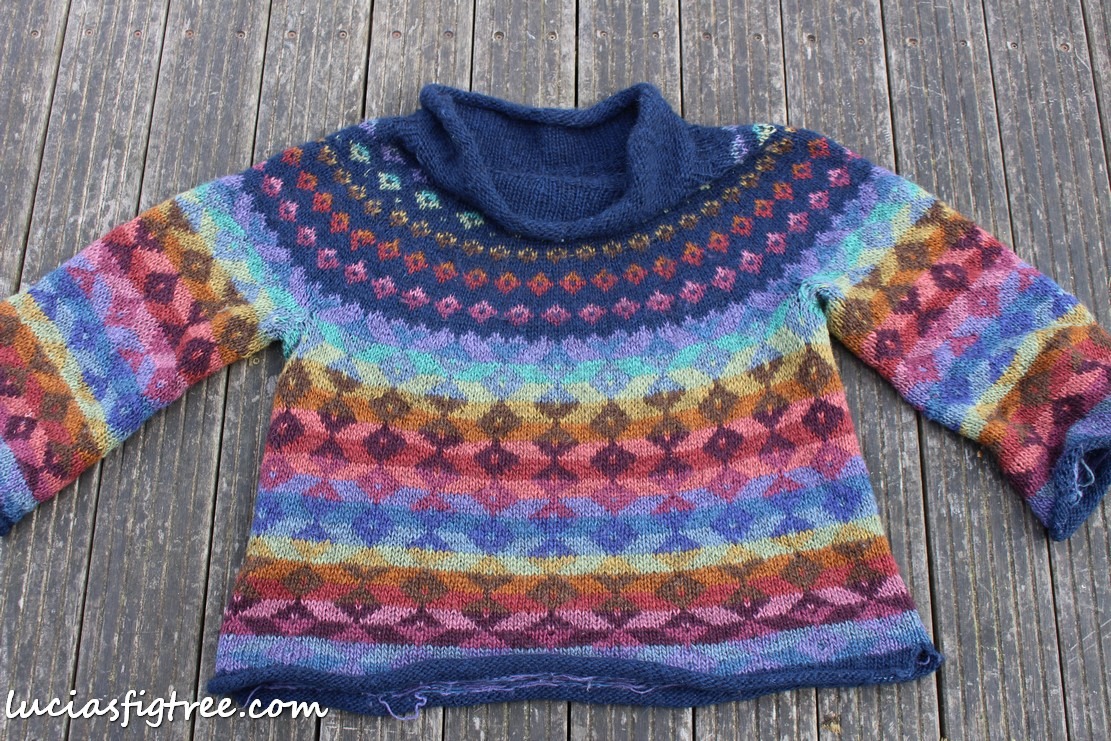
a fabulous yarn especially for knitting and if you are interested in making outdoors garments or beautiful Lopapeysa ,with their recognizable design that has since become a national icon for Icelandic cultural identity ( I love Iceland!)

I made so many  Lopapeysa over the years, they have been my favourite knitting project. So if you love knitting and you also love the outdoors I would definitely recommend knitting one. They can be a bit scratchy at the beginning but they become amazingly soft with age and also they last a long time!

Francesca, my daughter, has a favourite one  I made for her when she was 16 and she wear it all the time..it has a couple of holes on the sleeves but I think it adds to the charm!

you can see it here.

I also have to finish my last bear and i have to  make a  “VERY PINK” ‘s one for my niece, Aurora, she is going to be 7 at the end of May and she loves pink…

This week I also finished joining together the Camo-blanket for Francesca.. I loved joining together the squares she made ,and adding a border.

More WIP’s…the COSMIC CAL!!  how exciting!!!

I normally don’t do Cals because I am really impatient and I  haven’t done a Cal since the Sophie’s Universe, but I think the Cosmic is a lovely one so I decided to give it a go.https://www.crystalsandcrochet.com/

I have been an admirer of Helen’s work since she started designing, she has recently joined the Stylecraft’s blogstars group and has been a real privilege chatting to her, she is not only a great designer but also a lovely all around person!.  the Cosmic is going to be my first blanket using Helen’s patterns.


Part one went live this week on the Stylecraft’s web site, it is available in English, American and Dutch, but on Helen’s page is translated in many other languages so have a look at Helen’s page! there is also a video tutorial too on youtube which I found very helpful.

I enjoyed the pattern so much that I made 2 versions as I couldn’t make up my mind about the yarn!! I made a Stylecraft SPECIAL DK ‘s one and an Aran weight one with some Drop’s NEPAL that I had at home.


Some of you ladies as asked me about the colours I used on the Stylecraft’s version so here they are: plum/matador/mustard/petrol/empire/gold/bright pink/aspen/magenta/spice/storm blue/fuchsia purple/lipstick/fondant /tomato.

I am not sure yet how I am going to use them and if I will drop a colour or two…as all of you I am following the CAL so is a bit if an adventure!

I also decided to make my life more complicated and in certain rounds, I used 2 colours instead then 1 so again I don’t know if that will work for all the different parts..I will keep you posted, and here is part one of the Stylecraft’s version finished and I am nearly there with the Aran too.

that is all for today, wishing you all a lovely weekend,

the sun shined in Scotland for a couple of hours!…it is back cloudy now..lol

see you next time! thank you for reading

Lucia xx


The “art” of blanket planning…a beginner’s journey

I am still thinking if I am going to have a theme or what I am planning for 2018… I have few deadlines I need to honour but after that, I am a free -bird and I can do whatever I fancy.

So in the midst of creating something new and exciting I am also putting together a program for classes for beginners and more advanced crocheters, because one of the highlights of last year was teaching, I discovered that  I LOVE TEACHING! I like the excitement to meet new people, I like the energy and buzz that they bring to the table and I like that they go home, hopefully with some new skills to work with.

teaching to beginners is probably the most challenging of all lessons as it is often their first encounter with this amazing exciting artform and you want to pass on the rudiments of crochet as well as possible,

but at the same time not be boring or frustrating or altogether scary!  so I engaged the help of my daughter Francesca to test some samples of possible projects to make sure that I teach them  to walk before to run as Hussein Bolt! Francesca is great because she can crochet already, she is what I would call a very keen beginner and I think that is a good platform to start with.

While testing and chatting about several possibilities she said she wanted to make a blanket “all by herself” for someone very special… so I started to say ..ok what do you have in mind, what size, what colours, what yarn …etc.


It became apparent to me that you can make an original, interesting and exciting blanket from scratch even if you are a beginner, just following some basic rules.

So that is what this  Blog entry is all about a beginner’s journey…and I will keep you updated on her progress and you might find something interesting to use on your projects at home.

So where to start…

WOOOW SO EXCITING I AM GOING TO MAKE A NEW BLANKET!….

then comes the frantic search on Pinterest , Ravelry, magazines, books, social media, and patterns of all sorts.. which is all good.

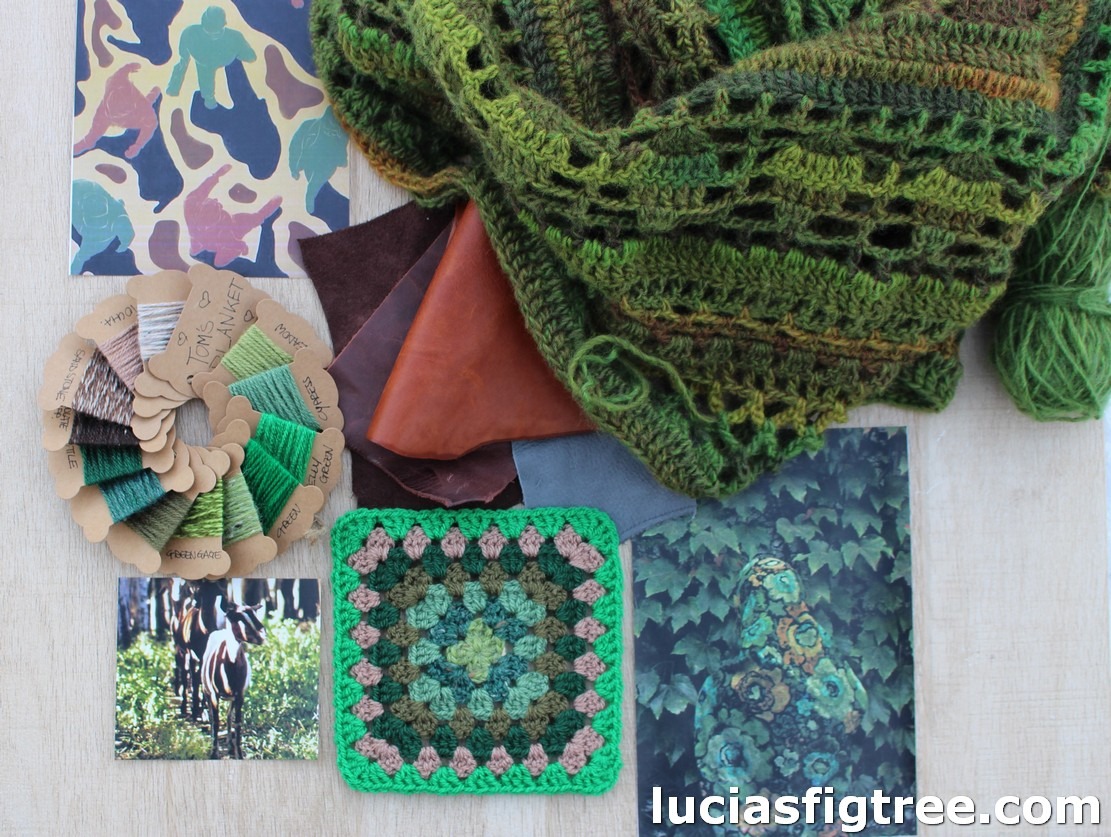
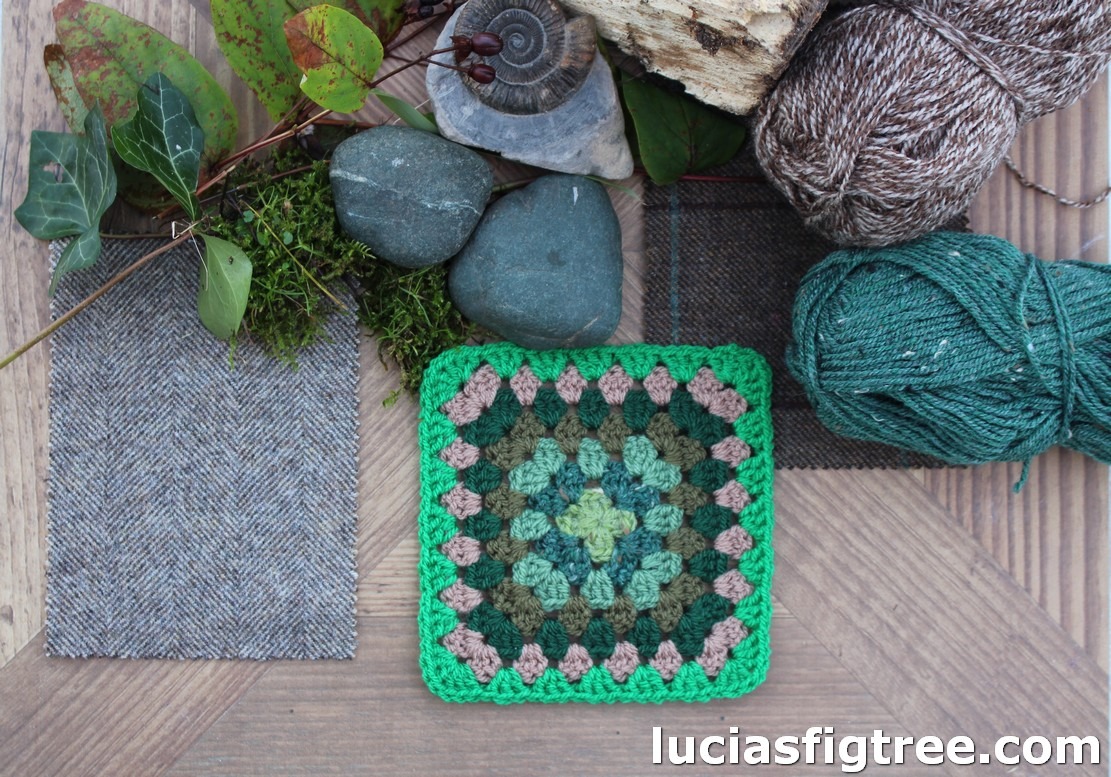
So I encouraged her to collect things, scrap of fabrics, leafs, stones , anything that can create a visual map .  Even the process to combine them all together it is very important because you can focus on the colours and that will reflect on the choice of yarns you are going to make . so make a bord, take a picture with your phone and THEN CHOOSE THE YARN!!

Bring the picture with you at your yarn-store or use it as reference if you shop on line  or even to select some hues from your stash..( because we all have one of those…).

So Francesca collected things she likes and patterns she finds interesting, but also I reminded her that if you make something for someone else your search should be focused not on the pattern you like or you want to make yourself, but on what he/she would  like to have!

She made the boards and took the pictures herself  …so this is a collaboration project!

Some nature’s inspiration….and , by the way, you do not need amazing skills or amazing landscapes, travelling or what so ever…just go outside !!!

Very often you see on social media fellow crocheters complaining that they spent a lot of time, efforts and money making  what they thought was a lovely blanket ar scarf or whatever but they encounter  a very  tepid reception. Now I do believe there is always a rogue one that no matter what you make he/she still could not  careless but you will find that 99% of the  time people love receiving a handmade gift made with  love. .. BUT  you must follow a few rules to succeed…

I have to confess, I have seen some shockers on my computer that made me think ..oh well no wonder it didn’t work out!

FIRST RULE:

ARE YOU SURE HE/SHE WANTS A BLANKET?????

that is a GREAT START  to figure that out first!  maybe he /she prefer a new t-shirt, a pair of shoes, a concert ticket, been taken out on a special day, a Transformer, some Kyle Jenner’s makeup or a gosh.. a Gucci bag! I don’t know..million of different possibilities and remember

if he/she doesn’t really want a blanket it is not all lost! don’t get upset or deflated..just MAKE A BLANKET FOR YOURSELF ! or find someone else 😀

SECOND RULE:

DO NOT BITE OFF MORE THEN YOU CAN CHEW!

aghhhh really delicate point… I know we all have seen the most amazing and intricate blanket and we want to make one exactly the same but you must  be realistic and not only look at your budget but also at your abilities especially if it is meant as a gift. it has to be right..none of that malarky “ohh I miss 2 stitches on my round 23..now I am at round 37  should I unravel and fix it?…if you noticed the answer is always YES!! totally utterly YES!!! I can’t stress that enough..the idea that you could call it unique means you are kidding yourself on ,it is like baking a cake and forgetting the sugar, apologies if I am being a little bit harsh.

I am going to tell you a little story… after the Frida’s  Primavera was released I had a lot of emails from ladies showing me their progress and I really loved to help and  compliment them on their efforts.. but I also had a lady who sent me a picture of the blanket and one of the  hexagons had only 5 sides… she  had joined the blanket and said to me..I know it has 5 sides and not 6 but will it be still ok? can you tell me how can I fix it ?.. what could  I say? there isn’t a nice way to say…sorry but you have to unravel the all blanket because it doesn’t look right.. I did say that and I don’t think she was very impressed at all.  I wish I had a “Magic Wand” or an a “Aladdin’s Lamp” to correct mistakes , but trust me..mistakes have to be fixed. I made tonnes myself and I have had to unravel countless times until I am entirely happy with it.  So the bottom line is;

if you see it, others, even if they do not crochet,  will see it too.


So CHECK YOUR WORK! and more importantly practice your square until you are completely happy with it,  before embarking on a full blanket!. It takes just maybe an evening  to practice a  motif or a  square,  please make a swatch of the stripe, or wave or  whatever pattern you plan to use..and I know it might be a bit boring and you are excited to start, but it will save you time and frustrations in the long run.

I have been going on a bit of a tangent..let’s get back on track…


so my advice is simple;


Do not bite off more you can chew.

Swatch whatever you think is good

Believe and be comfortable that you can do it.

And  tackle the project head on!


Please always remember, that  it is MUCH BETTER to make a beautifully executed properly planned, humble, granny square’s blanket, than  a wonky striped blanket or a complex hexagon blanket with  one of the sides missing .

Back to Francesca’s blanket…

As the blanket is for a guy she didn’t want a fussy pattern and she opted for ..the granny square. and I am very happy she did that because it allows me to show you what amazing potentials a granny square has!

So she did a few samples..until she was happy with it..then came the part I like most COLOURS !!! I leave you with a picture…and  I will tell you the story next time 😀

love to you all,

Lucia xx
Annabelle’s blanket colours and few more stories….

my plan to write a blog entry last weekend didn’t really work…due to a flu epidemic that left most of us floored for a few days.

I am on the mend now so I thought I could catch up with this.

Firstly I would like to say a BIG THANK YOU for all the lovely comments on the colours choice! I  thought Caro’s pattern was really lovely and unusual and it worked really well with the bright colours  I used.


Here is the link to the original pattern just in case you missed it on Facebook, as said, I bought it on Ravelry.

https://www.ravelry.com/patterns/library/baby-blanket-in-overlay-crochet

and this is the list of the colours and yarn I used for my version:

STYLECRAFT SPECIAL DK :

1 ball each in:

spice,fondant,fuchsia purple,magenta,mustard,aspen and buttermilk.

STYLECRAFT BATIK DK :

2 balls each in :

pistachio and coral.

a note on the quantities…

I listed what I started with, but as you know, I made the 48 squares suggested in the pattern, but I ended up using just 20 squares for Annabelle  because I wanted the blanket to be stroller’s size as I found it is  a very practical option to give as a present, they are not too big, they can be carried everywhere,  they can be fold and stuffed  in a bag if  not needed and, in my experience, you can get the most use out of it


So if you are thinking to make a blanket for a baby I would suggest anything between these 2 sizes:

a minimum of   60cm x 75cm  to  75cm x 100cm .

Annabelle’s measures: 65cm x 85cm and you can see it “in action” here…

How cute are Annabelle and her sister Rose? I was delighted that Siobhan and Andrew were ok with me sharing this lovely picture of their beautiful girls with you, so you have a chance to see the other blanket I made for Annabelle’s older sister, Rose when she was born two years ago. It still looks great and I am so pleased they use it all the time because that is what blanket -making is all about! making something that is useful, that can be washed, that can be dragged around and snuggle under and if the colours make you smile that is an added bonus!

Next, I have to organize my thoughts for 2018…

I have several things in mind and a few projects I have been working on, behind the scenes,  coming up too.

it is going to be a VERY exciting year! as I am NEVER tired to crochet, I have a head full of colours and ideas. but my aim this year is to take on board all the comments and advice I gathered in 2017 and to make my work more accessible to all of you out there, I want to do more classes so I can pass on my passion for this amazing craft , I want to be less erratic with my blog entries and improve my online presence too…

It is going to be a lot of work but it is going to be great fun too so stay tuned!


lots of love,

Lucia xx


November blanket: the WALRUS HUG

Ok it is December already… and I finally found the time to write a post about the November blanket. I don’t really know where my days go especially at this time of the year, it feels like I am always chasing my tail! I had a couple of project to finish and deadlines at work too. plus we had a bit of a drama with frozen pipes and burst pipes… the joy of living in a house that is 200 years old…

any way back to the Blanket..do you like it?


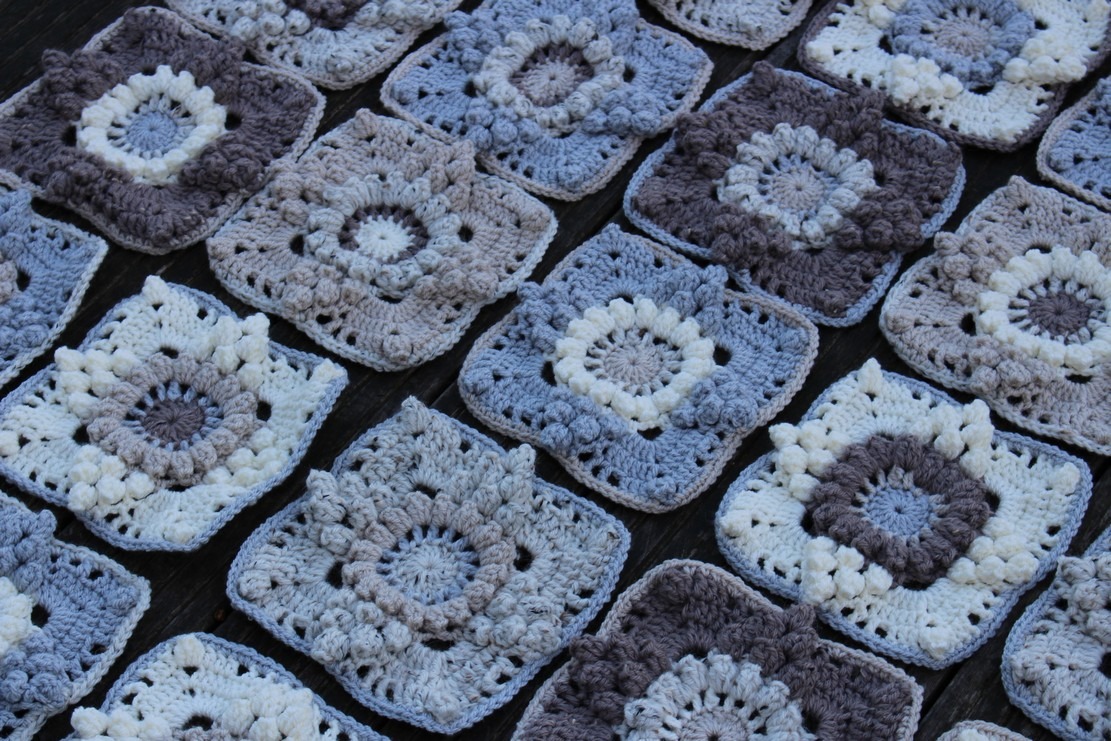
I started joining the pieces together at the end of November and finished the blanket a couple of weeks ago . Joining the pieces is one of my favourite parts as the blankets start to take shape. Until this stage, it is a bunch of squares that “should” work nicely together, that is what happens when you start a blanket from scratch without a pattern to refer to- so there is always some risk involved!


It might be a bit daunting to create something from scratch but it is very exciting too, until the end you don’t know if it is going to all workout or if it is going to be something “OK “… I make several attempts before getting it right, and there isn’t really a plan of action. I do start with an idea of a general feeling, then I try to match the yarn to that feeling.Then I look on the internet for images that might convey my idea, as inspiration, then …even if I have been doing that for many years, I still need to put them on a scrapbook. There is nothing like a visual aid if you plan a blanket and that is what I was teaching to the ladies that came at Poppy’s in November.

On that matter if you haven’t read it, please read the Blog entry that Sophie from Stylecraft did of the weekend, it is so well written and has lovely pictures too…I was far too busy chatting and playing with the yarn that I took virtually no pictures at all!!!

This is the link if you haven’t read it yet….https://stylecraft-yarns.co.uk/blog/lucias-eastern-jewels-workshop-at-poppys/

so back to the blanket.. why WALRUS HUG?????

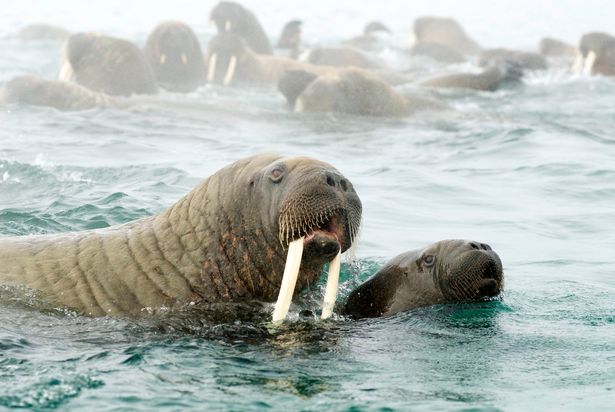
Well, there is a story behind… Like many of you, I crochet while doing other things, especially at night, I might listen to audible if I need to keep my eyes on the project, but if it is something I am quite comfortable with I watch TV with the family. One date that we never miss is a Sunday night Sir David Attenborough’ s BLUE PLANET 2. All my kids love it and we make a point to watch it together. It is a bit of  a routine..cups of teas, biscuits, blankets, I always have a WIP in my hands, but I choose something easy so I can follow the program at the same time…( I have been known  to crochet without looking..) Blue Planet is amazing, I watched all David Attenborough’s programs but there is something really special about this last one. I think it is not only about the amazing, extraordinary beauty of the world that we are living in, but there is also an emphasis on how important it is to be aware of the fragility of the environment. What we can do, even on a simple domestic scale, to make a difference.

Nothing hit home as obvious as the mother walrus, swimming in the icy waters of the Arctic , holding her exhausted pup as she grows increasingly ­desperate to find a resting place for herself and her baby. As ice flows diminish, she finds competition for a spot is so fierce she must fight her way through the other breeding walruses. It brought tears to my eyes and all my children were the same…that is why it is so important for them to see programs like that.It creates an awareness of the situation and it might help in the long run.

That is why the blanket is called a walrus hug, it doesn’t matter if it is a human or another mammal, the maternal instinct is always there to protect, comfort, and keep our children safe. A blanket, as trivial as might be, can help to make something feel better.  So while I was watching the program I thought about the blanket I was working on in my lap and that is how the name came along.

If you have a chance do watch  BLUE PLANET 2, it is amazing and such a breath of fresh air in a very disappointing selection of programs to watch with the family on a Sunday night.

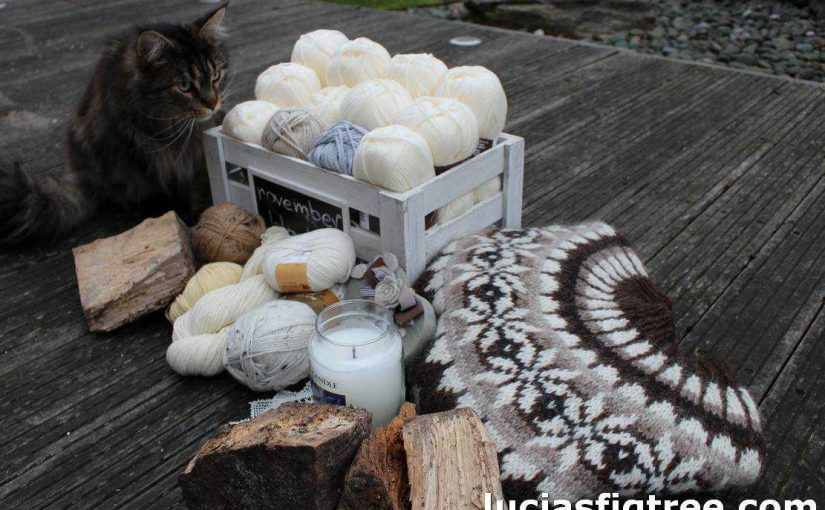
so here is my walrus hug..it is heavy, cosy and perfect for the season.

I am writing the pattern and I am determined to get it out before the end of 2017!! so yeah still a few days in the office then Christmas then hopefully some chilling time and plenty of crochet ahead! so wish me luck!

I am getting there..well maybe 😀

happy crochetting and thank you for reading,

Lucia xx


November blanket….time to cosy-up!

Halloween is over, yesterday we had the first frost, so as the temperatures plummet, no excuse is needed to wrap up warmer…and that is what I am aiming for with the NOVEMBER BLANKET.

I like the colder months very much, I do not mind shorter days, the cold, the wind and the rain as the key to enjoying this time of the year is to surround yourself with the softest, cosiest textiles around and maybe the odd hot chocolate or two….

Chunky knit, throws but also some soft cushions, maybe a sheepskin rug, some lovely scented candles, mood lighting ..it is all over magazines and shops windows as a way to create a perfectly plush refuge from the wind and rain and to lighten up your home as the days get shorter.

This trend is getting more and more popular, and has a few names: it is called Hygge, Gezellig and many other names…all of which encompass this desire for something cosy, nice, homey, friendly, snuggly, fun, comfortable or enjoyable…I guess it’s a feeling rather than a word.

It is everywhere… I went to IKEA a couple of days ago to get few bits and pieces ( they have the best and cheapest unscented candles…)  so I took a couple of snapshots with my phone of some neutral interiors set-ups, I always feel IKEA is a good indicator of what is trending and what people are seeking.


so I decided for this month I am going to go cosy, chunky and neutral!


neutral what a word for me!!!

I love colours and I am always surrounded by colour but for this month I thought would be fun to step out of my comfort zone and try something new and go NEUTRAL…

How scary!

so where to start..

the first thought that came to my mind was my nightmare hue, the unnameable one …it starts with an “M”…

the colour of the 90s: If like me you are 50 something you know EXACTLY what I am talking about, it  was omnipresent and everywhere, public spaces, hotels, new homes, old homes……well I bet you guessed what I am referring but I might write it down just ONCE: “m-a-g-n…” I bet ALL of you have used, have lived with, have bought a tin of…

MAGNOLIA!!!

I still have nightmares of designing houses and been told that the colour for walls, ceilings, woodwork and everything else that could be painted, was going to be magnolia, because “it goes with everything, it looks clean and fresh…” and me thinking “gosh not AGAIN!!!!”

Now I think that nearly 20 years later, neutral rooms don’t have to be a bore.

the trick is to create contrast and avoid everything been ” too plain and too matchy”  because that is what causes dullness is the same tonality;  so what is vital is to play with the saturation levels and undertones to create a warm, calming, inviting environment that has still freshness and crispness.

Another key to ban dullness is TEXTURE, and that is chunky yarns, sheepskins, washed wood, earthy pottery, candles, greenery and maybe even a pet!

Now if you go in a DIY store you find rows upon rows of neutral colours and undertones available for your home.

What I find really funny is that they aren’t called white, cream, beige, pale grey anymore…

they are called…

newborn, falling snow,lambskin..polar drift, icing sugar ..hahhaha you name it!

said that one thing is true…neutral colours, when used properly, work anywhere and everywhere.

So this is my challenge this month a neutral blanket!


I have already made a sample or two, I cant make up my mind yet about which one of the 3 colours to choose …so I have to sit on it for a little while I guess…


Chat  to you soon,

love you all,

Lucia xx


The August blanket: when things do not go as planned….

My august blanket…you might all think what happend?

Normally I blog a few times during the month and I have a ‘plan’  but blankets can have a mind of their own and this one took a different route.

This blanket was not going to be a place or a painting or a memory. This blanket was going to be about something really special that comes with blogging.

Blogging for me is about throwing  all your dreams, time, passion and the odd ball of yarn…  to this virtual space like paper airplanes. Some are just not meant to fly and they dive down or land on a puddle. However, some take the wind and they bring back amazing things, they bring back possibilities, new ideas, even more, paper in magazine articles’s form or patterns, but my favorite planes are those who bring me back friendship.

We all need that. It is as important as the air we breathe.. it keeps us healthy, focus our minds, helps us when the chips are down and also help us to celebrate good things.

I am sure there  are many more  reasons why people blog, people blog for support a cause or sharing information that matters to them, people blog for expanding their business, or for financial gain, some blog to educate others on different topics, but a lot of people blog for fun and sharing things that they like. Regardless what your reasons are often the  audience you attract through blogging doesn’t have to just be your “audience.” They can become your friends

I think deep down that is one of the main reason why many bloggers spend hours upon hours writing. Of course, I am not so naive thinking that it is all pink and fluffy and some of us are out there for purely personal or financial gain but I m pretty sure that loads are there because they genuinely want to share their passion with the world

Blogging is an amazing platform to communicate and share experiences, dreams, passions and is not just a one-way route, the best part for me is all of you out of there. I love getting comments and response, I love knowing that we have something in common, we share an interest but sometimesI found that crochet opens the doors to much much more that goes beyond some lovely comments about a well-executed blanket.  Crochet opens the door to friendship… such a big word!

So you might are wondering if I am diverting once again, but I am not..Ok I m maybe taking the scenic route to come to the point. The August blanket is about the online friends I made been a blogger.

I met a lot of amazing people been on social media from all corners of the world which have inspired me with their amazing creations, kindness, patience on putting up with my chaotic mind and most of all general good chat.

If you have seen this picture I posted on Facebook at the beginning of the month, you might have noticed the beautiful Durban girl square designed by Jen from Hooks and Tales. https://hooksntales.blogspot.co.uk/

in this past months I have been chatting with Jen about many things and not only crochet, she is a most extraordinary lady with a track loads of talent and a great deal of humanity too. After chatting with her I was going to make an amazing blanket using some of her beautiful patterns. So I left with a bag full of yarn ready for ACTION!!


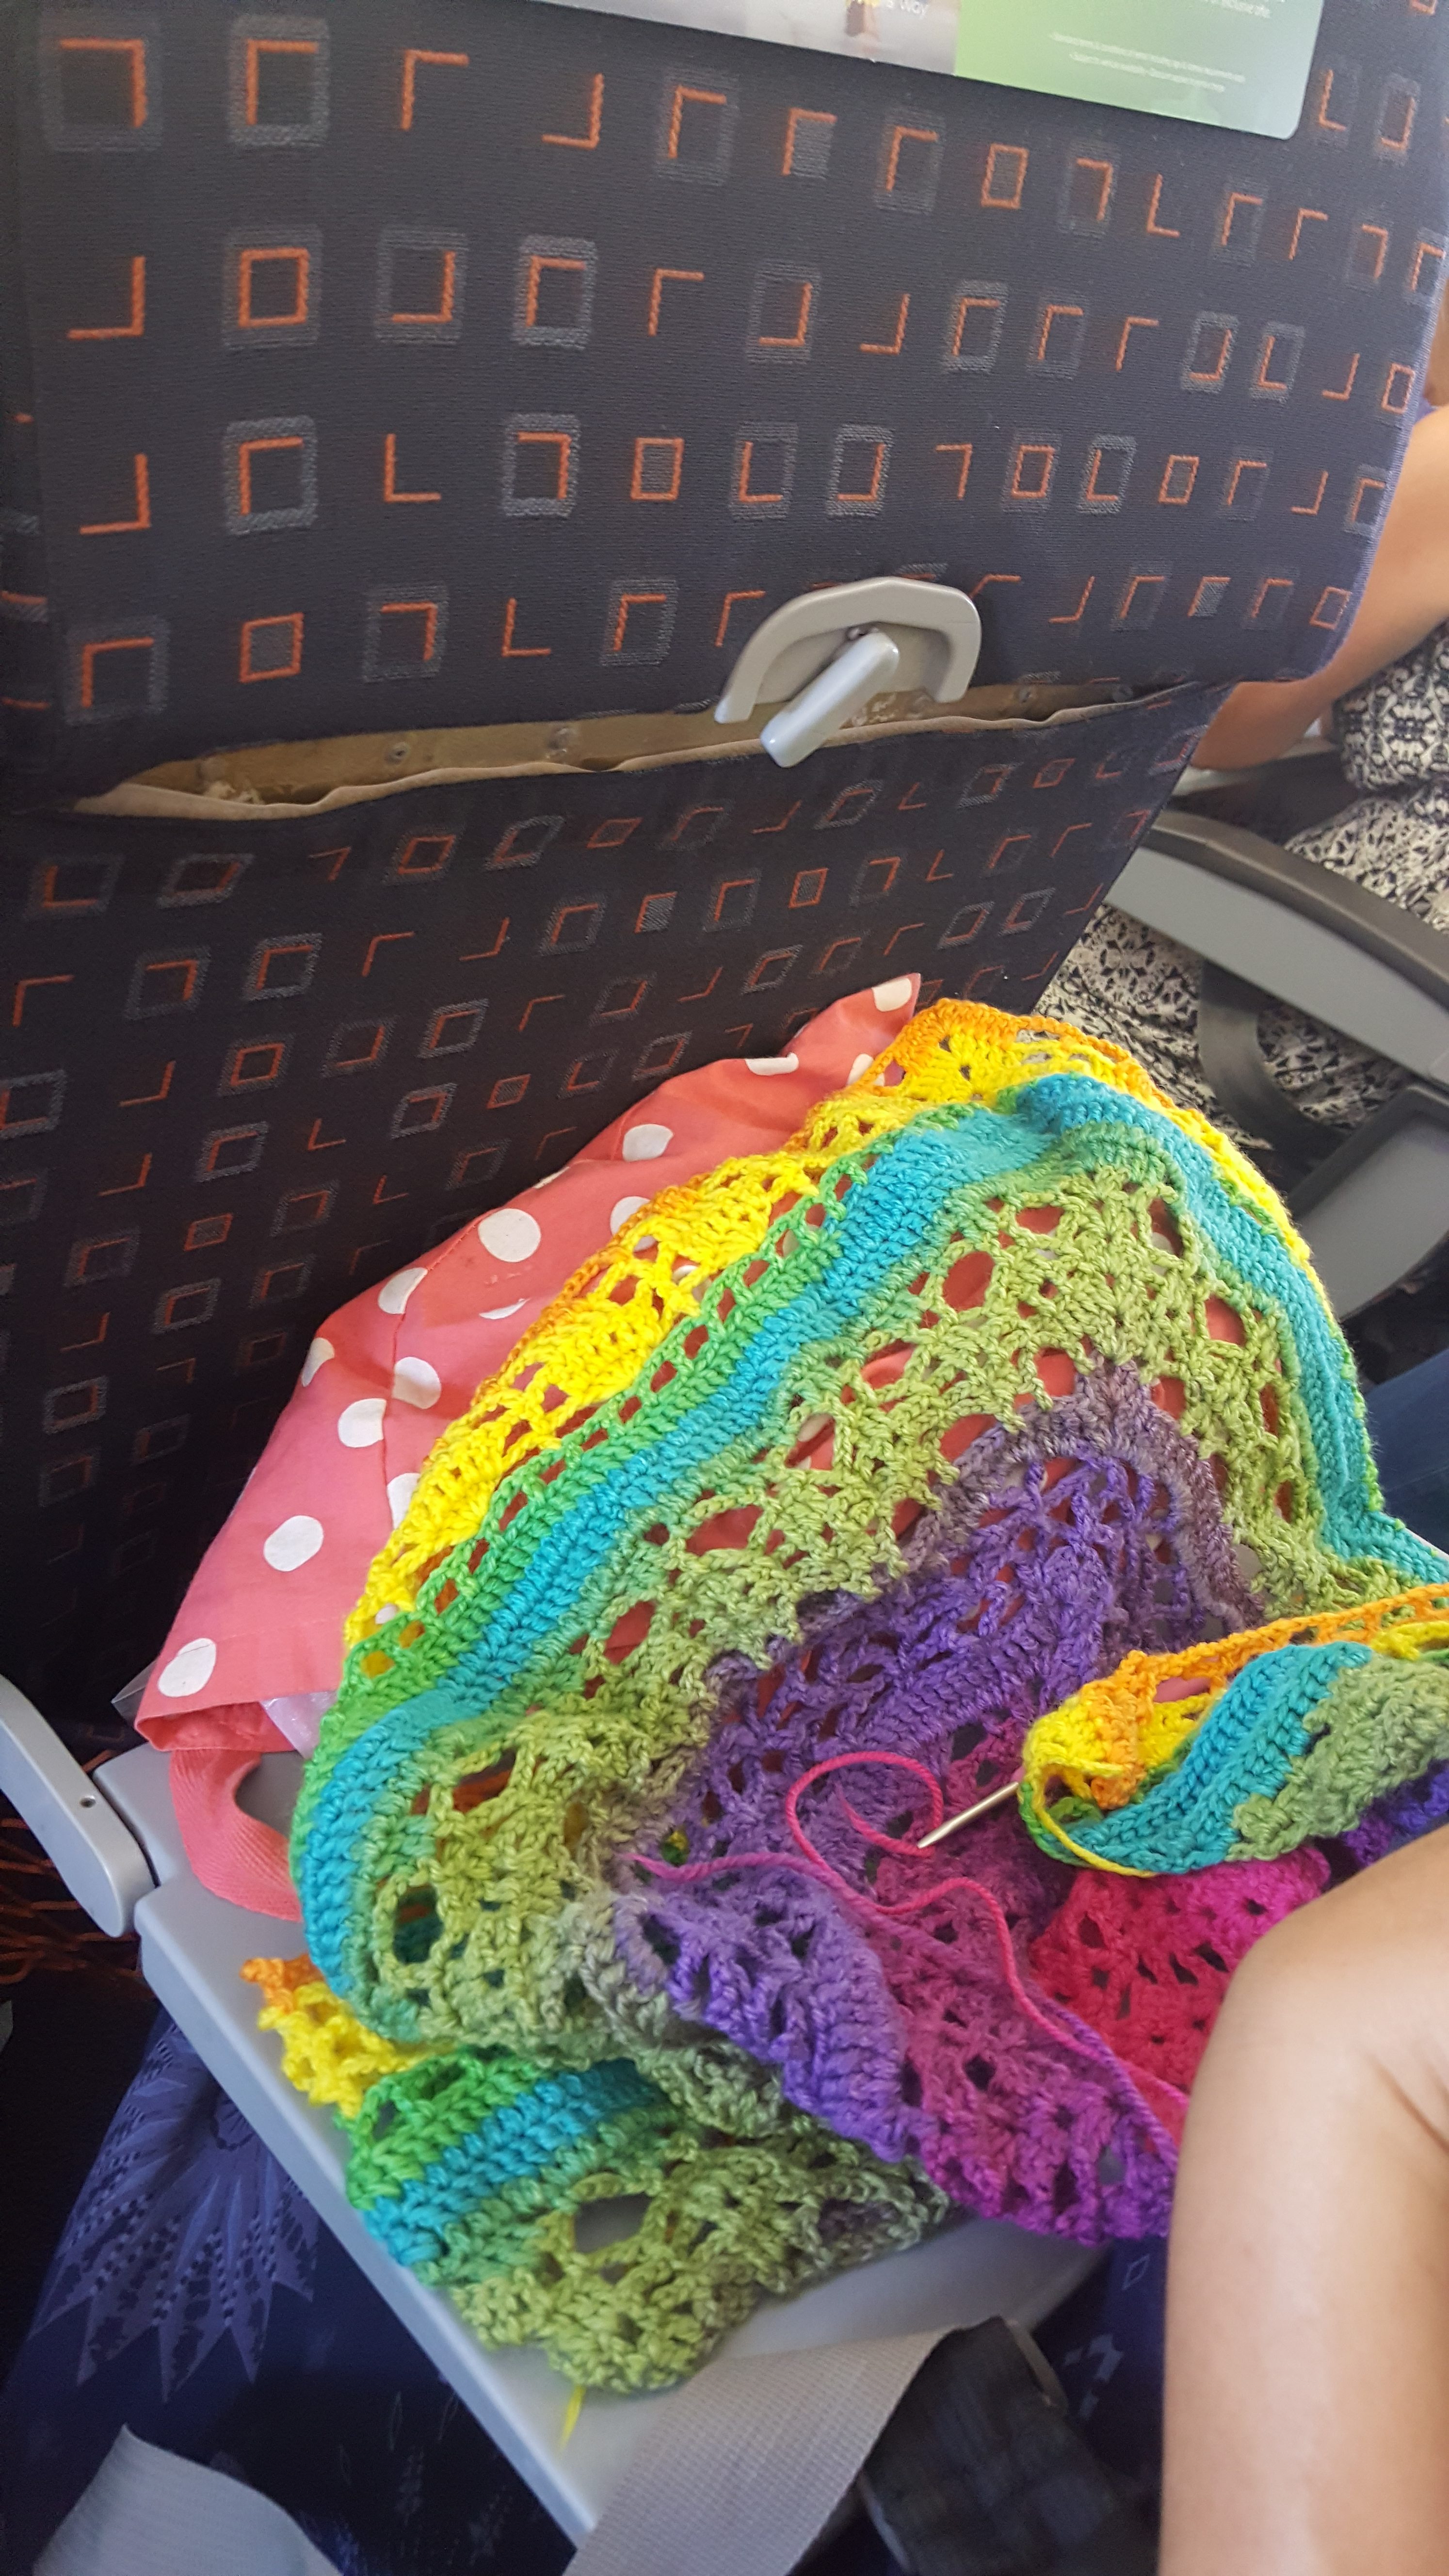
Then I boarded the plane…with some planned plane-friendly yarn and small project because there is always some crochet you can do on a plane that doesn’t involve invading your fellow passenger’s space with scissors, loads of balls of yarn…


Then I landed in Venice…

and I got HIT BY A WALL OF HEAT! I obviously was aware that the difference between Scotland and Italy’s temperatures is huge, but I wasn’t expecting 41 celsius!

I suspect 25 years in Scotland lowered my tolerance to the season but I found the heat so fierce that it made working with acrylic an impossible task even if with air conditioning. So disappointing…

all my plans had to be revisited…

My parents live in a small village now at the foot of the Euganean Hills in a region called Veneto. My brother lives there too with his family. It is the Pianura Padana or the Po Valley and with Bologna, Florence and a handful of other urban areas probably the hottest /humid place in Italy.

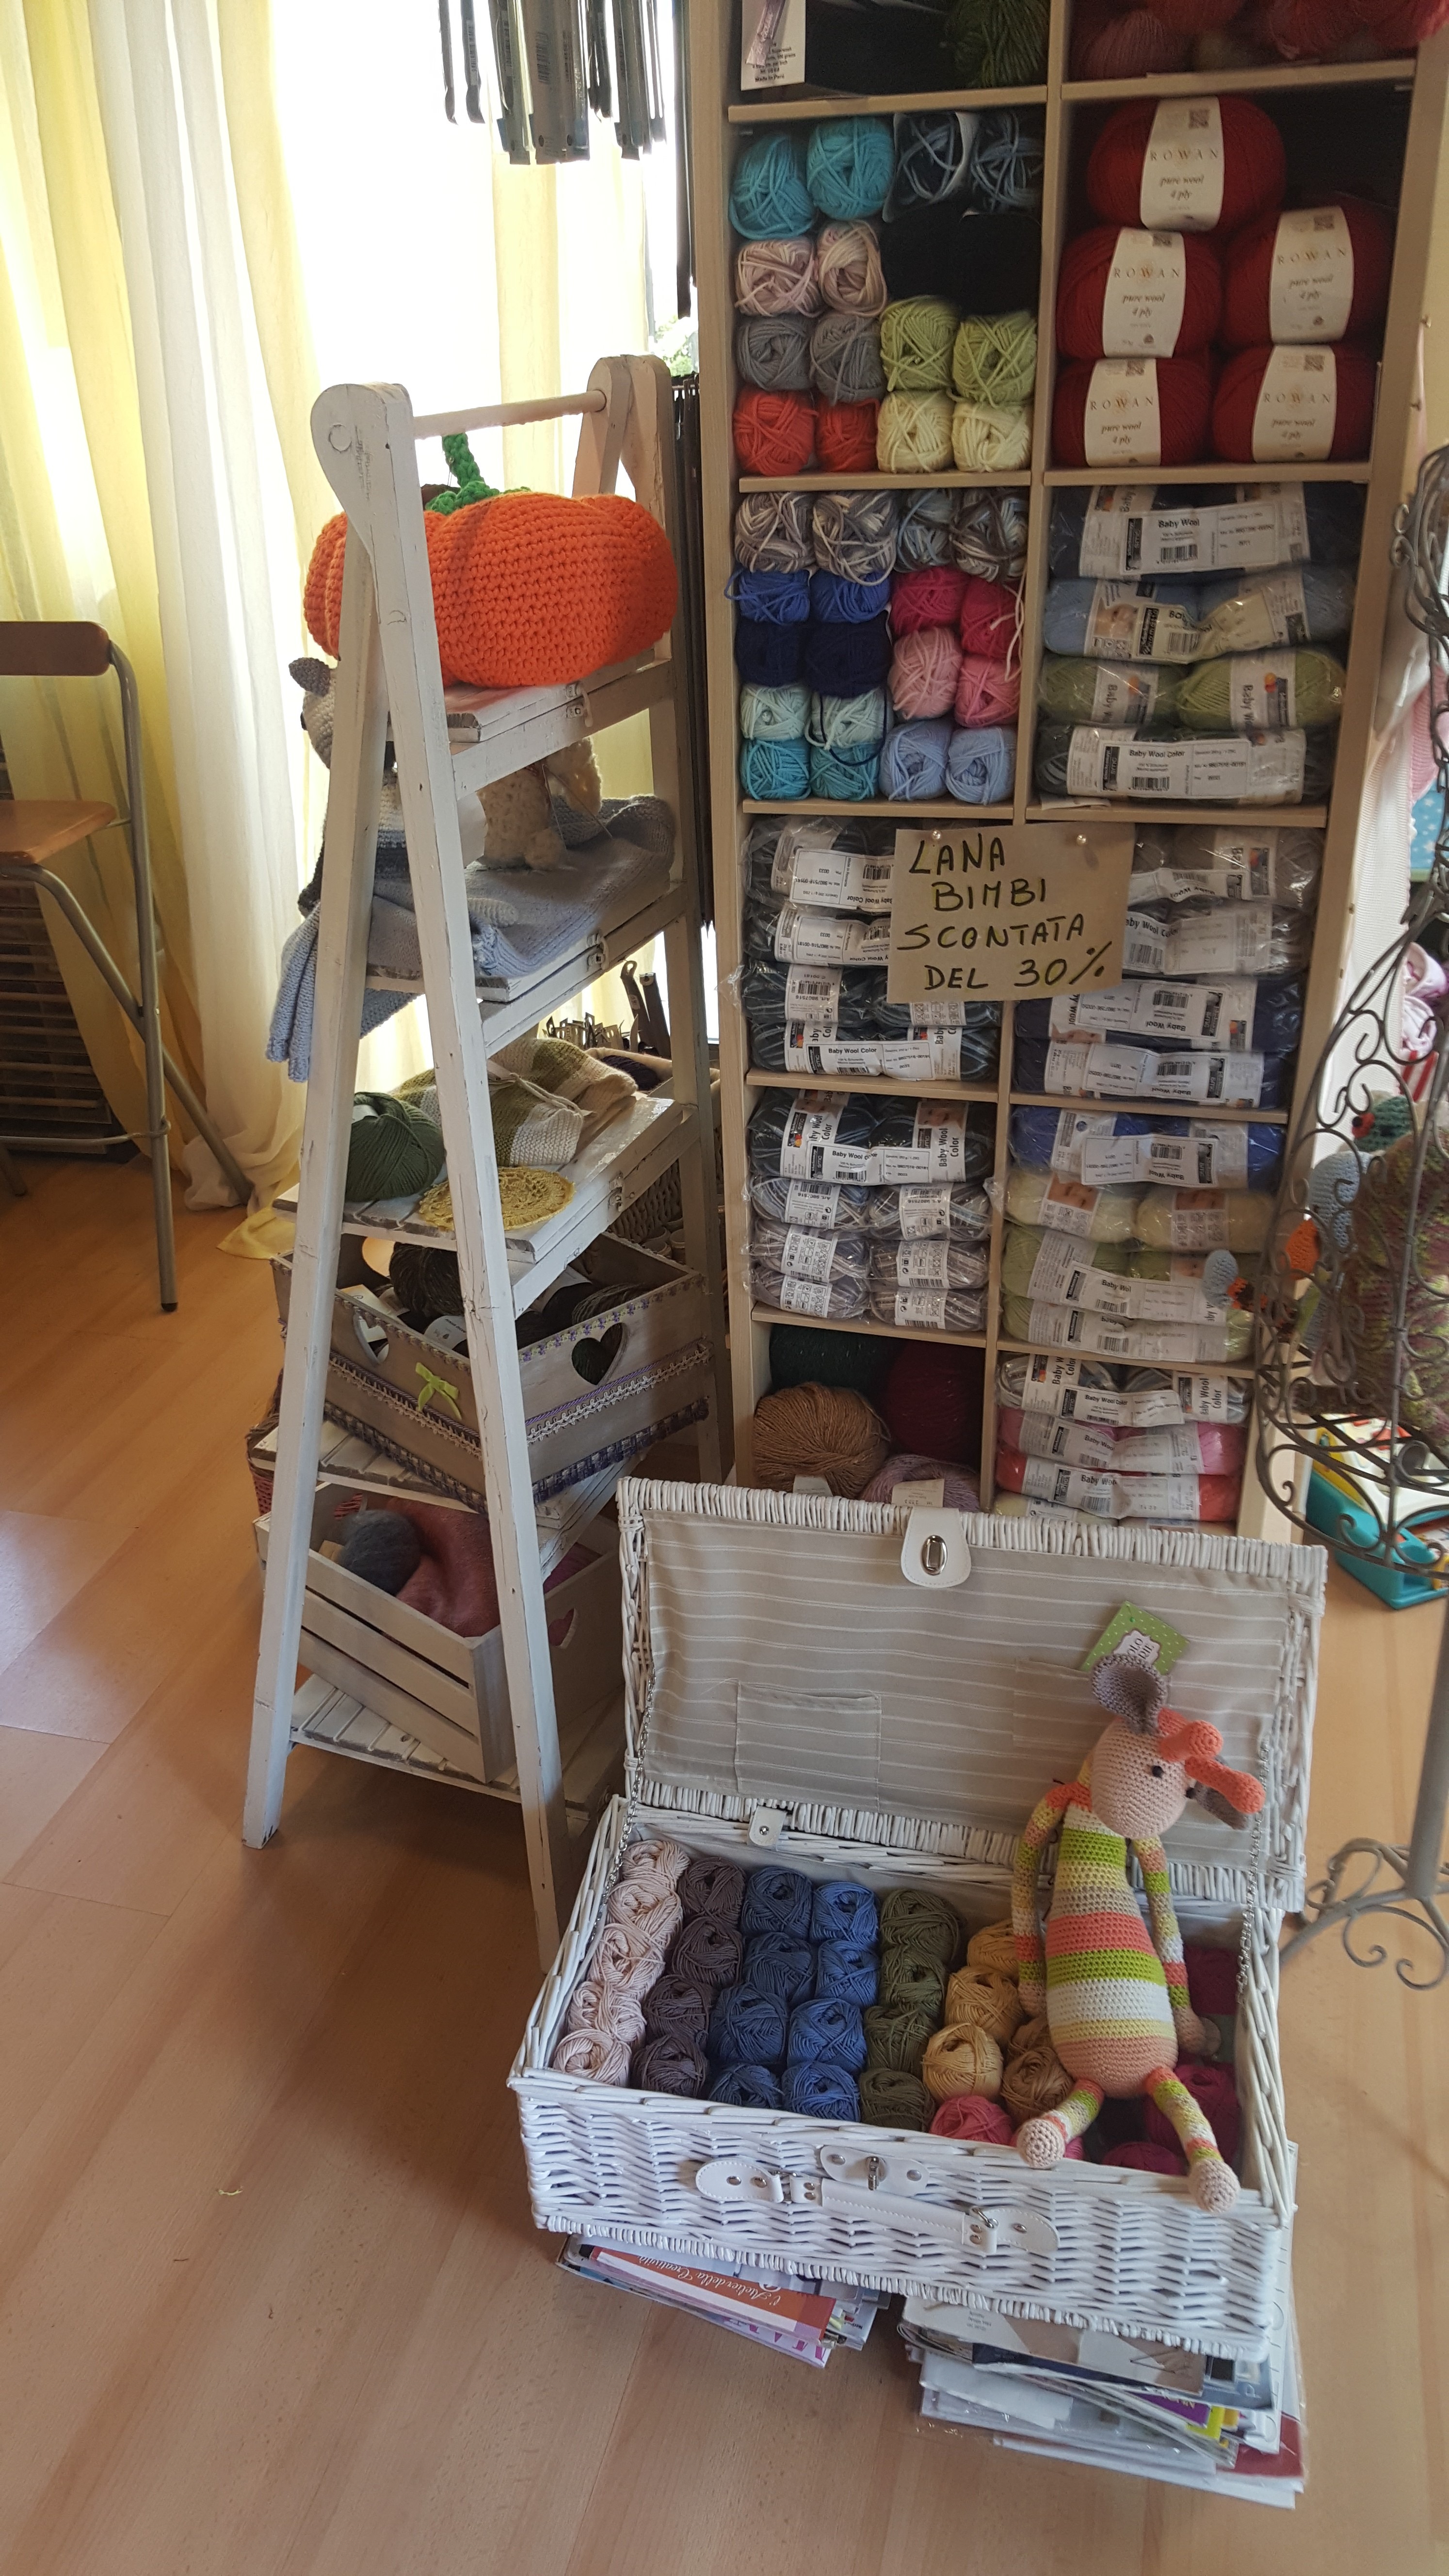
So I went back rummaging in my bag…and I did bring some cotton with me too, but I am so spoiled at home with my wall of yarn and colors that I was missing some of the colors I wanted and I couldn’t come up with something to make to keep me busy for the month. So before leaving for the mountains and the sea,  I went to visit the local Yarn shop in the village. It is called ‘Non solo mercerie’  which translated in ‘Not only haberdashery’ and it is run by a lovely lady called, like me, Lucia.

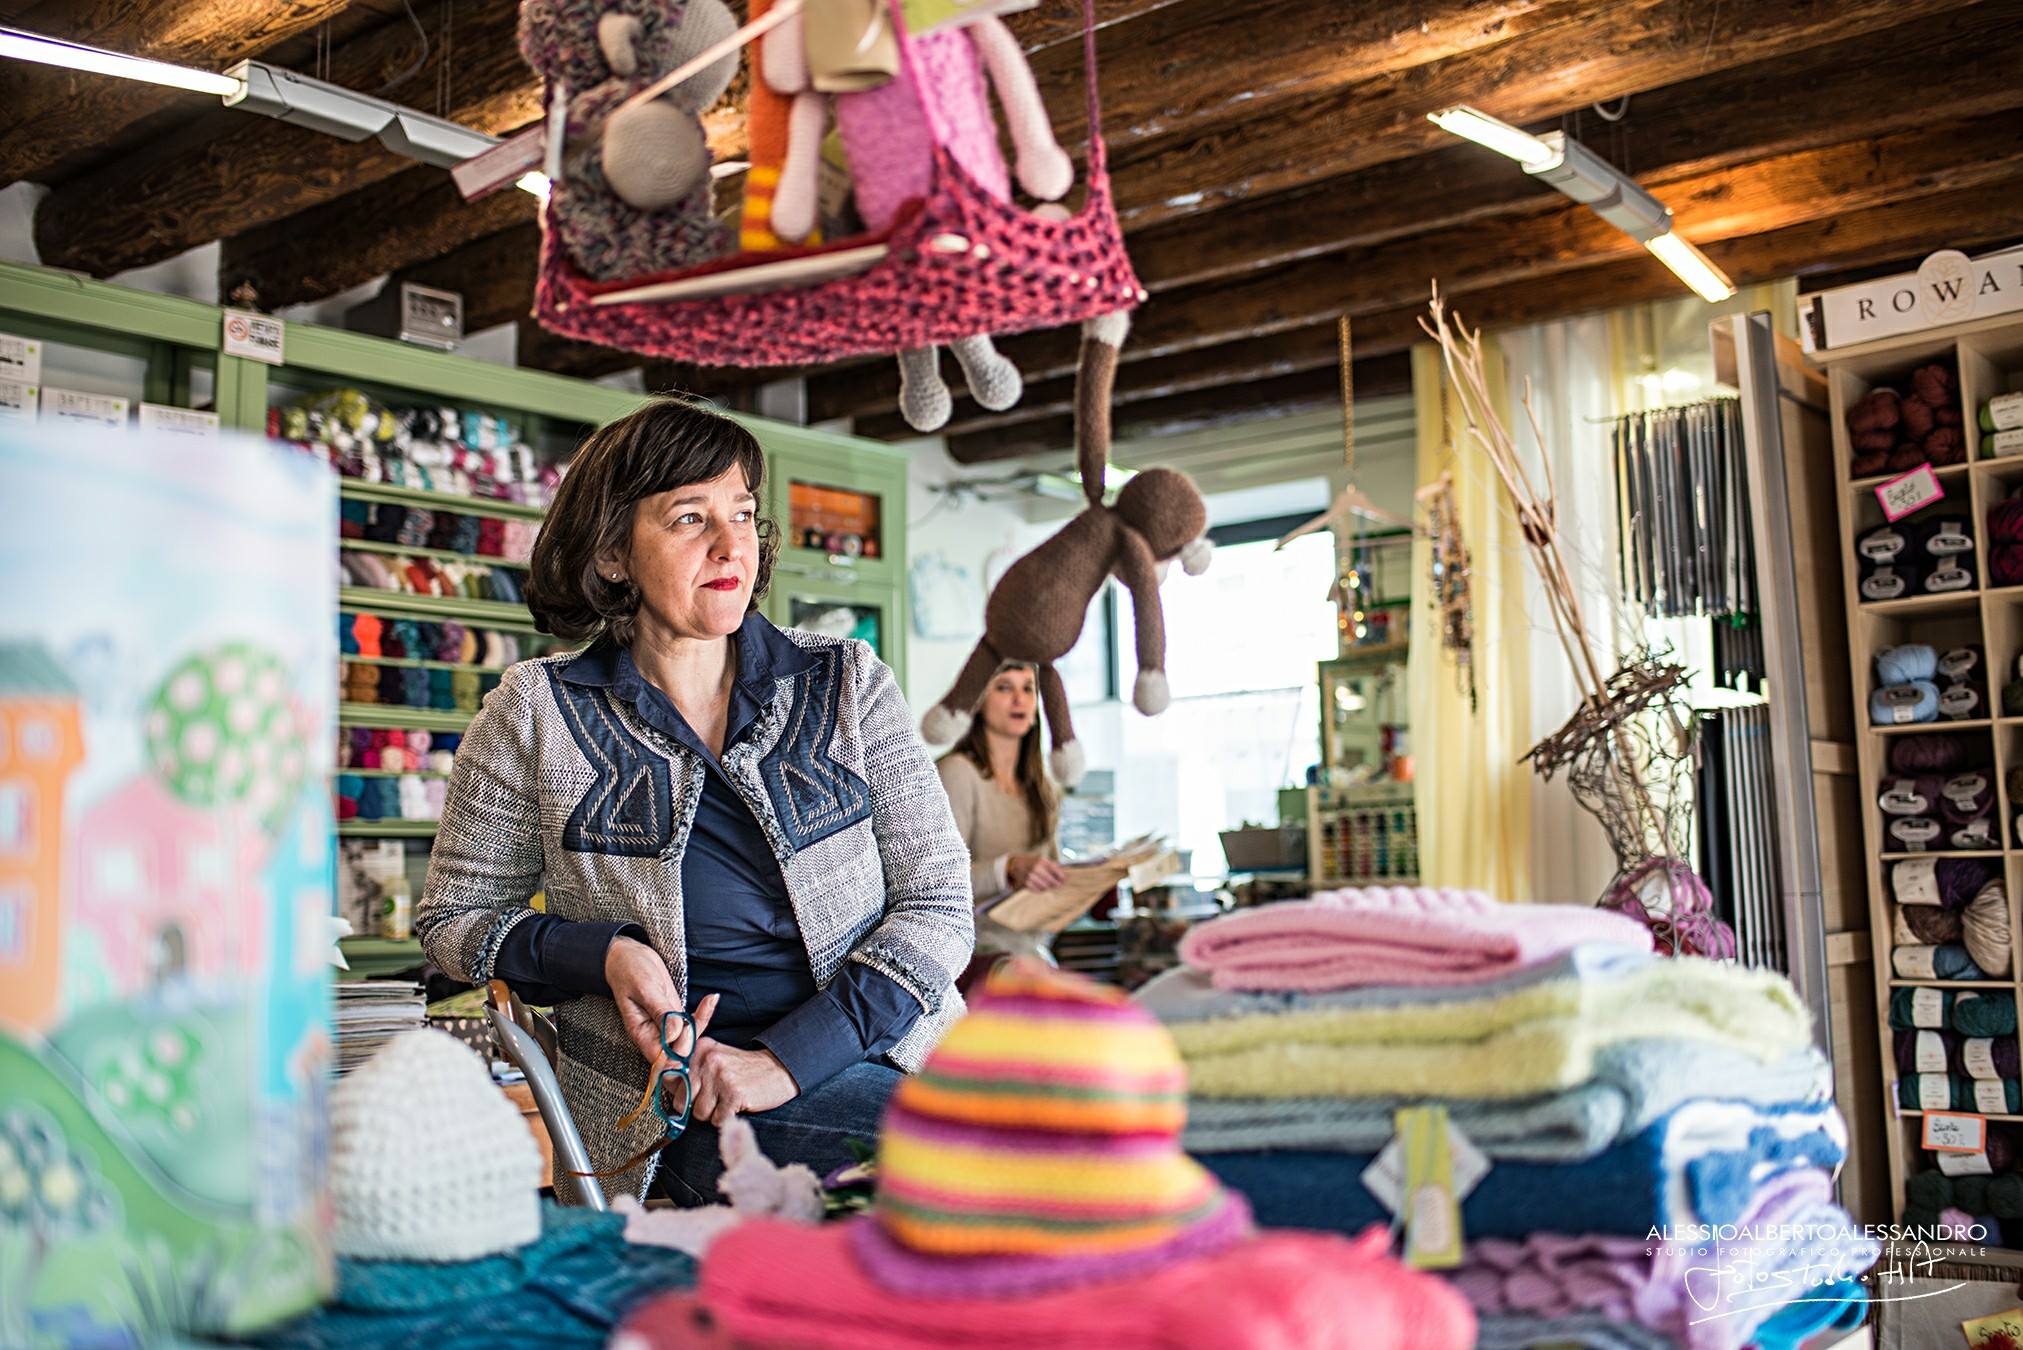
this is Lucia, the picture is the work of Alessio, a local talented photographer  https://www.facebook.com/Fotostudio4A/  the one I took was out of focus.

Lucia and I are friends on Facebook and we sometimes chat a bit on line, so was really nice catching up with her and Claudia in person, in their lovely shop 😀

and chatting about the inevitable heat, but more interesting about yarn, the difference in trends in Italy and the UK, the retail business, and how difficult it can be owning a brick and mortar yarn business,  new colors and blogging. I decided then to put my beloved Durban girl in her bag and find something new to do. Lucia had a box of Anchor cotton sitting in the shop,

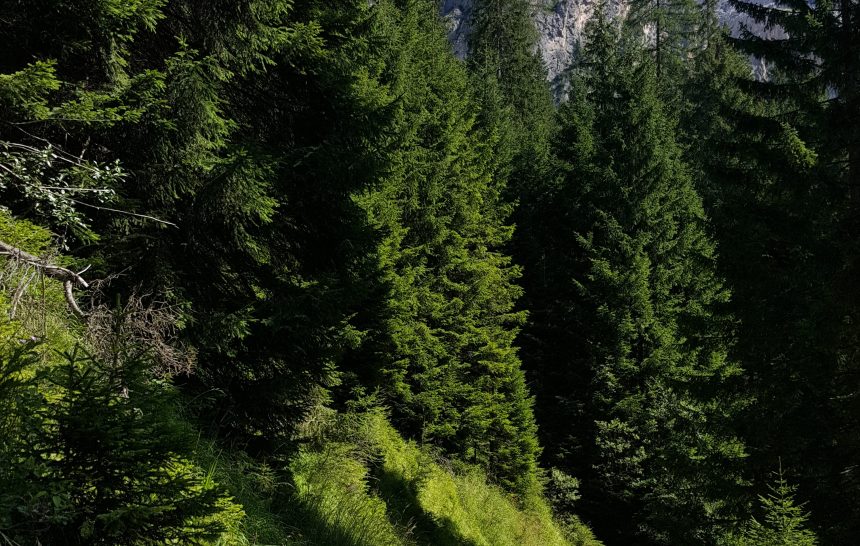
I haven’t used Anchor cotton in years, I didn’t even realize that it came in so many different colors, so I bought a few random balls, not much of a plan and I left for the mountains to escape the heat. Look how glorious the Dolomites are!

As I had not a clue what I was going to make, and I also had some poor internet connection with the phone, I opted for something very simple also because these three weeks have been really busy. in an ideal world I would have sat  high in  the Dolomites trekking and looking at the amazing scenery, but I also wanted to catch up with my family cousins and Olympia, my youngest daughter,

and travel companion wanted to go to the beach…so  I traveled 2500 kilometers up and down the country catching up with people and places.

here some pictures… mountains and sea…:D


I am going to write another entry with the details..sorry is a bit late but please stay with me I am trying to catch up…:D

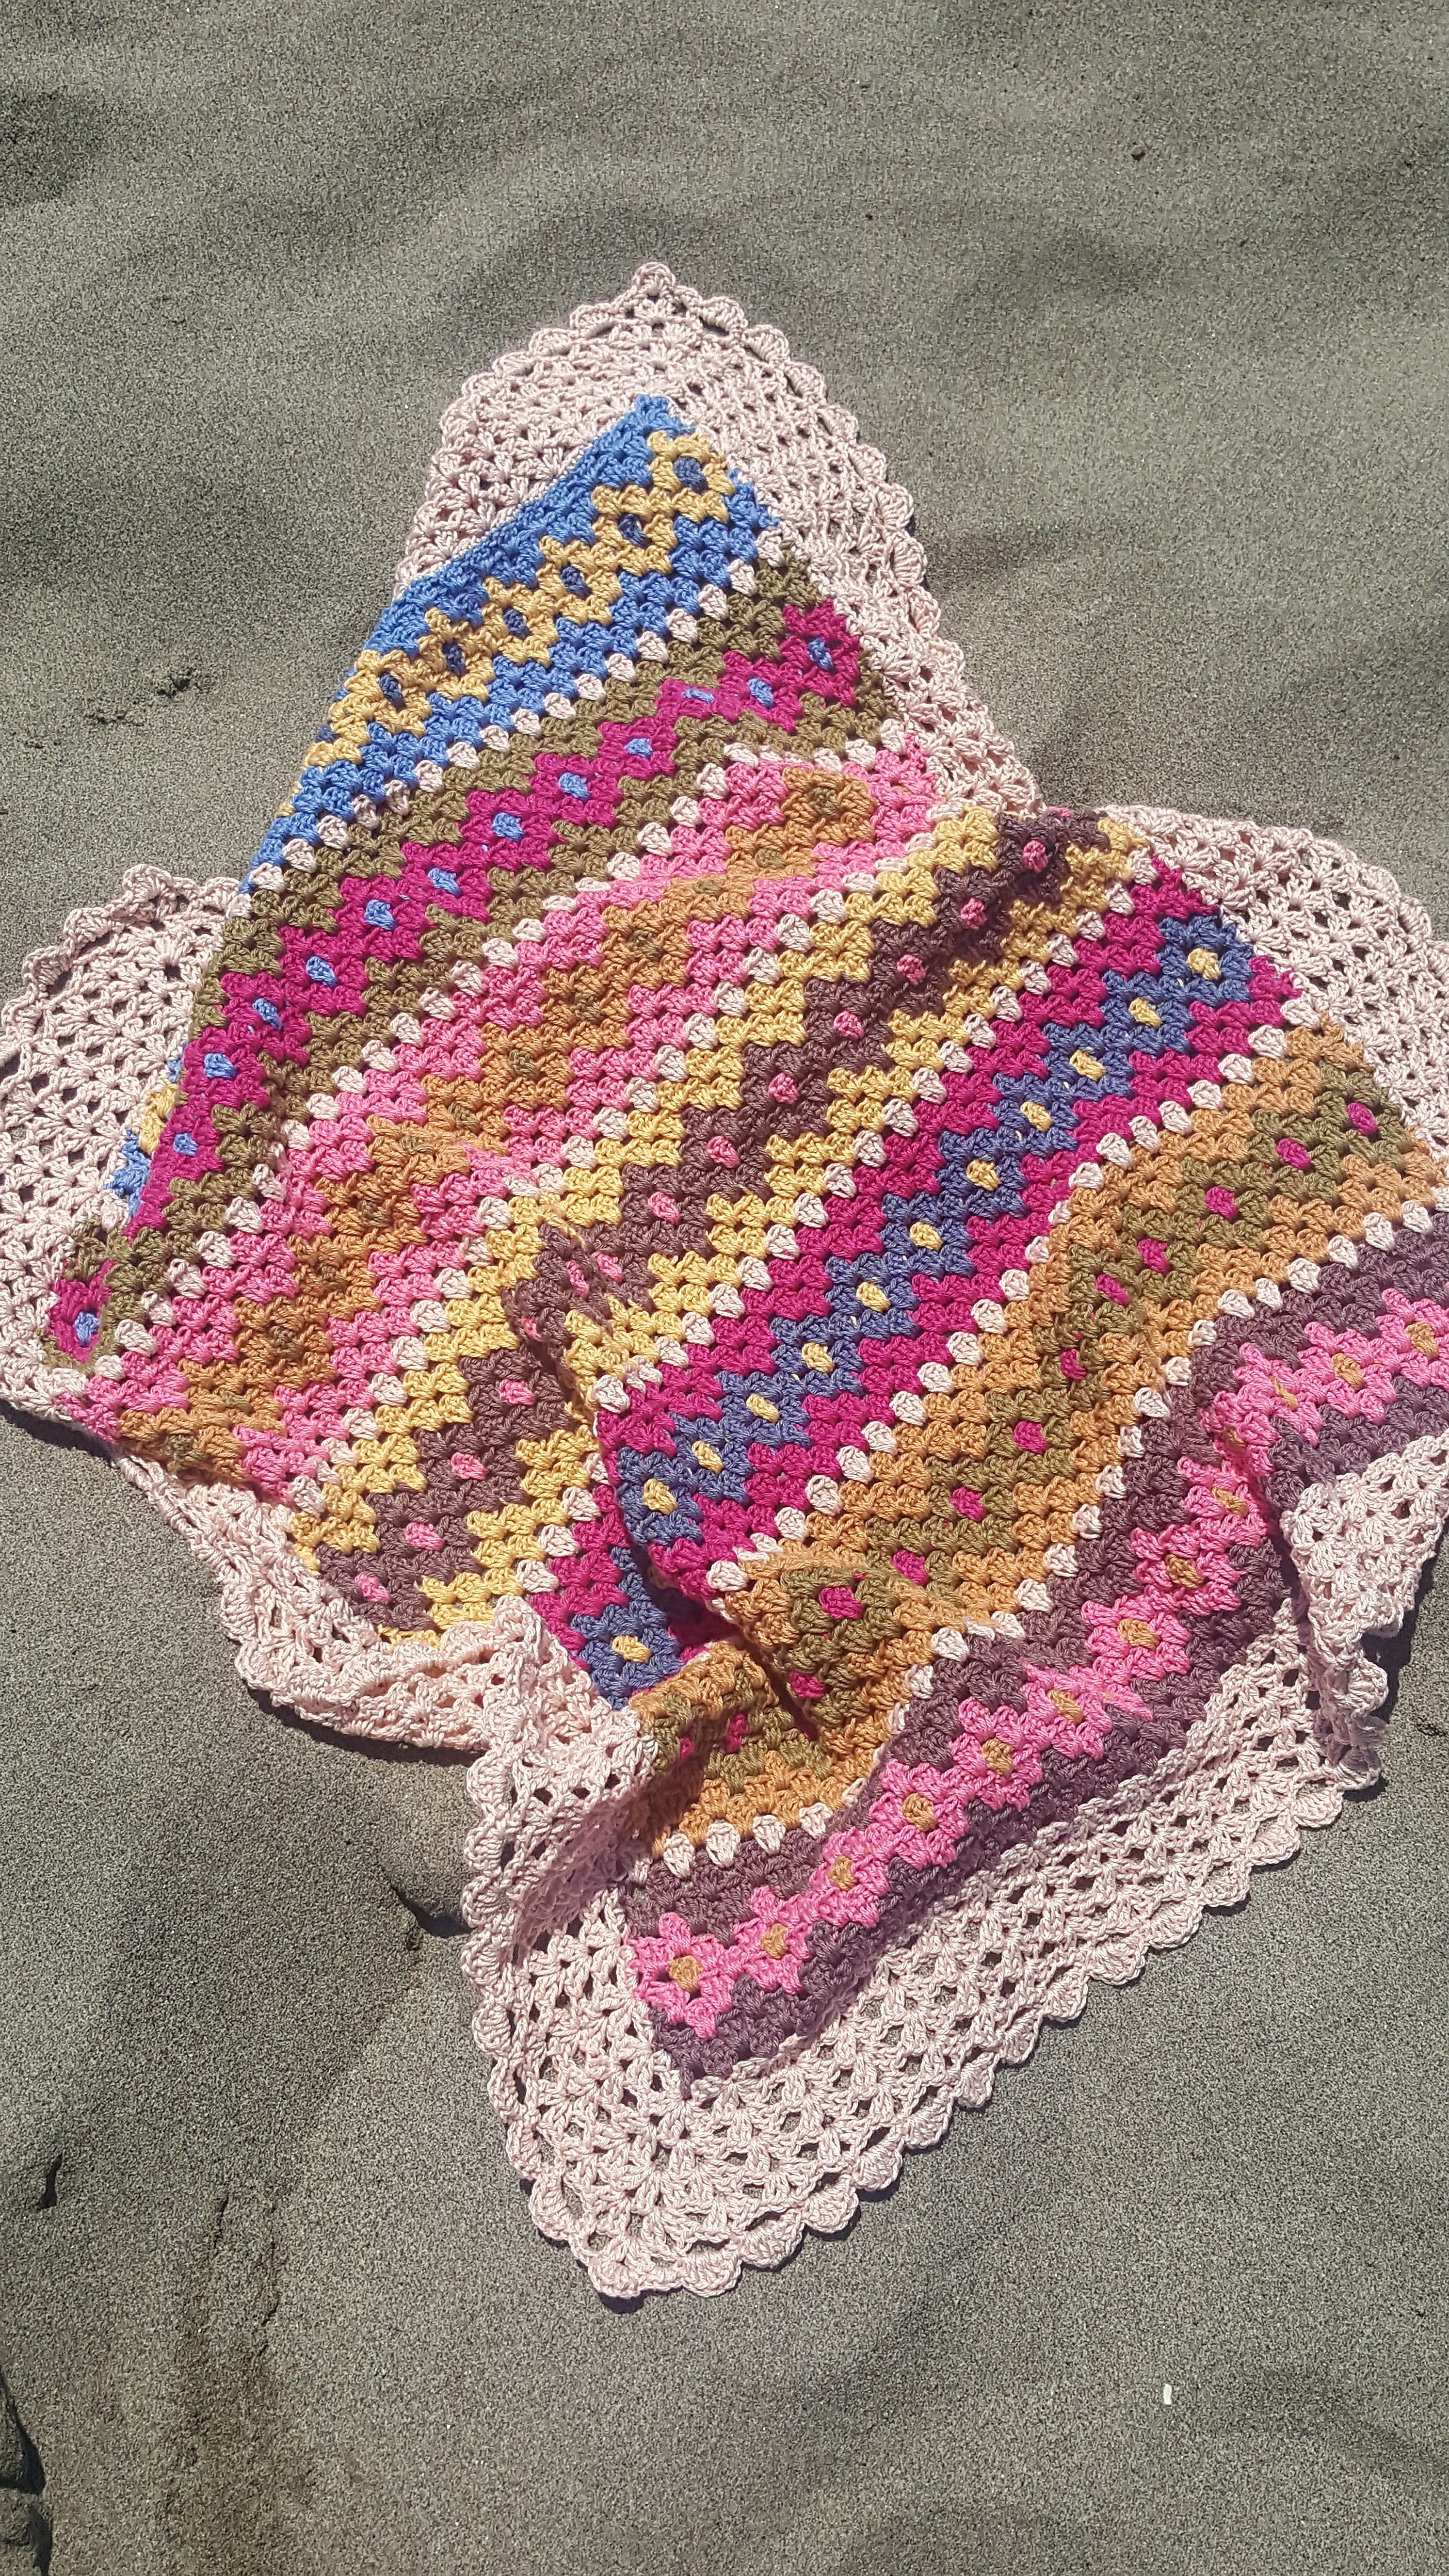
oh…here is the  August blanket made photographed on the beach 😀

love to you all,

Lucia x


June’s blanket, bucket-list and Iceland…

Hi Everyone… it is June and time for another blanket….

this one is about my bucket-list.

I have a few thing on that list, one of them is traveling and visiting/living in new places. the top of the list for the places is ICELAND, and that is what this blanket is dedicated to Iceland.

I always knew since I was a small girl that I wanted to live ‘up North’ well before  Hygge or  “Scandi style”  became so popular.

I made it just 2000 miles up north!  from Italy to Scotland… but I always wanted to hop another little bit..Shetland, Faroe Islands, and then Iceland!

If I wasn’t 53 and had a family, I probably would pack my bags and head for Iceland. In the back of my mind there is still a small flicker  of light which says I could  still do it …my kids are starting flying the nest; Francesca my oldest, she got her master in fine art, Valentina has just graduated this May in Law, Giuseppe is off to Edinburgh University next September, and I just got left Olympia that has still 4/5 years of High school…mmm never say never! ( mind you does Iceland needs a middle age woman that is obsessed with  wool/yarn /colours and books??? )

I could start with visiting Iceland first! I have never been… BUT it is on the top of my list hopefully in the next few months.

So why do I love Iceland?

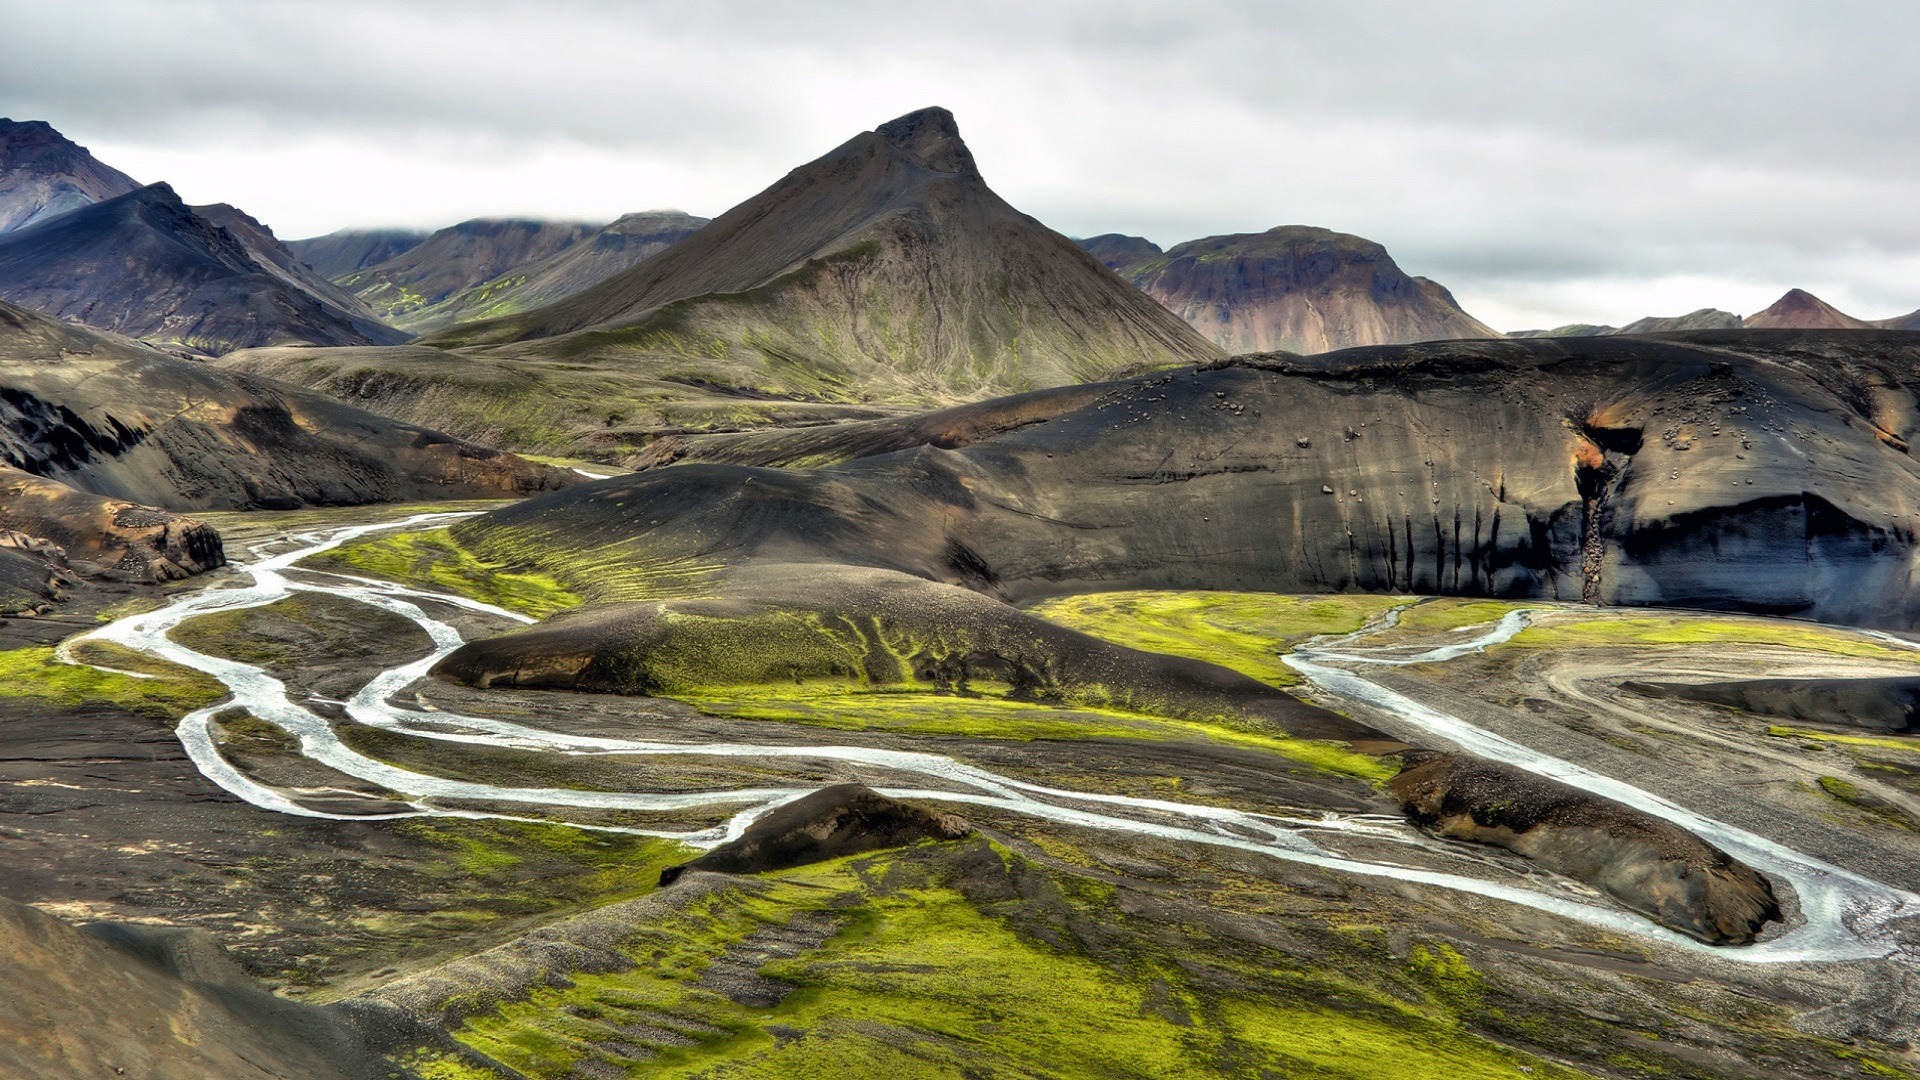
the most obvious reason is that Iceland is beautiful, There are breathtaking mountains, volcanoes, highlands, glaciers, waterfalls, fjords, geysers, lava fields, and a variety of coastlines.

but what attracts me most  are the Icelanders and their way of life and their values.

Icelanders are highly educated and the society is progressive.They have a literacy rate of 99% and most of the population has experienced higher education, they publish more books per capita than any other country. The have topped up the gender gap index Economist recently named Iceland the world’s best place for working women – in comparison, the UK came in at No. 24.Iceland was the first nation to elect a female president; Vigdís Finnbogadóttir was elected in 1980 and stayed in office for 16 years. Jóhanna Sigurðardóttir was Iceland’s first female prime minister and the world’s first openly gay female head of state.

Climate change is on the news every day and I believe it is a real issue for our planet. Fossil fuels are NOT the way forward. Iceland is the only country in the world which obtains 100% of its electricity and heat from renewable sources. 87% of its electricity comes from hydropower, and the remaining 13% from geothermal power. Oil-powered fossil fuel power stations are only used as backups to the renewable sources.

I could go on and add 20 pages of facts. and you are wondering if  I am a serious case of “The grass is always greener…. …..in your neighbor’s field” !!!

So what is really my tangible experience about Iceland and why I like it so much?? and here is where the creative side kicks in and the relevance to the blog…

LOPI YARN!!!!!

and in particular.

Icelandic Lopapeysa!

I made LOADS of them over the years…lopi yarn  is made from the wool of the Icelandic sheep.


It is unique in its composition and together, the distinctive fibers create wool that is warm, lightweight, water-repellent and breathable.


OK, it is  a little itchy ,but once you have worn a few times and washed too, it becomes really lovely. I can tell you this from experience as some of the jumpers  I knitted are 10 years old, they have a few holes but they are as much loved as they were once new!! those are few of them I have here at home…

also some of the books ( that is my other vice…books) I love about Iceland:


So I never attempted using Lopi Yarn for crochet but I m going to give it a go and the next blanket is going to be made entirely with Lopi . another experiment then…

Next time I will  tell you all about how I have chosen the colors and about Snorri Sturluson’s Prose Edda. I read a simplified version of it when I was 12 . and it is still now my favorite book.

I am also going to tell you about Hávamál, probably one of the most important poem in the book , which tells the story of Odin and the tree Yggdrasil.

and  Bivröst (“Moving Way” in Old Norse),The Bridge of the Gods:

Gvðín gerþu bru af iorþu til himins, er heitir Bifravst: “The gods made a bridge from earth to the heavens which is called Bifravst”

and about some amazing music I  I was so lucky to see live last night: Eivør Pálsdóttir.

Eivor is not an Icelander, she is a Faroese singer-songwriter with the most amazing voice ever! totally mesmerizing here is a link to youtube.


Thorin, our cat, loves Iceland too….

To the next time, Happy crochet,

Lucia x


Yarn,friends,more yarn,macaroons and a family’s ceilidh…part one

Let’s start with a question:

Do I need more yarn? ABSOLUTELY NOT !!!

Do I WANT  more yarn? ALWAYS!!!

Saying that let me start telling you about my weekend.

Every year I go to two yarn exhibitions: Yarndale and the Edinburgh Yarn Festival.

The reason why is because I like the spirit behind them. They both are a gathering of mainly independent producers, dyers and designers. And they are so worth going to because of the amazing talent and creativity behind those stalls.

On Friday morning my daughter Valentina and I took an early train from Glasgow to Edinburgh, Valentina had a dissertation meeting at University, and I went  to the Corn Exchange where EYF is held.

I met my friend Julia from http://handknittedthings.blogspot.co.uk/  in the queue outside the building amongst many very enthusiastic and chatting ladies! It didn’t rain which was a major plus, and it wasn’t too cold either so the hour and a bit waiting outside flew by in a flurry of yarn chats!

Julia and I  we went inside and we met Janehttp://janiecrow.co.uk/presta/ who was one of the exhibitors. and Sandra http://sandra-cherryheart.blogspot.co.uk/   then I just I wondered off admiring all the goodness in the show. Highlights? Far too many to mention but I especially loved Marie Wallin’s   tiny stand with her jumpers with the most exquisite colour combinations,


Amanda Perkins crochet blankets  http://www.amandascrochetblankets.com/home-page

The knitting Goddess http://www.theknittinggoddess.co.uk/,  Eden Cottage Yarns and my friend Zoe, which was exhibiting too and  has a lovely shop in Glasgow where I buy all my natural yarns. Zoe has a great selection of small independent producers, plus she dyes her on yarn also.  http://www.thequeenofpurls.com/

But let me tell u what made my day…

It wasn’t the yarn; it was those ladies that somehow recognised me and stopped to say hi and to tell me that they read and love my blog, my stories and my 12 blankets in 12-months challenge.

It was so overwhelming and humbling to get tangible recognition that my rumblings online are enjoyed by you out there .!

So a MASSIVE THANK YOU FOR YOUR SUPPORT!!!!

I am not taking the time you are spending reading my blog for granted it is totally appreciated.

So what did I brought back with me? I already posted a couple of photos on Instagram; I bought some lovely hand dyed yarn from the Knitting Goddess, three skeins from Eden Cottage and a VERY expensive cake from this new Hungarian supplier of gradients yarn called Bilum

B .


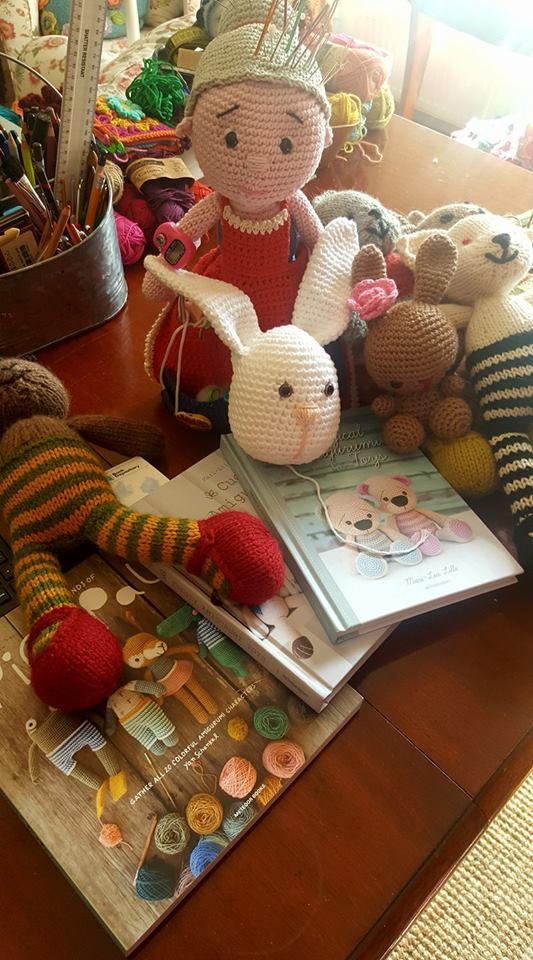
Amanda’s new blankets book, small pamphlets on crochet shawls that look very promising and a book on knitted toys because I couldn’t resist all those mini dresses and cute animals!

Out of the show, I shared a taxi with a lovely lady from Hampshire which very kindly gave me a lift to Edinburgh centre. I went to Mademoiselle Macaroon! https://mademoisellemacaron.co.uk/

Because I haven’t forgotten about my blanket and because they have THE BEST MACAROONS IN SCOTLAND!!!!  Gosh, I wish you could try them! They are delicious, and the small bakery/cafe is so quaint, you can see Edinburgh castle while sitting sipping your coffee and ejoying your macaroons and the staff couldn’t be more helpful.

yeah, as we say in Scotland: ‘PURE MAGIC!!’

and look what we got here…..can you spot the macaroon and the new squares??


More Edinburgh news tomorrow as my weekend is not over yet and I have a family Ceilidh tonight.

love to you all,

Luciaxx
X