My yarn room makeover

Hi, Everyone!

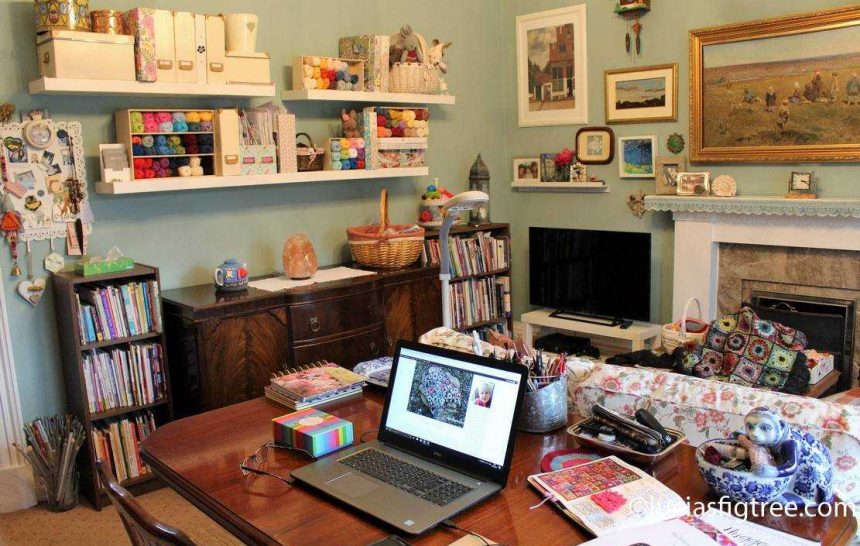
If you follow me on Facebook, you might know I spent the past two days trying to re-organize my studio. 

It wasn’t meant to be a big job; just assembling two small bookcases and shifting some of the books to create more space for my yarn.. because I am, as probably many of you are,  a”yarn collector”!

Some will say a “yarn hoarder,” but I don’t like the negative connotation which comes with the term hoarder.

I simply just LOVE yarn! 
I love all the all aspects of yarn; I like the feeling of it, the texture if it is a hand dyed skein, I love the story behind it and the origin of the fiber. I dabbed into spinning and hand dyeing too but again there are so many talented artisans out there that make a much better job than I do, as both dyeing and spinning require a great degree of skills.

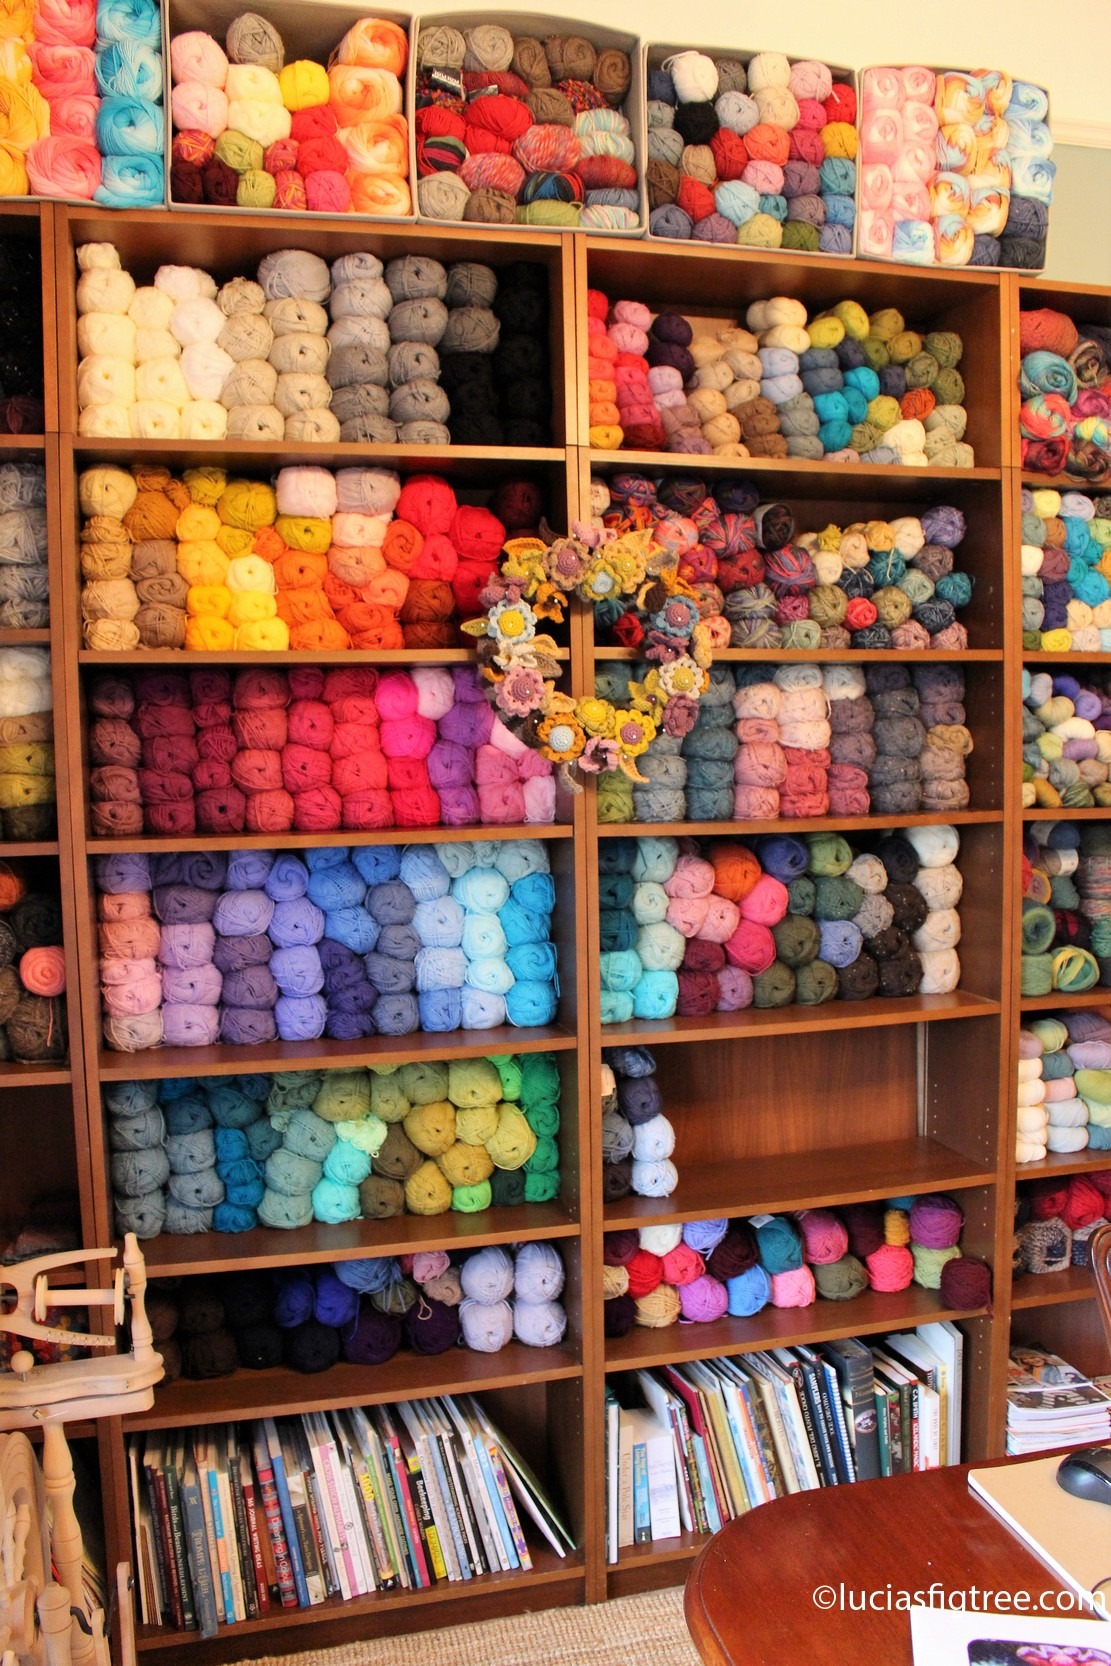
My yarns are like color pencils, and that is why I love them displayed and divided by hue,  fiber content, and yarn weight( 4ply,DK,chunky).

You probably have spotted I have a lot of STYLECRAFT’s yarn because it is what I use mainly for my blankets.

I try to stock at least one ball for each color in the main ranges I use which are: SPECIAL DK, ALPACA TWEED DK,BATIK, LIFE DK and CLASSIQUE COTTON DK. There is a gap in the library because all this ‘one blanket for each month’ makes the yarn flying out of the shelves so quickly!  If  I might make a suggestion,  you love making  blanket ,  you do not have a stockist near you , or, you are like me, and  you get overwhelmed when visiting a yarn shop, the best way about it  is to choose a brand and a weight. Then invest in one ball for each color of the range you selected  as it makes the process to choose the colors for projects much easier, it streamlines your stash too. And  if you  have some space where to display  it is a total bonus!

I a

When come to storing or displaying yarn I  am always on the lookout for the easy and inexpensive way to do it, and  I might have a couple of tips to pass on…

My studio furniture is a mix of IKEA and some old vintage pieces.

IKEA is cheap and does the job very well. My sofa is from Ikea, has a washable cover ( very useful for the cat, and the tea and cakes crumble…) the bookcases are all Billy

http://www.ikea.com/gb/en/search/?k=billy  the big one is several years old, and I have been adding modules as I need them.

The shelving is IKEA too and so are most of the storage boxes.

My overflow of yarn is on top of the bookcases in boxes those are  DRONA boxes, http://www.ikea.com/gb/en/products/small-storage-organisers/storage-boxes-baskets/dr%C3%B6na-box-beige-art-70298813/ the retail price is  £2.50 and they come in a variety of colors. I love them because they are really cheap but well done, made of fabric they are strong enough to hold the yarn and be positioned on their side. For extra strength and stability, I  used some velcro tape so to join all the boxes together.

For the cotton yarn, have used MOPPE http://www.ikea.com/gb/en/products/small-storage-organisers/paper-media-organisers/moppe-mini-chest-of-drawers-birch-plywood-art-40216357/ 

They are mini chest drawers (42x18x32cm) made of solid plywood, perfect for storing cotton yarn and as books dividers too.

The extra vantage is that the drawers do not have a handle, so I use the frame without the drawers as a mini bookcase, then the drawers too can be filled with more yarn and positioned on their side. Doing, so I double the amount of yarn I can store and display, and I can combine the different size drawers together. the  plus side is that plywood  is a natural product  (yarn doesn’t  like plastic…)

So you can keep an eye on what you have available,  no more rummaging in bags stashed all over the place and I might be  bias, but I think they look pretty too!

have a lovely day, thank you for reading,

Lucia xx
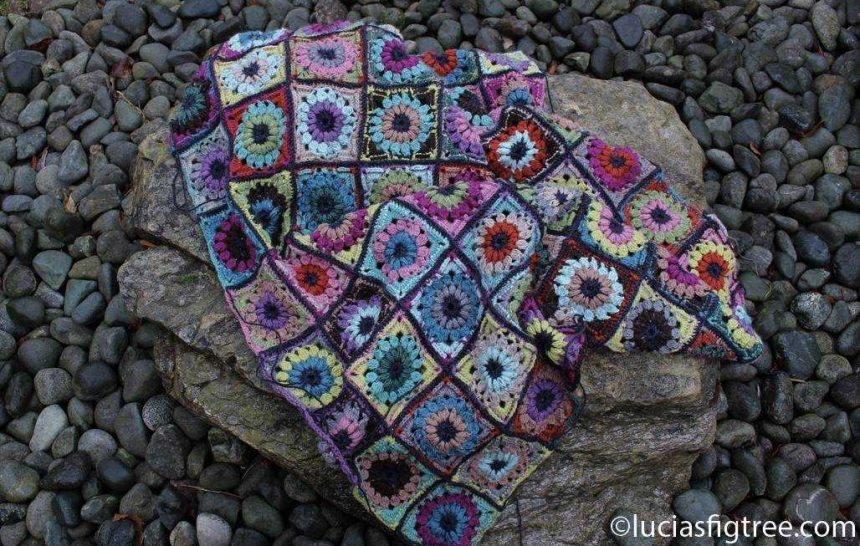
 

More about the Emily…

I thought I’d write an update on the blanket I’m currently making. I must say it has not been plain sailing, maybe it is because the task to transform an idea into reality, especially if it is something that you are passionate about, is never easy.

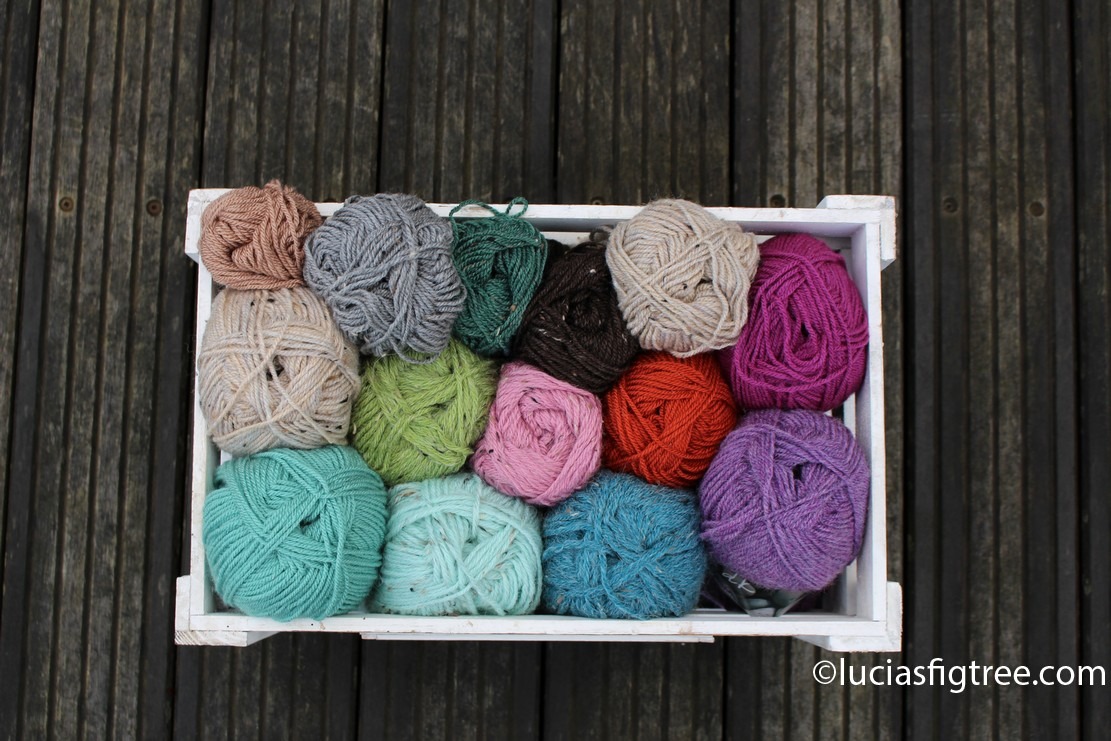
If you have read my previous post, you might recall the 14 colors I had selected.  I had to make some adjustments as the tomato was too bright and highjacked the colors combination.

In the picture you can see why, it is  out of focus in purpose  so you can see the ‘tomato effect’.   I substituted the bright hue with a tweedy chocolate which works much better and, consequently, I had to do a fair bit of ‘frogging.’ Chocolate browns, pale greens, dusty blues and some copper, they are all part of the interior of the parsonage and the surrounding area. One of the rooms I liked most was the hall. I remember reading Ellen Nussey’s ‘Reminiscences’, how “…the hall floor and stairs were done with sandstone, always beautifully clean, as was everything about the house…”  and she describes the walls as being “not papered but stained in a pretty dove-coloured tint’.  The restorations of the house revealed that it was more of a pale blue-gray that had been introduced and it is what you can see today.

Next was the pattern for the actual square, again several attempts and LOADS of samples later I came up with something I quite liked. The first thing I wanted to do is for the square to have a rugged feel of the Yorkshire landscape and outdoor clothing. My attention was drawn by some of the  original garments wore by the Brontës that I had seen displayed in the museum.

The reason why so many sisters personal items, utensils, and clothes which in normal circumstances would have disappeared have been preserved is that a cult and interest for everything that involved the sisters became quite prominent very soon after they died. Fuelled not only by the extraordinary success of their novels but also by the publication of the first biography of Charlotte Brontë written by Mrs.Gaskell’s in 1857 just a few years after the death of the sisters.

It wasn’t only the sisters but it was also theirs surrounding that became of interest. Virgina Woolf wrote in 1904 following a visit to the parsonage:”Haworth expresses the Brontës; the Brontës express Haworth; they fit like a snail to its shell.”
I digress…
Back to the blanket. As I said I wanted to have a feeling for the landscape and the clothes, but also I wanted to have some lacy aspect also to celebrate the very popular at the time, Irish crochet that adorned not only their clothes but also their homes.

On the subject of  Irish lace, I also got inspired by some amazing examples I saw in the archive of the Knitting and Crochet Guild on the Friday when I visited Stylecraft.

Irish lace became popular around 1830 when an English businessman, Charles Walker,  brought several lacemakers to teach the craft in Limerick, Ireland, drawn to the area by the availability of cheap, skilled female labor. Walker’s business thrived: within a few short years his lace factories employed almost 2,000 women fuelled by the increasing demand.
The hues of my blanket  are quite demure, as nothing of Emily makes me think of frivolity, the yarn is tweedy, warm and quite substantial, like their clothes made for long walks on the moors but also some femininity, hence the lacy feeling of the pattern, with a round 3D center and  lighter surroundings.

Still, on the lacy theme, I was going to use a flat braid to join the squares, but it didn’t work for me at all, the squares became quite misshapen and had to be unraveled once again.

Then I thought about something  curious I saw at the museum: a letter which was written by Anne Brontë to Ellen Nussey, actually, quite poignantly it was going to be her last letter as Anne was terminally ill, the note was a beautiful example of cross-writing, the letter is written with lines both horizontally and vertically, a common practice to save on postal costs.

The pen marks and pattern of the letter inspired my joining method: mixed charcoal, a beautiful organic color, became the chosen hue and a crisscrossed pattern to join the square.

In the next few days I am going to tackle the border..I have a couple of options and i will have a try and see which one look the best.

Until the next, thank you for reading!

Lucia xxx


The blogstars weekend…

Overdue post…

As usual, I am always the last one writing, all the other bloggers have uploaded their take on the weekend, and Kathryn  (http://www.crafternoontreats.com)  has also uploaded a podcast which is very good and informative and I would highly recommend it.

http://www.youtube.com/crafternoontreatscrochet

Here are the links to the other Blogstars if you want to listen or read more:


http://emmavarnam.co.uk/stylecraft-blogstars-a-little-bit-star-struck/

http://sandra-cherryheart.blogspot.co.uk/2017/02/stylecraft-blogstars-meet-again.html

http://zootyowlcards.blogspot.co.za/2017/02/yarn-yarn-and-more-yarn.html

http://getknottedyarncraft.blogspot.com.au/2017/02/blogstars-meet-up-february-2017.html

http://handknittedthings.blogspot.co.uk/2017/02/stylecraft-blogstars-meet-up.html

http://attic24.typepad.com/weblog/2017/02/yarny-happenings.html

http://thetwistedyarn.com/2017/02/05/stylecraft-blogstars-meetup-aka-not-too-shabby-a-weekend/

http://theknittingexploitsofjosiekitten.blogspot.co.uk/2017/02/stylecraft-blogstars-blogging-all-over.html


What did I bring back home from the weekend? (besides a big bag full of new yarns and colors to try of course!)

I think I brought back quite a few things that slowly have decanted down after the excitement of the weekend.

Below are some pictures I shall start with some pictures because to me images speak 1000 words and also do not make spelling mistakes!

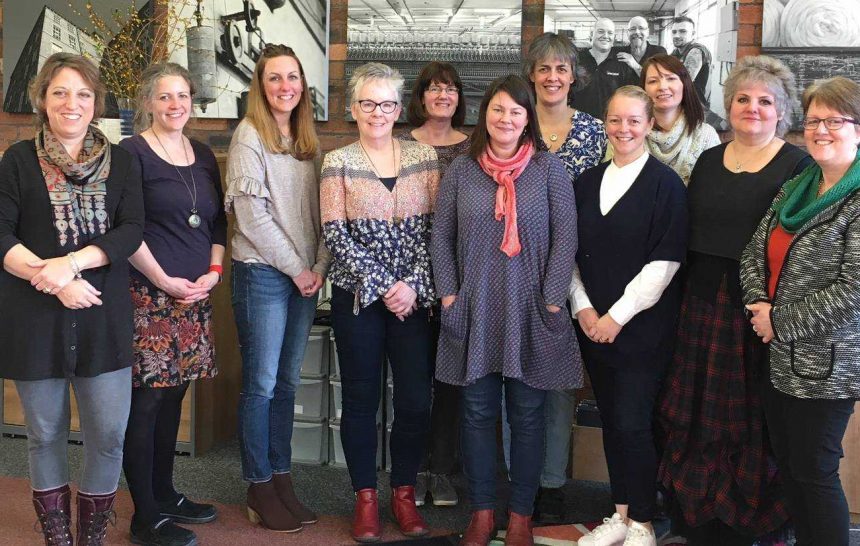
The pictures are not mine they are a few of Helens http://www.theknittingexploitsofjosiekitten.blogspot.co.uk  and Sofie http://www.Stylecraft-yarns.co.uk) uploaded on our chatroom and I’m so glad they were taken because I was far too busy chatting and doing things! Helen and Sophie did capture beautifully what for me was the spirit of the weekend.


So what do you see?

You see colors, a table full of yarn, lots of sample garments, coffee, a beautiful sunny room with brick walls and a high ceiling and some very happy, busy, crafty ladies!

If you can get a feeling for this atmosphere, it is because that is what we all got in common not only us at the weekend but all of you out there that read our blogs and follow our yarn and other stories online. We all love making things.

I didn’t know what to expect for my first meeting, I knew the bloggers, as you do, by reading their stories online, or having briefly met them at shows like Yarndale or the Edinburgh Yarn Festival. I was really looking forward to the weekend, but I also had a certain degree of apprehension being the last to have joined the group.  The apprehension went out of the window in 2 seconds!  As they couldn’t have made me more welcome, it felt like catching up with some old friends.

So if I could summarize what I liked most of the weekend I would say sitting together chatting about not only crochet related issues, but also the quotidian,  lots of little windows opened on ordinary lives, with family, work, pets, hobbies, travel, food, likes and dislikes. You name it.

Then I  had a Eureka moment as I  found out that the main reason why I like making things, and talking about it, it is because I love the social side of it.

A sort of déjà vu moment where I  remembered when I was a little girl under the fig tree with my grandmothers and their friends. It is hard not to see a common theme: friendship. That doesn’t matter where you are, or what language you speak; all that matter is that you take TIME  to make something and been creative. It is a bit like being an artist or a poet or a musician, you make things that make you happy and also creating things that make others happy because they understand what you are doing and why you are doing it.

That applies to many of the bloggers and also to the ladies that look after the archive of the knitting and crochet guild which, some of us visited on Friday afternoon. It was a warehouse-like building which sat unassumingly in a back street in  Scholes, near Huddersfield, in Yorkshire.  I wish I had taken a picture of the door because I had to bend down ( and I m not a giant ..) to get in and there I was in Aladdin’s cave!!!

There I was, amidst rows upon rows of shelves with boxes. Each box with details of the contents. The most amazing collection of EVERY single pattern ever published for both knitting and crochet, and also yarn samples and lots of crochet and knitted items. All of which I wish I could’ve examined and enjoyed for hours and hours.

I have been a member of the knitting and crochet guild for few months, but I had no concept of the amazing work that these ladies, which are all volunteers,  do to preserve this extraordinary archive of creativity and also to promote the craft!

For a very small fee you can support them and become a member it makes a huge difference to their work, so  please have a look at their page:

http://kcguild.org.uk/


One of the things I liked most is that the work of cataloging the items and the patterns it is also a research of the origin of the items and the story behind them. Who made it, when, where and why.  How amazing is that?

This is one of the lovely items we saw a bed cover donated to the Guild and the original pattern that had been used.


Well, that is a snippet of my visit, I m sure I will think of something I forgot and write some more as it comes back to me. Hope you are all having a lovely week,

many thanks,

Lucia xx


‘Emily’ my February blanket: a humble homage to the Brontë sisters.

As you probably knew already,  last weekend, I went to my first STYLECRAFT’S BLOGSTARS  meeting.

It will take all week for the experience to sink in and  I am still in the process to write a blog entry about what I saw , who I met and millions of ideas and exciting new projects, but today I am going to give you an update on my plans for the February blanket.

Stylecraft’s HQ is in Yorkshire in the north east of England, a wonderful rugged landscape well worth a visit if you got the chance.

While I was there for the weekend, I  decided to stay an extra day and fulfil a wish  that I had  wanted for ages.

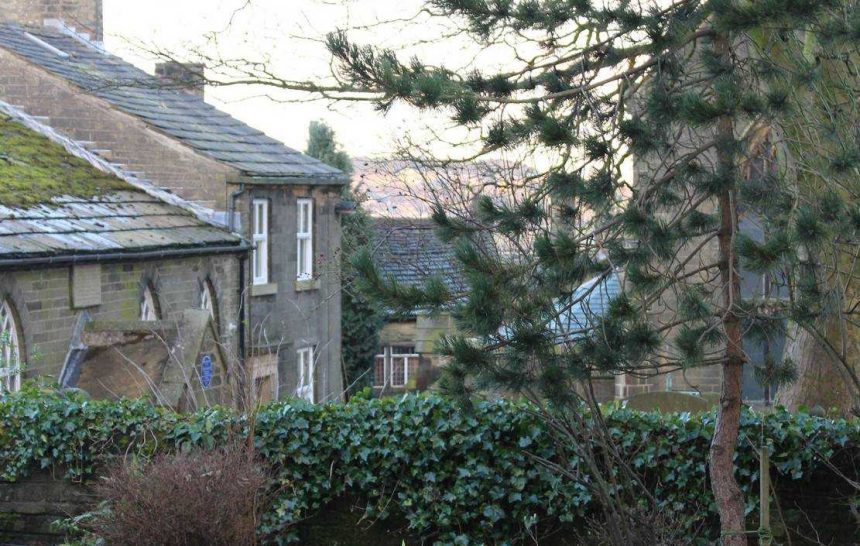
I went to Haworth to see the Brontë Parsonage.

As with all the things that you put up off for a long time, I had developed some sort of concern that there was a possibility of disappointment. And that  my experience wasn’t going to be what I expected. But I m very pleased to say that it was not  the case for this visit.

I wanted to see the house in winter, and also I wanted to see it when it wasn’t too crowded because in a very selfish way it was quite an important pilgrimage for me.

I was very fortunate, I arrived there at  twilight ,just before closing, beautifully quiet, as the museum had just reopened last week and many are not aware of it.

It was wonderful to be standing in solitude  in their very  front garden.

You are wondering why a 50 something year old  woman is so fascinated by the Brontë sisters?

Well I, have been fascinated by them for most of my life, since I read their novels and poems when I was a teenager, I  never  saw them as a  gloomy trio of unmarried women in a  isolated village in the Yorkshire’s moors  telling tales of love , despair and sometimes  happy endings.

I thought of them as witty , intelligent and also quite troubled women, well ahead of their time, raising topics that are still pertinent today , 200 years later. Drawing attention with their novels on subjects such as; choosing  your own path,  independence and being true to yourself .

The Brontë sisters have all an extraordinary ability to express their emotions so intensely about, not just love , loss, and  passion; but also about rage, madness, and domestic abuse, and  the reality of working just with the sole purpose to survive.

What also appeals to me a great deal is the fact that you can  be an extraordinary individual  without living a life full of  epic experiences.

So back to my visit…

I was standing at twilight in the front garden of the parsonage and looking at the colours, the light, the moss on the tombstones, the interiors  of the house with their soft dusty blues , greens and purples,  the books, paintings, clothes, kitchen utensils and objects of an ordinary life and I felt so content in being there.

To capture in a tangible way how I felt , I m going to dedicate my February blanket to my favourite Brontë sister, Emily, a blanket to remember my visit to Haworth on a beautiful winter afternoon.

I selected the yarn , a mix of tweeds and solid colours , some soft alpaca mix  for comfort against the gloomy weather, and a  general mood for the blanket.

the tomato looks more like an hot pink in this picture…which is not right but it give you an idea, hopefully in the next few days if it is not raining I will be able to take a better  picture.

The pattern is nearly there too; I am still tweaking with it.  It is going to be different from what I normally make but hopefully will work . more updates as the week progresses.

Love you all Lucia x


THE JANUARY BLANKET IS DONE!!

First THANK YOU SOO MUCH for the lovely comments and likes , I m really glad that the first blanket of 2017 has been received so well, I am so glad you loved the colours even if the pictures  I posted on Instagram where not the best.

The best way to appreciate the colours is  with an outdoor picture and I  have been stalking the sky for days now hoping for a break in the weather. this morning I managed  to take a few but the sky is like pewter colour and the light is poor too , those are the joys of living in Scotland! today we even have a rainbow…

anyway I am not entirely happy with the results but I have to do for now, as I have received so many messages asking for details ,colours and ..the border!

so lets start with the  yarns and colours first:

2 types of yarn : STYLECRAFT SPECIAL DK and STYLECRAFT BATIK

As said in my previous post the SPECIAL  DK  is 100% premium acrylic fibre and comes in a 100 gr. ball. the STYLECRAFT BATIK DK is a 80%premium acrylic and 20%wool and come in a 50 gr. ball.

both yarn are machine washable at 30 degrees and also cool tumble dry.

I tested both of them several times and they wash beautifully .that is the reason why I use this yarn, because there is no point making a beautiful blanket and then been afraid to use it because it is a nightmare to wash ( never mind drying) but I wont go into a big discussion about quality and versatility . we leave that for another time.

colours 22 of them…I know sounds a lot but the variety in hues makes the blanket really.


STYLECRAFT SPECIAL IN: lime,pistachio,cypress,khaki,spring green,tomato,mocka,walnut,pale rose, raspberry ,sage,storm blue.

STYLECRAFT BATIK IN: graphite,coral,old gold,cream,pistachio,sage,raspberry,storm,indigo

the border joining and border are made with STYLECRAFT BATIK in biscuit.

QUANTITIES:

SPECIAL : 1 ball for each of the colours

BATIK: 1 ball for each of the colour listed, plus 5or 6 balls for the joining and border.

a note: when I made the blanket I found I got a bit short on the batik but just for probably 7/8 grams.

now ideally you want  to have 2 balls of the batik for each colour  but again you will have left a lot of yarn, and I don’t know how you feel about it. I don’t mind as I make blankets all the time so I will re-use what is left, but  if your blanket is one-off, you might want to think about it and maybe use more of the special colours as you will have plenty there to finish with.

I would still use the biscuit for the border and joining though, it is so lovely and it suits the blanket beautifully.

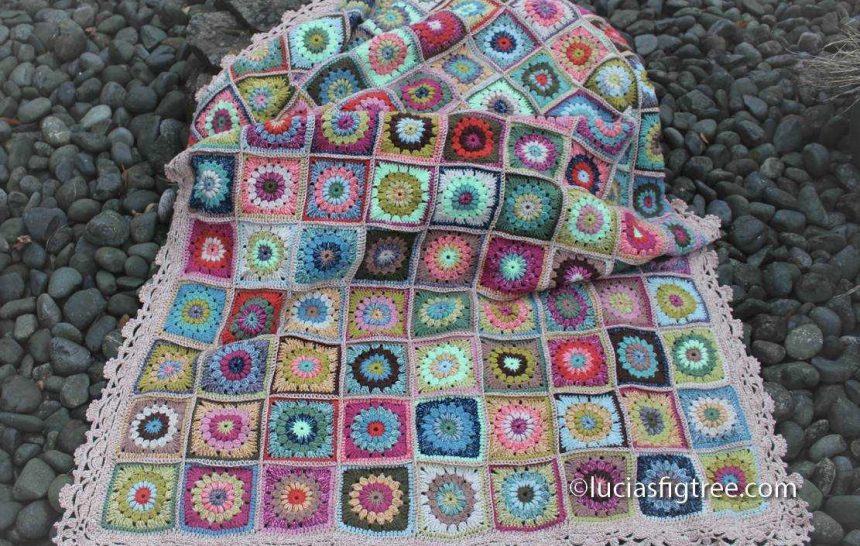
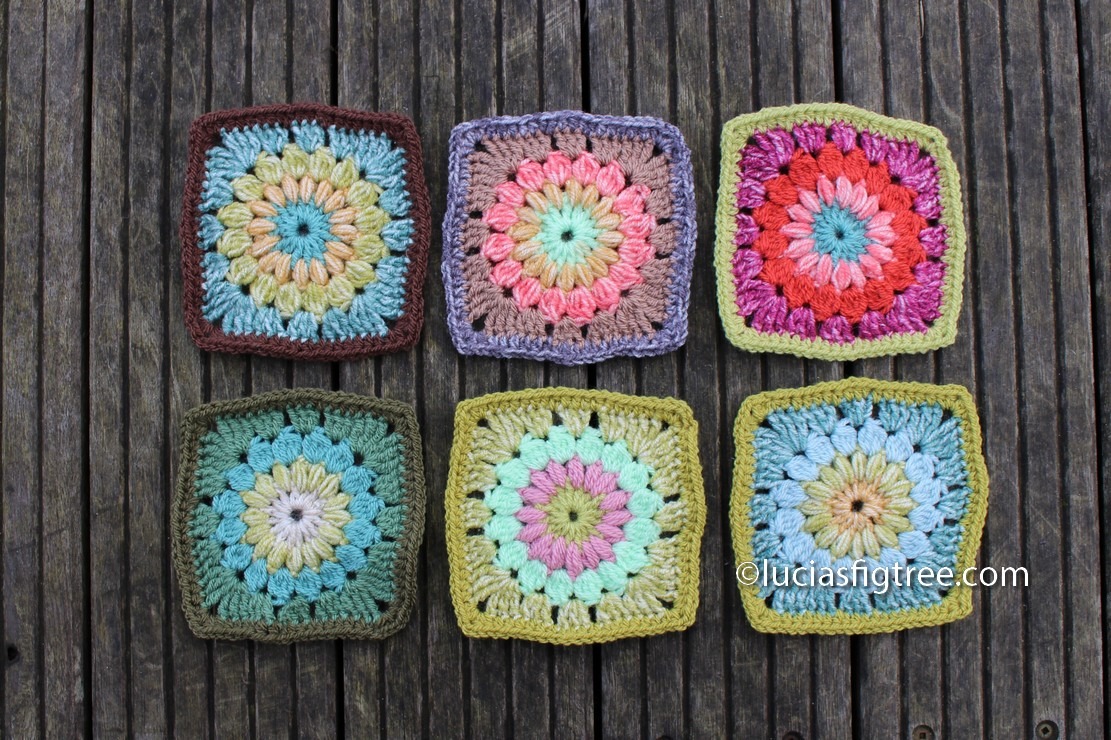
The quantities above are for a blanket which measures:  120cmx200cm  .I made 9 strips of 15 squares each , so we have in total 135 starburst squares.

As said the pattern for the starburst is from Jane Brocket’s book : ‘the gentle art of knitting’. I know the name is misleading but it is a book with patterns for both  knitting and crochet. I bought mine 2nd hand on amazon this is the link:

https://www.amazon.co.uk/d/cka/Gentle-Art-Knitting-Jane-Brocket/1843405326/ref=sr_1_1?ie=UTF8&qid=1486052621&sr=8-1&keywords=the+gentle+art+of+knitting

please check the 2nd hand availability as it can be a fraction of the price and unless the books are ex library they are always in great condition , besides you recycle and save the planet and give a really nice book another chance! so win-win all the way !

note that I have added an extra round of half trebles, that is because it frames better the square and make the all thing much neater , but I am afraid, it adds more ends to sew! and talking about the much dreaded ends, just after each round is complete please,please sew your ends!!! if you do that it is not such an horrendous task at the end !

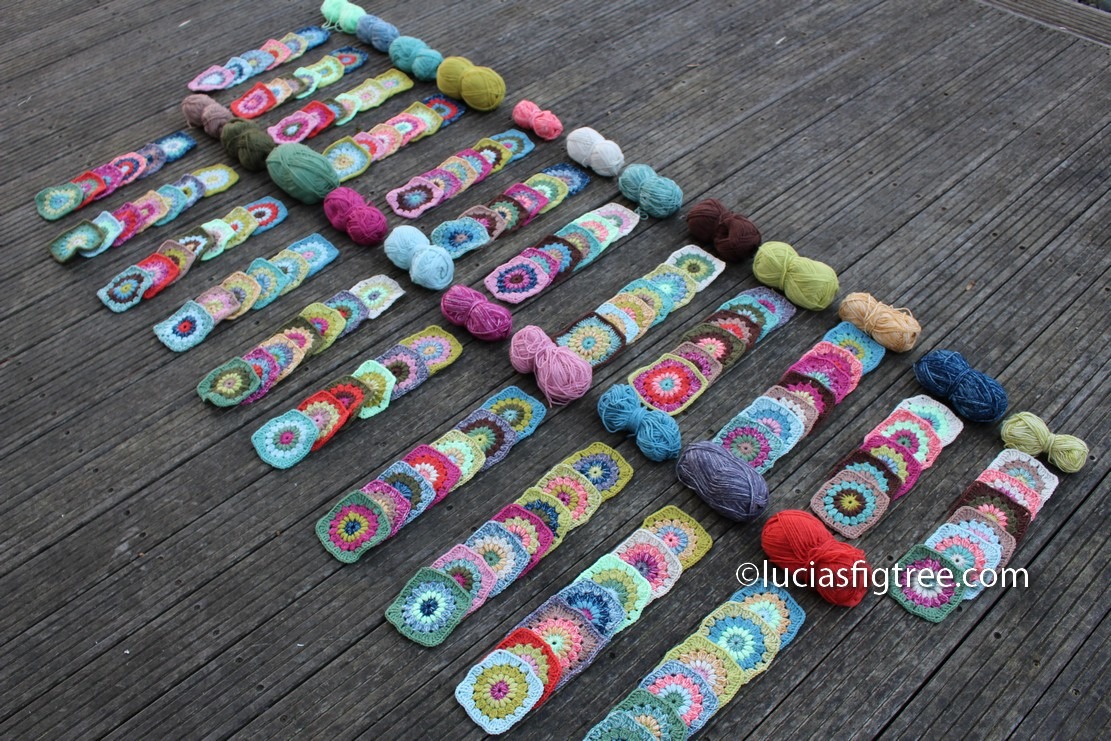
there are 2 ways to make the blanket: one you do the lucky dip and pick random colours off a bag without looking, or if you are like me and you want to control the hues makes all the 135 squares one round at time , then you clear up some space or use the outside and place 135 little squares so to decide the next colour up.

both methods are excellent it is just up to you what you prefer.

THE BORDER!!!!!

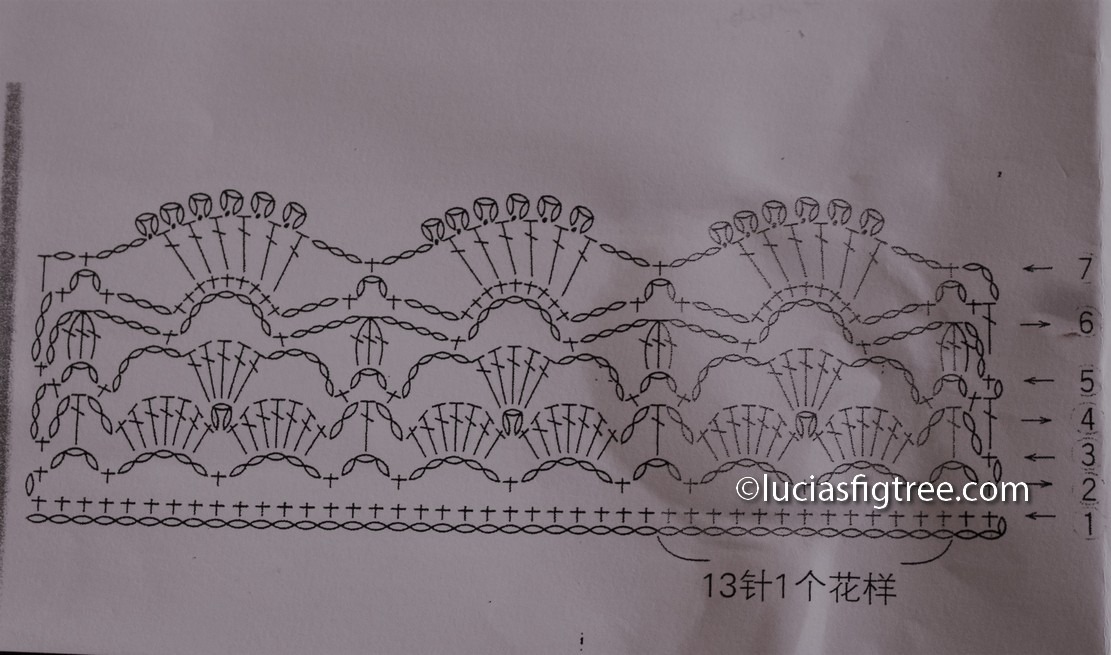
I m so surprised and delighted that the border has been such a success! as said on facebook I tart up something I saw on the internet. this is the original diagram. as you can see it is just the horizontal part and there is no corner.. so I made the corner up and eliminate some of the  rounds.

lets start from the beginning:

you join all the squares together with a simple SC stitch then I did a full round  ( foundation round )of half trebles in biscuit : the corners are 2 sc- ch1- 2sc then  2 more rounds . I think it is called moss stitch:

ROUND 1 : sc, 1 ch,skip a stitch below and 1 sc

ROUND 2: skip the sc of the round 1 and in the ch1 space make a sc not in the space but in the row below, the foundation row

this will make a nice sturdy frame for the border. the border works on a multiple of 13 stitches . I started just after the corner with a ch3 skip 2 of the base. and kept going with round 1 . this  round it is really important and yougot to arrive at the corner with a ch3 so be careful, if you find that for some reason you are either shorter or you got too many just unravel a few of the chain and try to fiddle a bit you wont notice that much at this stage if instead to skip 4  you skip 3 as long as you do it for a max extra of 4/5 stitches! it is called fidgeting…don’t do more then that or you have a dog-dinner of a border!!

On a serious note if you keep the intervals precise of round 2 in the diagram your  border will sit perfectly flat .

ROUND 3 :I followed the diagram but I didn’t do the 3 ch space between the 2 shells.

ROUND4: I followed the diagram but instead to do the shell on the 3ch space that I omitted in the previous round I did my shell in the space between the 2 shells of round two.

ROUND 5: as the diagram.

ROUND6: skipped

ROUND 7 : final round I followed he diagram but instead then more chains I made sc in the round 6 ch spaces. that give a solid well defined last round instead then some flimsy chains , they might work for cotton but in heavier dk yarn  it is much better more definition , it keeps your border neat and straight without either frilling or curling

corner: please look at the picture, it is self explanatory .

I will get the program to write diagrams and  once I figured out how it works I will make it easier for everyone to follow my pattern..it is just I need to find the time to do that. If out there is one of you that is a computer wizard and know how to do that get in touch!!!

well that is all for today,

to the next blanket for February…gosh I have to think of something then!!!! …I deffo bitten more then I can chew with this one blanket each month!

all the best Lucia xxx


ABSTRACT EXPRESSIONISM AND CROCHET. WHY NOT?

Abstract expressionism and crochet…. I bet a lot  of people will find my statement total blasphemy.

I don’t mind, if that is the case, and I apologise in the very unlikely eventuality that an art critic has stumbled upon my blog. The purpose of the entry is to tell the story how this blanket came about, and   how I have used  saturated colours.

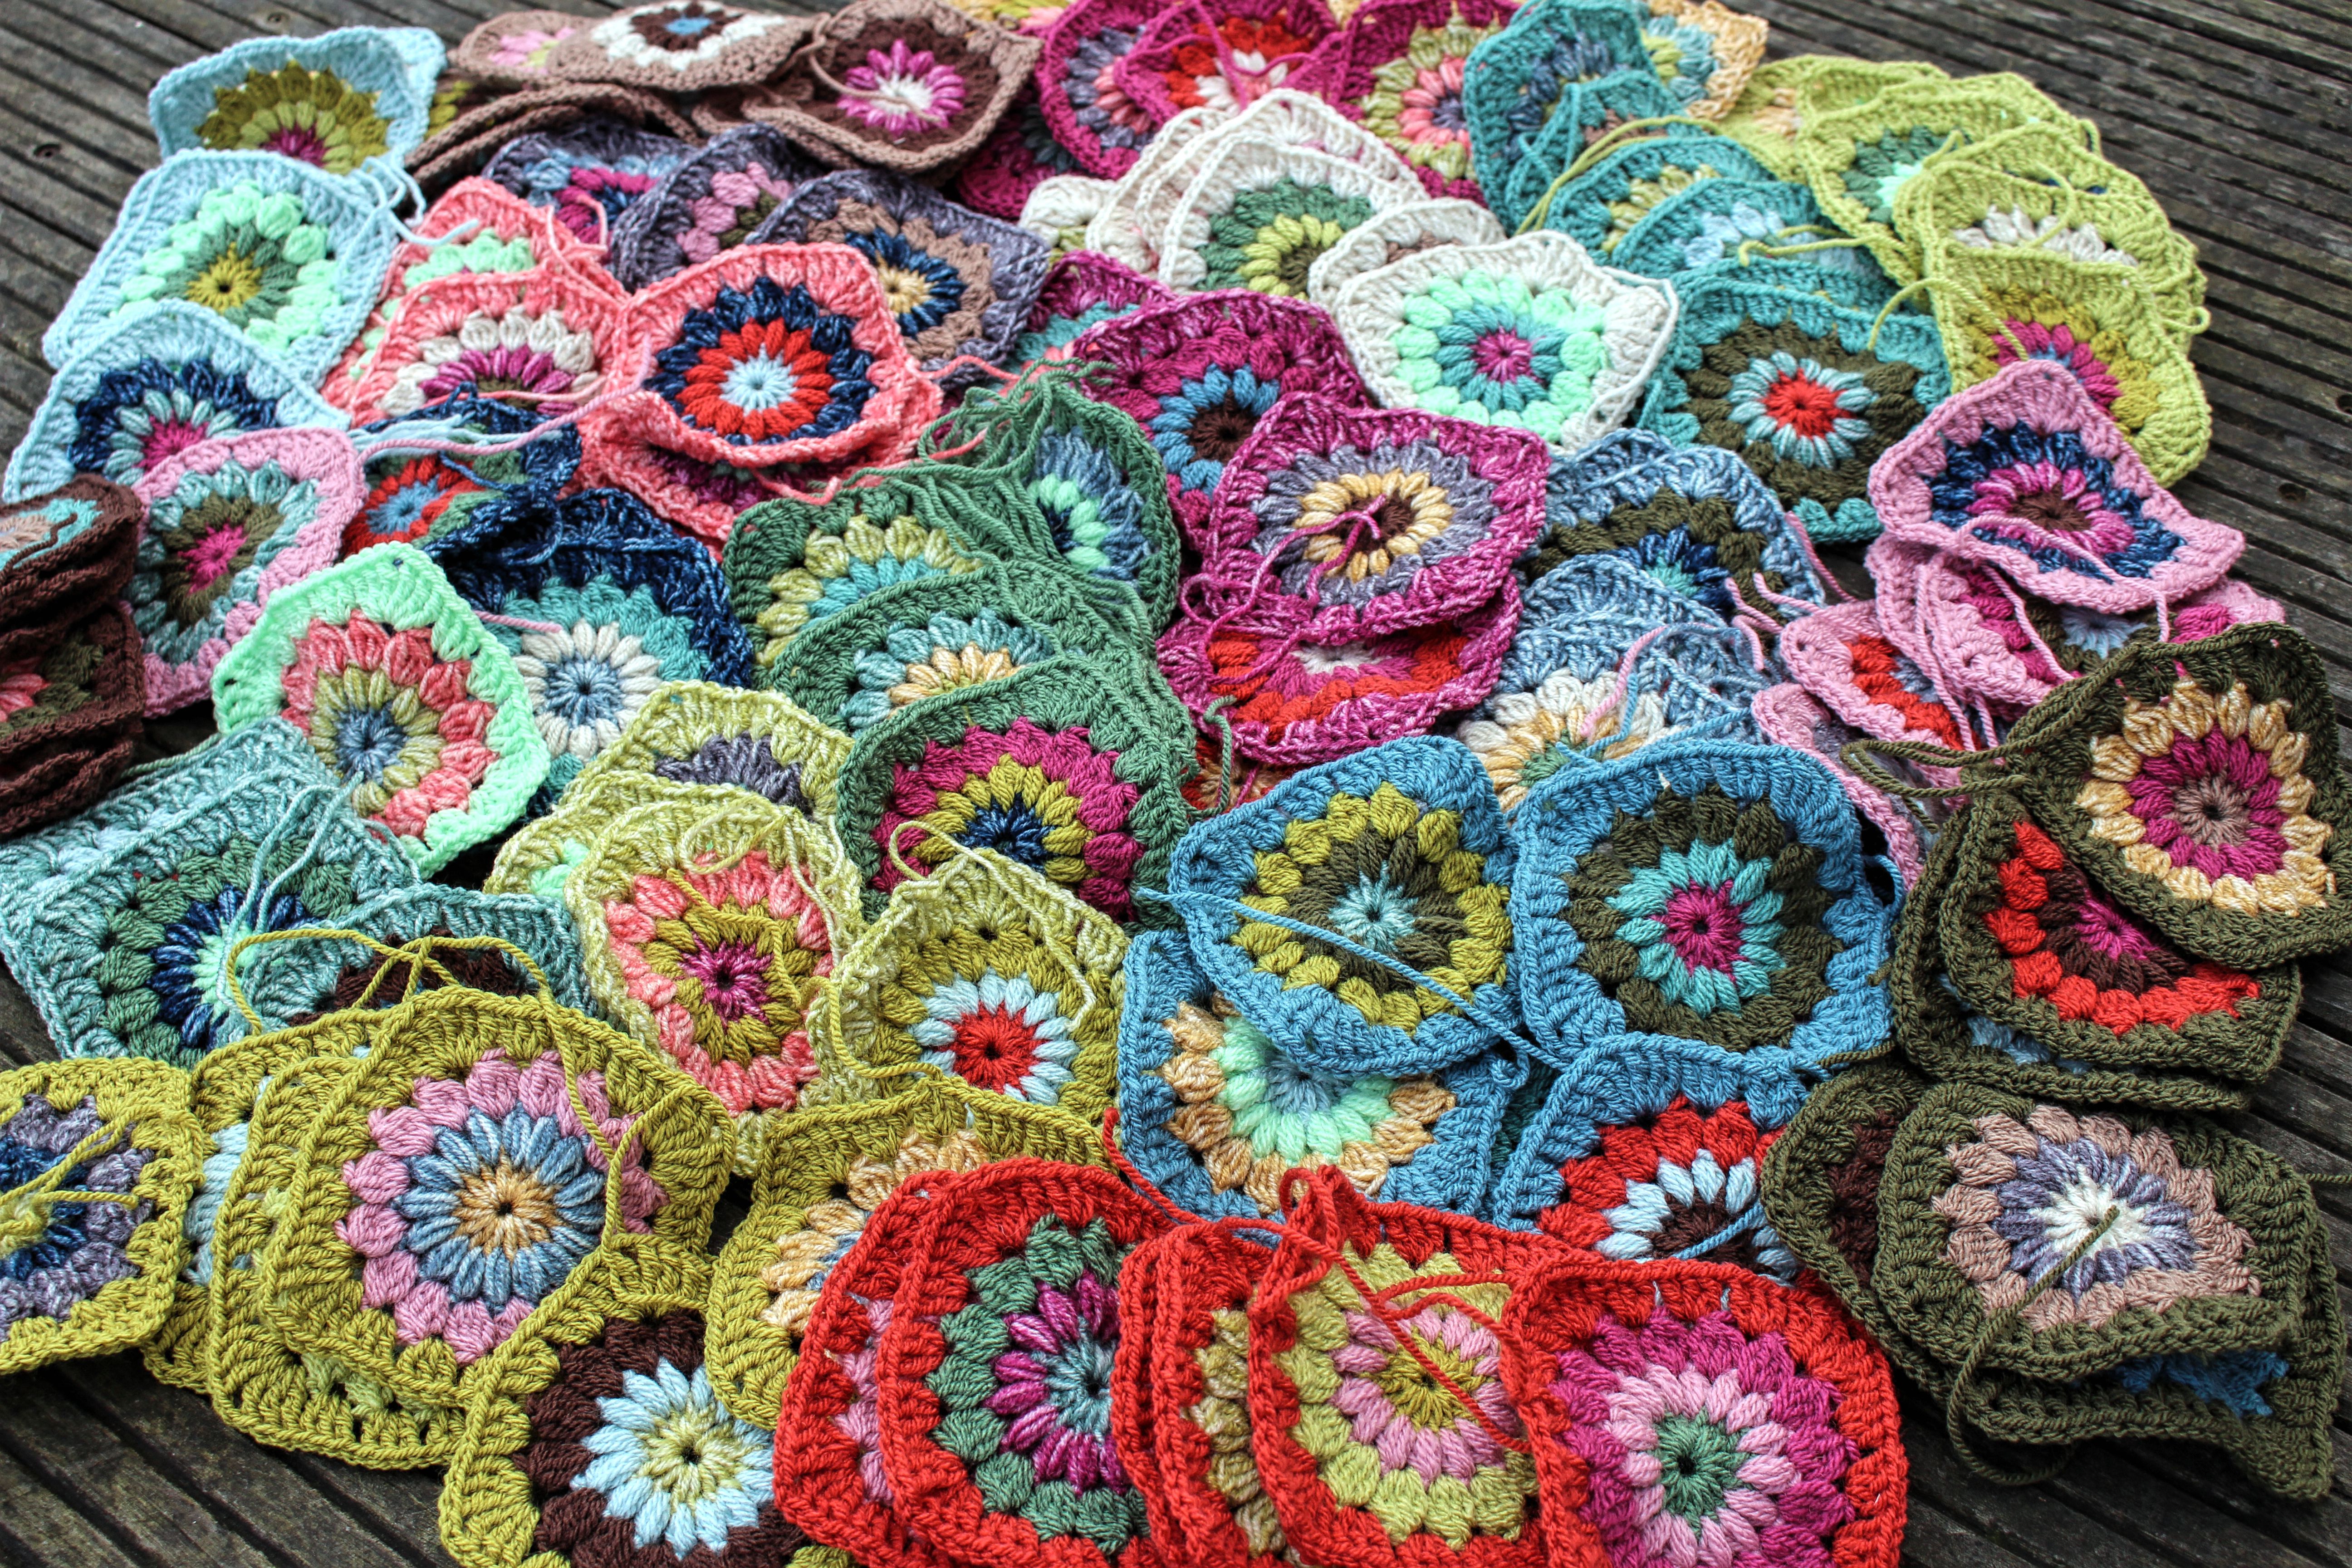
It all started with a pile of yarn , and the notion  to try something out of my comfort zone for a change. I wanted to use a pattern with a strong visual impact so I opted for  bull’s eye  which is a circle inside a square. If you google bull’s eye crochet square, the search engine will come up with several versions same basic design but slight differences due mainly to the thickness of the yarn ,which will determine  the size of the square, the number of stitches and the numbers of rounds .

I made a few samples ,with one strand  of DK but it turned out too flimsy and far too many rounds , so I opted for 2 strands together and fewer rounds. That created a more distinctive texture and visual impact. that made  the blanket  not only bold in colours but also bold in texture and weight!. ( in the photo above the one strand sample)

lets go back to the colours…

I wanted to use bold strong saturated colours and most of all  what are often considered ‘difficult ‘colours such as midnight blue , emperor, burgundy for example. 

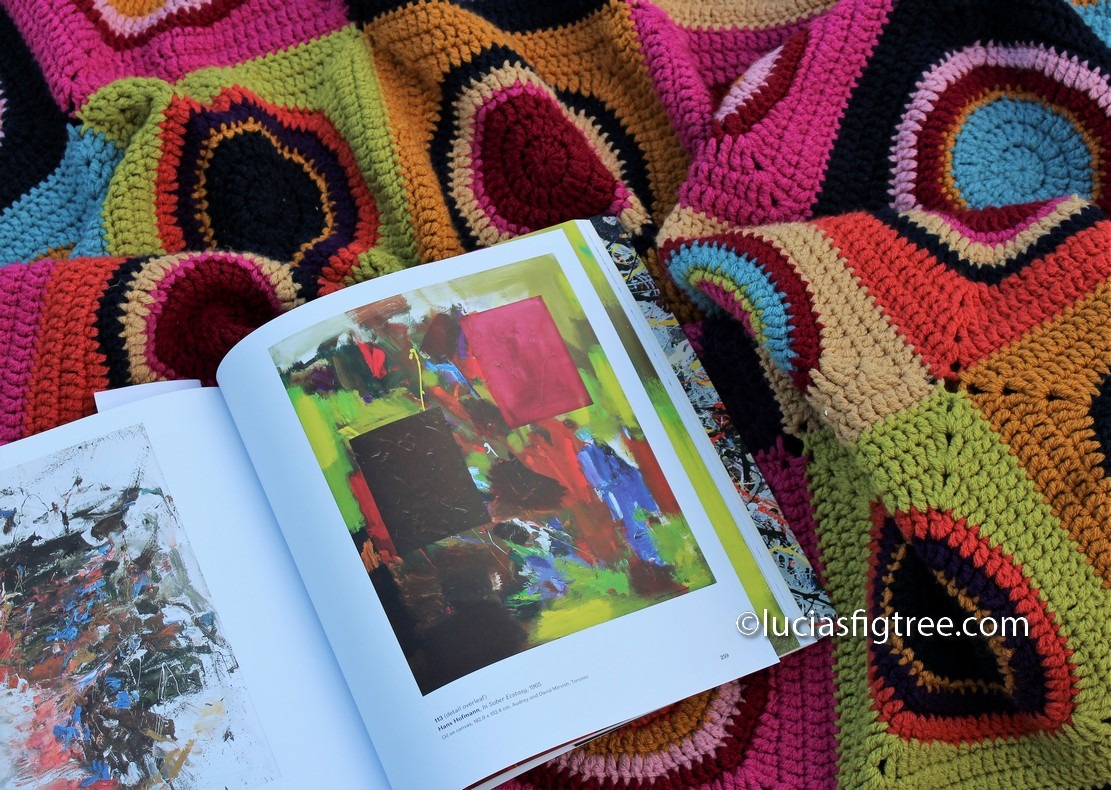
Colours that very seldom I choose to add to my selection. I toiled with different combinations without much success I have to say, Then ,while in London last  September , I went to see an exhibition with my oldest daughter Francesca at  the Royal Academy of Arts called ‘Abstract Expressionism’  a selection of works by Hofmann, Pollok, Gottlieb,Willem de Kooning, Rothko,Kline,Still and many others.

I am not an expert or an art critic but just looking at those paintings as an ordinary person  what  I found astonishing  was how colour do exist as an independent element, and how colours project a mood and  also , how simplified forms and geometric shapes plus the use of saturated hues  create such a strong and bold statement.

I know that  it might be a bit ridiculous to compare crochet to works of art , but it is all about what catches your eye and what do you see and inspire you, it doesn’t have to be a painting at all ,  it can be someone else amazing blanket, can be nature, can be a pininterest board or a scrap of fabric or your favourite jumper.

That afternoon three paintings made quite an impression on me: one is called ‘in sober ecstasy’ painted by Hans Hofmann ,then ‘penumbra’ by Adolph Gottlieb, and  Williem de Kooning ‘untitled’.

I  couldn’t take pictures  obviously so I bought one of the catalogues of the exhibition and went home .

Now I  wish the pictures could give justice to the original but it can still give you an idea where I am coming from. what I saw in Hofmann was the amazing combination of colours and how those  brown/reddish rectangles  just made the painting sing, so it occurred to me that  a ‘dull’ imposing block of colour with a very strong geometric form can make  the other colours sing beautifully. hence dull colours  handled correctly can make a fantastic impact.

I loved Kooning’s  painting for the colours choice and  the  impact  of circles and squares  together and last in Gottlieb’s painting the red ring around the the black dot. can you see where I am coming from?

Bottom line of all of this is:

Just look around you and just pick what you like, and I mean it, pick ANYTHING that inspire you, because that will make any of your work personal and your item will tell  a  lovely story which is not my story but  it is YOURS.

Now few details because I have been asked to write down a pattern for it and the colours selection.

The blanket measures: 200cmx150,  there are 35 squares of 25cm each one.

I used Stylecraft special dk 2 strands together and a 5,00 hook.

the colours are: camel,midnight,tomato,gold,claret,emperor,fuchsia purple,storm blue,lime and pale rose. each square is made by a round centre squared up , I think a shape you are probably quite familiar it is also called bull’s eye.

my version is made of 9 rows:

row1 to row6 for the central circle and the last 3  rows squares it up.

PATTERN:

ROUND 1:

make a magic circle, inside 12 trebles,

ROUND2

2 trebles  together in each of the trebles of the previous round close with an ss on the ch3 of the beginning (24 trebles in total)


ROUND3:

ch3repeat this sequence: *1 treble, 2 trebles together* all around ( 36 trebles in total)

ROUND4:

repeat this sequence: *2 trebles,2trebles together* all around (48 trebles in total)

ROUND5:

repeat this sequence: *3 trebles, 2 trebles together*  (60trebles in total)

ROUND 6:

repeat this sequence: * 4 trebles,2 trebles together* all around ( 72 trebles in total)

those 6 rows make the internal circle. be aware that the sequence remain the same for all the blocks but  in each individual block some of the rows are in simple crochet and NOT in trebles! so please refer to the details of the the individual block to know which of the rows are in simple crochet.

ROUND 7/8/9 they will square the circle as follow:

ROUND7

start this row with *1dtr, 3tr,2htr,5 sc,2htr,3tr ,1dtr* then we do the corner as follow: in the same treble we crochet: **2dtr,ch1,2dtr** repeat 3 more times the all sequence that will make 4 corners (2dtr,ch1,2dtr) and 4 side of the square (1dtr,3tr,2htr,5sc,2htr,3tr,1dtr)

ROUND8

start this row at the corner . in the ch1 space make *2dtr,ch1,2dtr* this make the corners, then  the side is 20 trebles to reach the other corner and repeat the sequence all around.

ROUND9

start this row at the corner in the space ch1 of the previous round and make the corner as follow: *1tr,1dtr,2ch,1dtr,1tr* 23 trebles for the side and the corner again.

note: I say at the beginning 1 treble but the first treble is substituted ,as always happen at the beginning of each round, by 3 ch and if it is a rounds of sc will be 2 ch. also I close every round with an ss on the first group of chains.

normally I would say choose the colours as you please but in this case it makes a different if you use them in a specific order so I am going to list the different blocks as follow:

there are 10 different blocks in the blanket : this is the list:

then combine your 35 blocks as follow in the picture, and join them together with 1 strand of yarn only and  a simple sc in the back , now I m a bit of a perfectionist so I didn’t want the seam of the joining to be detected so when you join the block together please make sure that the colour of the yarn you are using matches one of the colours of the last round of the block. which means if you have 2 blocks to join together  which the last row is one lime and the other emperor use emperor to join. I know you will have more ends to sew but it does make a difference trust me.

the border is 9 rounds using 2 strands of yarn together.

first 8 rounds are sc and the last round is crab stitch .

colour sequence border:

ROUND1 : camel

ROUND2: gold

ROUND3: midnight

ROUND4/5/6/7/8 : claret

ROUND9: midnight.

QUANTITIES of yarn…I am afraid that is going to be a bit empiric but I tried to make a block to see the quantities, you will have to add it all up ….

round 1 and 2 together : 4 grams

round 3: 3 grams

round4:4 grams

round5: 5 grams

round6: 6 grams

round 7/8/9 together: 26 grams

the border I have no idea but I recon is at least 100 grams of claret.

sorry for the quantities, it wasn’t my plan  to make a pattern out of it, it was just an experiment blanket, so if you want to make one please make a sample of the block , that will help you to decide how much you need.

all the best

Luciaxx


ONE BLANKET FOR EACH MONTH….

I have been thinking in the past few weeks what I should make this year, and I have come up with a rather ambitious plan:

one blanket for each month of the year.

I know it might be far too much, and I won’t be able to keep it up, but I still thought I could try!

ALSO, there is another reason:

If you remember I have been thinking about making some posts about colors principles, but it can be quite a dry subject if handled on a theorist base so I figured it might be better showing the ‘rules’ of color’s harmony applied to an actual piece of work,  hence, the blankets.

It is an experiment, so please bear with me, and if it becomes too verbose or boring we scrap it, and we think of something else!

We  start with JANUARY’S BLANKET:

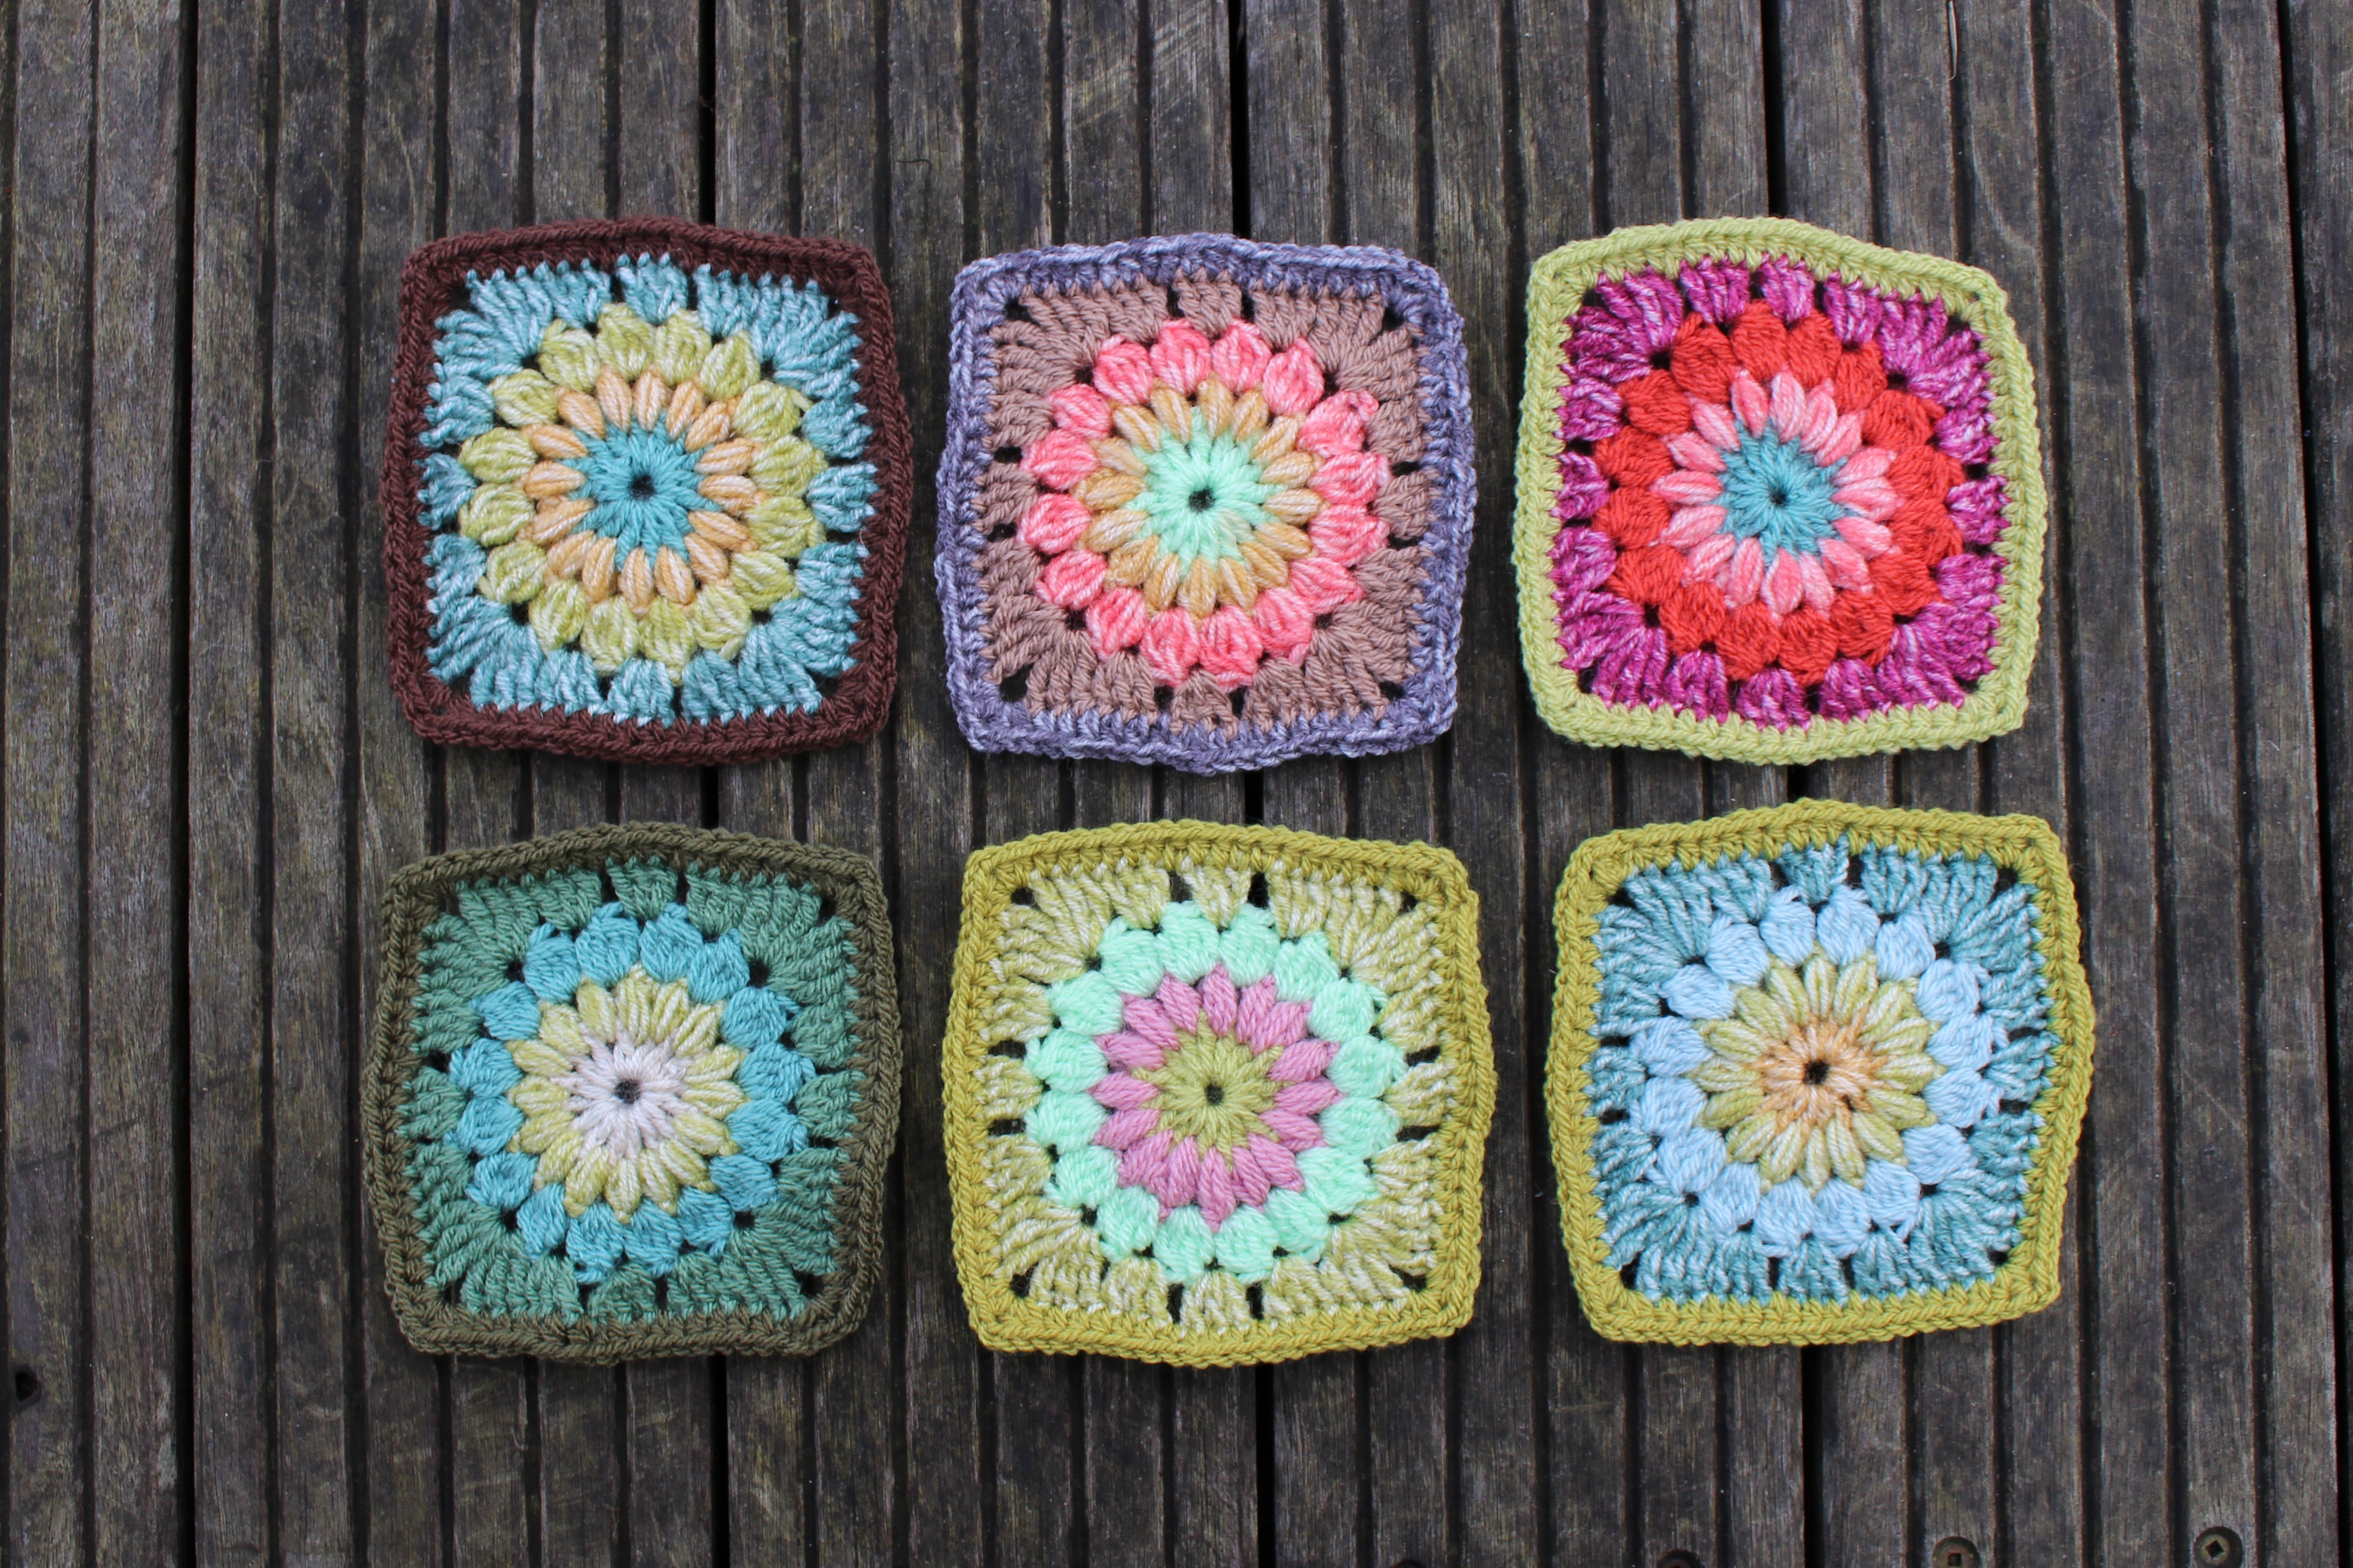
For the  January’s blanket,  I picked a very simple well-known pattern, a starburst square, and mine is Jane Brocket’s version, if you don’t have her book, please do not fret as there are lots of free very similar patterns available on the internet.

I am using  2 different type of  DK yarn :

Stylecraft’s SPECIAL and Stylecraft’s BATIK

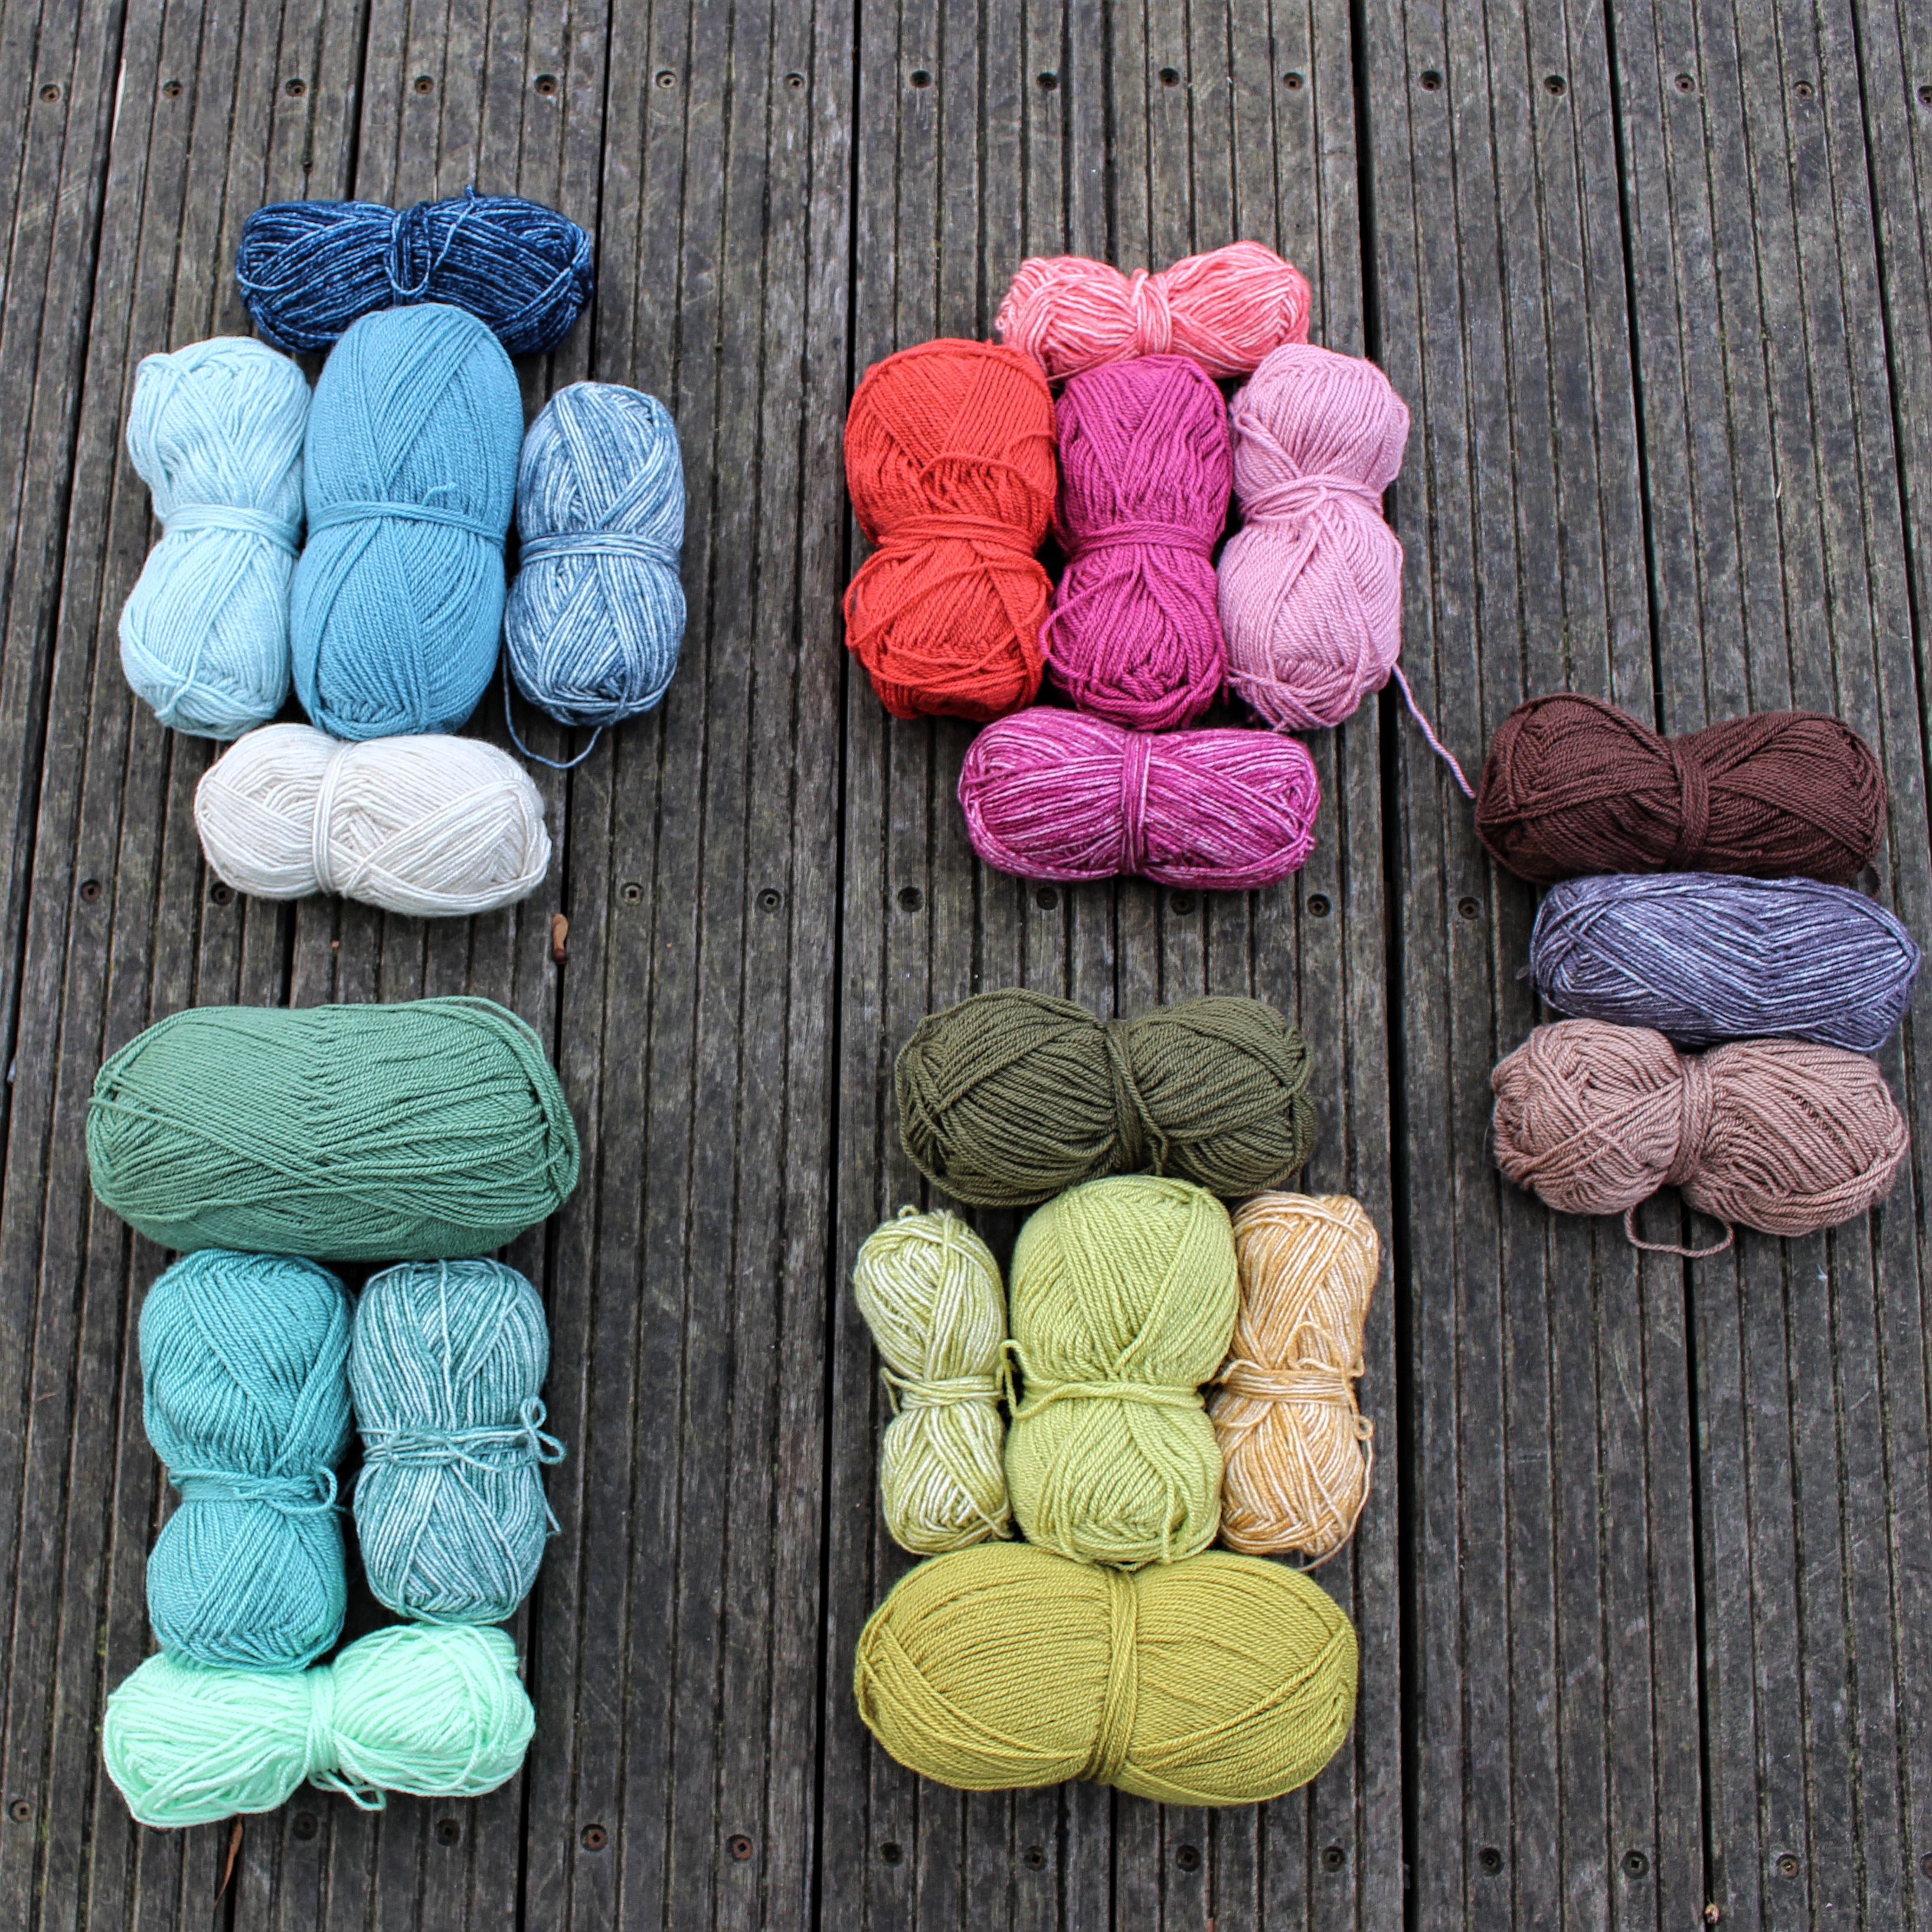
I selected 22 colours…I know a lot, but  I took vantage of the fact that Batik comes on 50 grams balls so I can add more colours and still have the same average weight for the blanket.


I mixed the 2 yarns because this blanket is about HARMONY . Harmony , in my opinion, is  a balance between contrasting colours.

The easiest way to achieve harmony , is with desaturation of the colours.

what that means?

we need to make a step back and see what defines a colour. three parameters defines a colour:

  • hue
  • saturation
  • value

hue  is what we call any colour from the visible  light spectrum . basically the rainbow.

Saturation is how intense the color is. High saturation is rainbow bright, while low saturation is close to greytones.

value is how bright the color is. Full saturation, full brightness is a rainbow colour. No saturation, full value is white. No value is black.

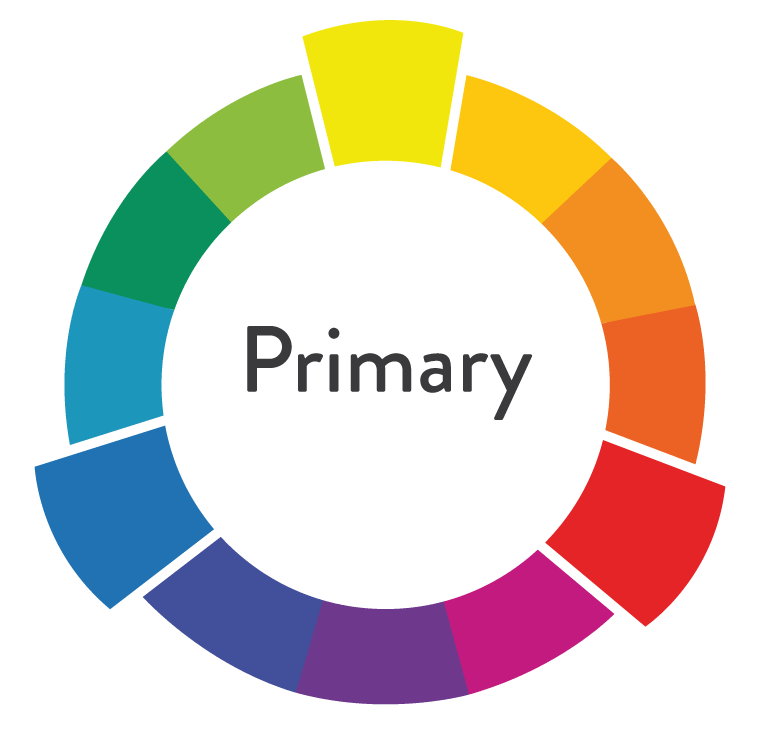
If you use paint you can obtain that in 2 ways : mixing a prime colour (red,yellow,blue)  with white or with a black. That is easily done with paint, but with yarns  it is a bit more complex as you can imagine especially if we use solid colours. That is why the BATIK yarn come really handy because  it  resembles very much to paint by not been a solid colour as each hue  is mottled with white.

does make sense? maybe not ,at this stage , but you will see it applied as the blanket comes along.

So let see these colours in more details…

you will notice that I haven’t use any prime colours but variations of them.

so we have blue’s hues plus or less saturated, Blue is well known for its ability to relax the mind,

then we have  a touch of ‘reddish/raspberry  hues.

I say reddish because I  am not using  a prime color,  the hues are more towards the orange which is  for physical comfort, food, warmth, and  the pink, which is a tint of red,  also affects us physically, but in a  soothing way, rather than stimulating, again plus or less saturated,

then some greens Green being in the center of the spectrum, it is the color of balance

and finally, some ‘neutrals’ those colors  ,plus their variations based on saturation, will help to create more interest in the blanket because they allow the other colors to ‘pop’ up.

I have made so far four rounds; now I have a FEW ends to sew in and then I am ready for the last round of half trebles! That will frame the square ready to be joined in…

more to come soon

Lucia xxx


Beating the January’s blues: a plate of leftovers for a “presto-pronto” quick cushion.

I always feel the first few weeks after the festive season can be quite a bit of a challenge, cold and dark days ahead, if you are like me in the northern hemisphere, back to work, maybe a depleted bank balance after the festivities or are you overwhelmed by far too ambitious list of ‘new year resolutions’?
If that is the case all you need is ..CROCHET of course!!!
What you want it is a small project: something special to look forward and to concentrate on, something reasonably easy and quick for instant gratification, and if that also put a dent in your stash of leftover yarns it is even better!
If you follow me on Instagram or Facebook you might have seen a picture of some shriveled colorful little strip ..well that is my first new project of the year!
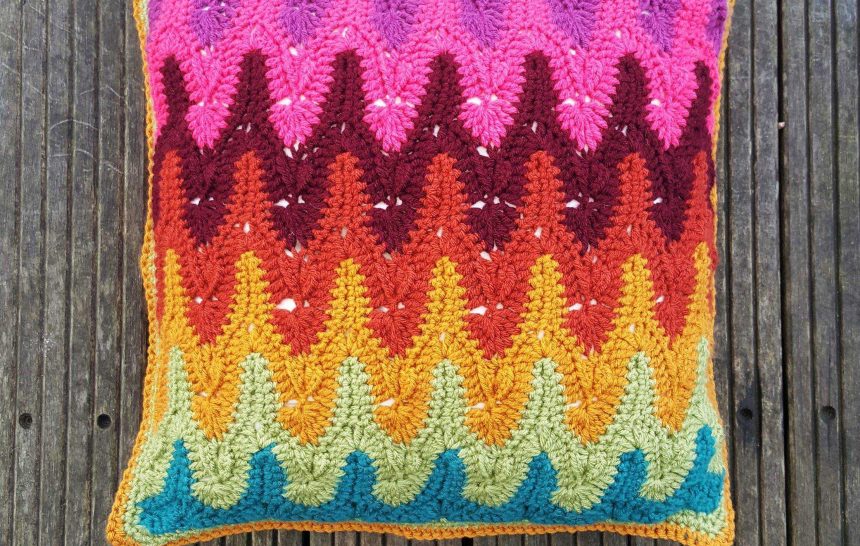
I thought my kitchen looked quite bare and needed some cheering up after I took down all the Christmas decorations, I needed some bright colors, so I made a new cushion for the sofa.
The cushion took just a few hours in between following Lucy’s Moorland Cal.
I used some leftovers Stylecraft chunky special I had. But any chunky in bright colors will do the job. The colors I used are: petrol/spice/gold/meadow/copper/pomegranate and plum.
The cushion measures 45 cm square.
For every block of color, I used about 28grams of chunky yarn.
The pattern is Margaret Willson’s “Bargello pillow” you can find it on Ravelry, this is the link:

http://www.ravelry.com/patterns/library/bargello-pillow
I bought just the pillow’s pattern, but all the magazine’s issue looks quite nice too.
Now a few tips:
ONE:
Use a smaller hook from what the yarn recommend; I used instead of a 6,0 a 4,5 hook. My hand is quite loose so just have a try. What you want is a dense, stiff fabric. Doing so will make your pillow less prone to lose its shape with use.
Do not worry if it looks all wrinkled and misshapen, all you need is some steam-blocking! And voila’ you have a lovely, smooth, perfectly shaped square!!
TWO:
The two sides of the cushion are different. That not only optimize the use of your stash but also create an alternative look;
THREE:
Make sure that your cushion pad is BIGGER than your crochet cover!!
My cover is 45 cm square, but I used a 50cm feather’s filled pad from Ikea.

http://www.ikea.com/gb/en/products/textiles-rugs/cushions-inner-cushions/fj%C3%A4drar-cushion-pad-off-white-art-80300518/

I like Ikea’s pads because they are cheap, mine was 4 pounds, fluffy but still quite firm and more so they DON’T lose any feathers!!!

Well that is all for today, I hope you like my cushion and I wish you all a lovely weekend
Lucia xxx

NEW YEAR NEW ADVENTURES

Hello everyone and the first blog’s entry for 2017!

Firstly I would like to wish to all of you, out there, may you have hope, peace, joy, good health and more during this coming year.

Second, now that it is official, I can let you all know I am an STYLECRAFT BLOGSTAR!!!

How exciting is that???

I have to thank not only Stylecraft to invite me to be part of their group, but more so I have to thank you all for liking my page,  sharing what I do and supporting me and my crochet adventures !!

It still amazes me  that I got the opportunity to write and share my experience with you all, simply because crochet doesn’t have borders, crochet it is what we all got in common, and it links all of us together regardless nationality, culture, language and social background and I think, you will agree with me ,

it is a beautiful thing.

So you might wonder how did I become a Blogstar… well actually I m a bit surprised myself!

It all started with Lucy’s blog Attic24. I just stumbled on it a couple of years ago, while looking at crochet projects, and chatting to a friend of mine, Yvonne, who loves crochet as much as I do.

Lucy ‘s blog was, and still is, amazing! Full of colours, beautiful images, advice, lovely projects and tutorials, to the point that I decided to buy a kit for her cottage ripple blanket and give it a go. The price was very reasonable, the colours looked amazing BUT….

big, BUT, it was…ACRYLIC!

My memory of acrylic yarn was  of an unpleasant,scratching ,shining  fibre, which, if you rub it on, will make your hair standing like a porcupine!!! But it wasn’t the case…  when I opened the pack, I got a soft, squidgy lovely yarn with beautiful hues, exactly how Lucy had described it on her blog!!!

I loved the yarn so much that that year I made LOADS of blankets and I bought every single shade that was available!!

So when STYLECRAFT launched a competition for a new shade, I had to be part of it!

My entry was Lobelia, and I was lucky enough that Lobelia got selected, with other beautiful hues, and became a permanent colour in their special DK range.

From there it is all history… emails, a visit to their HQ in Yorkshire,  I met Sue Pinner at Edinburgh yarn festival last year, more blankets, more designs and here I am a blogstar…😊So  this year is going to be a BIG one, and I will try my best to bring you lots of colours and projects, to share my journey and last but not least to HAVE FUN!!!


FOR THE NEW YEAR ALL WE NEED IS SOME GREEN!!

FOR 2017 ALL WE NEED IS SOME GREEN !!!

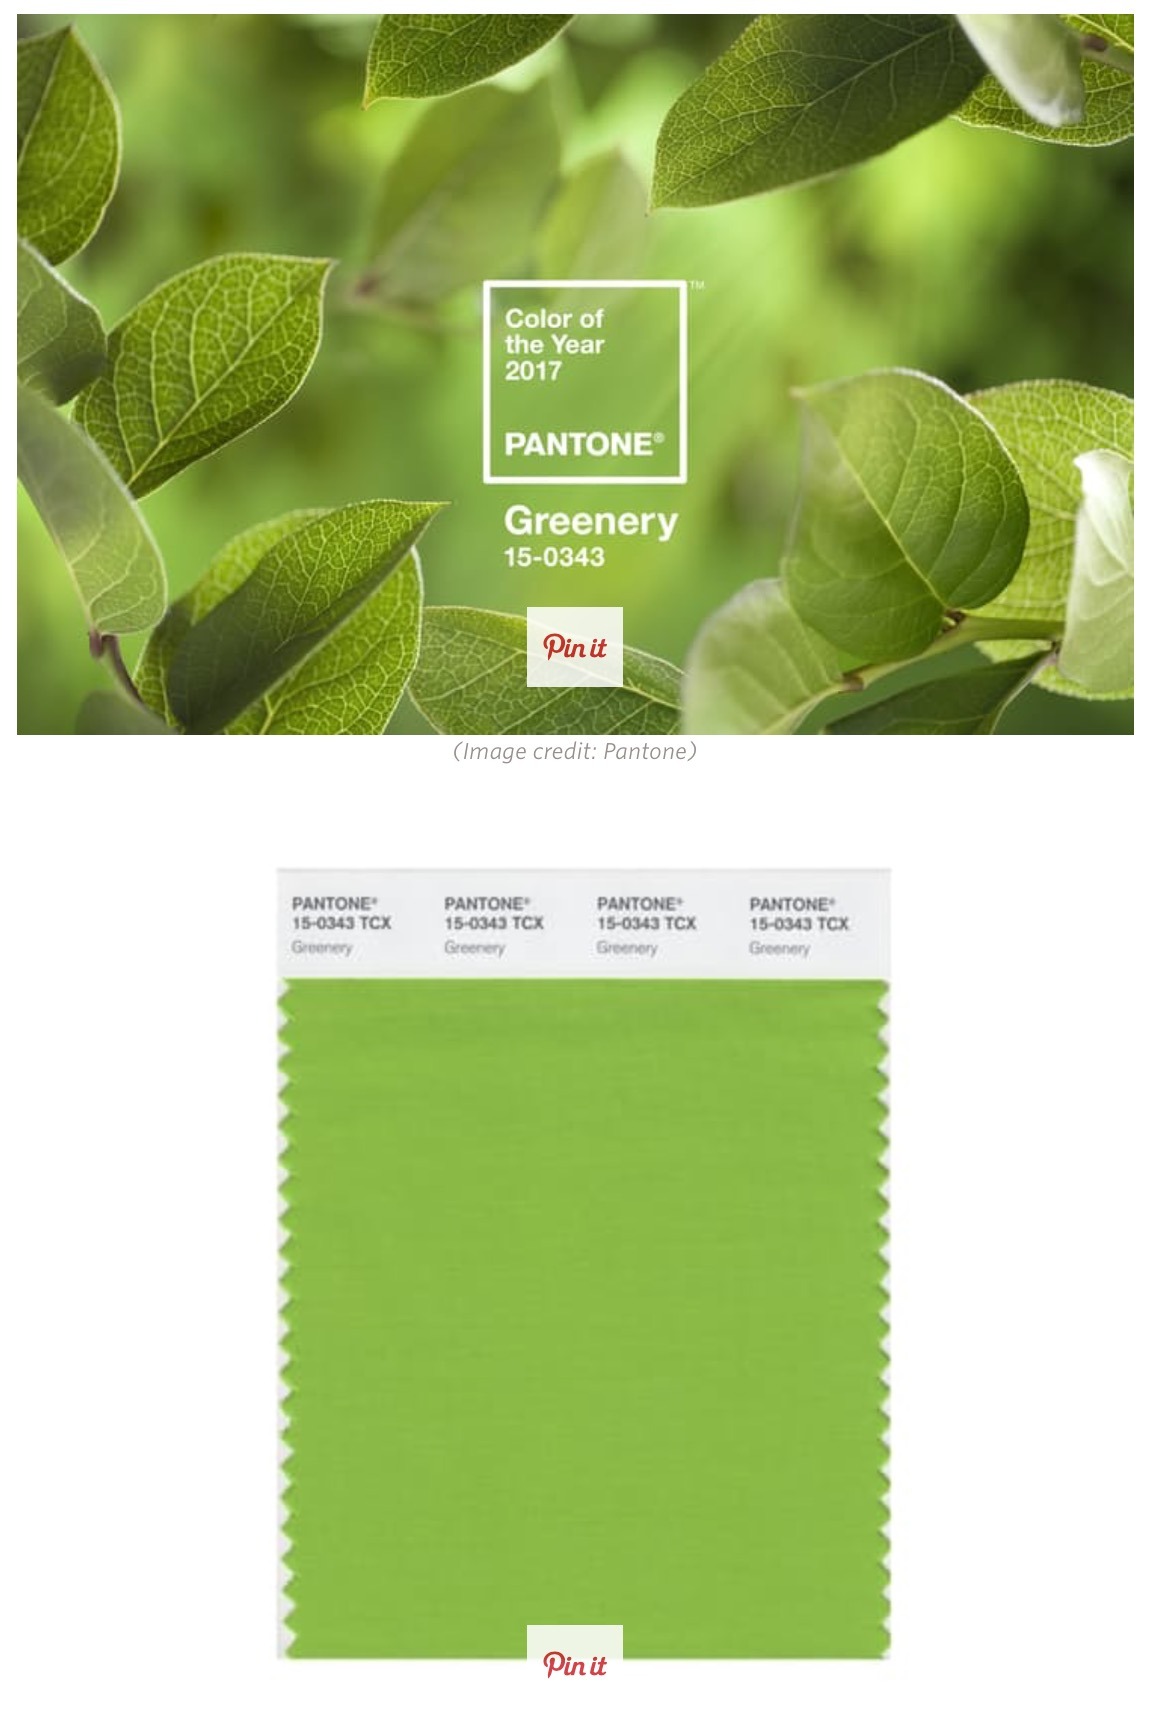
As I bet you are all busy getting organised for the festive season I thought I share with you some ‘colour’s love’. This weekend Pantone, the  market leader in colour communication and colour technology,has released their new colour of the year 2017 and it is FABULOUS !!

It is called GREENERY .

It might seems a bit silly getting excited about a  release of a new colour ,but colours trends are quite important for my job , so I keep always a close eye on them because they can have a substantial impact on  the industry.

The other reason it is because I LOVE anything about colours anyway!

So ,if you are not familiar with,what  is the PANTONE Colour of the Year?

It is a symbolic colour selection; a colour snapshot of what we see taking place in our global culture that serves as an expression of a mood and an attitude.

So even the colours industry seems to send a message of hope ,regeneration , environment issues ,etc  and all the above is very relevant  with the choice as Greenery is symbolic of new beginnings.

So what do you think? You like it?

I do. I think greenery is much better then last year choice of a dusty blue n a pale fleshy pink, and has a much better vibe too.

Back to crochet….

I know that some people find green difficult to use in crochet but ,trust me,  green can be really effective and just lovely!

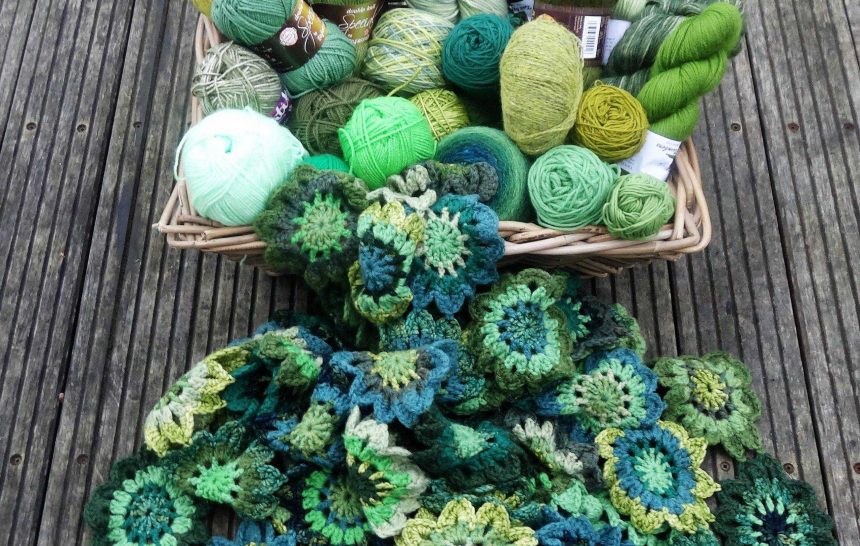
One of the projects I did last February was a multi-green wrap. I have been wearing it quite a lot because greens are one of those colours that goes with everything and it does compliment not only most wardrobes but also skin tones and complexions .

The idea came from an amazing blanket I saw  quite a while ago on a blog called ‘according to Matt’ the blog has now been revamped , renamed and it  looks fantastic is called : ‘Boys&bunting’

http://boysandbunting.blogspot.co.uk/

Please Have a look because there are a lot of really nice projects, tutorials,reviews and amazing photography too.

This is the link to the blanket: http://boysandbunting.blogspot.co.uk/p/according-to-matt-archives-japanese.html

From there I got redirected to Lucy ‘s at Attic24, as she used the pattern for the Japanese flower on a lovely wrap in 2011! ( good patterns never get old)

Http://attic24.typepad.com/weblog/2011/03/japanese-flower-scarf-ta-dah.htmlo,

So , well, I had to make one too!!

Mine is all green, made with a lot of left overs , great for your stash and really easy to do too. The pattern I used is the same that Lucy used on the original entry and it is from   a Japanese book , that I believe it might be still available on Amazon https://www.amazon.com/MOTIF-BOOK-VOL-Japanese-Crochet/dp/4529044424

But  don’t worry  if you can’t get your hands on the book  , it is not that crucial as there are so many very similar versions  of the pattern on pin-interest so just put Japanese crochet flower on your search engine and see which one you like best .

That is all for today,

2017 is going to be the GREEN YEAR  so TRY  SOME GREENS!

Lucia x

P.S. The sample is made with Stylecraft special dk in : bottle,meadow,cypress and pistachio.