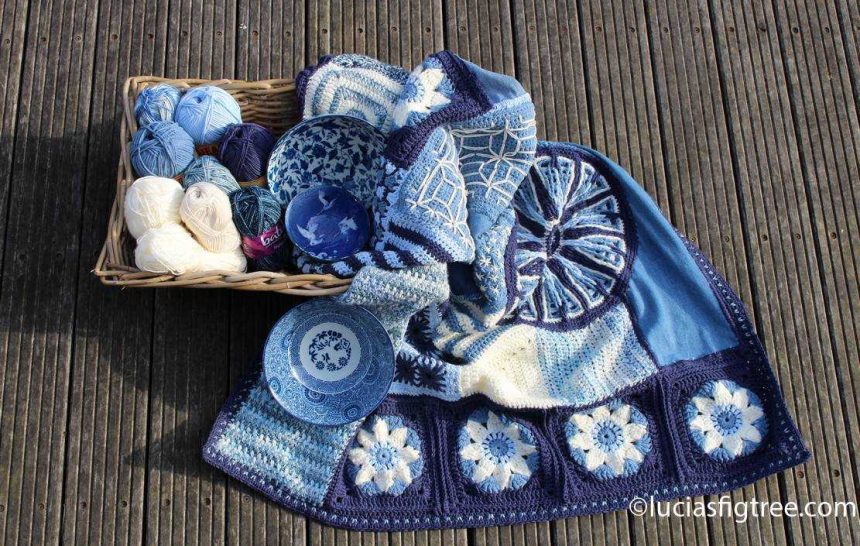
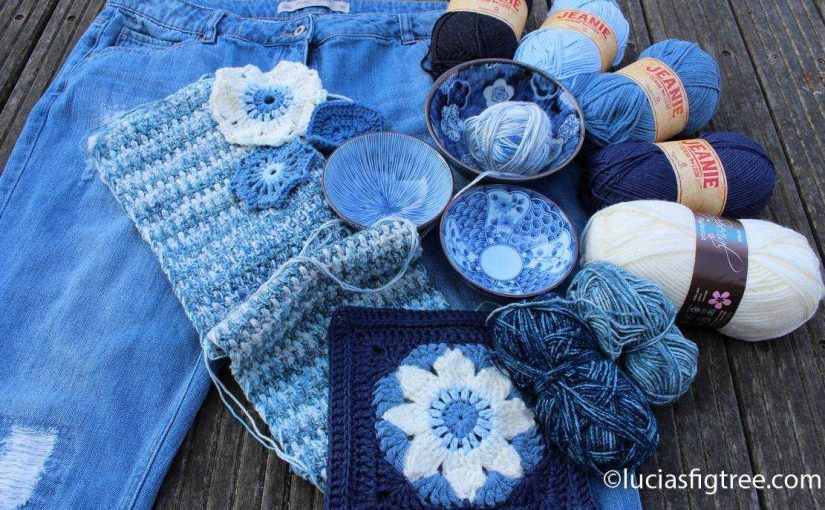
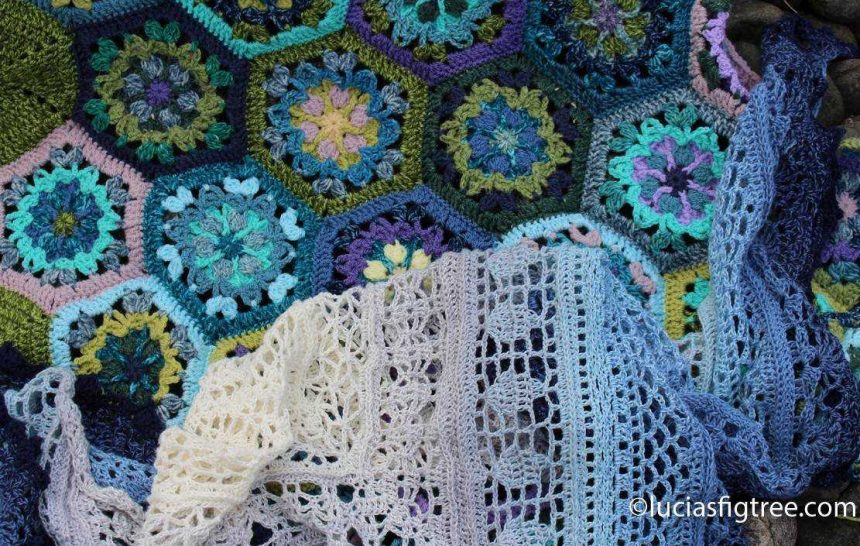
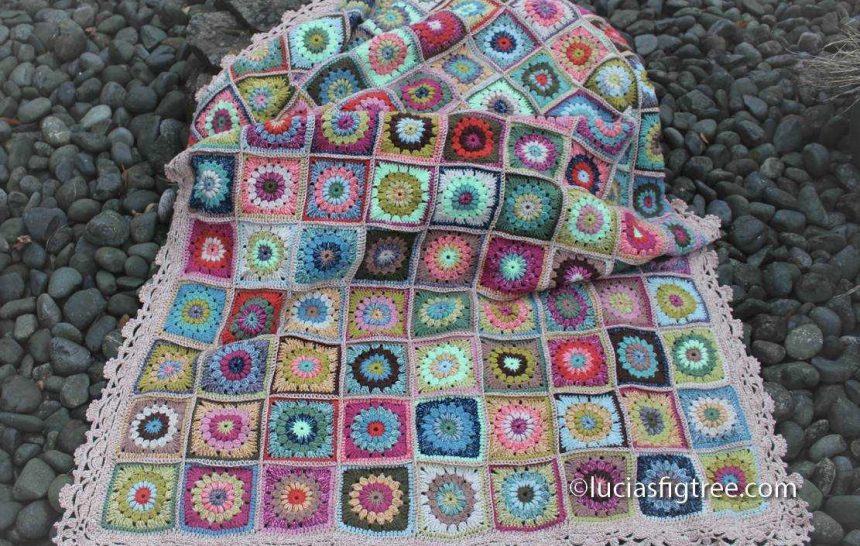
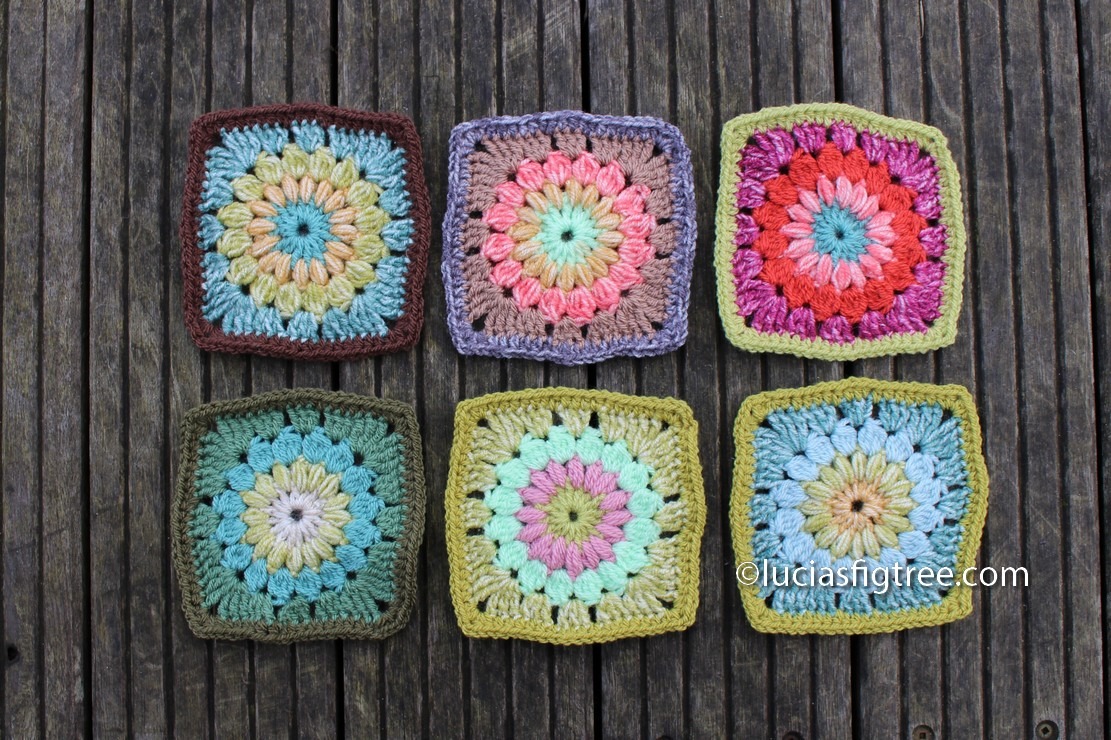
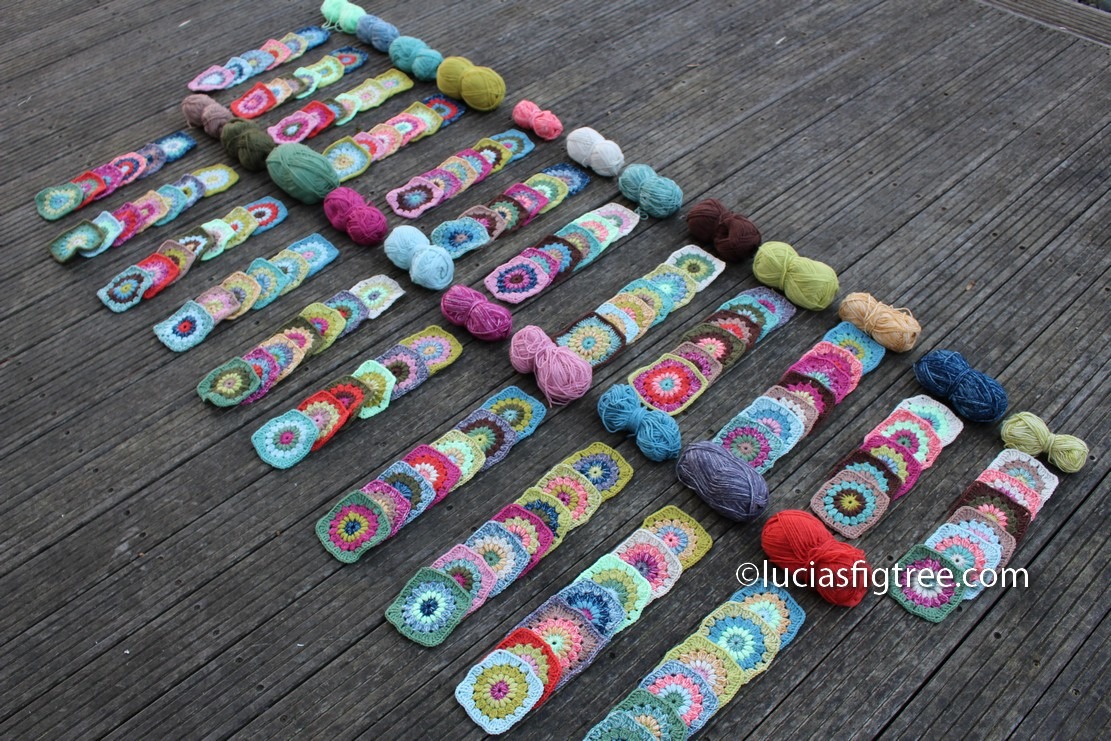
June’s blanket, bucket-list and Iceland…

Hi Everyone… it is June and time for another blanket….

this one is about my bucket-list.

I have a few thing on that list, one of them is traveling and visiting/living in new places. the top of the list for the places is ICELAND, and that is what this blanket is dedicated to Iceland.

I always knew since I was a small girl that I wanted to live ‘up North’ well before  Hygge or  “Scandi style”  became so popular.

I made it just 2000 miles up north!  from Italy to Scotland… but I always wanted to hop another little bit..Shetland, Faroe Islands, and then Iceland!

If I wasn’t 53 and had a family, I probably would pack my bags and head for Iceland. In the back of my mind there is still a small flicker  of light which says I could  still do it …my kids are starting flying the nest; Francesca my oldest, she got her master in fine art, Valentina has just graduated this May in Law, Giuseppe is off to Edinburgh University next September, and I just got left Olympia that has still 4/5 years of High school…mmm never say never! ( mind you does Iceland needs a middle age woman that is obsessed with  wool/yarn /colours and books??? )

I could start with visiting Iceland first! I have never been… BUT it is on the top of my list hopefully in the next few months.

So why do I love Iceland?

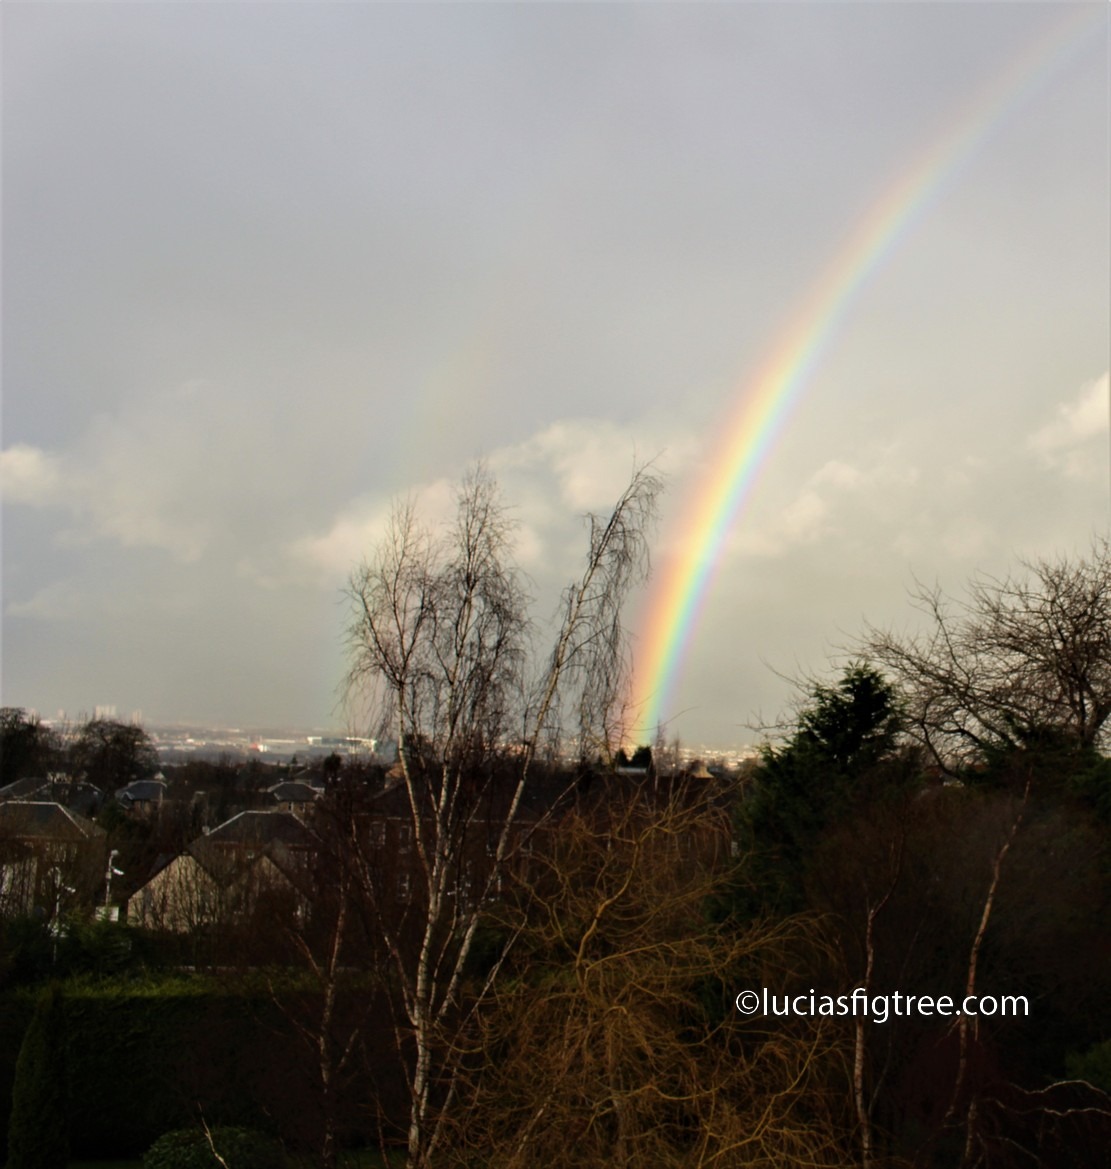
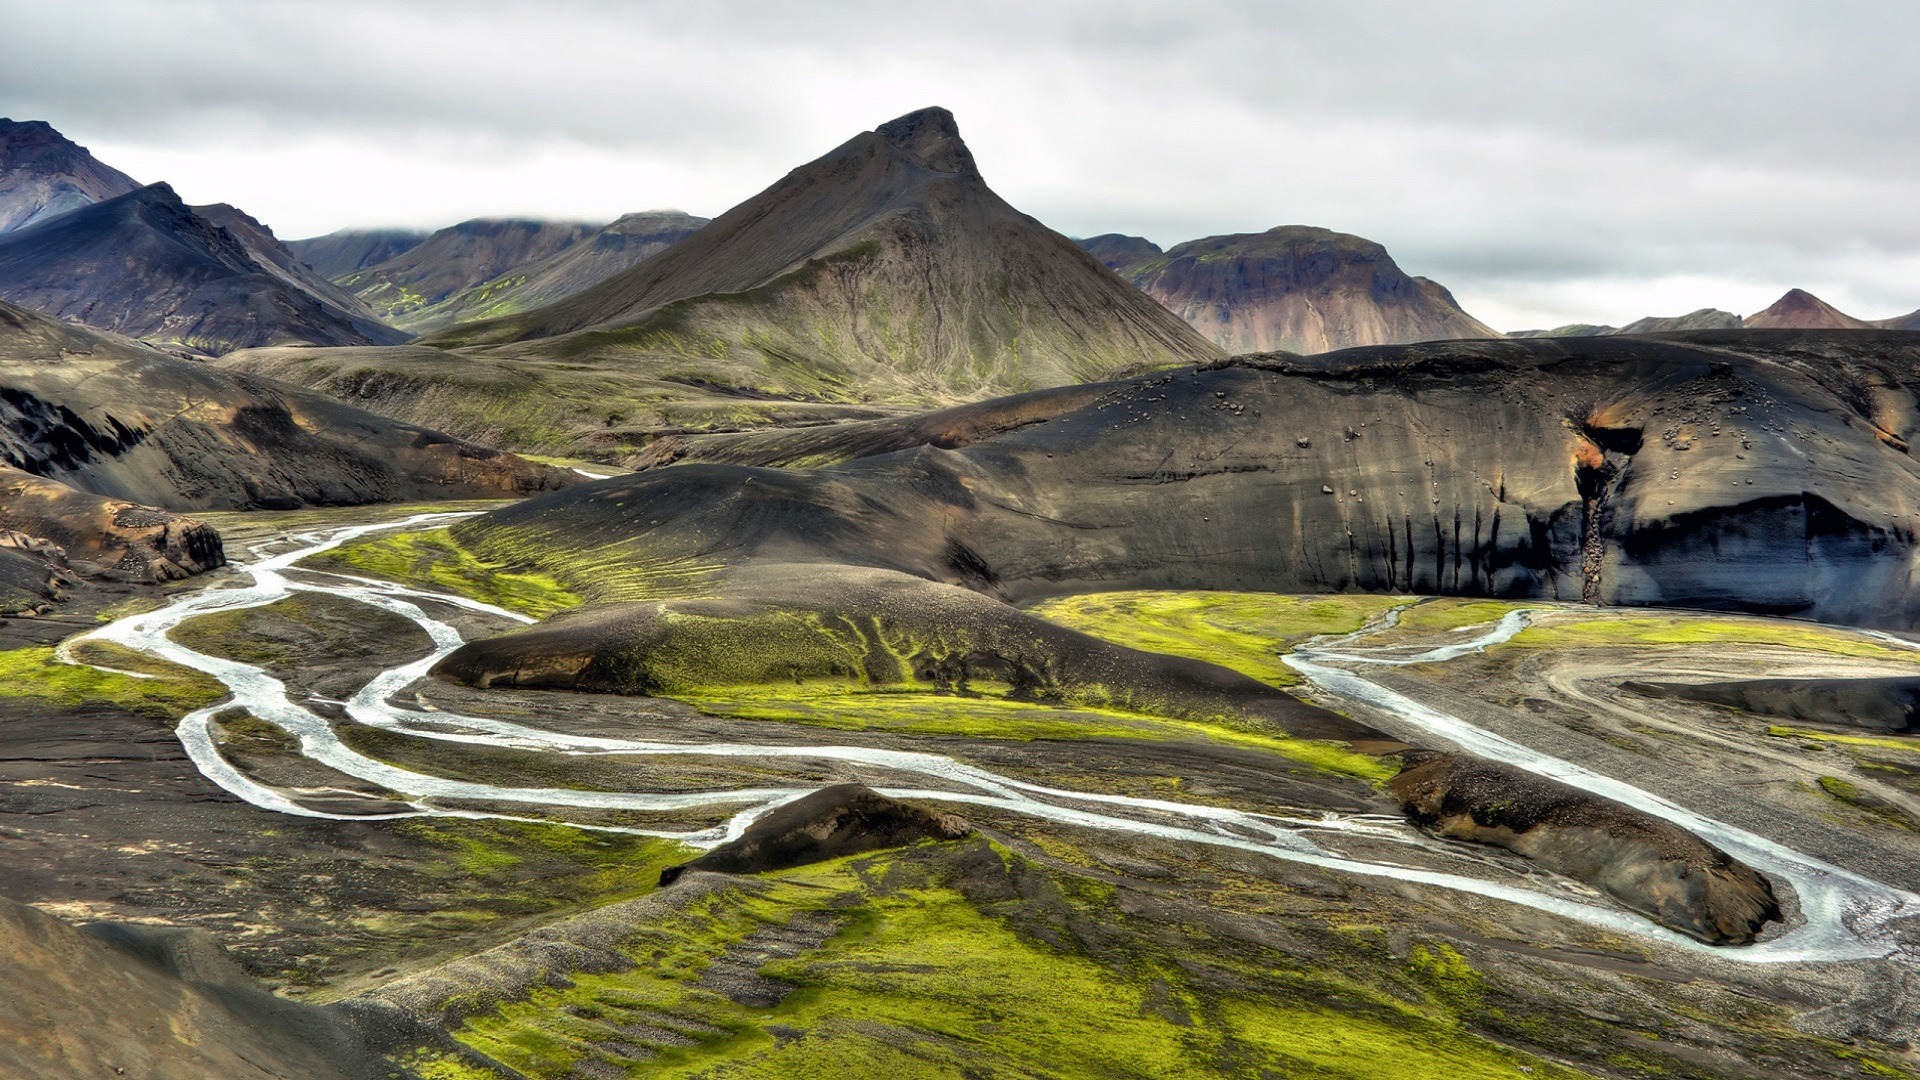
the most obvious reason is that Iceland is beautiful, There are breathtaking mountains, volcanoes, highlands, glaciers, waterfalls, fjords, geysers, lava fields, and a variety of coastlines.

but what attracts me most  are the Icelanders and their way of life and their values.

Icelanders are highly educated and the society is progressive.They have a literacy rate of 99% and most of the population has experienced higher education, they publish more books per capita than any other country. The have topped up the gender gap index Economist recently named Iceland the world’s best place for working women – in comparison, the UK came in at No. 24.Iceland was the first nation to elect a female president; Vigdís Finnbogadóttir was elected in 1980 and stayed in office for 16 years. Jóhanna Sigurðardóttir was Iceland’s first female prime minister and the world’s first openly gay female head of state.

Climate change is on the news every day and I believe it is a real issue for our planet. Fossil fuels are NOT the way forward. Iceland is the only country in the world which obtains 100% of its electricity and heat from renewable sources. 87% of its electricity comes from hydropower, and the remaining 13% from geothermal power. Oil-powered fossil fuel power stations are only used as backups to the renewable sources.

I could go on and add 20 pages of facts. and you are wondering if  I am a serious case of “The grass is always greener…. …..in your neighbor’s field” !!!

So what is really my tangible experience about Iceland and why I like it so much?? and here is where the creative side kicks in and the relevance to the blog…

LOPI YARN!!!!!

and in particular.

Icelandic Lopapeysa!

I made LOADS of them over the years…lopi yarn  is made from the wool of the Icelandic sheep.


It is unique in its composition and together, the distinctive fibers create wool that is warm, lightweight, water-repellent and breathable.


OK, it is  a little itchy ,but once you have worn a few times and washed too, it becomes really lovely. I can tell you this from experience as some of the jumpers  I knitted are 10 years old, they have a few holes but they are as much loved as they were once new!! those are few of them I have here at home…

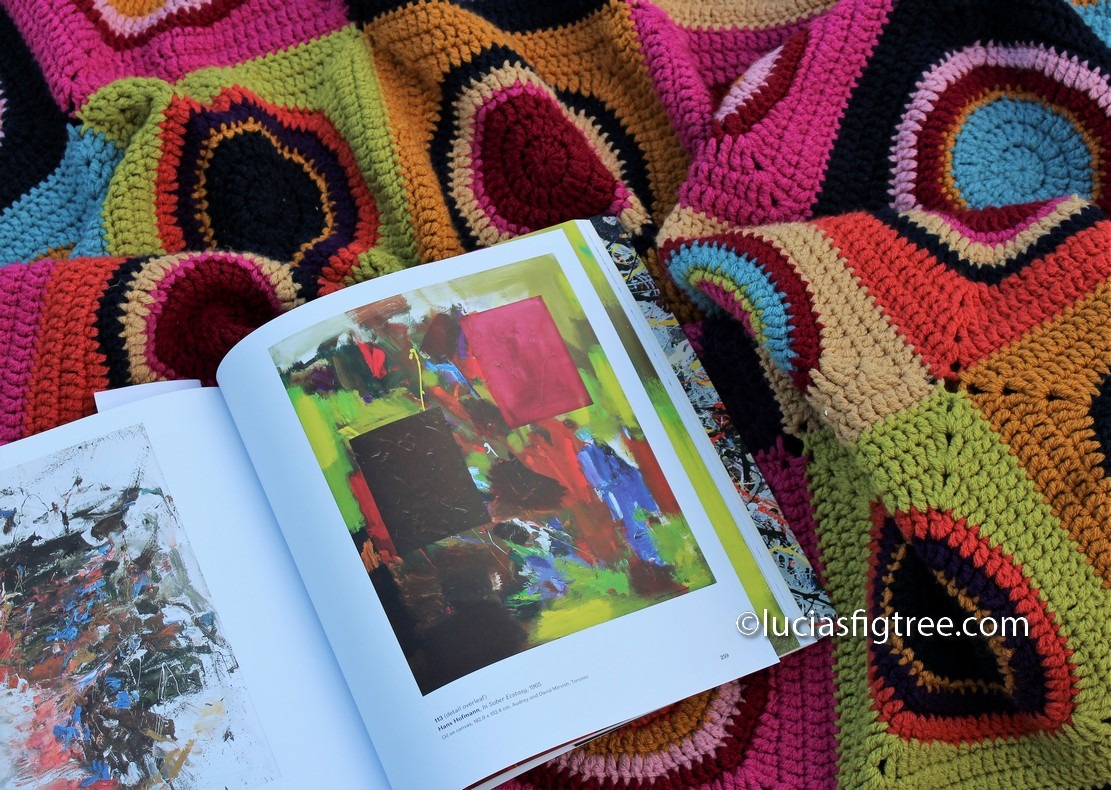
also some of the books ( that is my other vice…books) I love about Iceland:


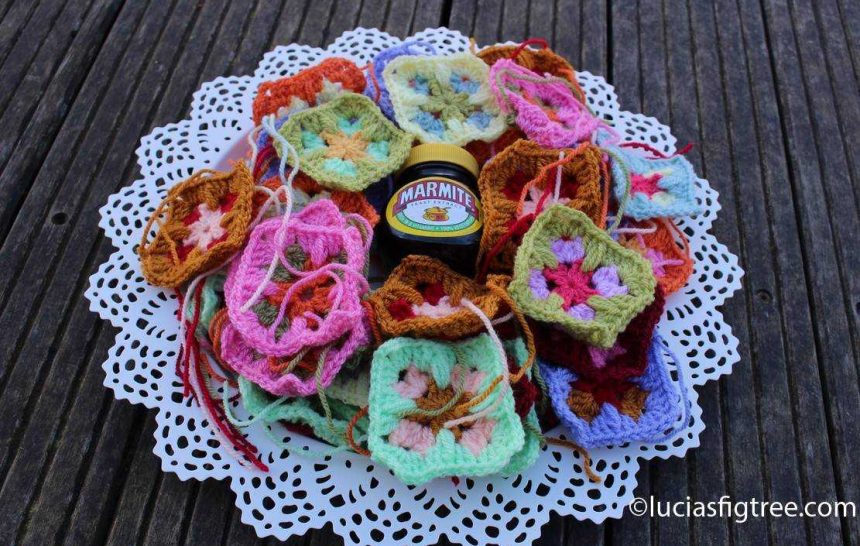
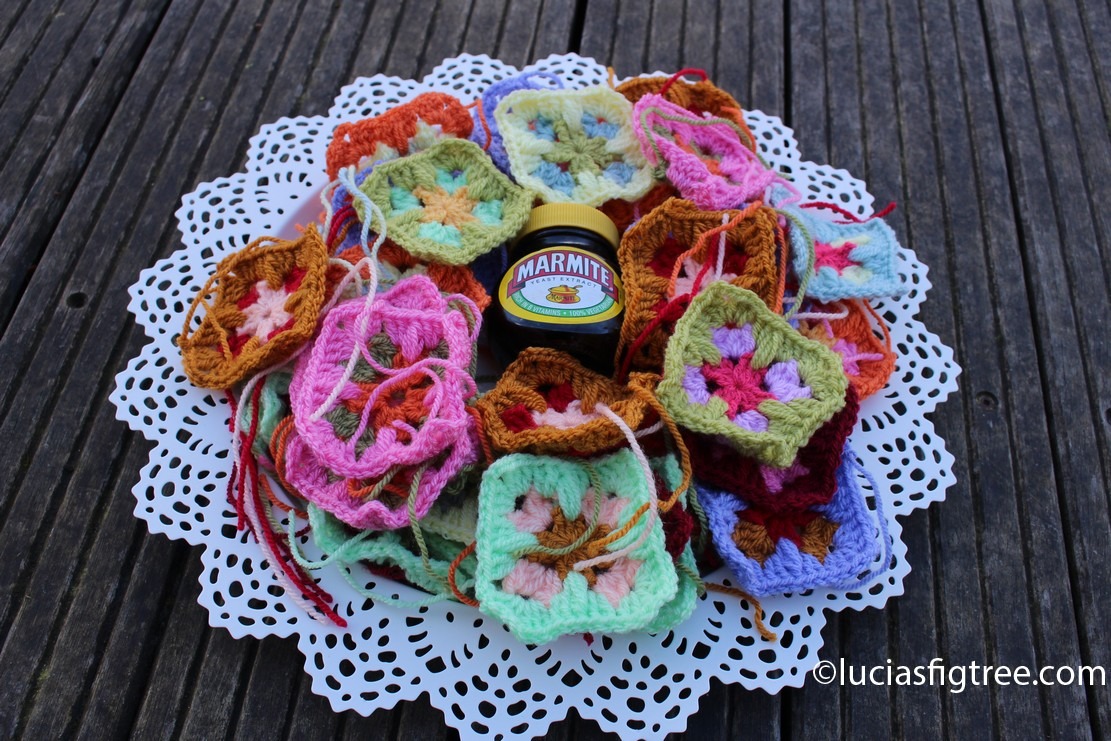
So I never attempted using Lopi Yarn for crochet but I m going to give it a go and the next blanket is going to be made entirely with Lopi . another experiment then…

Next time I will  tell you all about how I have chosen the colors and about Snorri Sturluson’s Prose Edda. I read a simplified version of it when I was 12 . and it is still now my favorite book.

I am also going to tell you about Hávamál, probably one of the most important poem in the book , which tells the story of Odin and the tree Yggdrasil.

and  Bivröst (“Moving Way” in Old Norse),The Bridge of the Gods:

Gvðín gerþu bru af iorþu til himins, er heitir Bifravst: “The gods made a bridge from earth to the heavens which is called Bifravst”

and about some amazing music I  I was so lucky to see live last night: Eivør Pálsdóttir.

Eivor is not an Icelander, she is a Faroese singer-songwriter with the most amazing voice ever! totally mesmerizing here is a link to youtube.


Thorin, our cat, loves Iceland too….

To the next time, Happy crochet,

Lucia x


The end of May: The indigo blanket

Last day of May and here is my May blanket…

I’ve called it the Indigo blanket because of the colors.


The Indigo blanket has been a bit of an unusual one and definitely an experiment. As I have said on my previous post on Facebook I did not have a plan of what I was going to do, I started with the fabric and from that, I built up the different squares. As you know my inspiration has been Japan textiles, indigo, Japanese pottery and also the spring season too.


Scottish spring starts quite late and one of the things I like most about the month of May is the cherry blossom trees. They start around the 3rd week in April, depending on the weather, and they are in full bloom at the beginning of May. Near my house, there is an old graveyard that has the most amazing display of Cherry blossom trees, and every year I wait to see them bloom, and I found walking or sitting under them very relaxing.  I hope you will not find the photo I took of the Graveyard at all offensive, or disrespectful, it is a beautiful and peaceful place.

That is why I thought cherry blossom in my blanket were relevant because they have a Japanese connection too.

In Japan, the custom of enjoying the ephemeral beauty of flowers is called “hanami” and it is an important date in the calendar of many Japanese, as, for those brief few weeks, many flocks to see the flowers and enjoy the festivals sitting, eating and drinking under the blossoms.

I know my local cherry blossoms aren’t remotely as majestic as the 1000’s of plants at Tokyo’s  Shinjuku Gyoen or Ueno Park , or more so the world famous Kyoto’s Maruyama Park  but nevertheless, every year, I wait to see them coming up hoping the weather is good enough to have them in full bloom even if it is just for a short time.

So let’s have a general look at the blanket then…can you see the cherry blossoms? there are 10 of them …, also there are different plain squares, some textured ones and a bit of overlay crochet.


For the overlay crochet, I bought one of CARO Created Design’s  beautiful mandala patterns. I wanted something that resembles the sun  and also reminded me of  the decoration of a Japanese ramen bowl so I used the central part  of her Mandala 6

http://www.ravelry.com/patterns/library/overlay-mandala-no-6

But if you do not want to buy a pattern you can always use any mandala design you like. Interesting enough look at the back of the blanket…the back of the mandala is lovely too.

I thought even a circular simple alternate colours mandala  works too.


The denim part I just cut the jeans and tried to make some pieces with neat corners. The pieces came out of different sizes and also I cut a few hexagons too. I thought that if I crocheted around the edges I could join the fabric squares to the crochet squares. I found out that it is not that easy and I ended up doing quite a bit of overlay with the different pieces, mainly because I wanted to make sure the blanket came out a neat as possible rectangular shape. also one of the characteristics of  Boro textiles is different pieces overlay-ed on each other.

There is a bit of embroidery too…,


Some of the patterns are inspired by Sashiko’s geometric shapes and the little sort of stars are my answer to this amazing picture of

Japanese gold fireflies photographed by Anthony Luke.

http://anthonylukephotography.blogspot.co.uk/2012/01/truly-remarkable-long-exposure.html

the blanket measures 170cm x 100 cm.

THE YARN:


I used a combination of Stylecraft JEANIE in Dixie,Menphis and Delta. fantastic yarn,Aran weight, that beautifully compliments the denim fabric.

I also used some BATIK in Indigo and Storm; some Stylecraft Special Aran and 4ply in cream;

some Sundae dk in Blueberry sorbet;

and finally some Classique Cotton both dk and 4 ply in Ivory for the embroidery.

The Batik and Sundae are used  one strand of each together or , for certain squares I added a strand of  4ply special in cream, to get the same gauge of  the Jeanie.

I can get in more details of the patterns if you are interested, please just let me know.

Happy crocheting!

Lucia xxx


May’s Blanket: an old pair of jeans and a journey.

If you have been following my blog, you are by now aware that what I am aiming to do with this crochet journey is to experiment how you can use crochet as a medium to weave a story into the fabric of a blanket.

Furthermore, I would like to encourage all of you out there to do the same and to create your little piece of history.

Today I want  to introduce something else that it is very important to me:

“Nothing lasts, nothing is finished, and nothing is perfect”.

It is a Buddhist concept called wabi-sabi  “the wisdom and beauty of imperfection.” it can be applied to virtually anything but in this case it  is about  taking the time to create something really unique  as a beautiful way of connecting with a garment or textile, and making a feature of an old scrap of fabric, recycling  old yarn or mixing oddballs,  given as a present, out of a sale basket or an impulse buy..( we all have been there…) , old yarn from the bottom of your stash.

With the assumption  that beauty is in an object’s impermanence and imperfection that means that  mistakes, maybe some wonky stitching or different textures can be embraced, and you do not need to be a confident crocheter you just need to be able to hold a hook and have some yarn, so this is also a perfect project for a beginner.

What has inspired me are traditional Japanese boro cloths.


They have a beauty like no other. Each cloth tells a unique story of its journey through life with patches carefully sewed on and reinforced with stitching, often over generations of a single family.

Although beautiful, boro cloths came about through pure necessity. During the 18th and 19th centuries cotton,in Japan, was a luxury afforded only to the nobility. The lower classes had homespun fibers, like hemp, which were more difficult to make into a fabric and didn’t last as well. By patching and stitching, the fabric could be strengthened and its life could be extended. During the Edo era, there were also laws that restricted lower classes from wearing bright colors which is why the cloths are indigo blue and brown.


During these times pieces of cloth were re-purposed in various forms. Often starting off as a kimono then becoming everyday clothing, a piece of sleepwear, a futon cover, a bag then finally a dusting cloth. Every scrap was used until it wore out.

Boro textiles are now highly sought after collectibles. I am not so sure about the ethical side of that and the fact that now they  fetch thousands of pounds and adorn the lounges of affluent people, to me it defies the purpose in the first place, but I am grateful for the opportunity to see them in exhibitions n museums as a tangible piece of history and a lesson too.


Boro celebrate the beauty of something frayed, decaying or repaired and also conveys a deep sense of regret concerning waste, as Earth’s resources are limited and it is important to search for new and creative ways to recycle and reuse.

So back to the blanket…

What am I going to do? I have no plan really. I  have been collecting bits and pieces: some Japanese bowls I use every day, I love the colors and patterns, some yarn I have been given to try at the last Blogstar’s meeting and  some crochet samples I made.


All I know I want to use my old jeans. I bought them years ago. It must have been a bit of a ‘middle life crisis’ as I never wear jeans and I thought they looked ‘trendy’.

Then I gained some substantial amount of weight and they lingered at the bottom of my wardrobe for ages as I couldn’t wear them anymore, but since Christmas I have been shedding the weight once again and now they are far too big for me to wear. I wore them to go camping for Beltane’s celebrations  last weekend and I had to keep pulling them up which was really annoying.They are not good enough to go to a charity shop but they are precious to me as they remind me of my weight loss journey. So they are going to become a blanket!

I am going to see if I can introduce some sashiko to join the pieces together,

Sashiko is a traditional form of Japanese hand sewing that uses a simple running stitch sewn in repeating or interlocking patterns, usually piercing through several layers of fabric.

wish me luck…I will keep you updated on it’s progress,

love to you all,

Lucia xx


April blanket: ‘the Norian blanket’

My belated Easter post…I have been sitting on this blog entry for 10 days…the plan was to get it published before Easter, but things have gotten in the way so I am just now making the final touches to the post.

So I hope all of you had a lovely Easter or spring break with your families, loved ones and maybe with some crochet too!  Whether you managed to find some free time for starting a new project or continuing with some WIPs.

I had a bit of extra time to surf the net last weekend and I saw there are a lot of new CAL’s that have started.

I  like Esther @https://itsallinanutshell.com/ new CAL , have you seen it? it is called the ‘nuts about squares ‘ it looks really interesting I love week2 block!

https://itsallinanutshell.com/2017/02/17/announcement-nuts-about-squares-cal/

I also saw that quite a few of you had started the  Hydrangeas’s blanket, Lucy’s @attic24 new creation.

http://attic24.typepad.com/weblog/2017/04/hydrangea-stripe-blanket-ta-dah.html

I really like the colours she has chosen for her latest project, the pattern is beautifully simple but so effective and I am sure it will bring hours of joy to many people.

So many temptations and I wish I had loads of hours and try them all!

Anyway let’s get back under the Fig tree, so I can update you on what I have been doing…


The April blanket now has a name, it is called  ” the Norian blanket” you will see why pretty soon, I am very happy with my block it is an original design of mine and it is a lovely hexagon that I hope you will like.


I know in the past I have been outsourcing patterns or partial patterns mixing with something original designed by me, but this blanket will be just my design, that will make the pattern details much easier for everybody to outsource and follow by having it all being written down in one place. I have been getting some help so I can create as clear a template as possible for the pattern and, assume everything go smoothly, I should be ready to publish it in the next few weeks.


Here is a picture of the block, I’d love to hear your opinions! The idea is obviously Bee related, and it should look like a bees’ friendly meadow with loads of pretty flowers in bees favourite colours!.

now you wondering why Norian?

well there is an article I am going to link you to:

The Beekeeper Who Craved a World Without Right Angles

http://vernon.npdc.govt.nz/search.do?view=detail&page=1&id=269200&db=object

It tells the story of a very keen Kiwi Beekeeper called Roy Brewster. Roy and his wife Nettie built a  house in the 1950s in New Plymouth, NZ , where nearly everything was hexagonal, from its floor plans to its windows to all of its interiors and furnishings. They also had a hexagonal quilt on their bed too.

the name Norian is short for:  “NO RIght ANgles.”

I love the story and I love the house and I thought my April blanket could fit quite nicely in their home.

more about Norian blanket:


The block and the yarn and colours selection were the easy part, and I fired away pretty quickly all those hexagons. The problem started when I had to figure out how to join them together…You might think the joining is the easy part but actually often is not, and It has taken me several attempts and a lot of unraveling but, after a few frustrating days, I have hopefully got it now, I don’t know yet, the joining is still in its early stages, so I will let you know in a week or so..hence why at Easter I decided to leave the blanket on a side and make something else.


If you follow me on Instagram and facebook you might have seen some pictures I posted earlier in the week.

https://www.facebook.com/luciasfigtree/

https://www.instagram.com/luciasfigtree/

you might have seen some pictures I posted earlier in the week.

The shawl is called Edlothia, the designer is  Jasmin Räsänen , and this is the link: http://www.ravelry.com/patterns/library/edlothia

I loved the fact that this pattern has charts.   I found charts so much easier to follow, it might look complicated but it is surprisingly easy to crochet and the results! It is not blocked yet as I hope on a nice dry day for it, but it looks good and I think the Scheepjes whirl I have chosen does it justice. I bought a couple of those cakes a few weeks ago and I was waiting to find a project that used most of it if not all of a cake, so to show off the gradients effect to its best.


First time using Whirl I found the yarn a bit splitty at the beginning but then I got the hang of it, it is lovely to work with and I  love how gradual the change of colours is I hope will block well, I will let you know as soon as I am done.


that is all for today, wish you a happy weekend,

all the best Lucia xx


My 10,000 girls…

You all know I got four children but the  ones  of you that know me in real life,  also know that I have some extra   10,000 to 50,000  little girls. The number depends on  the time of the year!


I am an urban beekeeper!

and

I LOVE MY BEES!!!!


Beekeeping is just  FANTASTIC!!!!

Even simply sitting down near the hive with a cup of tea or..indeed a crochet project and watching the coming and going of the hive is an extremely relaxing experience.

I went into beekeeping for many reasons, one of them is that by keeping just one hive you are immediately introducing 50,000 pollinators into an urban area, and that can have a huge impact on the environment. I like the idea of making a difference as an ordinary individual, considering the fact that , most of the time, we can’t seem to affect any of the sad things that are happening to the earth.

As many of you ,due to the  media coverage,   I started to become aware that bees were having a hard time from a combination of pesticide use, parasites and poor nutrition, and it also became quite obvious that they were doing better in towns and cities than in the countryside. I guess reduced pesticide use in towns, coupled with year-round forage in gardens and parks means honeybees could have a better chance of survival in urban areas.

So that is why they love their home in the middle of Glasgow!!

So , one Christmas, Santa brought me a beautiful Hive and that spring my first  nucleus arrived.( a nucleus is a  small honey bee colony created from larger colonies.)

I couldn’t have managed any of the above without the help and expertise of Ed,  ( you  can see the two of us checking the  hive’s progress and doing some spring cleaning… ).

Ed used to be at school with one of my brothers in law and is a professional beekeeper and an expert in  urban beekeeping .


He owns several hives of  and also he  helps people like me that want to keep bees as a hobby.

My colony has settled really well; they are gentle natured girls..( yes there is such a thing as “grumpy bees” !! )

Last year I had many afternoon sitting watching them , understanding how the colony works  and as a bonus , after making sure they had enough honey to get them trough the winter, we got a few jars of delicious honey! So I am looking forward this new season of beekeeping

in the picture below a frame of raw honey, plenty of food for all the new bees ready to hatch.

Look at the girls coming in carring little bags of pollen on their legs!

I am soo hooked on beekeeping that in the next few weeks I think I  will split my original colony  and add another hive as I got plenty of space and they seems to love their spot.

I could go on for pages telling you loads of stories, fact and technicalities but this blog is about crochet, so, back to yarn, colours and hooks,  my next project is dedicated to my lovely buzzing girls!

To explain what I am going to do I am adding another small  fact about bees:


Like us, bees are trichromatic. That means they have three photoreceptors within the eye and base their colour combinations on those three colours. Humans base their colour combinations on red, blue and green, while bees base their colours on ultraviolet light, blue and green. This is the reason why bees can’t see the colour red. They don’t have a photoreceptor for it. They can, however, see reddish wavelengths, such as yellow and orange. They can also see blue-green, blue, violet, and “bee’s purple.” Bee’s purple is a combination of yellow and ultraviolet light. That’s why humans can’t see it.

The most likely colours to attract bees, according to scientists, are purple, violet and blue.

So that is what I have chosen as hues for my next blanket!…I  am soo excited about as it is going to be beautiful !! I let you see a small preview..because I have already started ….


to the next,  stay tuned!!!

happy hooking, love to you all

Lucia xx

Voilà ! the macaroons blanket.

31stof March! just in time….

You probably have already seen some previews on my  Instagram. I finished the macaroon blanket last week, but I have been so busy trying to finalise the last details of the ” secret project” plus I had a few deadlines at work . However, I am now finally sitting down, writing the recipe for the macaroons blanket, so you can all make one for yourselves!

Firstly let me tell you,  it will take a degree of patience! The squares are very easy to make but there are 280 of them!  Saying that… I actually really enjoyed the journey and seeing all of these little bundles of colours growing in my basket… a bit of frustation  at times with the ends to be sewn in BUT it will be worth it in the end as the blanket came out really beautiful !! Like baking, it is with no doubt, a labour of love.

If I can make a suggestion, as often happens to me with any granny square blanket, I find it much easier to make it if the project is running along side  with something else, and most important, sew in your ends as you go! or it will be a nightmare!

THE SQUARE: it is my design. I made a small photo gallery so it is even easier for you to make your own:

FOUNDATION : magic circle


ROUND1:

3 ch( makes the first treble),2 trebles,  *3 ch, 3 trebles* repeat ** 2 more times., ss on the 3chs ( which act as  your first treble)  and fasten off.

(12 trebles and 4 ch3 spaces)

ROUND2:

start with a new colour in one of the 3 chs spaces and work  a cluster of 3 trebles together,3chs and another cluster; 3ch and in the next 3 chspace of round 1 repeat * cluster,3chs cluster 3 chs*  ss and fasten off. [ 8 clusters, 8  3chs spaces]

please note as from the photos your squares will curl! do not worry as the final round will straighten down the square.


ROUND3:

Start a new colour in any  3 chs space  between 2 clusters and work the angle as follow:* 3 chs ( act as 1st treble) 2 trebles, 3chs,  3trebles.

In the next 3 chs space work 2 trebles, 1 puff stitch in the centre of the 3 trebles of  ROUND 1 , 2 more  trebles*; and repeat **


so that is the little mini granny square. it looks lovely both sides


Next the yarn used and colours:

STYLECRAFT SPECIAL DK

  • CLARET
  • LIPSTICK
  • POMEGRANATE
  • GOLD
  • SPICE
  • FONDANT
  • APRICOT
  • SAFFRON
  • LEMON
  • CLEMATIS
  • LAVANDER
  • DUCK EGG
  • SPRING GREEN
  • PISTACHIO
  • MEADOW
  • one ball for each of the shades  EXCEPT for the PISTACHIO where you will need three balls in total.

the squares are 280, they measure 7,5 cm and are  organised in 14 columns of 20 squares each.the border is 15 cm deep.

The joining method is a simple row of dcs . I changed colours every time , that has made a lovely “multicolours grid” effect, which makes the blanket interesting both sides!.  the all blanket is 120×180 in total and the border is 15 cm deep.


THE BORDER:

the border is an adaptation of border number 72 from the new Edie Eckman’s book : ‘every which way crochet border.’ I said an adaptation because I repeated round 1 and 2 several times to make the border more substantial, and as consequence, I had to change the corners too, as I like my borders to be perfectly flat.


I know it is a nuisance but I can’t post even a partial picture of Edie’s border as that would infringe the copyrights . all I am saying just look at the closeups,  or use another border that is a multiple of 10 stitches.

I hope you will enjoy making the macaroon blanket and thank you for all the lovely likes and messages I received!

Bring on APRIL!!!!!!!

love as always,

Lucia x

Never mind the macaroons…mini grannies are like Marmite!

An unusual title, I know…but if you are acquainted with Marmite you will know exactly where I’m coming from! For those of you that haven’t the faintest idea what Marmite is, I will explain..

Marmite is a thick, sticky paste made from concentrated yeast extract, a byproduct from brewing beer. German scientist Justus Liebig invented accidentally the concoction in 1902.

Marmite has a very distinctive flavour. The taste is so unique as to defy description, but think of a yeasty, salty, soy sauce-esque flavour with the consistency of old engine oil. Some people really like eating it, and some people don’t like eating it at all.

I personally quite like it, but it is definitely an acquired taste!

So what does marmite have to do with crochet or mini granny squares????

Because Marmite actually based a marketing slogan off this divisiveness: “Love it or hate it.” It has infiltrated British culture and language to the point where an object or a person can be described as ‘marmite’


So MINI GRANNIES ARE LIKE MARMITE : You either LOVE THEM OR HATE THEM!

Lately I think I am more inclined to the latter…but I am glad I persevered! I still have 35 mini grannies to sew the ends in and I am done!

All 240 of them. What a marathon. 

I did some other things in between because I discovered that I found the little pesky things really boring to make. I am sure after they are all joined together and I started the border It will become much more exciting.

I will let you know what I have been up to! It is under wrap I believe until the middle of April!!

I leave you with all my little granny squares…

Now I need to join them! ..and find a border too.

Happy Sunday

Lucia xx


Yarn,friends,more yarn,macaroons and a family’s ceilidh…part one

Let’s start with a question:

Do I need more yarn? ABSOLUTELY NOT !!!

Do I WANT  more yarn? ALWAYS!!!

Saying that let me start telling you about my weekend.

Every year I go to two yarn exhibitions: Yarndale and the Edinburgh Yarn Festival.

The reason why is because I like the spirit behind them. They both are a gathering of mainly independent producers, dyers and designers. And they are so worth going to because of the amazing talent and creativity behind those stalls.

On Friday morning my daughter Valentina and I took an early train from Glasgow to Edinburgh, Valentina had a dissertation meeting at University, and I went  to the Corn Exchange where EYF is held.

I met my friend Julia from http://handknittedthings.blogspot.co.uk/  in the queue outside the building amongst many very enthusiastic and chatting ladies! It didn’t rain which was a major plus, and it wasn’t too cold either so the hour and a bit waiting outside flew by in a flurry of yarn chats!

Julia and I  we went inside and we met Janehttp://janiecrow.co.uk/presta/ who was one of the exhibitors. and Sandra http://sandra-cherryheart.blogspot.co.uk/   then I just I wondered off admiring all the goodness in the show. Highlights? Far too many to mention but I especially loved Marie Wallin’s   tiny stand with her jumpers with the most exquisite colour combinations,


Amanda Perkins crochet blankets  http://www.amandascrochetblankets.com/home-page

The knitting Goddess http://www.theknittinggoddess.co.uk/,  Eden Cottage Yarns and my friend Zoe, which was exhibiting too and  has a lovely shop in Glasgow where I buy all my natural yarns. Zoe has a great selection of small independent producers, plus she dyes her on yarn also.  http://www.thequeenofpurls.com/

But let me tell u what made my day…

It wasn’t the yarn; it was those ladies that somehow recognised me and stopped to say hi and to tell me that they read and love my blog, my stories and my 12 blankets in 12-months challenge.

It was so overwhelming and humbling to get tangible recognition that my rumblings online are enjoyed by you out there .!

So a MASSIVE THANK YOU FOR YOUR SUPPORT!!!!

I am not taking the time you are spending reading my blog for granted it is totally appreciated.

So what did I brought back with me? I already posted a couple of photos on Instagram; I bought some lovely hand dyed yarn from the Knitting Goddess, three skeins from Eden Cottage and a VERY expensive cake from this new Hungarian supplier of gradients yarn called Bilum

B .


Amanda’s new blankets book, small pamphlets on crochet shawls that look very promising and a book on knitted toys because I couldn’t resist all those mini dresses and cute animals!

Out of the show, I shared a taxi with a lovely lady from Hampshire which very kindly gave me a lift to Edinburgh centre. I went to Mademoiselle Macaroon! https://mademoisellemacaron.co.uk/

Because I haven’t forgotten about my blanket and because they have THE BEST MACAROONS IN SCOTLAND!!!!  Gosh, I wish you could try them! They are delicious, and the small bakery/cafe is so quaint, you can see Edinburgh castle while sitting sipping your coffee and ejoying your macaroons and the staff couldn’t be more helpful.

yeah, as we say in Scotland: ‘PURE MAGIC!!’

and look what we got here…..can you spot the macaroon and the new squares??


More Edinburgh news tomorrow as my weekend is not over yet and I have a family Ceilidh tonight.

love to you all,

Luciaxx

THE JANUARY BLANKET IS DONE!!

First THANK YOU SOO MUCH for the lovely comments and likes , I m really glad that the first blanket of 2017 has been received so well, I am so glad you loved the colours even if the pictures  I posted on Instagram where not the best.

The best way to appreciate the colours is  with an outdoor picture and I  have been stalking the sky for days now hoping for a break in the weather. this morning I managed  to take a few but the sky is like pewter colour and the light is poor too , those are the joys of living in Scotland! today we even have a rainbow…

anyway I am not entirely happy with the results but I have to do for now, as I have received so many messages asking for details ,colours and ..the border!

so lets start with the  yarns and colours first:

2 types of yarn : STYLECRAFT SPECIAL DK and STYLECRAFT BATIK

As said in my previous post the SPECIAL  DK  is 100% premium acrylic fibre and comes in a 100 gr. ball. the STYLECRAFT BATIK DK is a 80%premium acrylic and 20%wool and come in a 50 gr. ball.

both yarn are machine washable at 30 degrees and also cool tumble dry.

I tested both of them several times and they wash beautifully .that is the reason why I use this yarn, because there is no point making a beautiful blanket and then been afraid to use it because it is a nightmare to wash ( never mind drying) but I wont go into a big discussion about quality and versatility . we leave that for another time.

colours 22 of them…I know sounds a lot but the variety in hues makes the blanket really.


STYLECRAFT SPECIAL IN: lime,pistachio,cypress,khaki,spring green,tomato,mocka,walnut,pale rose, raspberry ,sage,storm blue.

STYLECRAFT BATIK IN: graphite,coral,old gold,cream,pistachio,sage,raspberry,storm,indigo

the border joining and border are made with STYLECRAFT BATIK in biscuit.

QUANTITIES:

SPECIAL : 1 ball for each of the colours

BATIK: 1 ball for each of the colour listed, plus 5or 6 balls for the joining and border.

a note: when I made the blanket I found I got a bit short on the batik but just for probably 7/8 grams.

now ideally you want  to have 2 balls of the batik for each colour  but again you will have left a lot of yarn, and I don’t know how you feel about it. I don’t mind as I make blankets all the time so I will re-use what is left, but  if your blanket is one-off, you might want to think about it and maybe use more of the special colours as you will have plenty there to finish with.

I would still use the biscuit for the border and joining though, it is so lovely and it suits the blanket beautifully.

The quantities above are for a blanket which measures:  120cmx200cm  .I made 9 strips of 15 squares each , so we have in total 135 starburst squares.

As said the pattern for the starburst is from Jane Brocket’s book : ‘the gentle art of knitting’. I know the name is misleading but it is a book with patterns for both  knitting and crochet. I bought mine 2nd hand on amazon this is the link:

https://www.amazon.co.uk/d/cka/Gentle-Art-Knitting-Jane-Brocket/1843405326/ref=sr_1_1?ie=UTF8&qid=1486052621&sr=8-1&keywords=the+gentle+art+of+knitting

please check the 2nd hand availability as it can be a fraction of the price and unless the books are ex library they are always in great condition , besides you recycle and save the planet and give a really nice book another chance! so win-win all the way !

note that I have added an extra round of half trebles, that is because it frames better the square and make the all thing much neater , but I am afraid, it adds more ends to sew! and talking about the much dreaded ends, just after each round is complete please,please sew your ends!!! if you do that it is not such an horrendous task at the end !

there are 2 ways to make the blanket: one you do the lucky dip and pick random colours off a bag without looking, or if you are like me and you want to control the hues makes all the 135 squares one round at time , then you clear up some space or use the outside and place 135 little squares so to decide the next colour up.

both methods are excellent it is just up to you what you prefer.

THE BORDER!!!!!

I m so surprised and delighted that the border has been such a success! as said on facebook I tart up something I saw on the internet. this is the original diagram. as you can see it is just the horizontal part and there is no corner.. so I made the corner up and eliminate some of the  rounds.

lets start from the beginning:

you join all the squares together with a simple SC stitch then I did a full round  ( foundation round )of half trebles in biscuit : the corners are 2 sc- ch1- 2sc then  2 more rounds . I think it is called moss stitch:

ROUND 1 : sc, 1 ch,skip a stitch below and 1 sc

ROUND 2: skip the sc of the round 1 and in the ch1 space make a sc not in the space but in the row below, the foundation row

this will make a nice sturdy frame for the border. the border works on a multiple of 13 stitches . I started just after the corner with a ch3 skip 2 of the base. and kept going with round 1 . this  round it is really important and yougot to arrive at the corner with a ch3 so be careful, if you find that for some reason you are either shorter or you got too many just unravel a few of the chain and try to fiddle a bit you wont notice that much at this stage if instead to skip 4  you skip 3 as long as you do it for a max extra of 4/5 stitches! it is called fidgeting…don’t do more then that or you have a dog-dinner of a border!!

On a serious note if you keep the intervals precise of round 2 in the diagram your  border will sit perfectly flat .

ROUND 3 :I followed the diagram but I didn’t do the 3 ch space between the 2 shells.

ROUND4: I followed the diagram but instead to do the shell on the 3ch space that I omitted in the previous round I did my shell in the space between the 2 shells of round two.

ROUND 5: as the diagram.

ROUND6: skipped

ROUND 7 : final round I followed he diagram but instead then more chains I made sc in the round 6 ch spaces. that give a solid well defined last round instead then some flimsy chains , they might work for cotton but in heavier dk yarn  it is much better more definition , it keeps your border neat and straight without either frilling or curling

corner: please look at the picture, it is self explanatory .

I will get the program to write diagrams and  once I figured out how it works I will make it easier for everyone to follow my pattern..it is just I need to find the time to do that. If out there is one of you that is a computer wizard and know how to do that get in touch!!!

well that is all for today,

to the next blanket for February…gosh I have to think of something then!!!! …I deffo bitten more then I can chew with this one blanket each month!

all the best Lucia xxx


ABSTRACT EXPRESSIONISM AND CROCHET. WHY NOT?

Abstract expressionism and crochet…. I bet a lot  of people will find my statement total blasphemy.

I don’t mind, if that is the case, and I apologise in the very unlikely eventuality that an art critic has stumbled upon my blog. The purpose of the entry is to tell the story how this blanket came about, and   how I have used  saturated colours.

It all started with a pile of yarn , and the notion  to try something out of my comfort zone for a change. I wanted to use a pattern with a strong visual impact so I opted for  bull’s eye  which is a circle inside a square. If you google bull’s eye crochet square, the search engine will come up with several versions same basic design but slight differences due mainly to the thickness of the yarn ,which will determine  the size of the square, the number of stitches and the numbers of rounds .

I made a few samples ,with one strand  of DK but it turned out too flimsy and far too many rounds , so I opted for 2 strands together and fewer rounds. That created a more distinctive texture and visual impact. that made  the blanket  not only bold in colours but also bold in texture and weight!. ( in the photo above the one strand sample)

lets go back to the colours…

I wanted to use bold strong saturated colours and most of all  what are often considered ‘difficult ‘colours such as midnight blue , emperor, burgundy for example. 

Colours that very seldom I choose to add to my selection. I toiled with different combinations without much success I have to say, Then ,while in London last  September , I went to see an exhibition with my oldest daughter Francesca at  the Royal Academy of Arts called ‘Abstract Expressionism’  a selection of works by Hofmann, Pollok, Gottlieb,Willem de Kooning, Rothko,Kline,Still and many others.

I am not an expert or an art critic but just looking at those paintings as an ordinary person  what  I found astonishing  was how colour do exist as an independent element, and how colours project a mood and  also , how simplified forms and geometric shapes plus the use of saturated hues  create such a strong and bold statement.

I know that  it might be a bit ridiculous to compare crochet to works of art , but it is all about what catches your eye and what do you see and inspire you, it doesn’t have to be a painting at all ,  it can be someone else amazing blanket, can be nature, can be a pininterest board or a scrap of fabric or your favourite jumper.

That afternoon three paintings made quite an impression on me: one is called ‘in sober ecstasy’ painted by Hans Hofmann ,then ‘penumbra’ by Adolph Gottlieb, and  Williem de Kooning ‘untitled’.

I  couldn’t take pictures  obviously so I bought one of the catalogues of the exhibition and went home .

Now I  wish the pictures could give justice to the original but it can still give you an idea where I am coming from. what I saw in Hofmann was the amazing combination of colours and how those  brown/reddish rectangles  just made the painting sing, so it occurred to me that  a ‘dull’ imposing block of colour with a very strong geometric form can make  the other colours sing beautifully. hence dull colours  handled correctly can make a fantastic impact.

I loved Kooning’s  painting for the colours choice and  the  impact  of circles and squares  together and last in Gottlieb’s painting the red ring around the the black dot. can you see where I am coming from?

Bottom line of all of this is:

Just look around you and just pick what you like, and I mean it, pick ANYTHING that inspire you, because that will make any of your work personal and your item will tell  a  lovely story which is not my story but  it is YOURS.

Now few details because I have been asked to write down a pattern for it and the colours selection.

The blanket measures: 200cmx150,  there are 35 squares of 25cm each one.

I used Stylecraft special dk 2 strands together and a 5,00 hook.

the colours are: camel,midnight,tomato,gold,claret,emperor,fuchsia purple,storm blue,lime and pale rose. each square is made by a round centre squared up , I think a shape you are probably quite familiar it is also called bull’s eye.

my version is made of 9 rows:

row1 to row6 for the central circle and the last 3  rows squares it up.

PATTERN:

ROUND 1:

make a magic circle, inside 12 trebles,

ROUND2

2 trebles  together in each of the trebles of the previous round close with an ss on the ch3 of the beginning (24 trebles in total)


ROUND3:

ch3repeat this sequence: *1 treble, 2 trebles together* all around ( 36 trebles in total)

ROUND4:

repeat this sequence: *2 trebles,2trebles together* all around (48 trebles in total)

ROUND5:

repeat this sequence: *3 trebles, 2 trebles together*  (60trebles in total)

ROUND 6:

repeat this sequence: * 4 trebles,2 trebles together* all around ( 72 trebles in total)

those 6 rows make the internal circle. be aware that the sequence remain the same for all the blocks but  in each individual block some of the rows are in simple crochet and NOT in trebles! so please refer to the details of the the individual block to know which of the rows are in simple crochet.

ROUND 7/8/9 they will square the circle as follow:

ROUND7

start this row with *1dtr, 3tr,2htr,5 sc,2htr,3tr ,1dtr* then we do the corner as follow: in the same treble we crochet: **2dtr,ch1,2dtr** repeat 3 more times the all sequence that will make 4 corners (2dtr,ch1,2dtr) and 4 side of the square (1dtr,3tr,2htr,5sc,2htr,3tr,1dtr)

ROUND8

start this row at the corner . in the ch1 space make *2dtr,ch1,2dtr* this make the corners, then  the side is 20 trebles to reach the other corner and repeat the sequence all around.

ROUND9

start this row at the corner in the space ch1 of the previous round and make the corner as follow: *1tr,1dtr,2ch,1dtr,1tr* 23 trebles for the side and the corner again.

note: I say at the beginning 1 treble but the first treble is substituted ,as always happen at the beginning of each round, by 3 ch and if it is a rounds of sc will be 2 ch. also I close every round with an ss on the first group of chains.

normally I would say choose the colours as you please but in this case it makes a different if you use them in a specific order so I am going to list the different blocks as follow:

there are 10 different blocks in the blanket : this is the list:

then combine your 35 blocks as follow in the picture, and join them together with 1 strand of yarn only and  a simple sc in the back , now I m a bit of a perfectionist so I didn’t want the seam of the joining to be detected so when you join the block together please make sure that the colour of the yarn you are using matches one of the colours of the last round of the block. which means if you have 2 blocks to join together  which the last row is one lime and the other emperor use emperor to join. I know you will have more ends to sew but it does make a difference trust me.

the border is 9 rounds using 2 strands of yarn together.

first 8 rounds are sc and the last round is crab stitch .

colour sequence border:

ROUND1 : camel

ROUND2: gold

ROUND3: midnight

ROUND4/5/6/7/8 : claret

ROUND9: midnight.

QUANTITIES of yarn…I am afraid that is going to be a bit empiric but I tried to make a block to see the quantities, you will have to add it all up ….

round 1 and 2 together : 4 grams

round 3: 3 grams

round4:4 grams

round5: 5 grams

round6: 6 grams

round 7/8/9 together: 26 grams

the border I have no idea but I recon is at least 100 grams of claret.

sorry for the quantities, it wasn’t my plan  to make a pattern out of it, it was just an experiment blanket, so if you want to make one please make a sample of the block , that will help you to decide how much you need.

all the best

Luciaxx


X